
10 NotebookLM Prompts That Put You Ahead of 99% of People
10 NotebookLM prompts for audio, video, slides, mind maps, reports, infographics, quizzes, and building apps with Claude Code and Antigravity. Copy-paste ready.


NotebookLM is Google’s most underrated AI tool.
Most people open it, upload a PDF, ask a question, and close it.
That is maybe 10% of what it can do.
NotebookLM can generate podcasts, create video overviews, build slide decks, design infographics, produce mind maps, write reports, generate quizzes and flashcards, and even build full apps when you connect it to tools like Antigravity or Claude Code.
But here is the thing. Every single one of these features has a prompt box. And what you type in that box changes everything.
A generic prompt gives you generic output. A specific prompt gives you something you can actually use.
I have been building with NotebookLM for months. I connected it to Antigravity to build apps from my docs. I paired it with Claude Code to automate research pipelines. I used it to create competitor analysis dashboards and investment trackers.
All of that started with the right prompt.
I’ll give you 10 NotebookLM prompts I use every week.
7 for features most people ignore.
3 for builds that most people think require code.
But before, let’s recheck what NotebookLM is and how to train one.
What is NotebookLM?
NotebookLM is Google’s research AI tool.
If you combine this amazing tool with Claude Code, Antigravity, or Codex, it becomes the brain of your building engine.
Even without them, though, it is still incredibly powerful.
Let’s see how you can train one first.
How to train NotebookLM?
Let me show you the fastest way to train NotebookLM.
Steps: Visit here → Click on “Try NotebookLM” → Click on “Create new” → Add any source
And that’s it!
As you can see, all actions are done here in the Studio.
This is where we’ll explore.
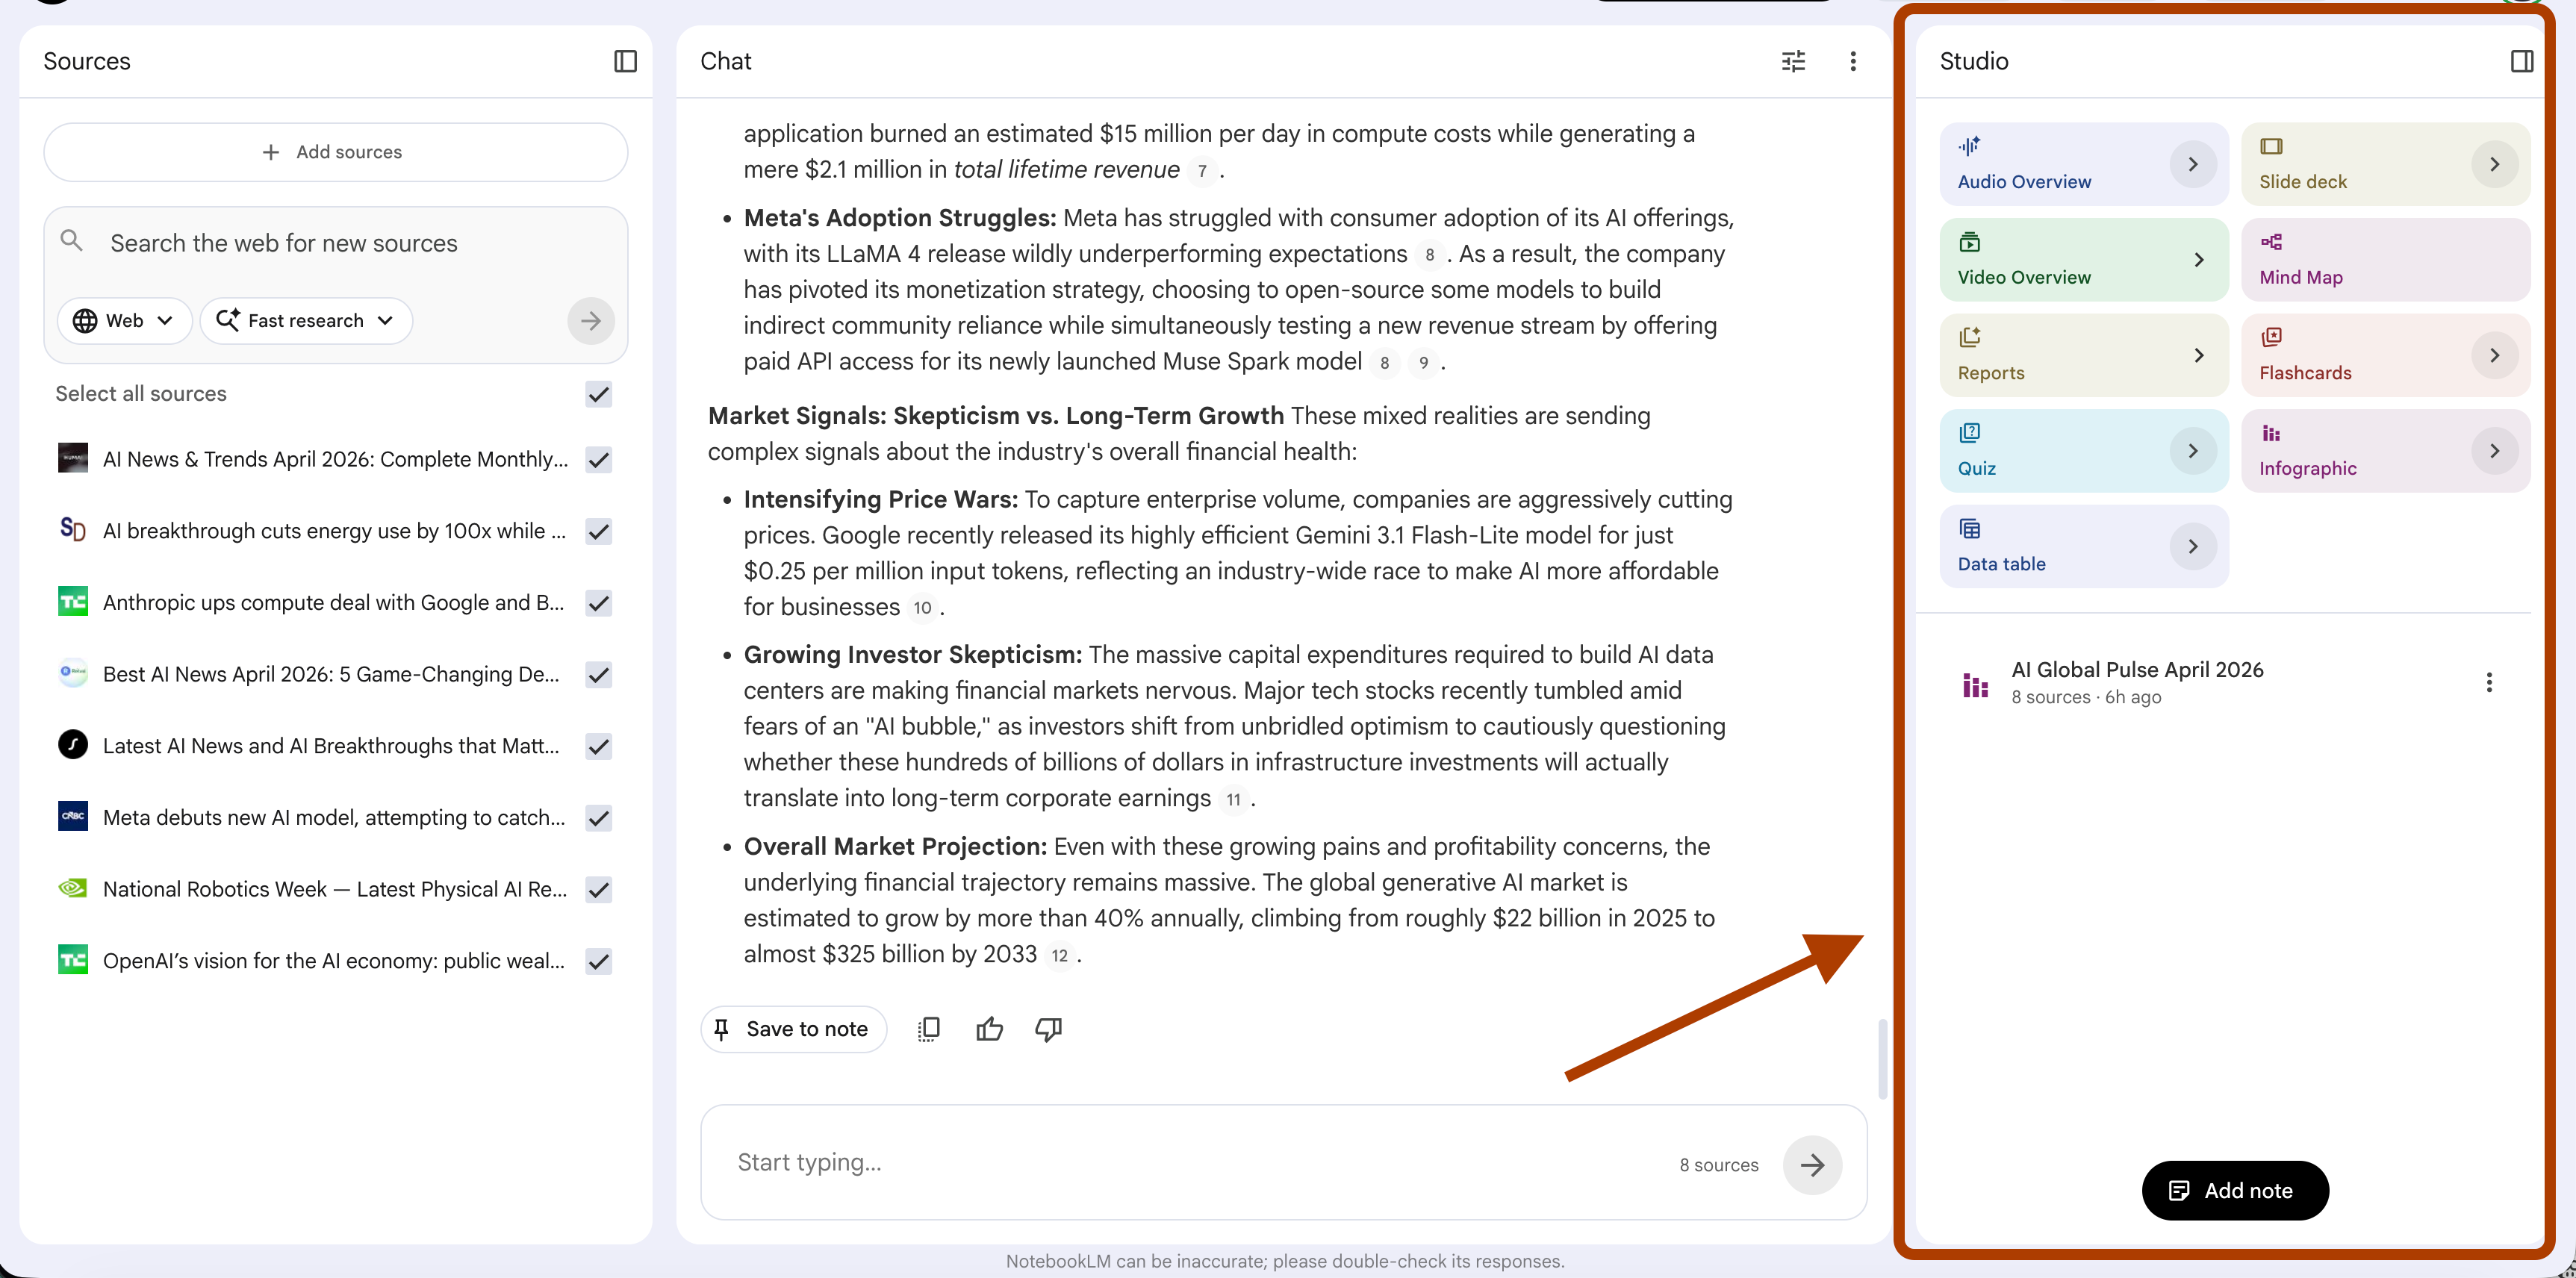
Because each of these elements can give you a pretty solid feature.
1- Audio Overview → Custom deep dive prompt
Audio Overview turns your documents into a podcast.
Two AI hosts discuss your sources like a real conversation.
But most people just click “Generate” and get a generic summary.
The secret is the customized box.
Click here.
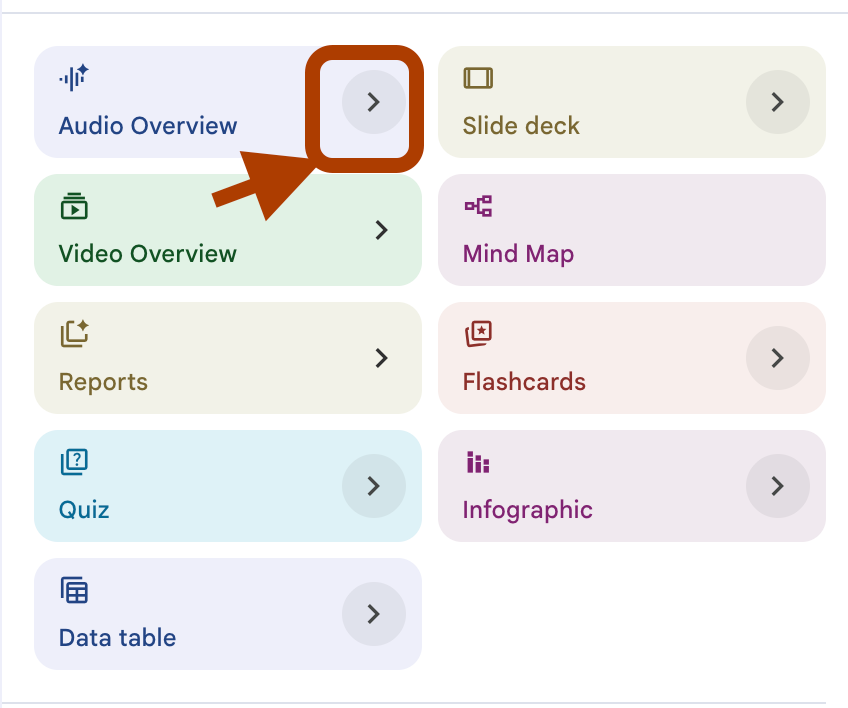
And here you’ll see the customization.
Now here, you can select 4 different formats and 3 different lengths, as you can see from the screenshot below.
Format: Deep dive, brief, critique,debate
Length: Short, Default, Long
But you can also customize the language.
But the most important part of this question:
What should the AI hosts focus on in this episode
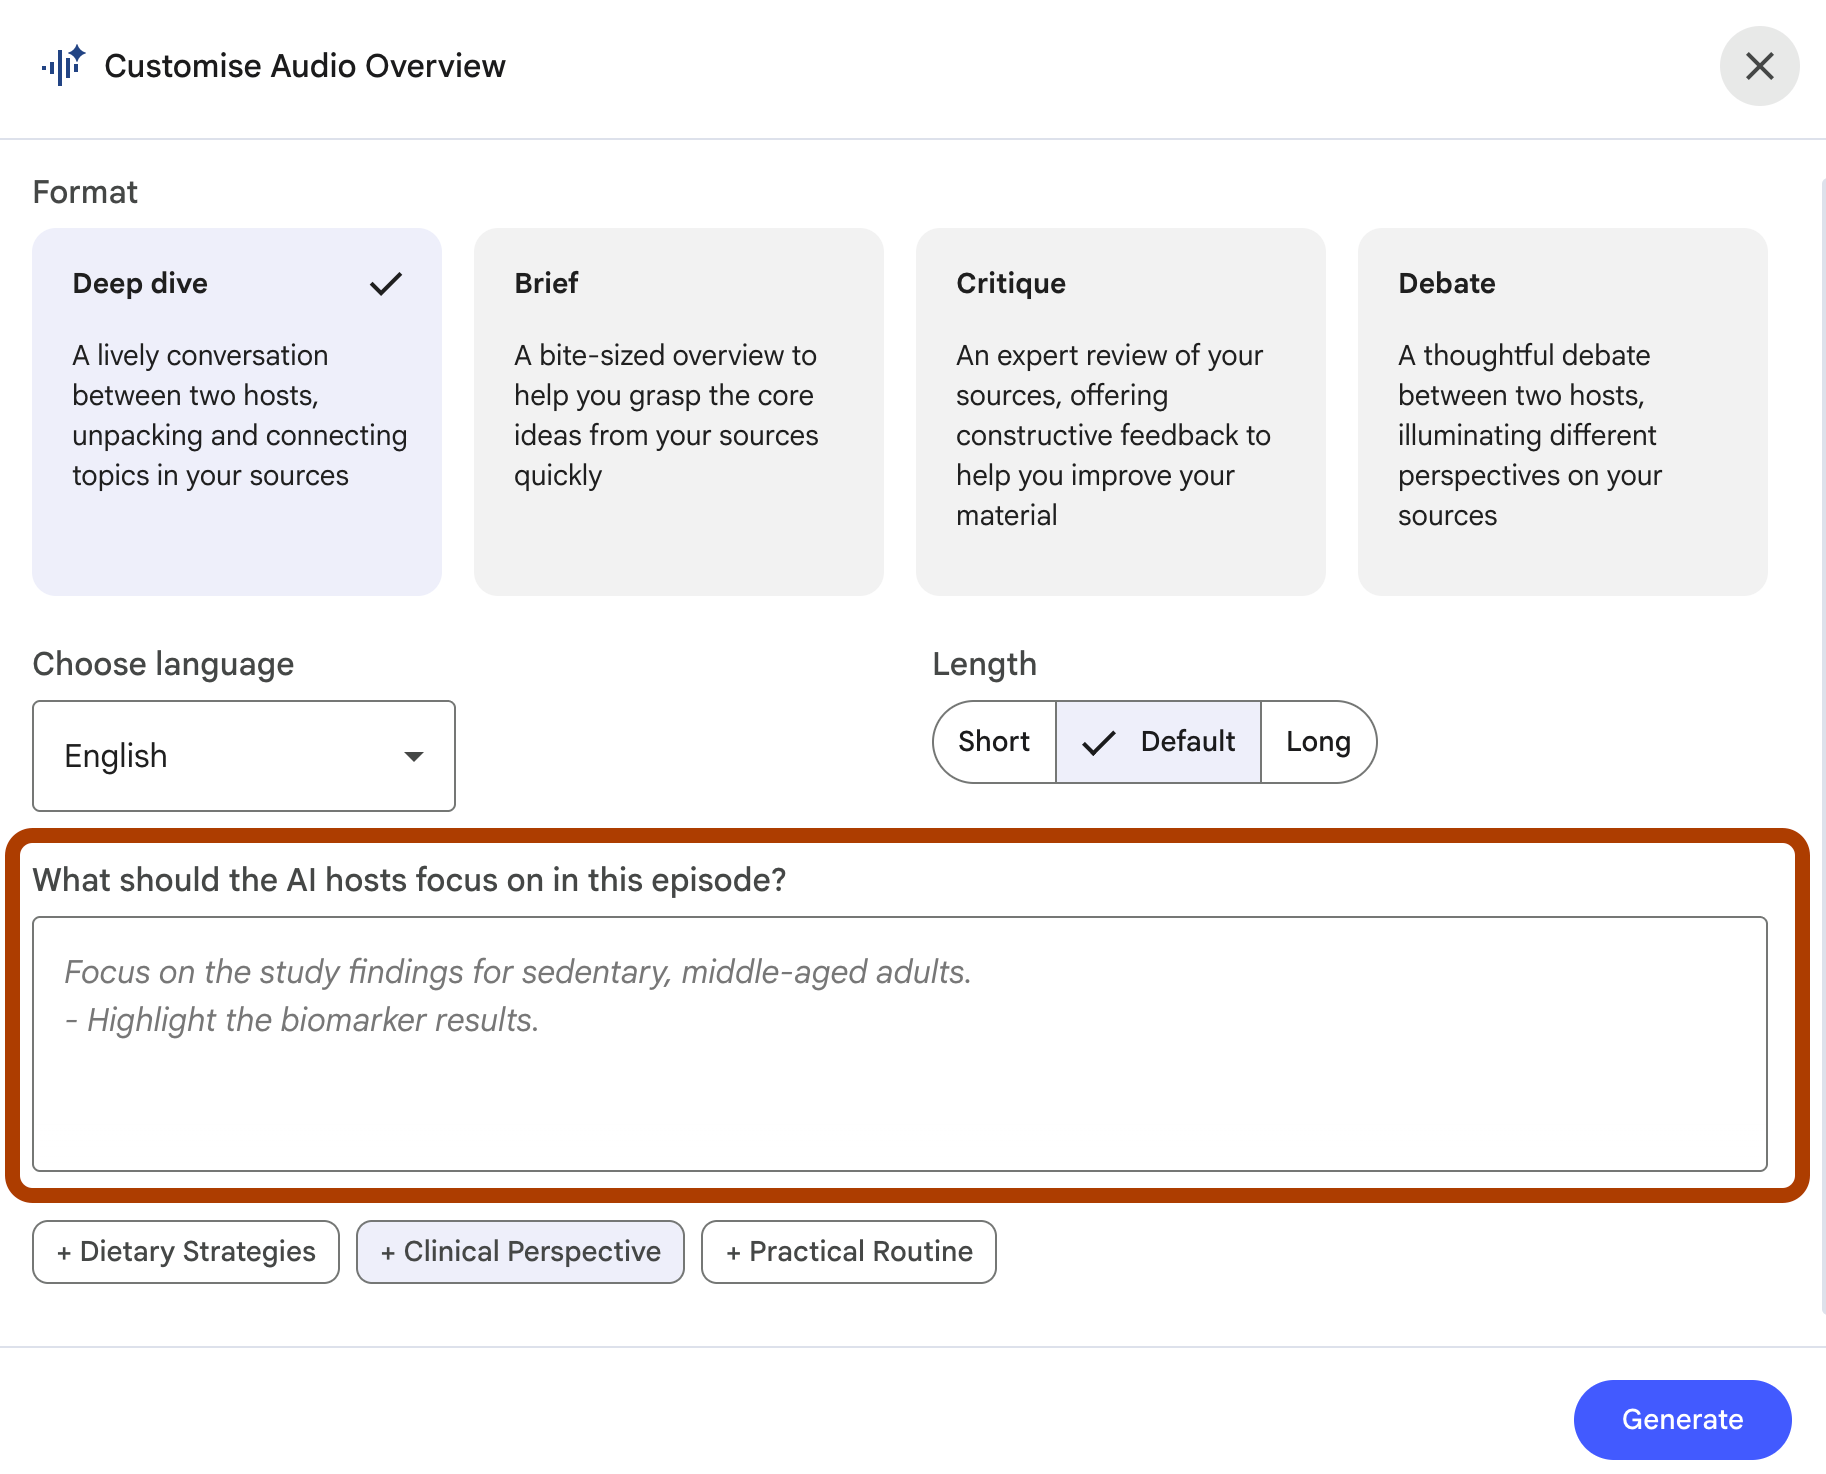
Here is the core of this customization.
You can select suggested topics, generated based on your NotebookLM.
For this case, I tend to use this prompt:
Skip the theory. Focus only on practical steps I can act on today.

Compare the different approaches in my sources and tell me which one

to start with and why. Give me a clear action plan.
Default gives you a summary of what you already uploaded.
This prompt forces the hosts to compare, prioritize, and give you a clear next step.
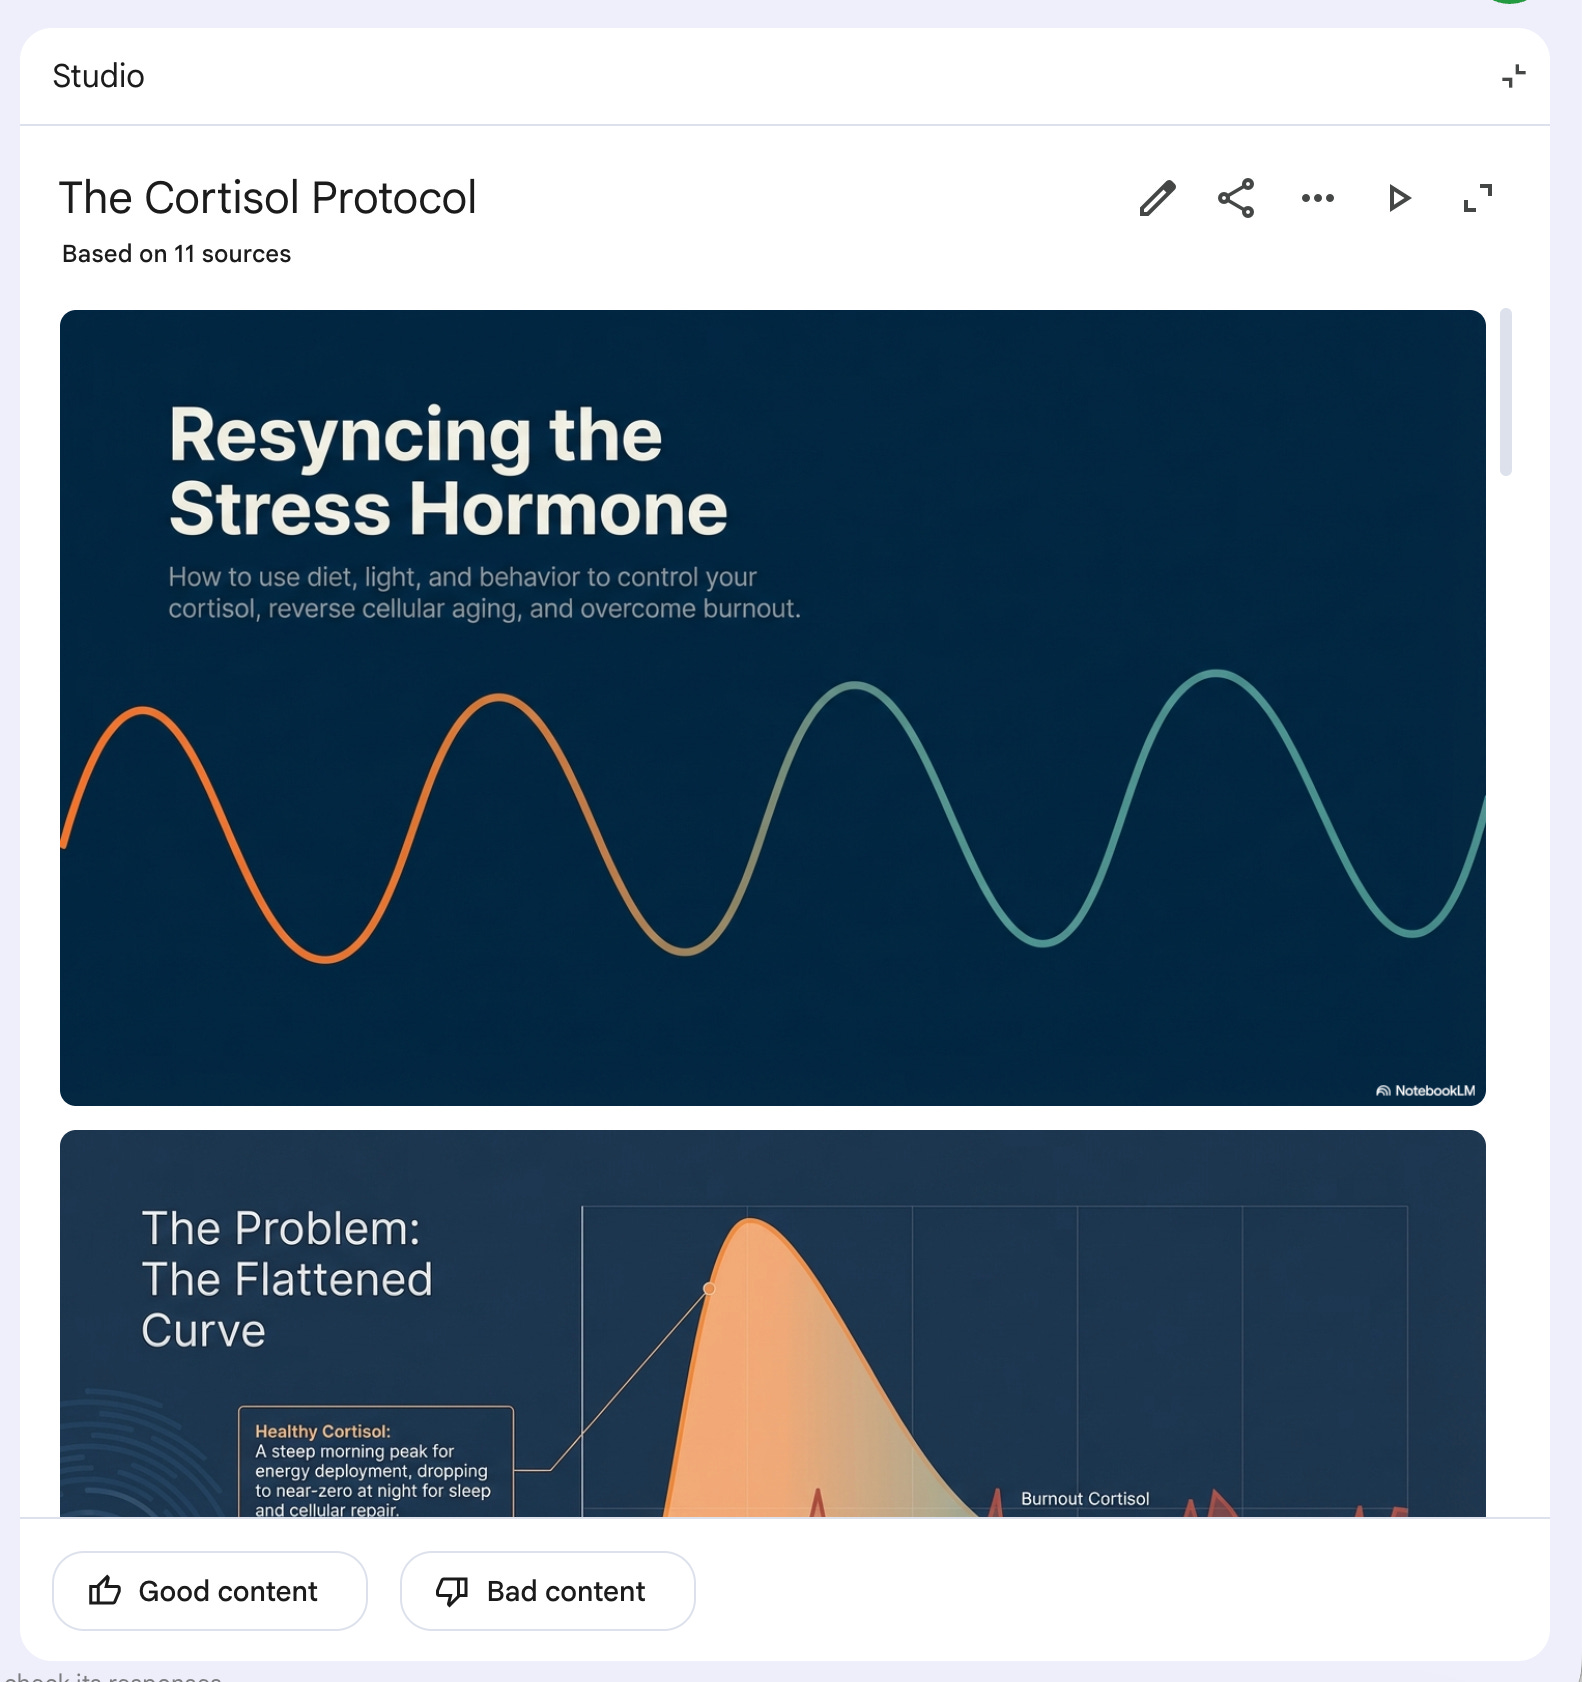
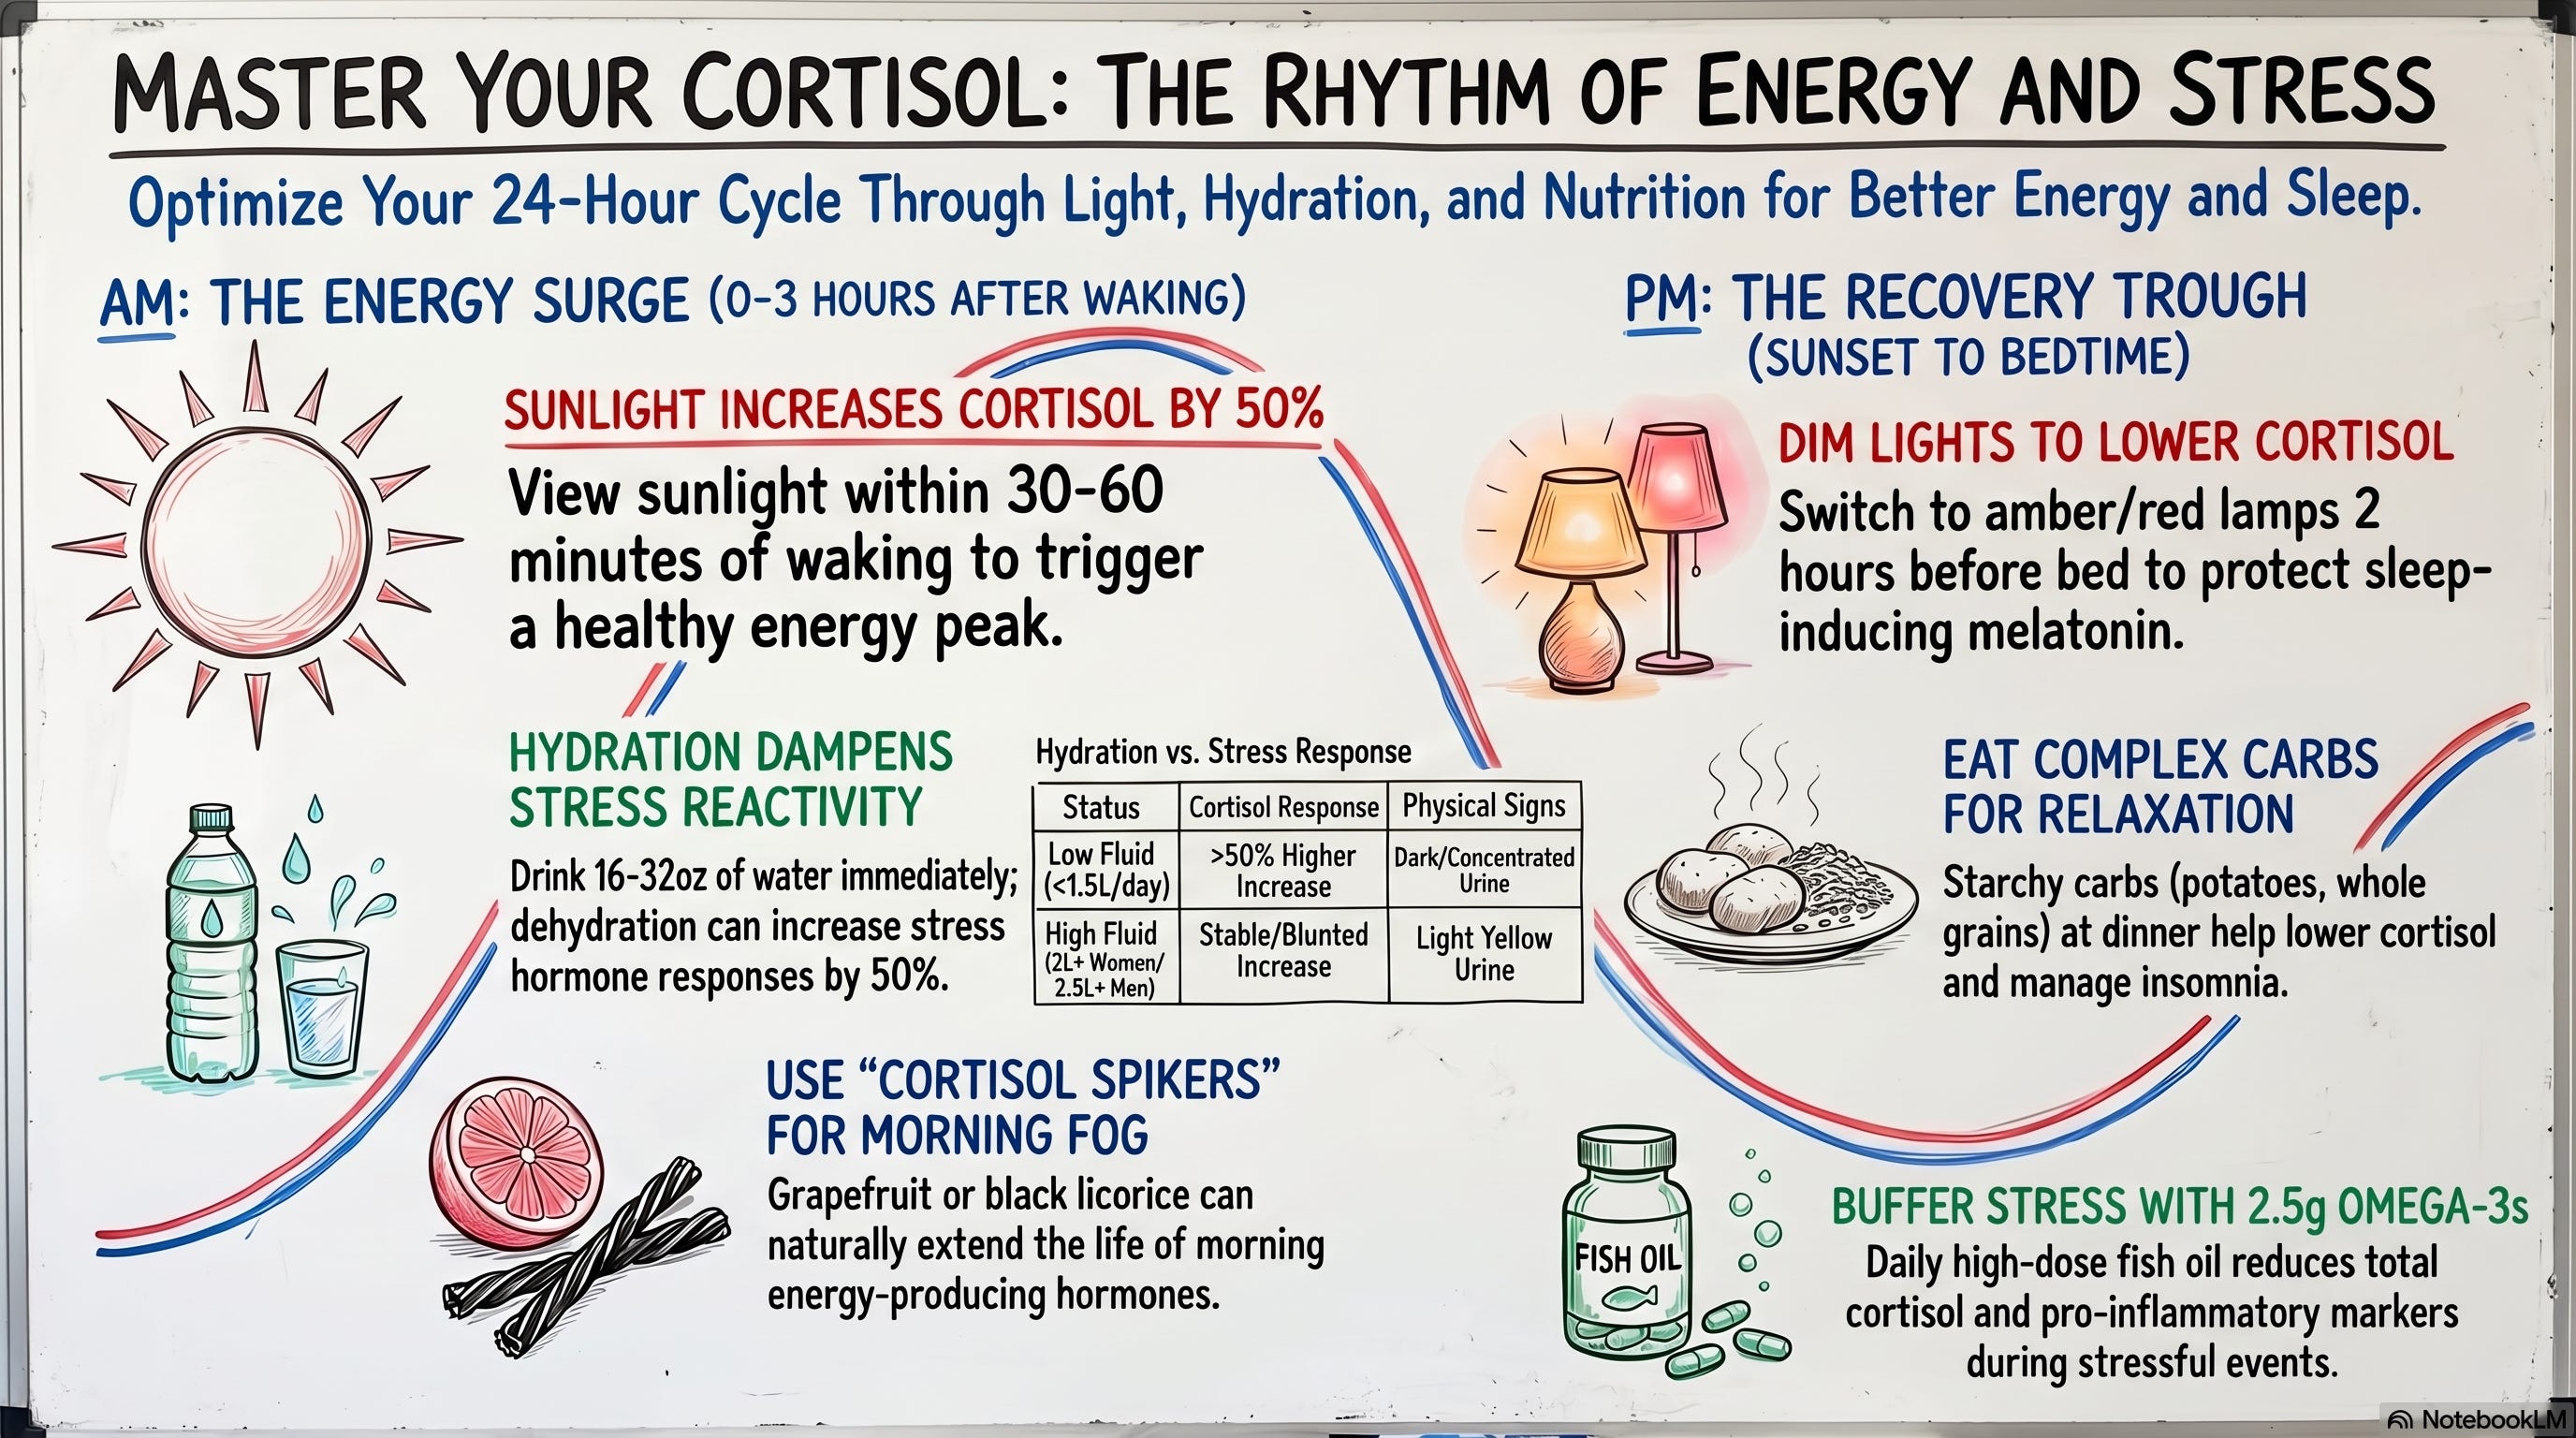
In this notebook, I’ve used Andrew Huberman’s podcast link from YouTube about cortisol.
After pasting this prompt above, here is the audio summary.
The most interesting part, you can click on “Interactive” and join the podcast, live!
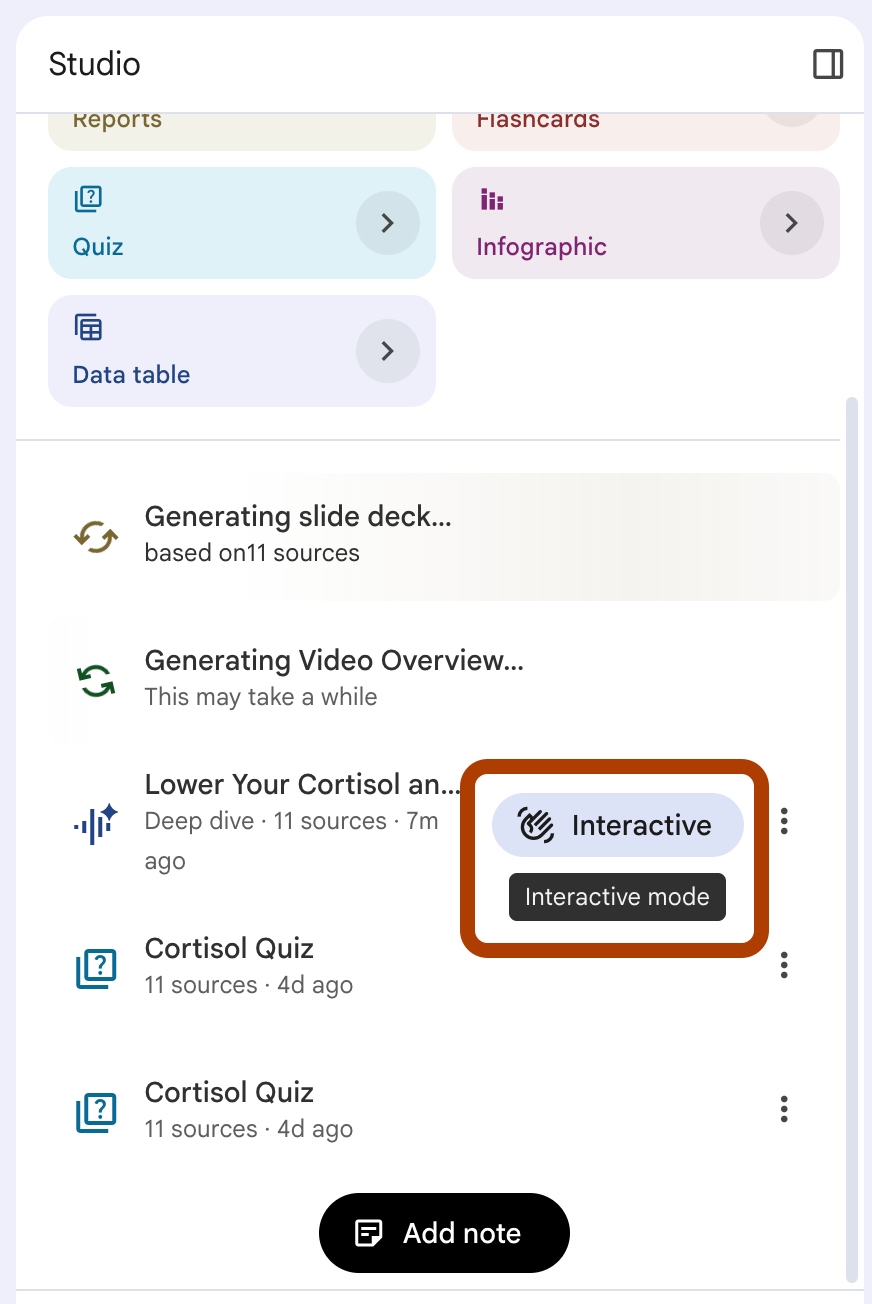
After clicking on “Interactive”, the live conversation popped up.
And I asked how I can do NSDR?
Let’s see.
Interesting!
2- Video Overview → Specific focus prompt
Video Overview creates a video from your sources.
Here are your options.
Three formats: Cinematic, Explainer, or Brief.
Also, you can customize it with a prompt
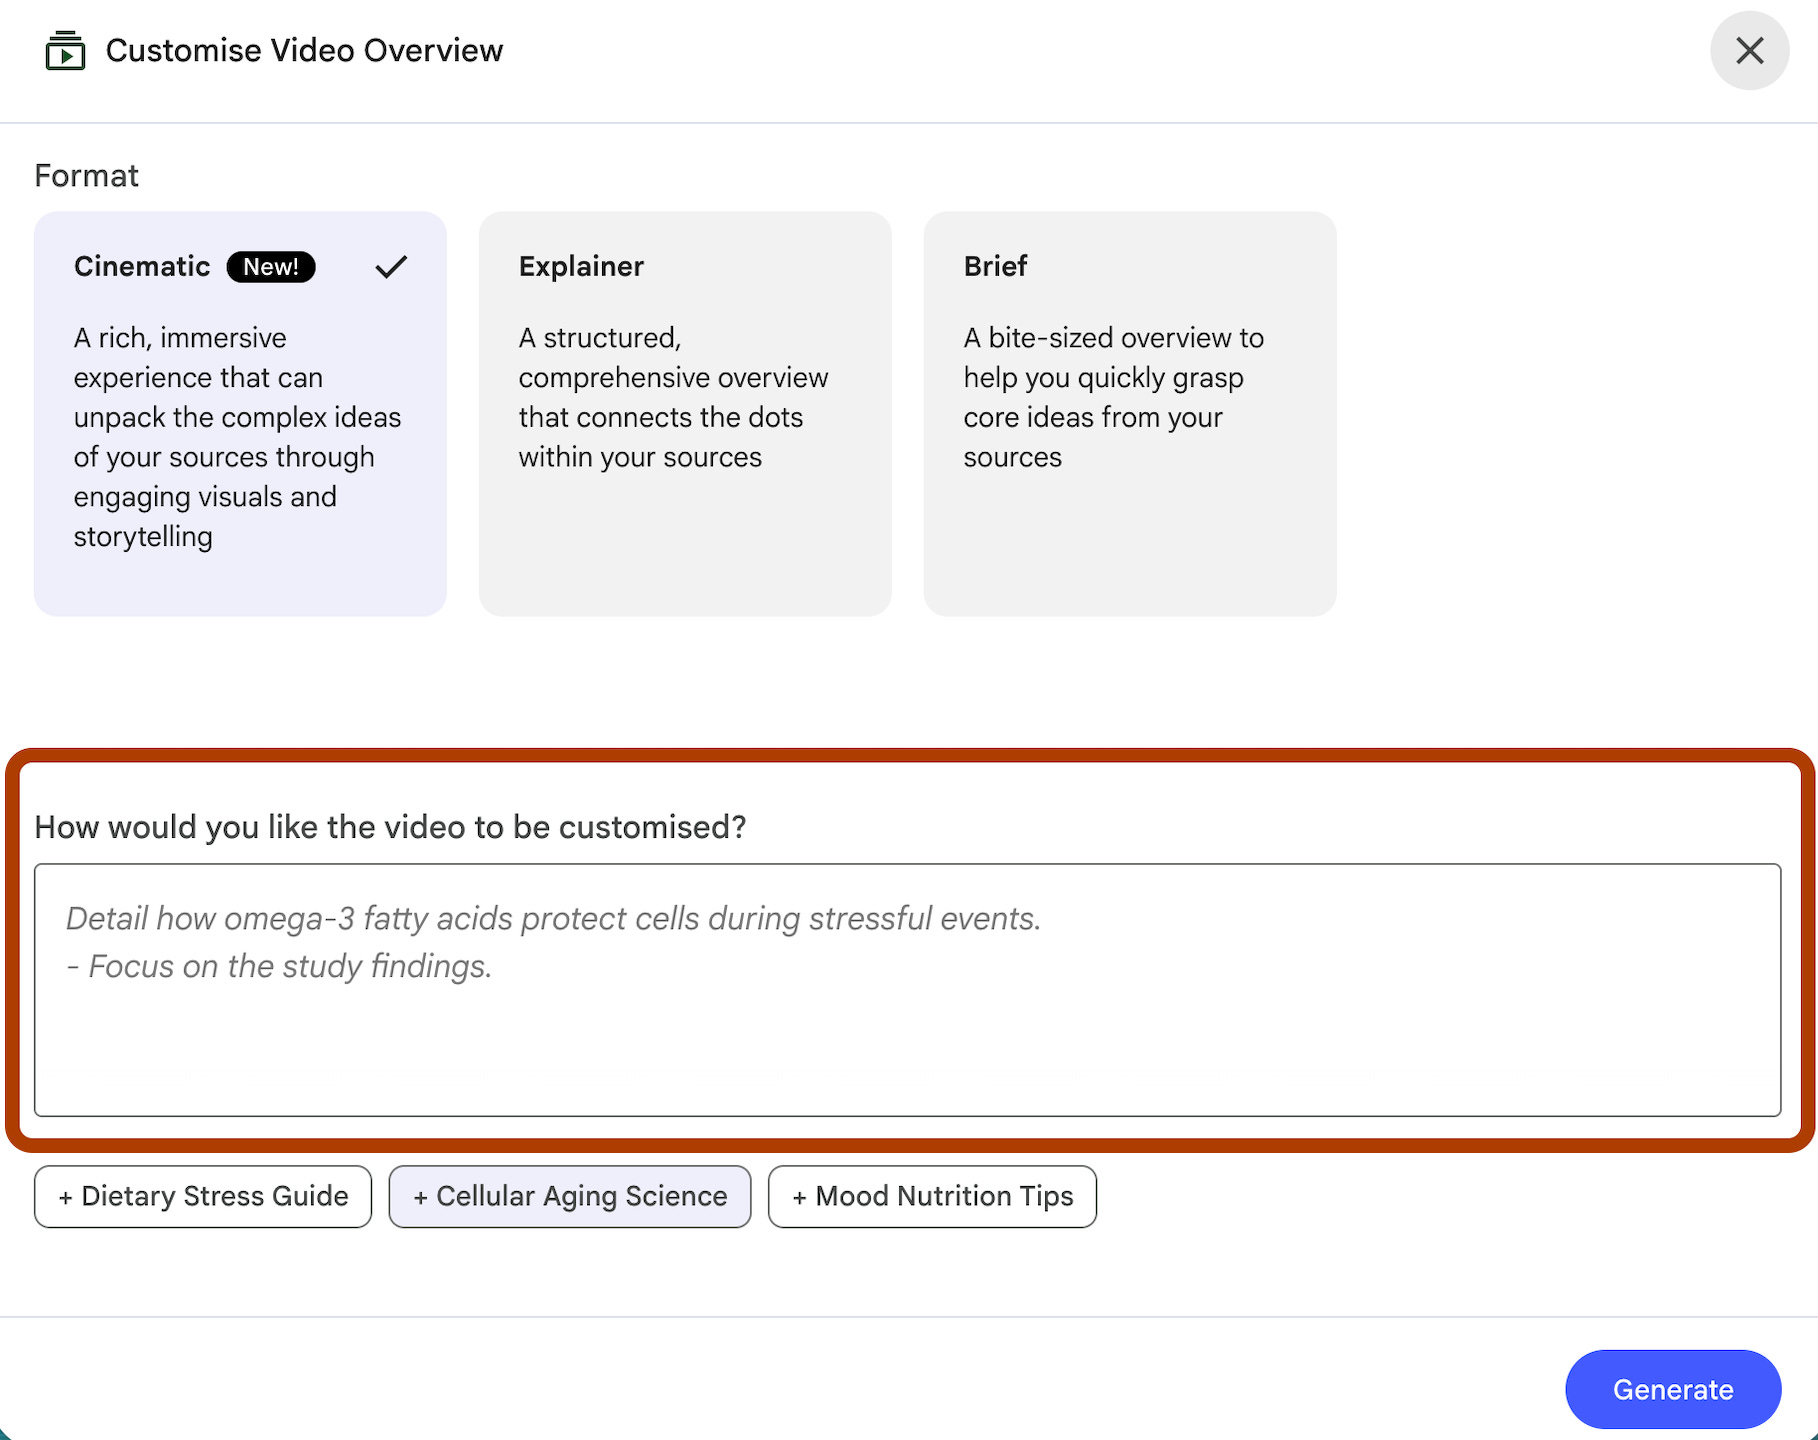
Here is the prompt I tend to use.
Walk me through the key concepts like a short course.
Explain each like I am seeing it for the first time.
End with the three most important takeaways I should remember.
Default video dumps everything from your sources into one clip.
This prompt turns it into a structured lesson with clear takeaways you actually remember.
Here is the video it created.
Tips: It might take 10-15 minutes to create a video, especially if you selected Cinematic
3- Slide Deck → Presentation generation prompt
Slide Deck generates a full presentation from your sources.
Here are the customizable parts.
Formats: Detailed deck or Presenter slides.
Length: Short/Default
Language: Customizable
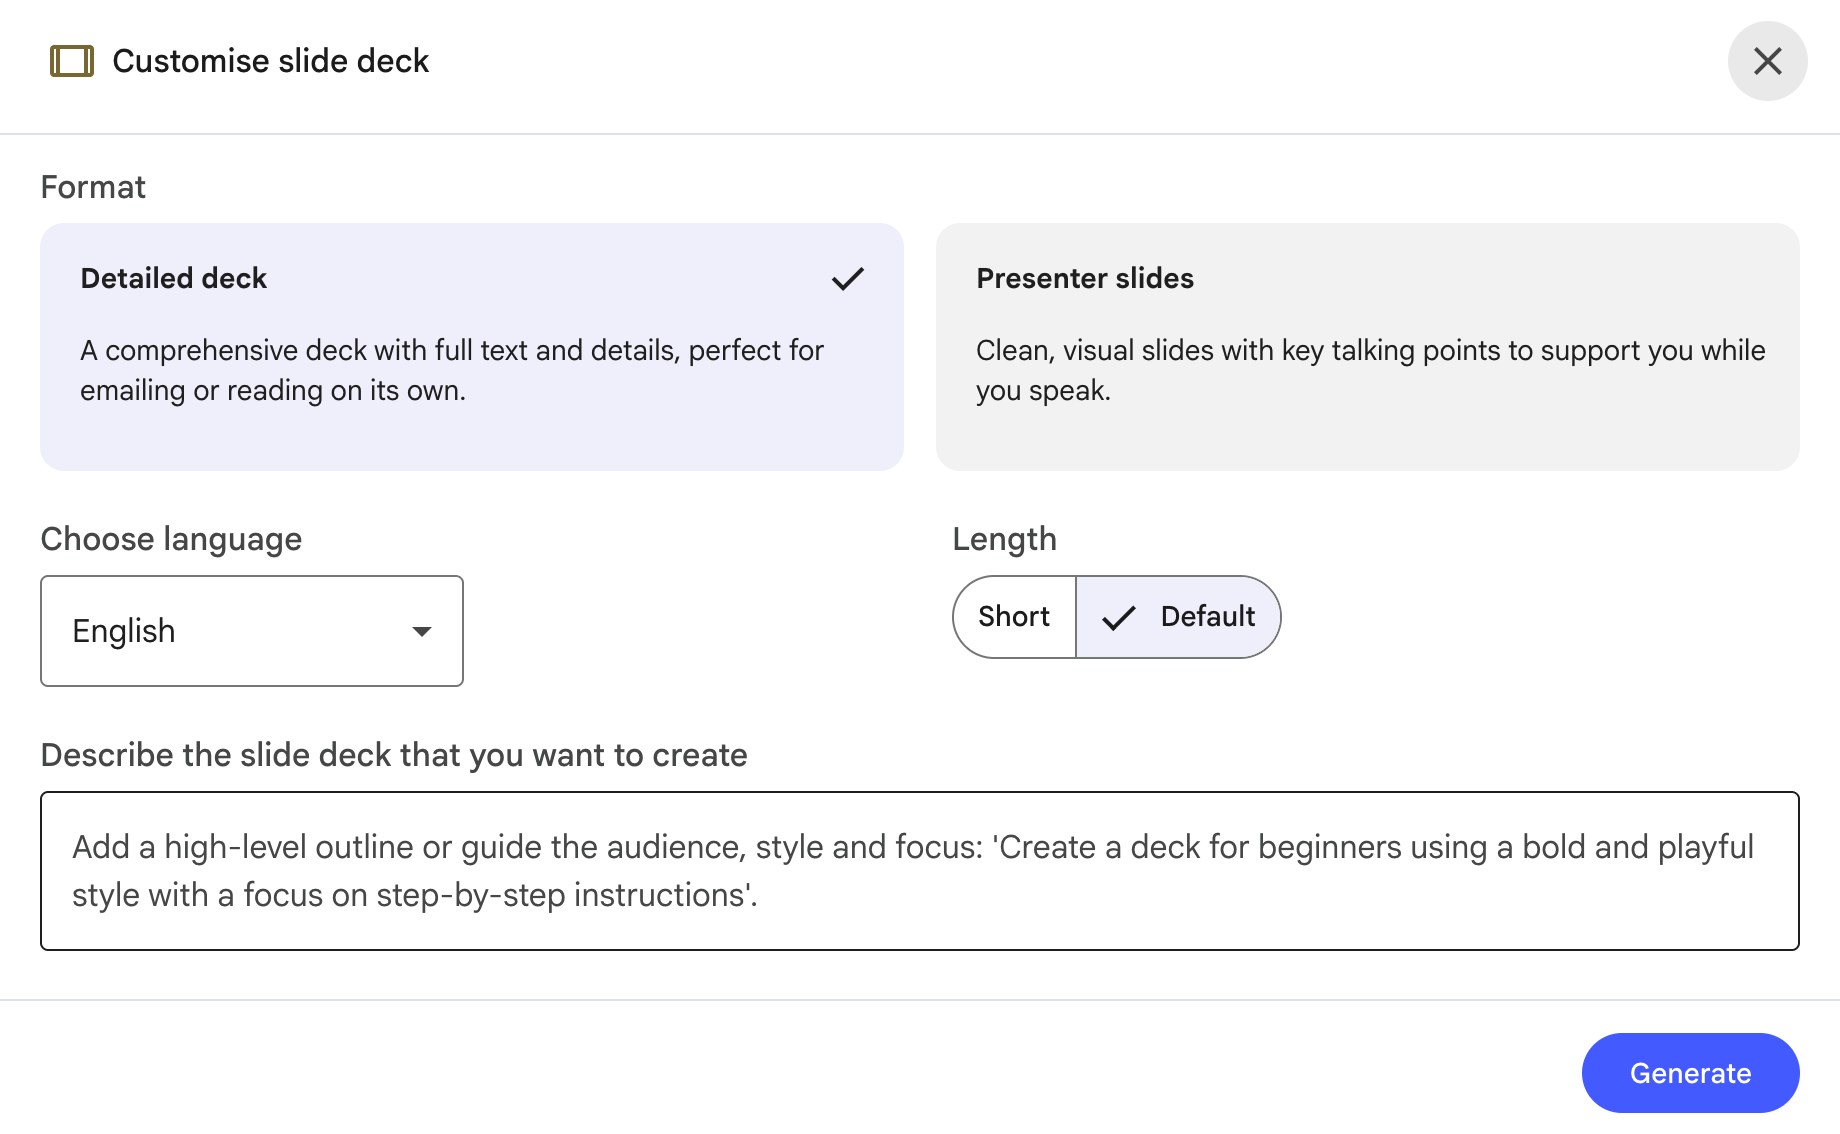
Here is my go-to prompt.
Create a slide deck that tells a story.
Start with the problem, show the key findings, and end with a clear recommendation.
Keep each slide to one idea.
No filler slides.
Here is the output.
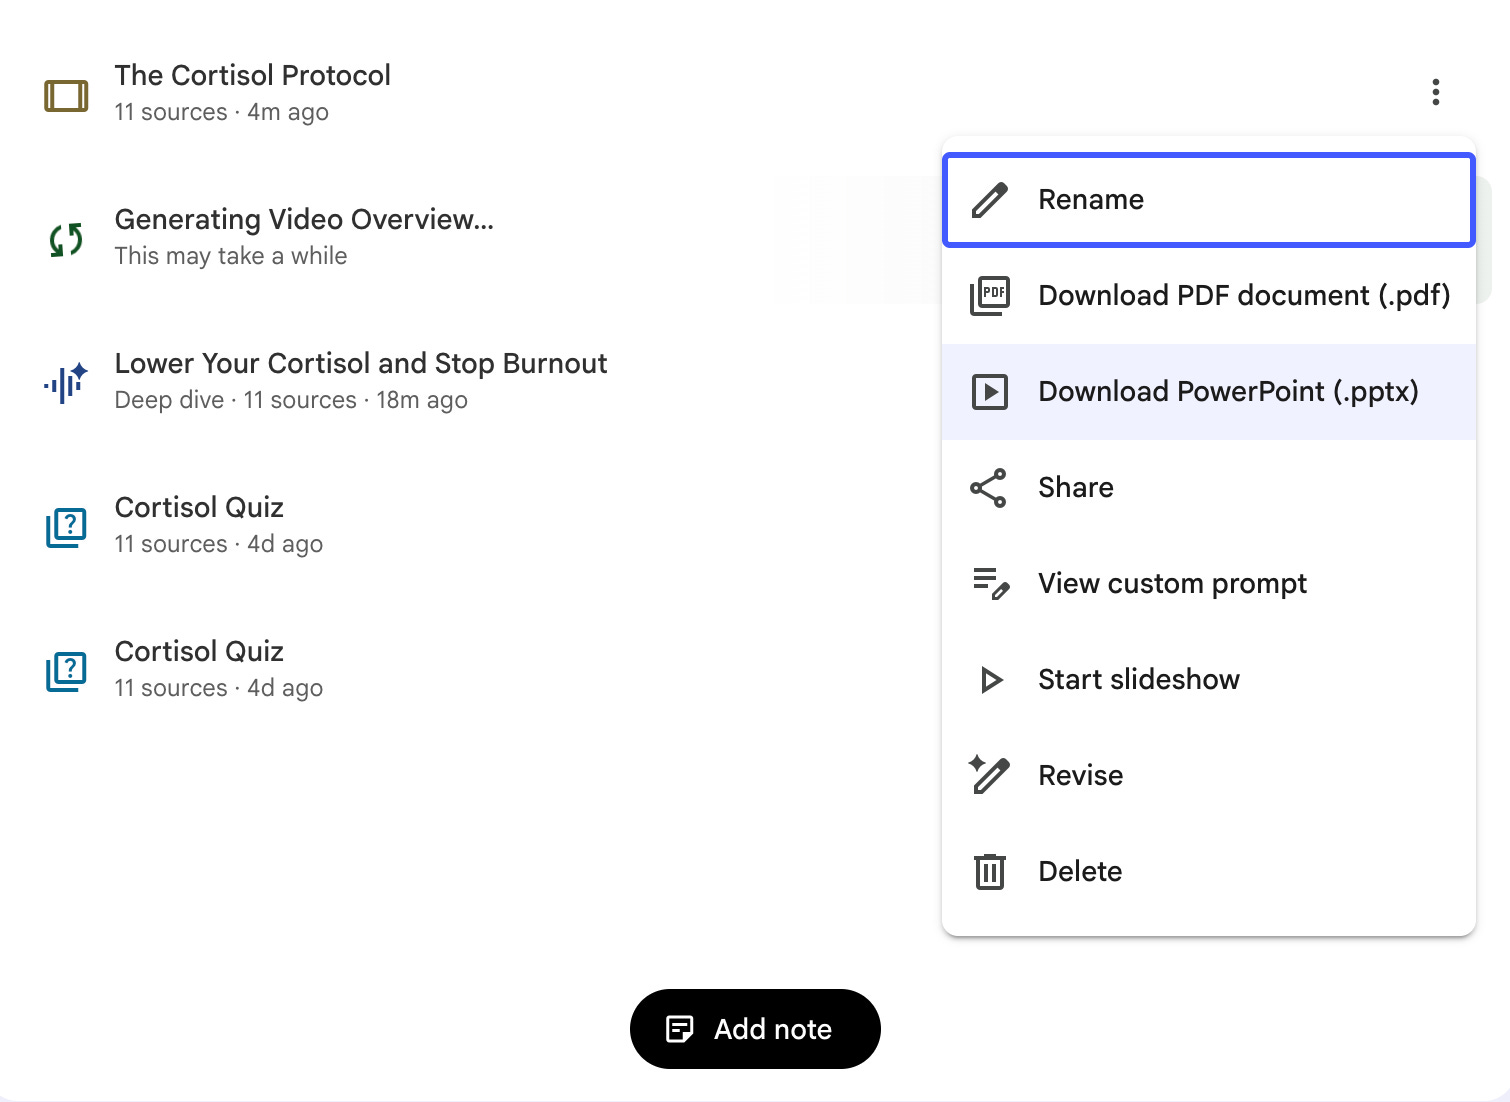
But the best part is you can revise this inside NotebookLM.
To do that, click on “Revise”.
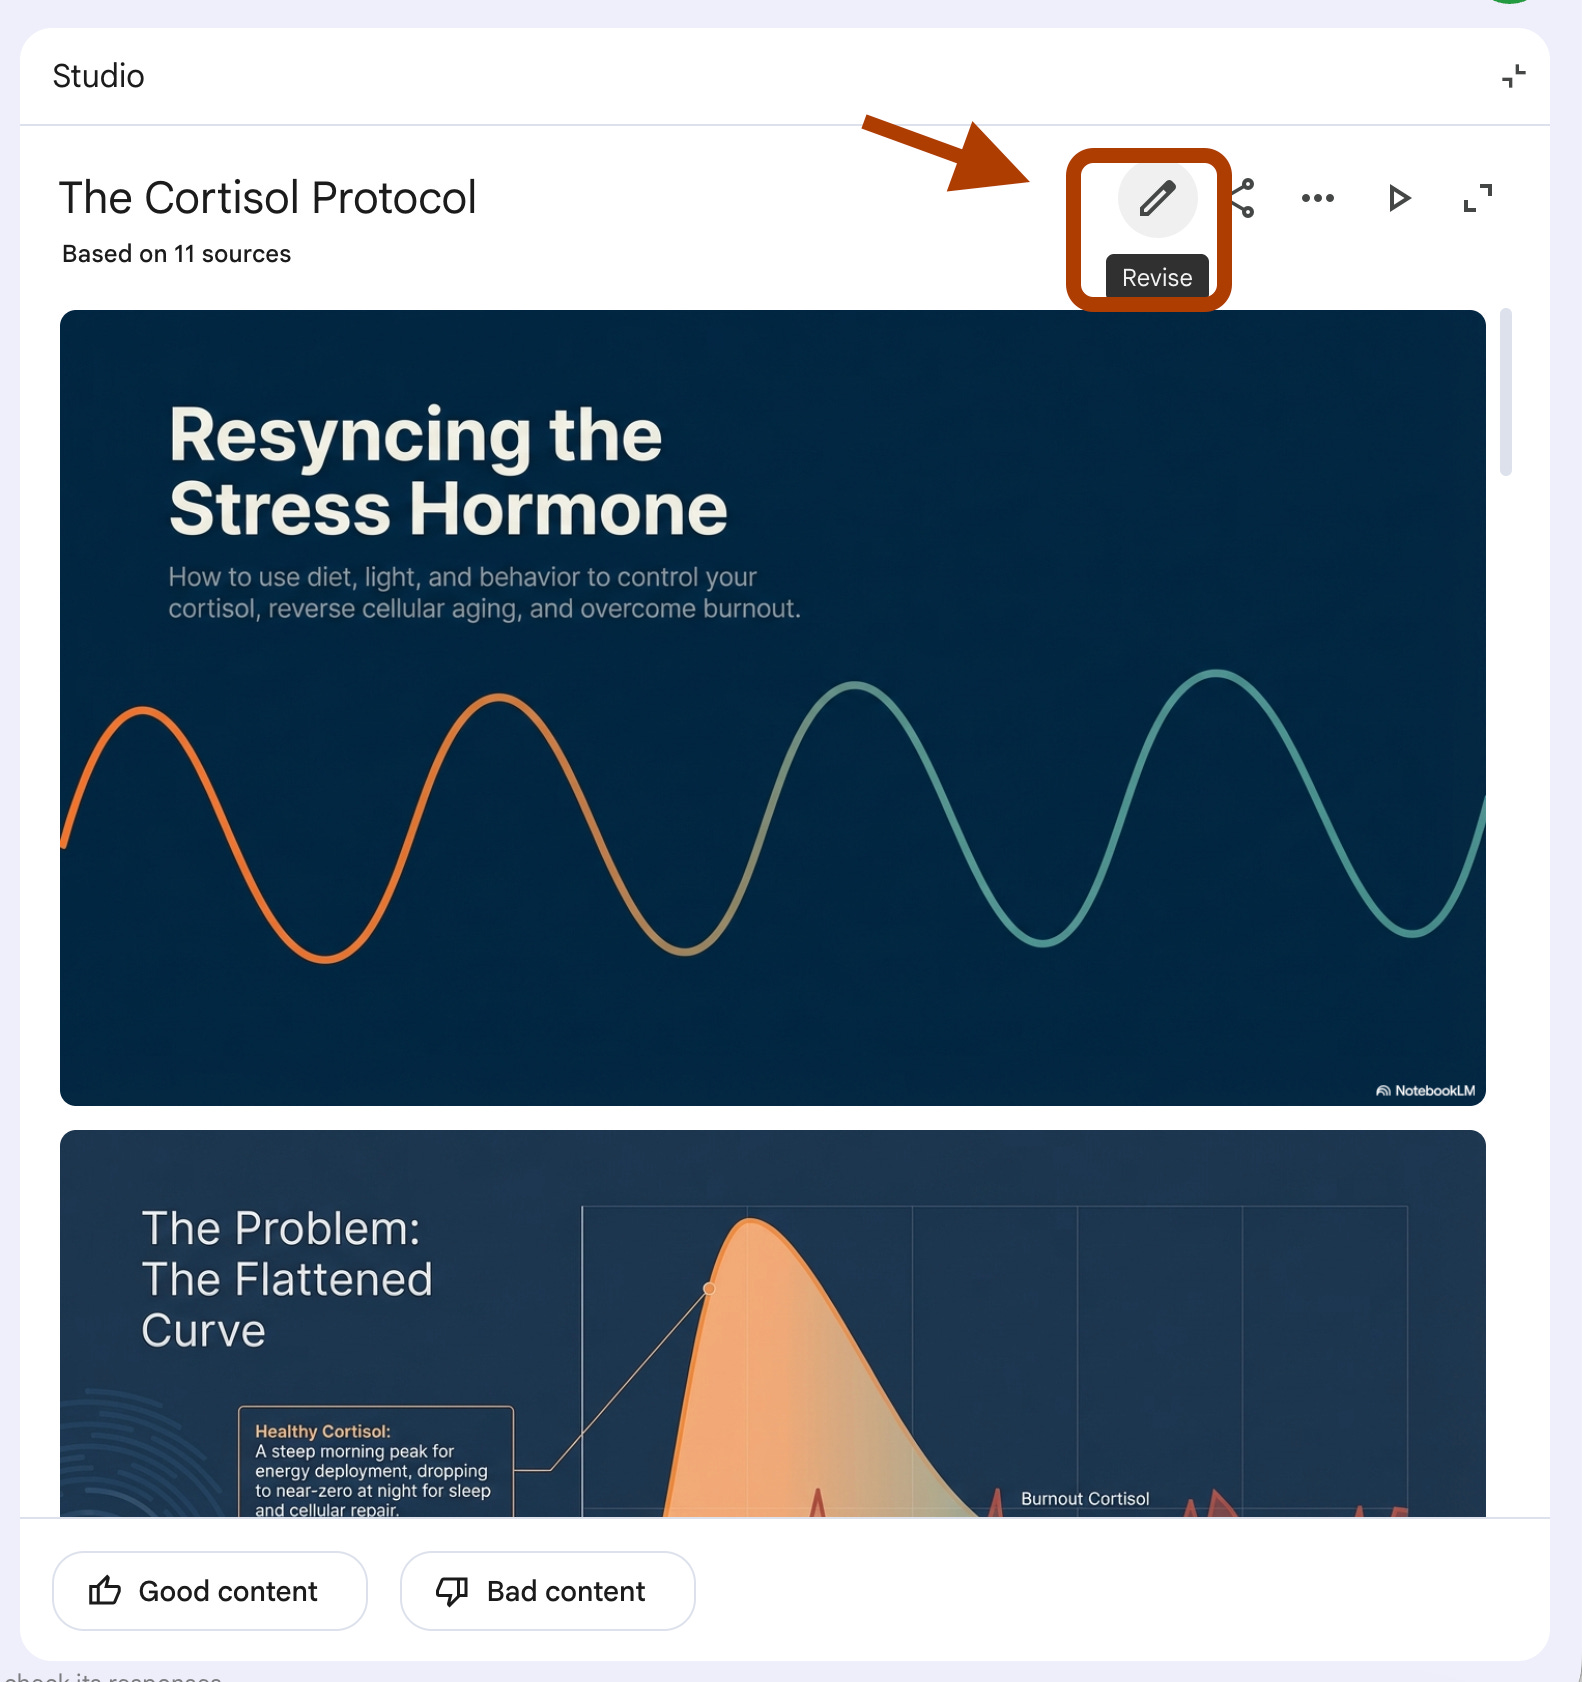
And next, you can select the slide you want to revise and be prompted to edit it.
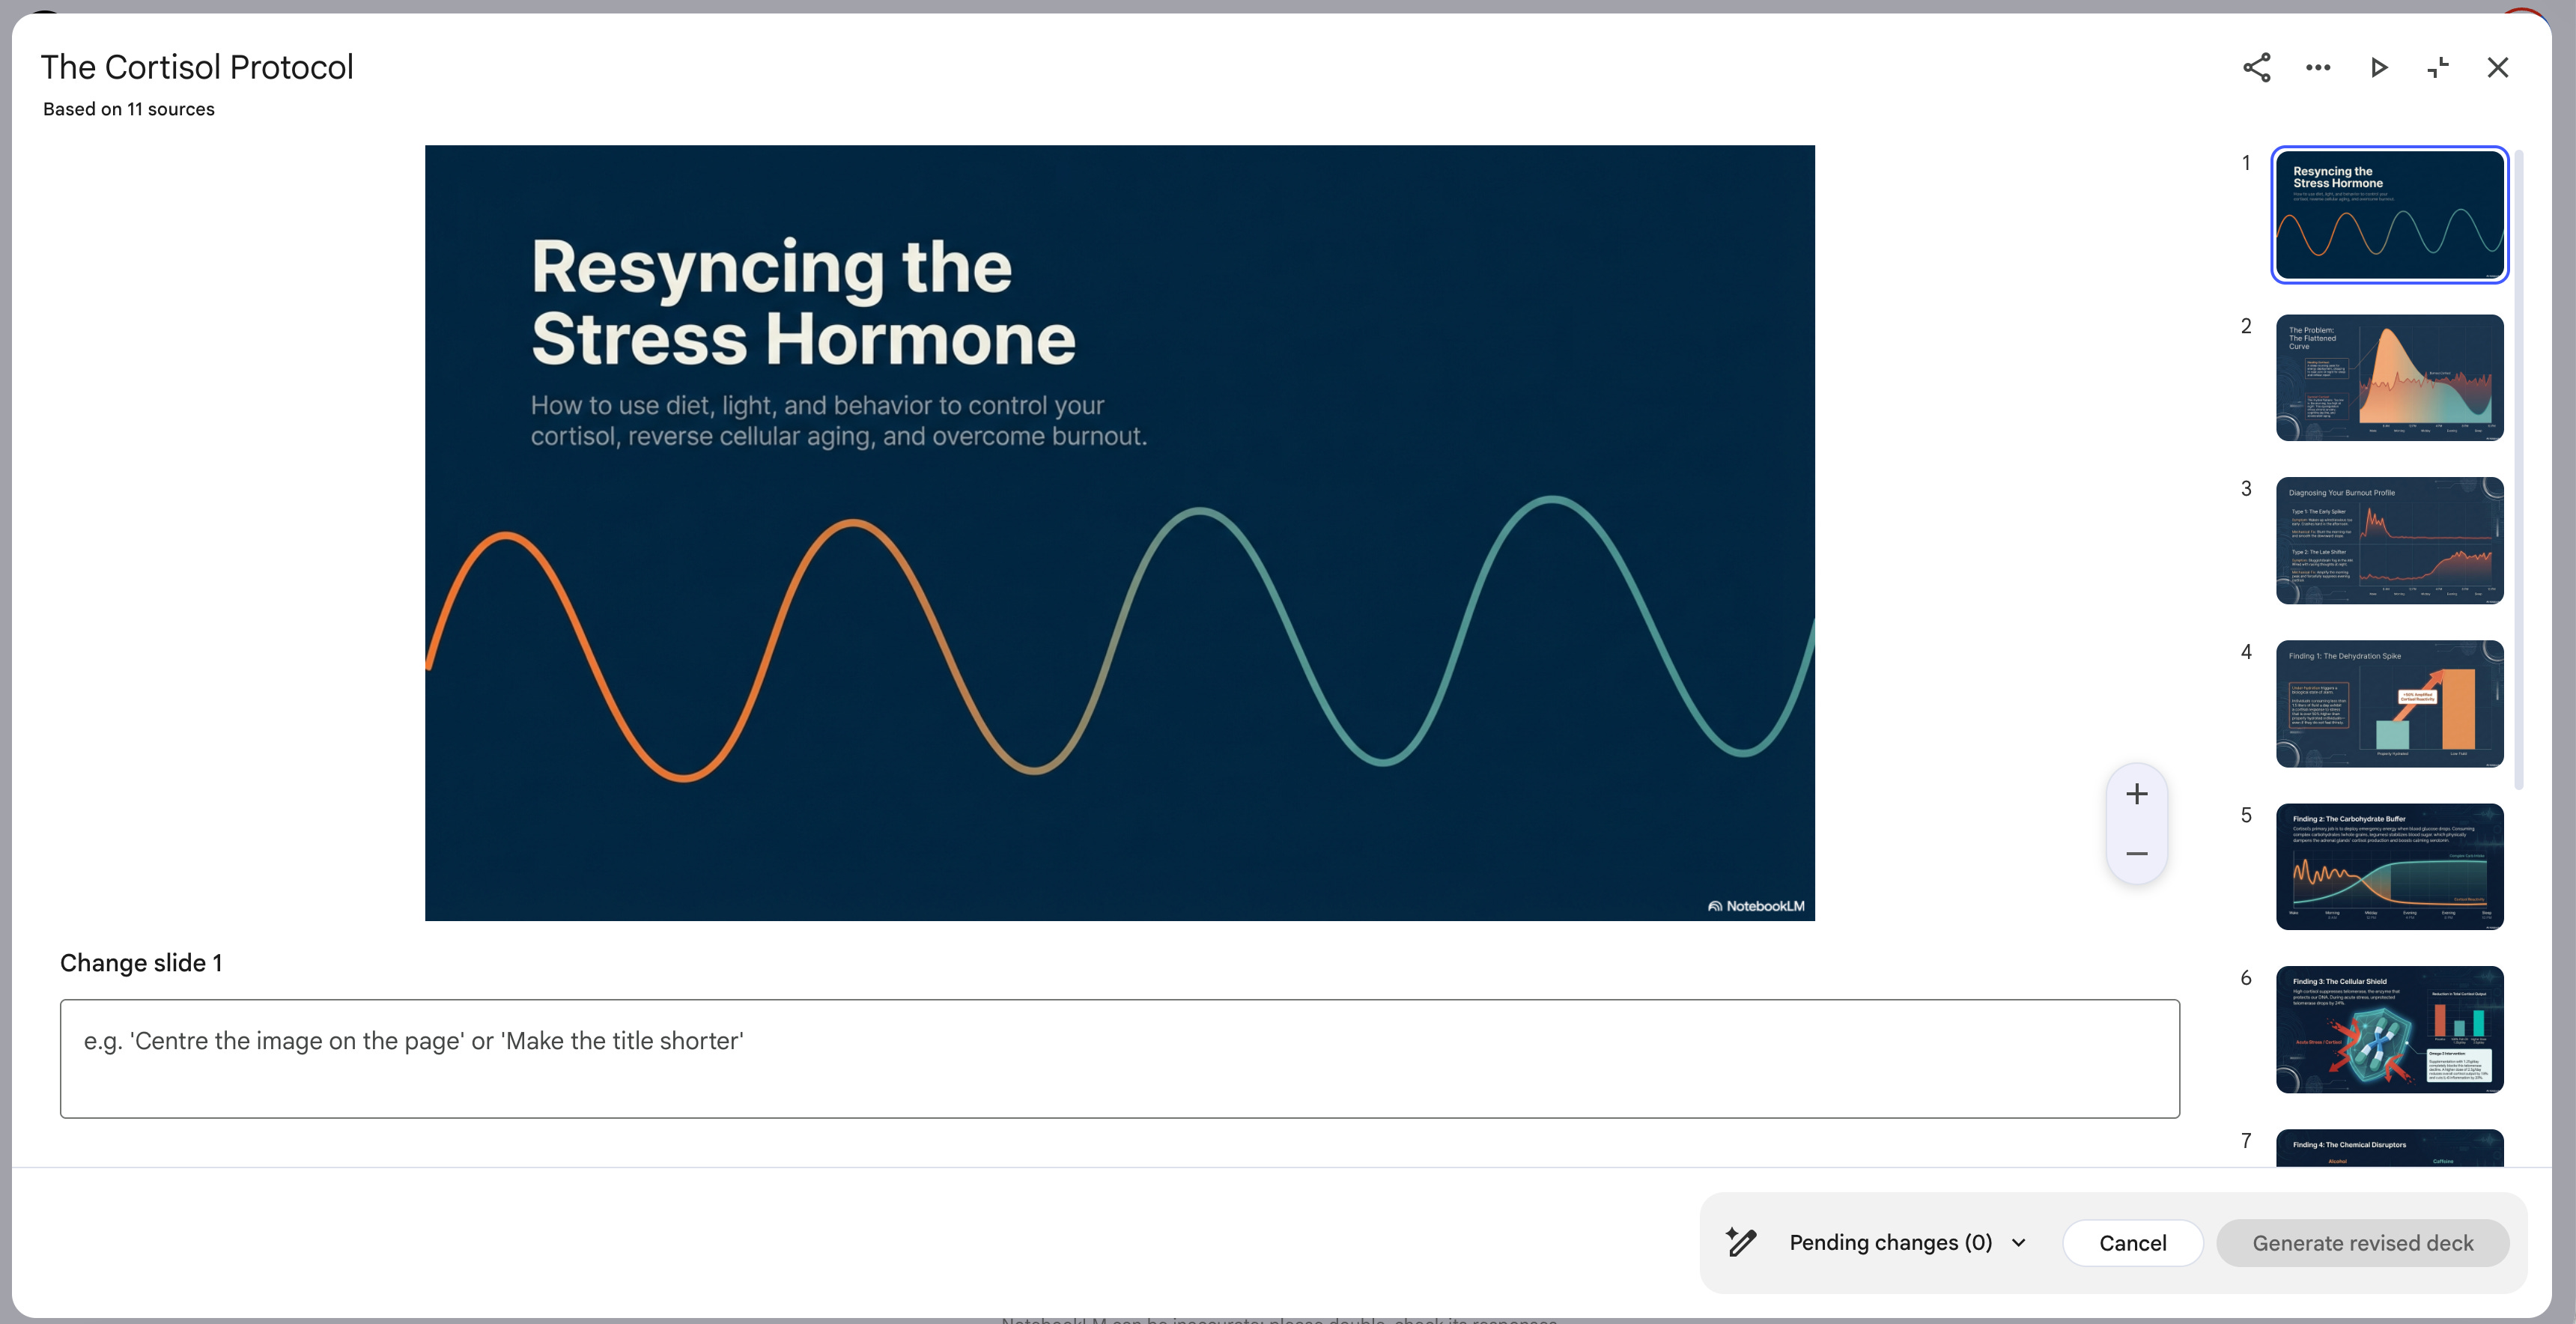
You can also download the slides as PPTX and edit them.
If you want to edit the element(visual) of these slides, I have made NotebookLM Slides editable with a little trick.
Also, you can automate slide generation using the Claude and PowerPoint connection.
4- Mind Map → Knowledge Mapping prompt
Mind Map visualizes how concepts in your sources connect to each other. No prompt box here, but the output is interactive.
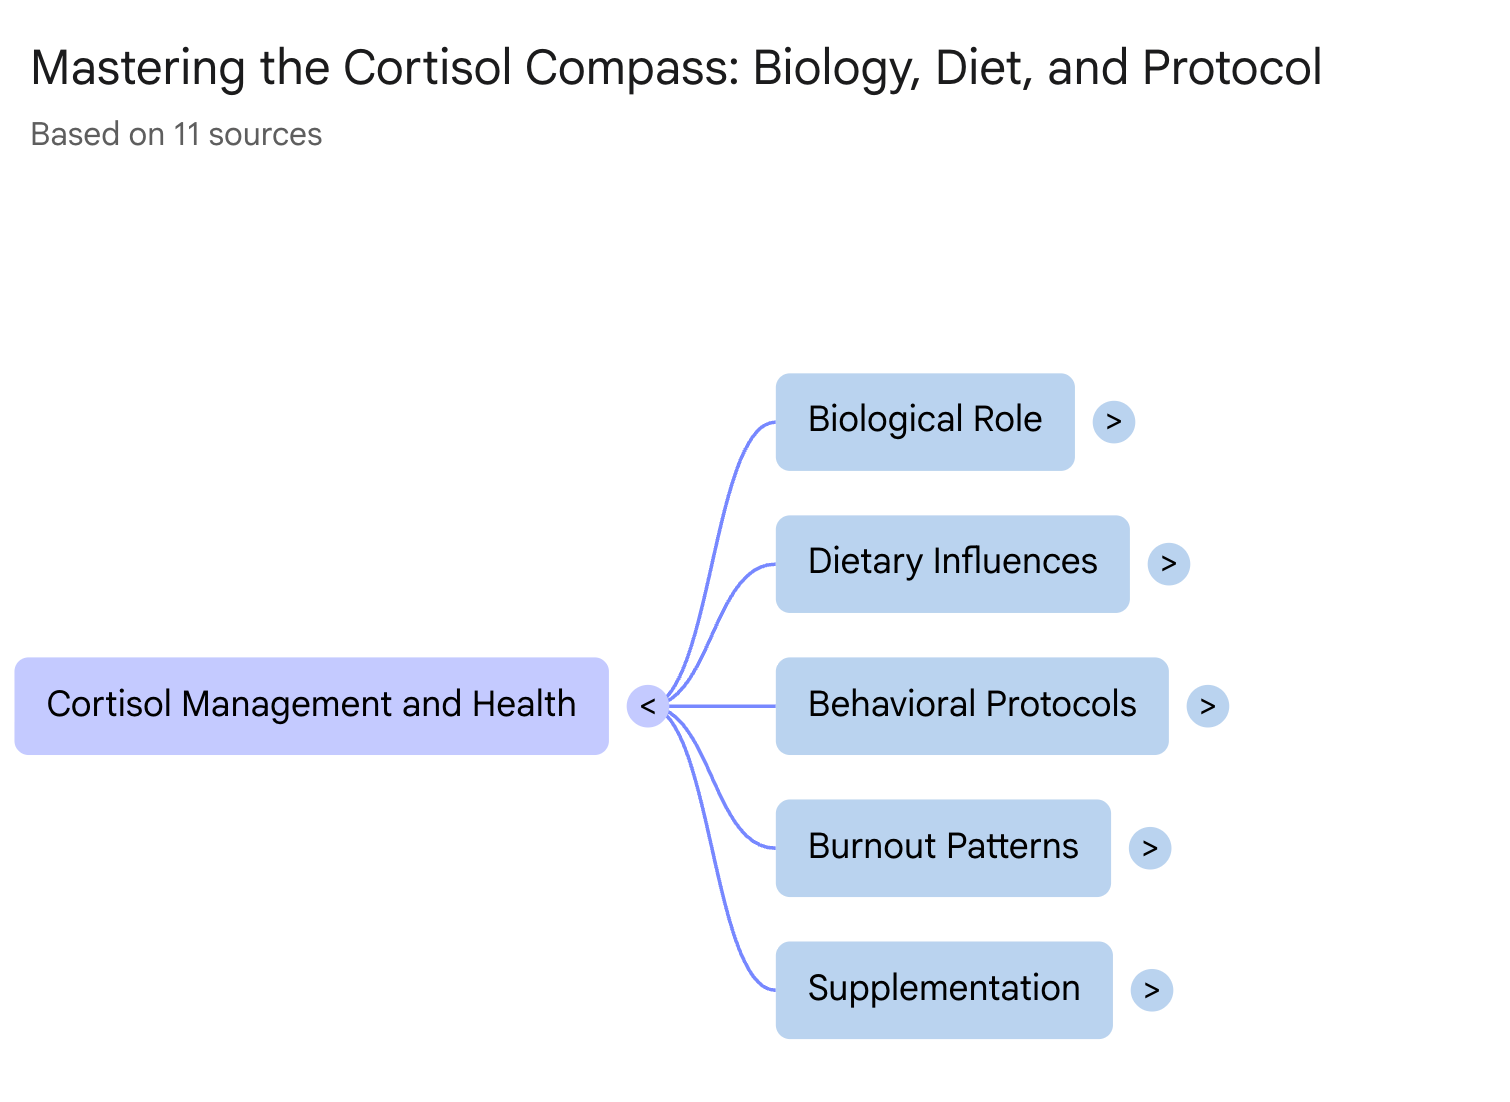
Click on any node and it expands into subcategories.
You go from a high-level overview to specific details in one click.
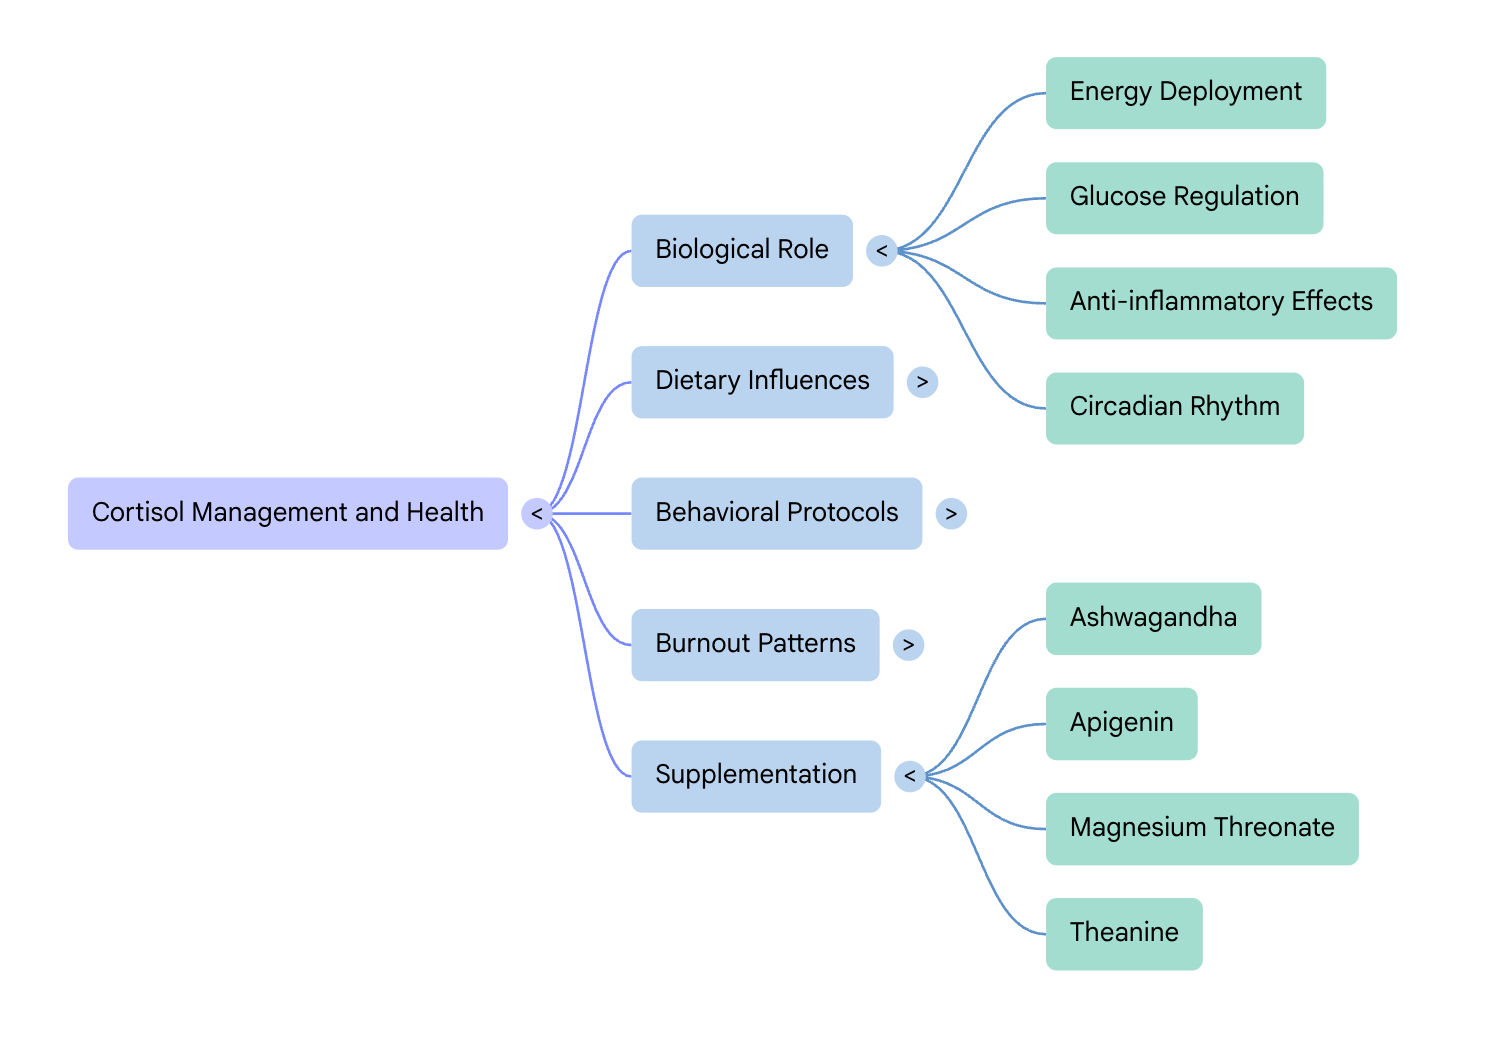
This is the fastest way to understand the structure of anything you uploaded. Instead of reading 50 pages, you see the entire architecture in 10 seconds.
5- Reports → Structured analysis prompt
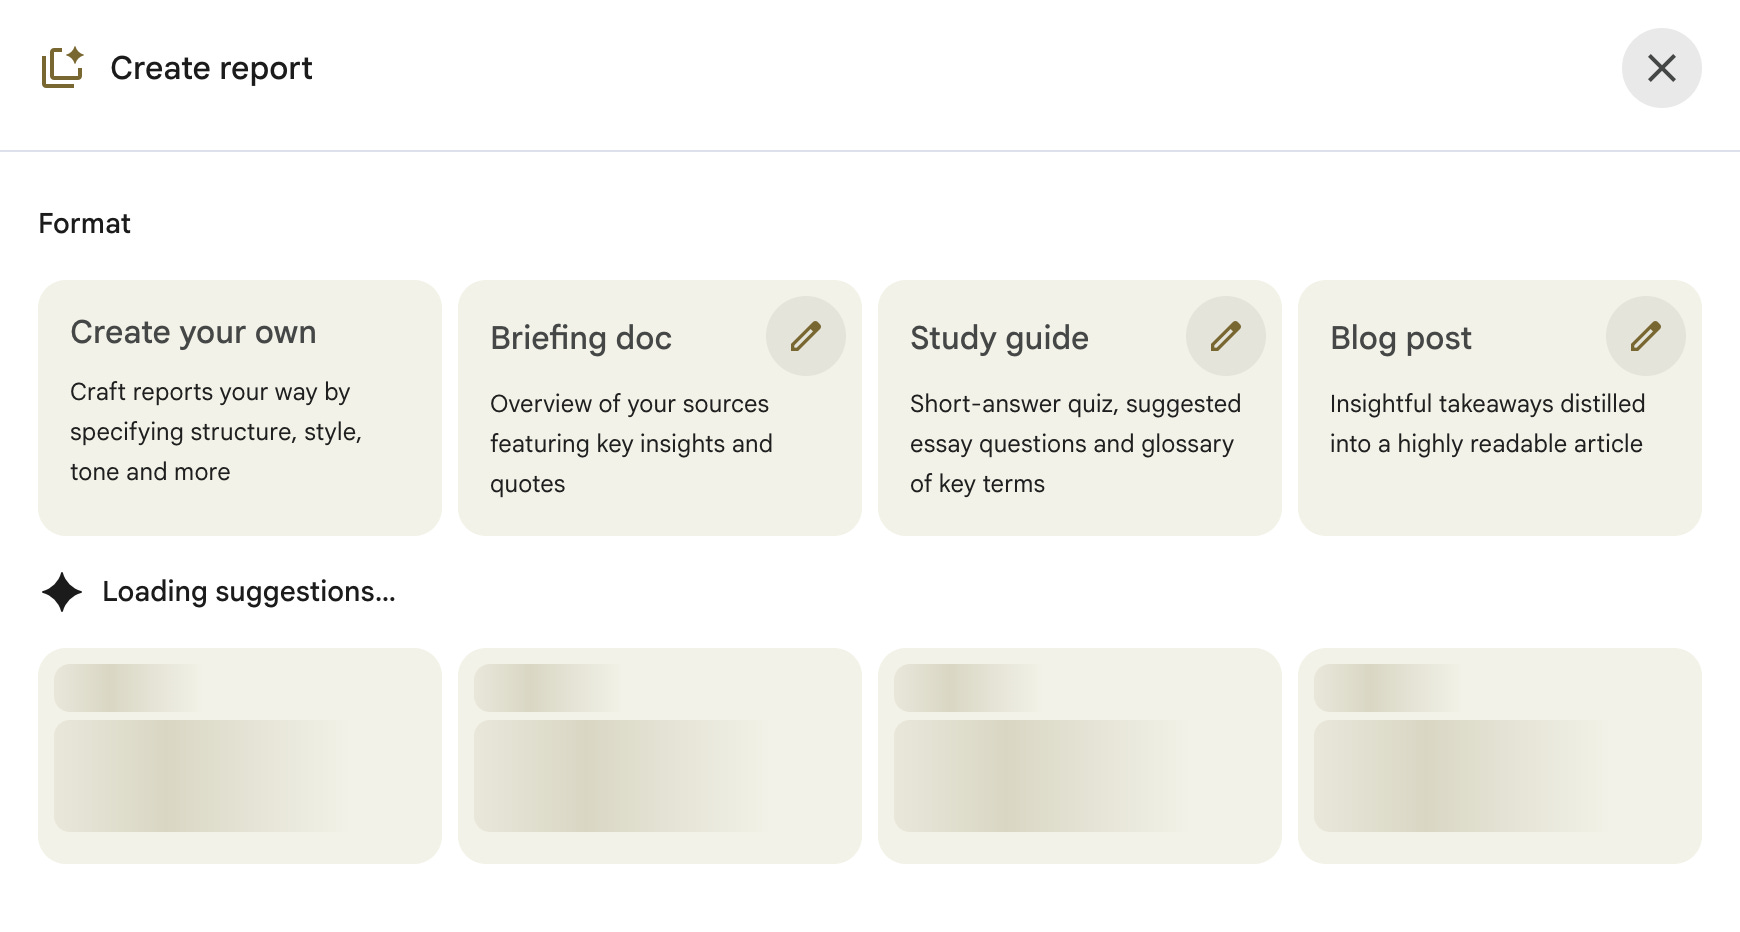
And there will be suggestions based on your NotebookLM. After clicking, here are my suggestions.
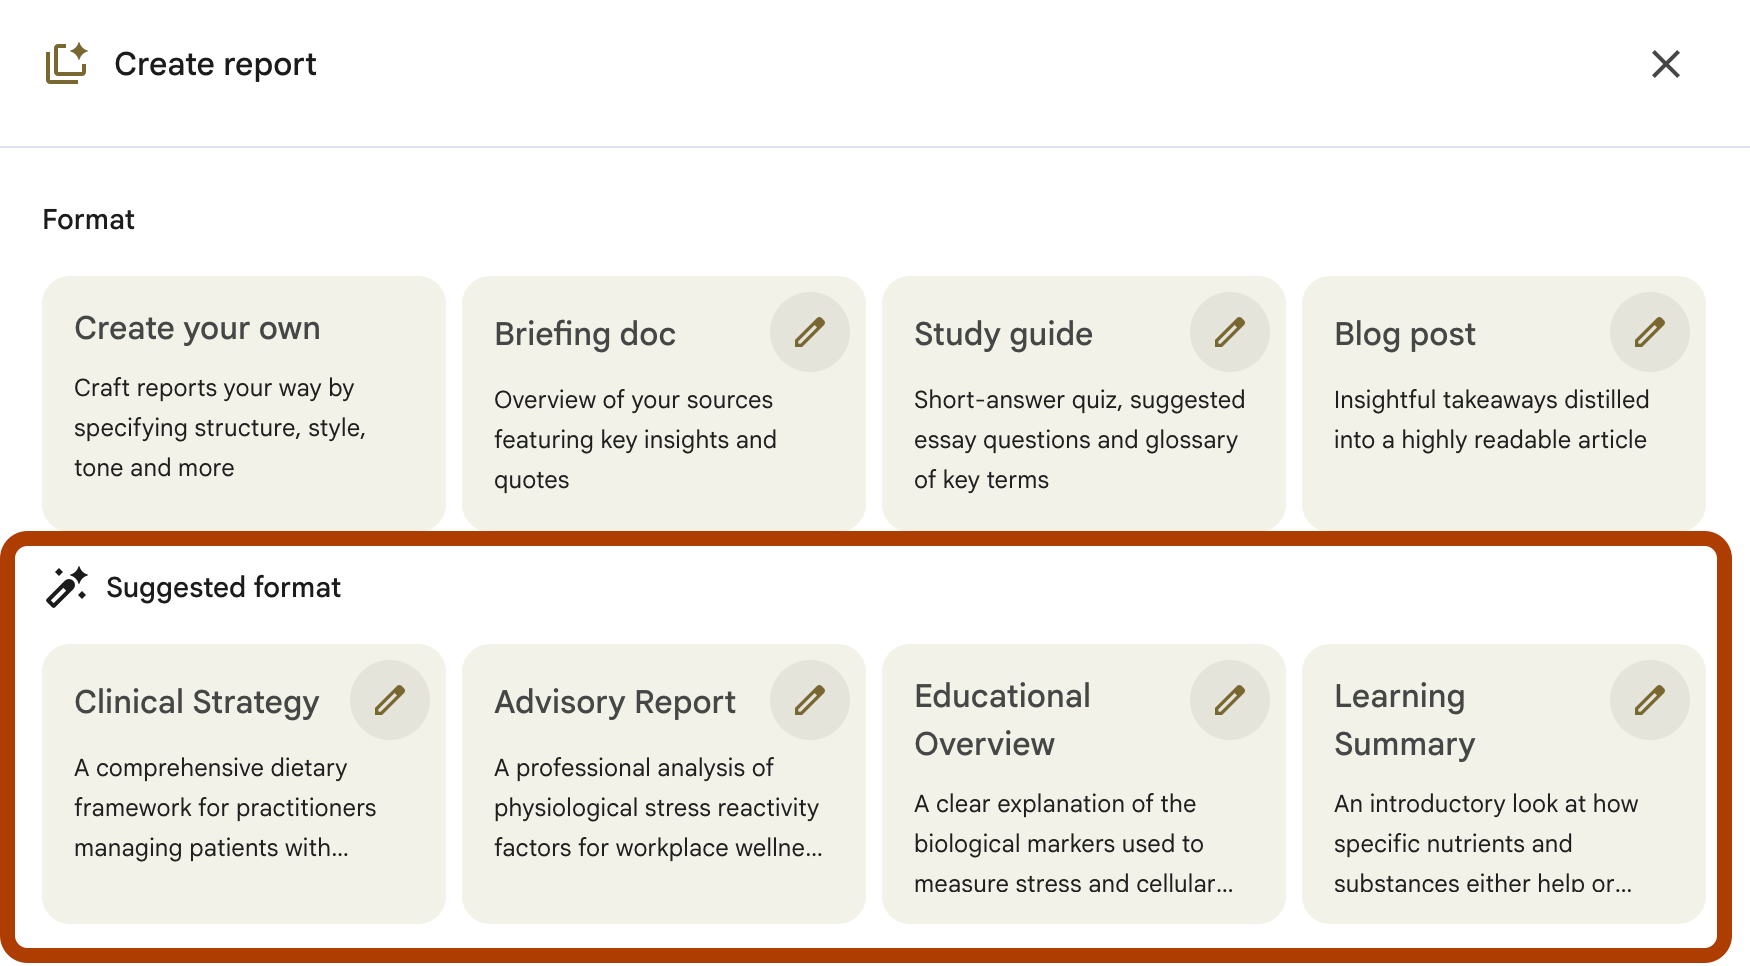
And you can customize any of them. Let’s customize the blog post.
As you can see, there are already pre-filled prompts here.

Let’s update this prompt.
Act as a bold, direct Substack writer. Write a listicle from the provided sources.

Voice: Short sentences.
No hedging — no "might", "could", "perhaps". Use parentheticals for punch. Specific numbers always. Transformation-focused: reader should think "I'll be different after reading this."

Headline: Action or number + concrete outcome. Not curiosity bait — a direct promise.

Hook: 6 sentences max. Start with a real story or relatable pain. Contrast what others do vs. what you'll deliver. End with a blunt line.

Body: Max 5 sections. Each section gets a bold subheading. Short paragraphs. Don't summarize — analyze why it matters. One blockquote per section if a quote is powerful enough. If something is actionable, make it copy-paste ready.

Close: One bold takeaway or a question worth sitting with. Then a short CTA.

Rules:

Under 400 lines total
No filler sections. Every section serves the headline promise.
No repetitive structures ("No more X. No more Y." or "This isn't X. It's Y.")
And here is the blog post.

Let’s see the full version.
If you want to learn how to write better using NotebookLM, check out my workflow.
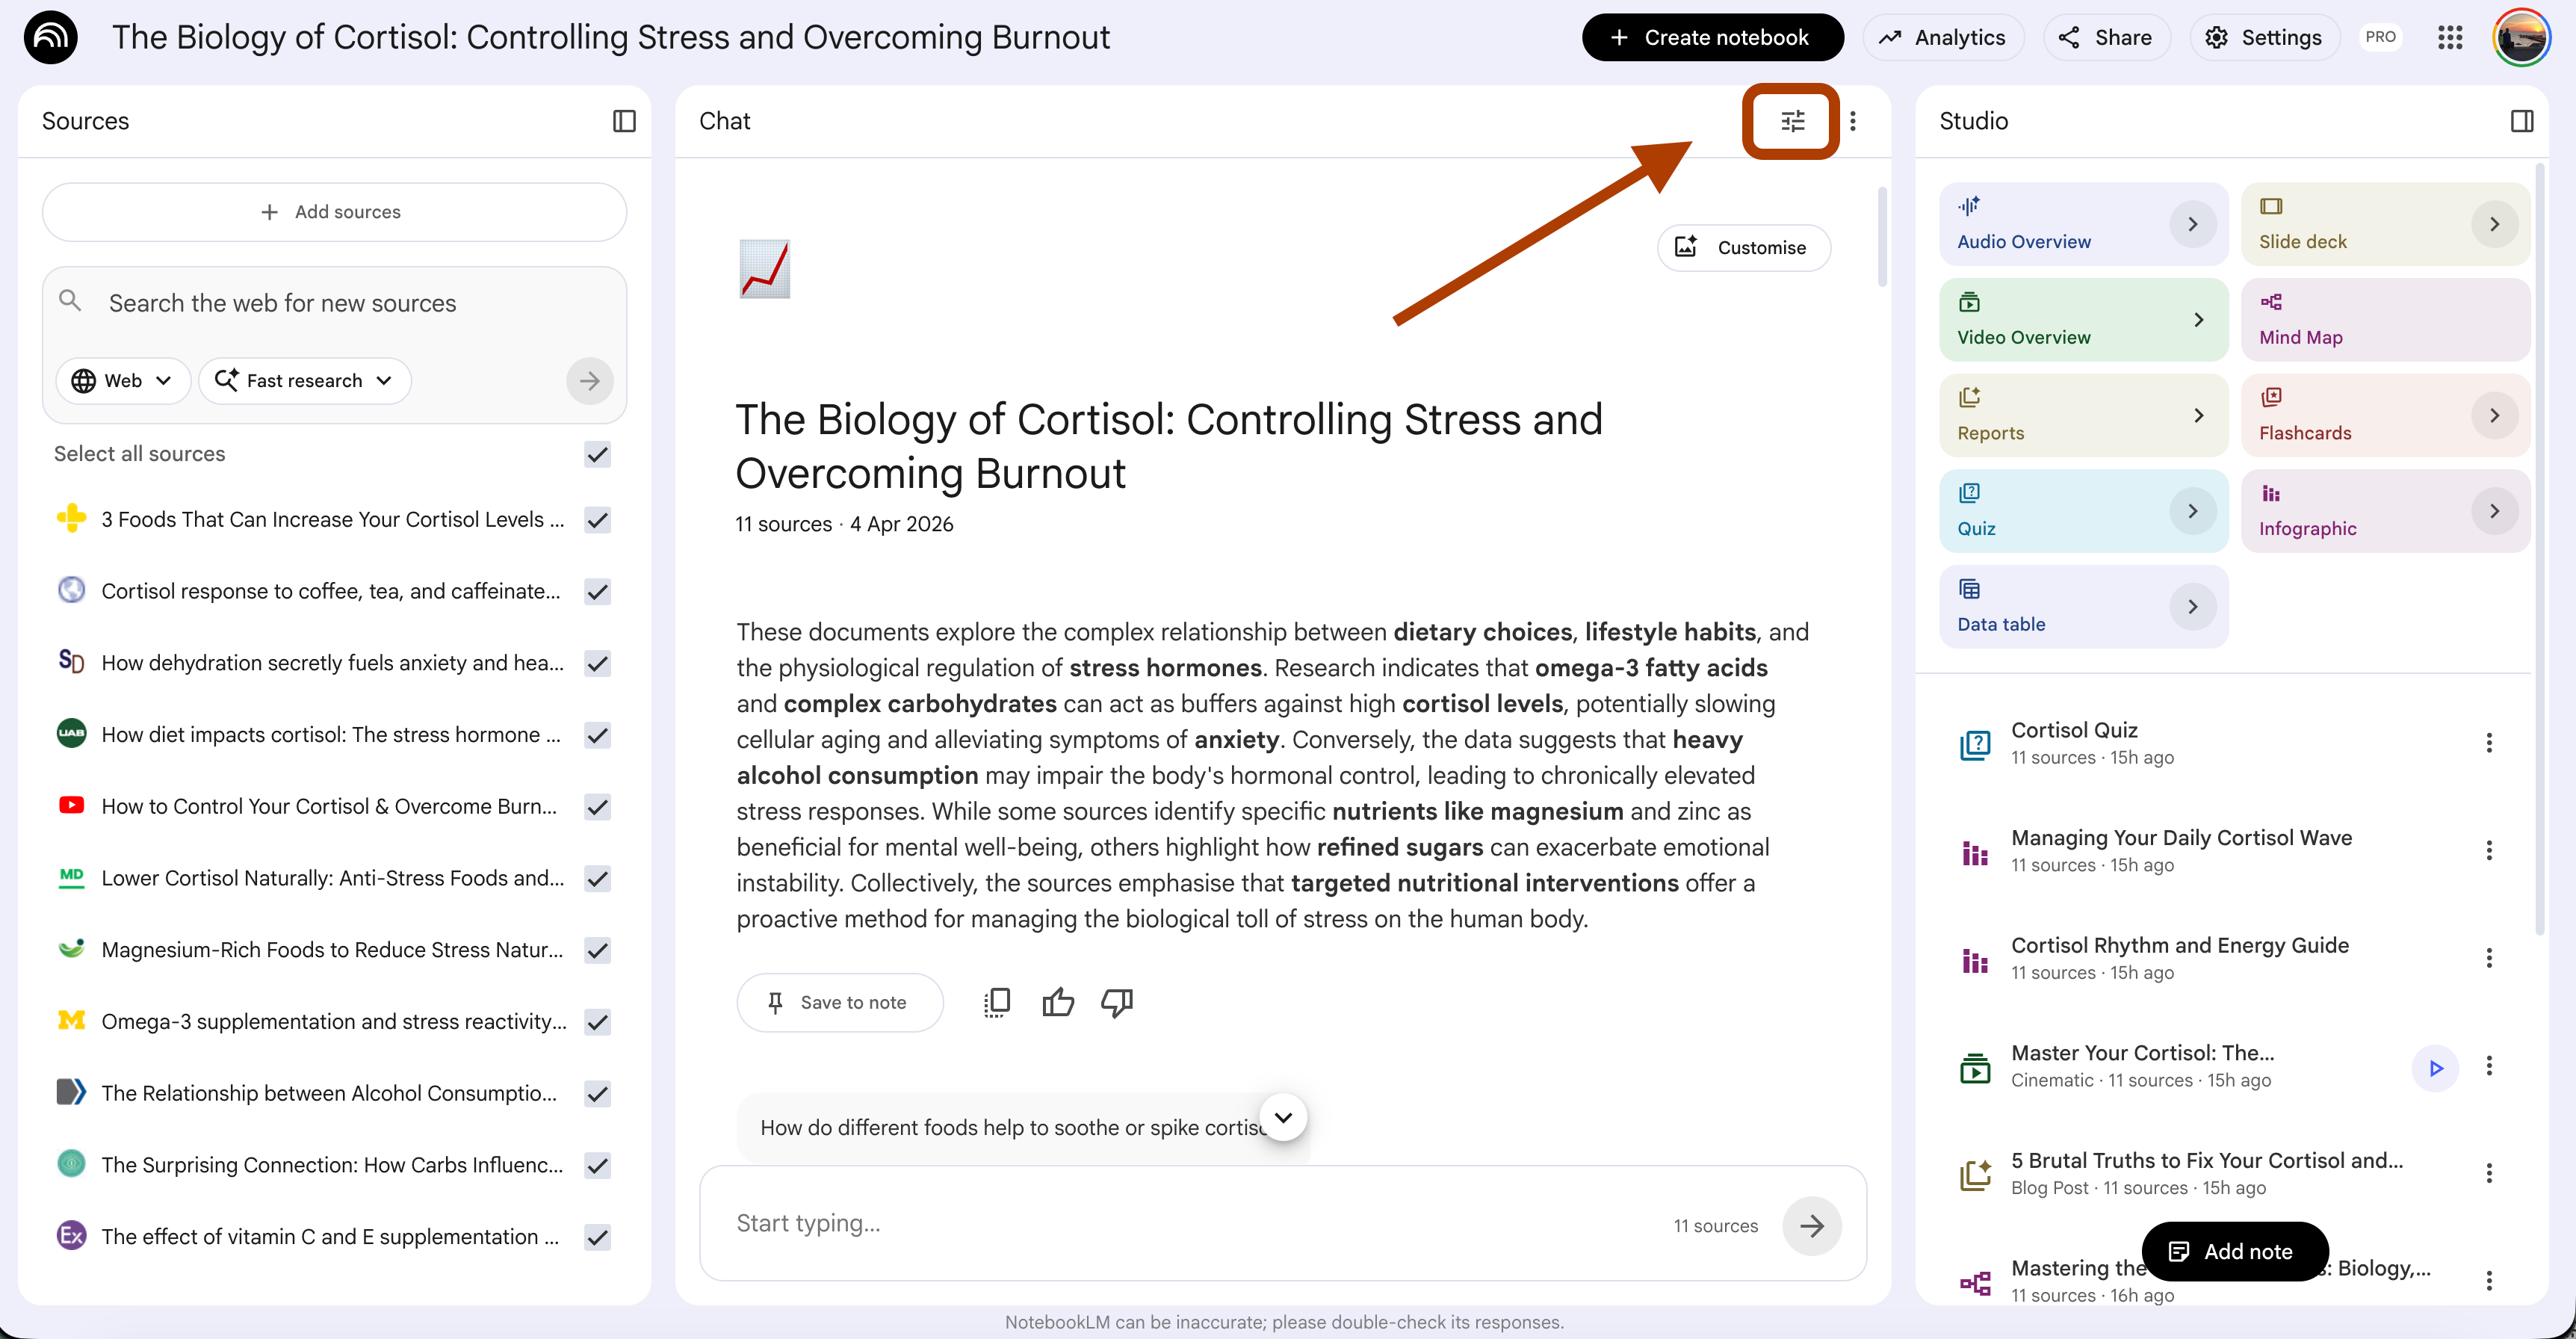
6- Infographic → Visual summary prompt
Infographics are using Nano-banana pro in the back-end.
You can customize.
Language
Orientation
Visual Style
Level of detail
And you can customize instruction as usual.
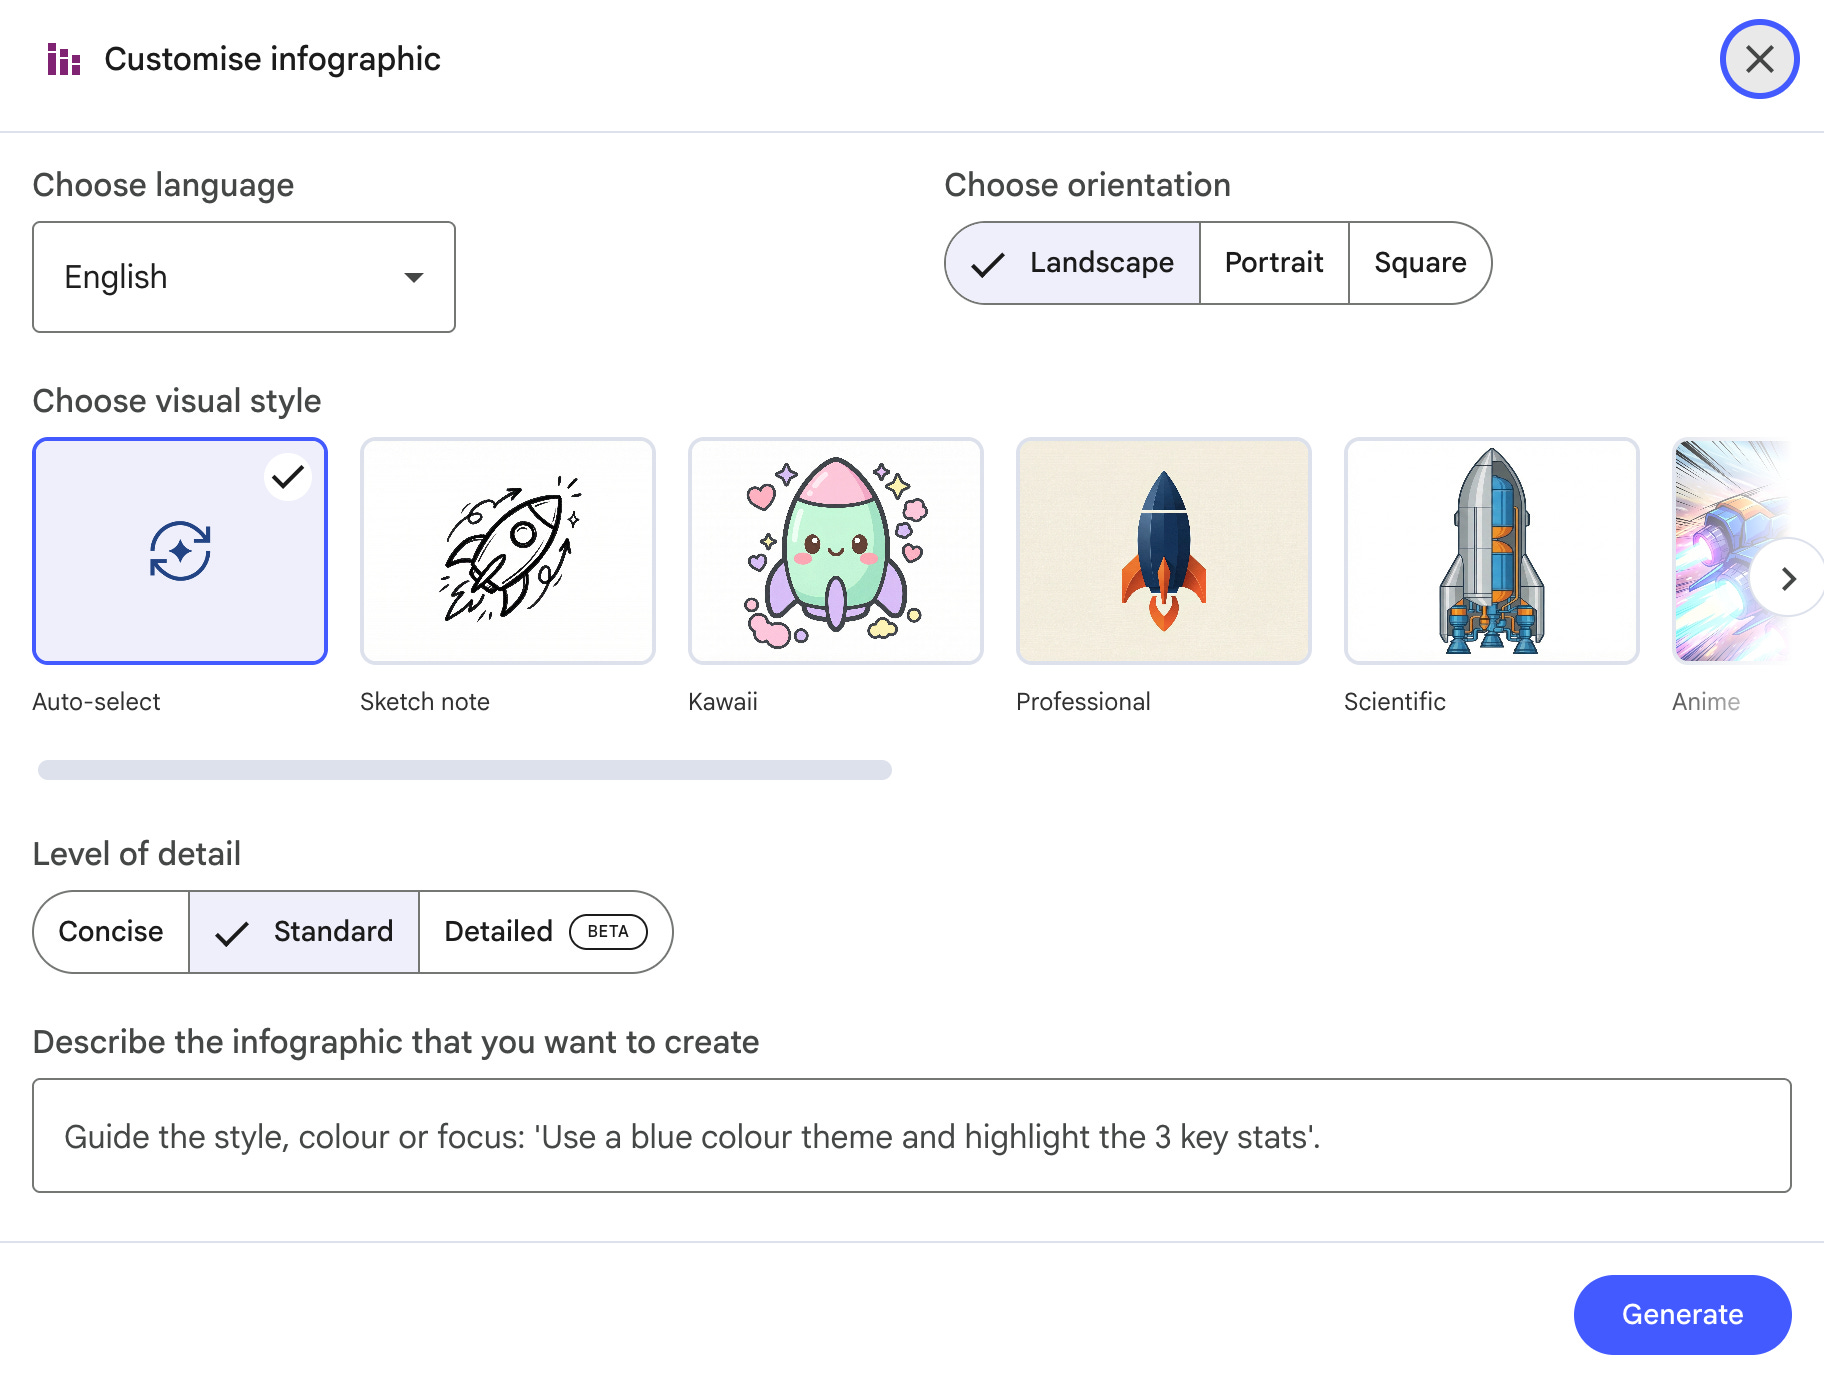
Here is the prompt I tend to use.
Generate a hand-drawn style infographic that looks like a real
whiteboard sketch. Use colored markers (black, blue, red, green)
with slightly imperfect lines. Lead with the main concept,
break it into 3-4 key points, and make every text large and legible.
Let’s see the output.
7- Quiz/Flashcards → Learning assessment prompt
The quiz generates questions from your sources to test what you actually learned.
Here are the customizable parts.
Number of questions: Fewer/Standard/More
Level of Difficulty: Easy/Medium/Hard
You can also customize with a prompt too.
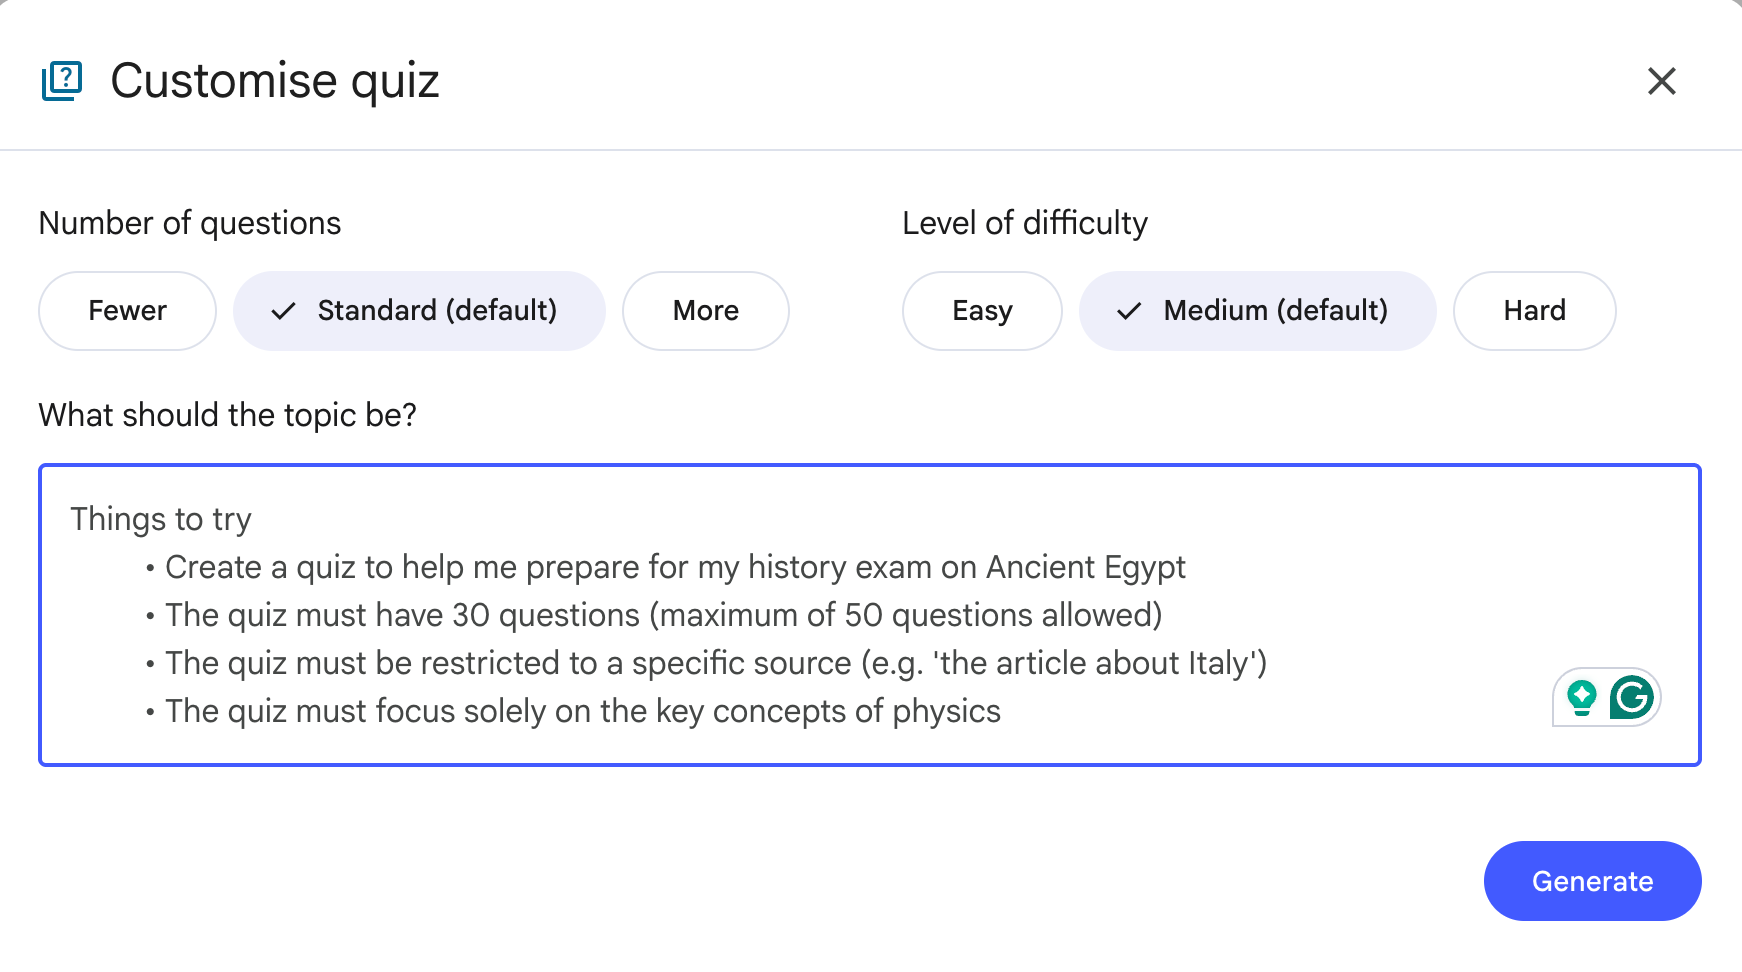
Here is my go-to prompt.
Focus on the practical concepts only. Skip definitions.
Ask questions that test whether I can apply what I learned,
not whether I can memorize it.
Default quiz asks you “what is X?” This prompt asks you “when would you use X and why?” That is the difference between memorizing and understanding.
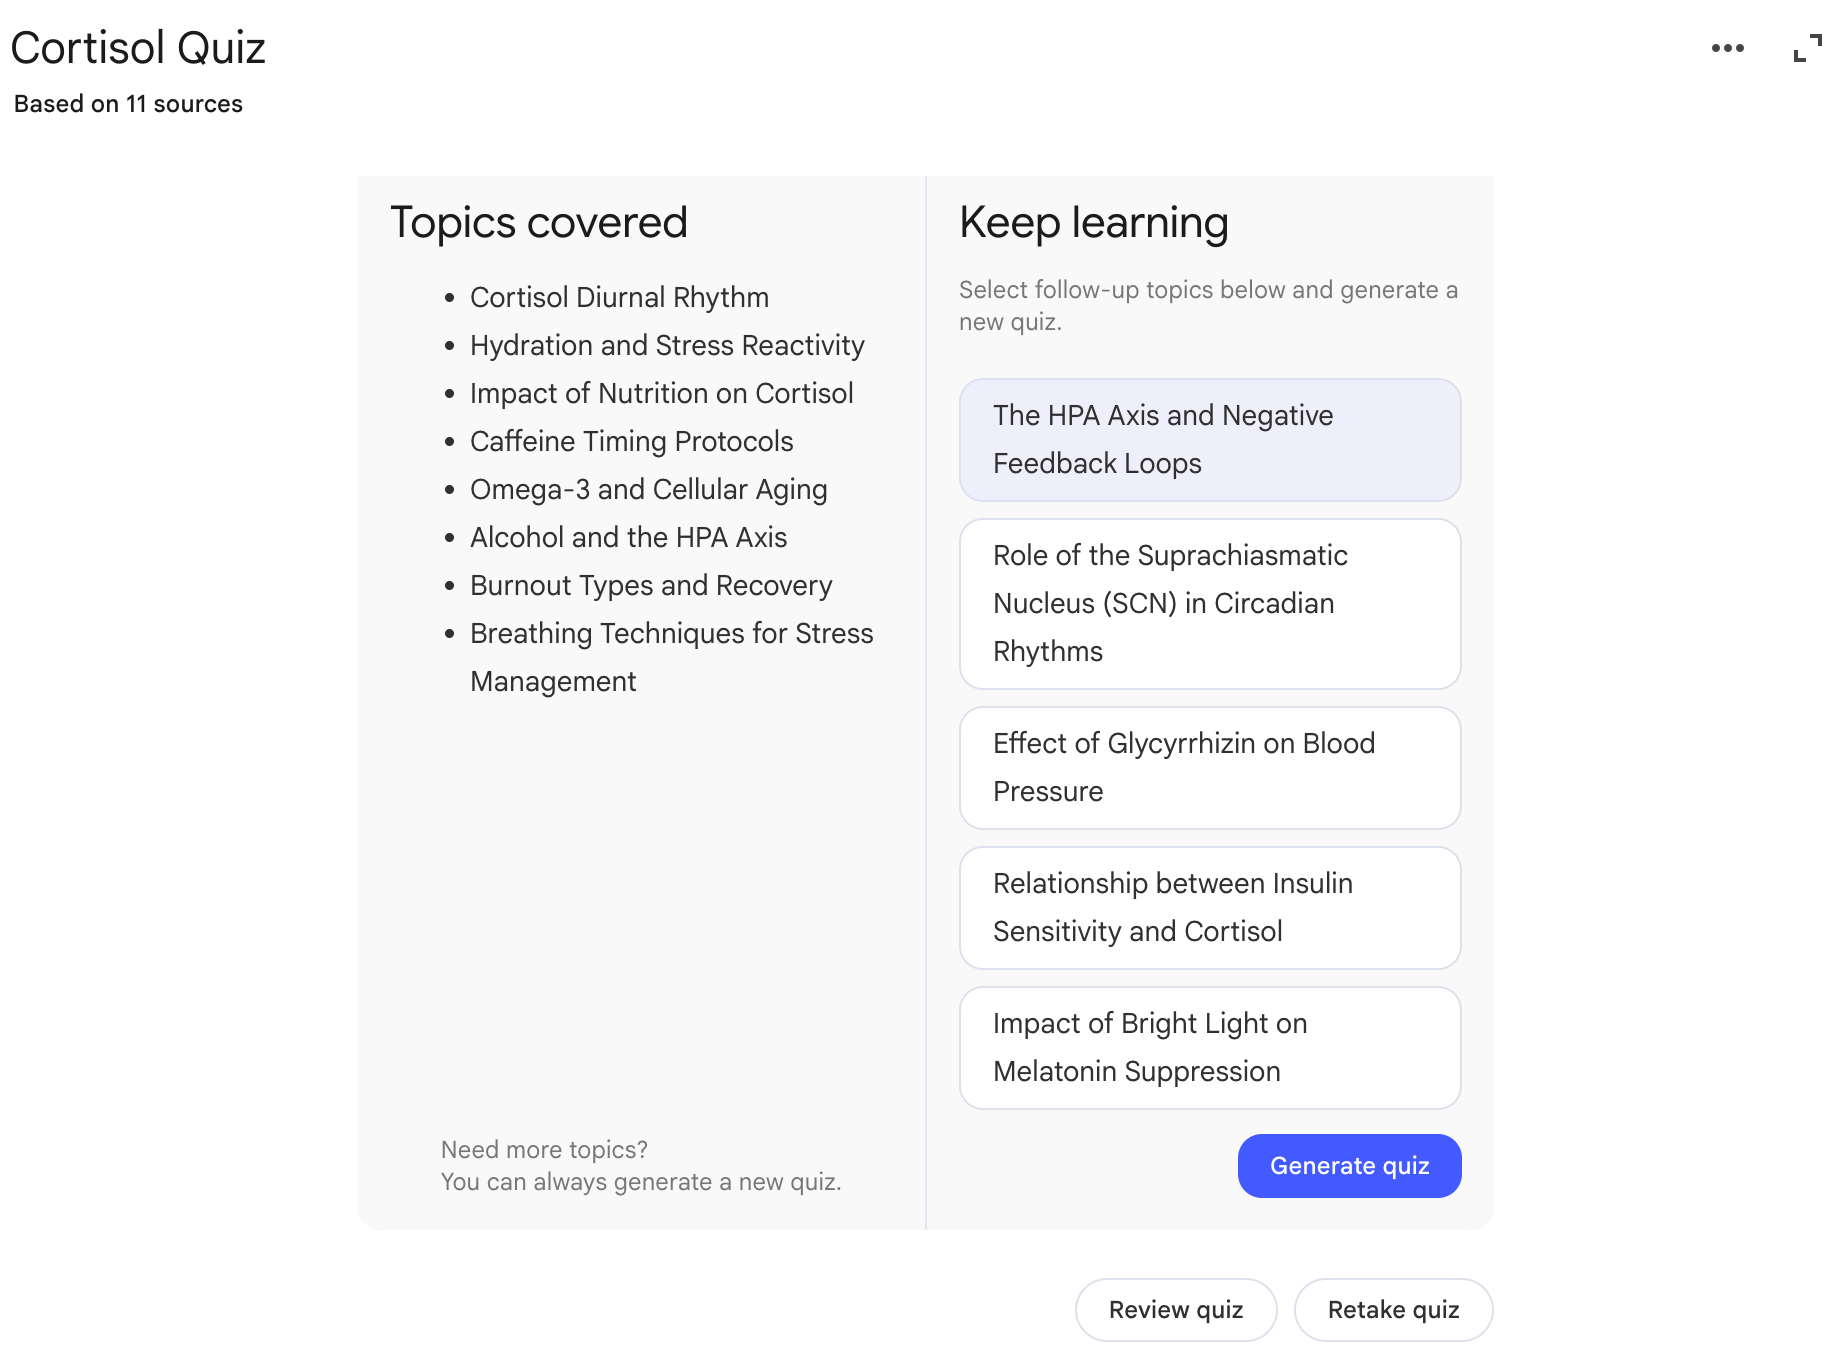
Let’s see the quiz.
Also, after the quiz, you can generate a new one by clicking on the topics from the “Keep learning.”
It suggests follow-up topics you haven't explored yet.
8- Build an app with the Claude Code connection
This is where NotebookLM stops being a research tool and becomes a build engine.
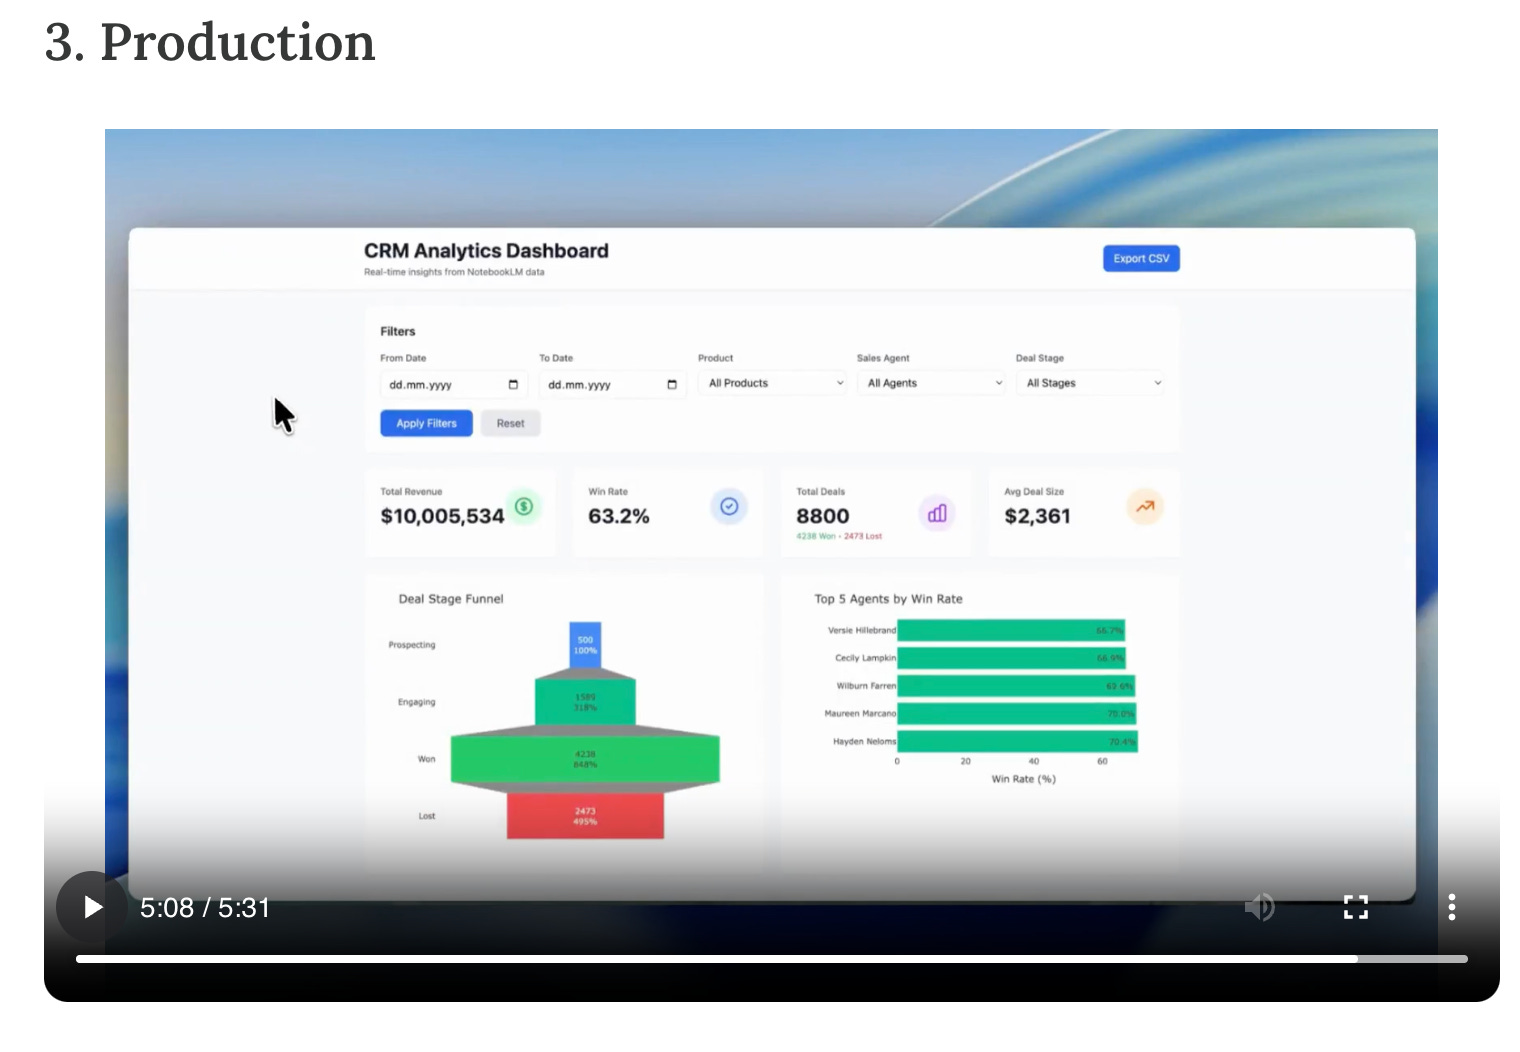
I connected NotebookLM to Claude Code and built a $10M CRM dashboard. NotebookLM distills the data, Gemini prototypes it, and Claude Code ships production code.
8- Build an app with the Claude Code connection
This is where NotebookLM stops being a research tool and becomes a build engine.
I connected NotebookLM to Claude Code and built a $10M CRM dashboard. NotebookLM distills the data, Gemini prototypes it, and Claude Code ships production code.
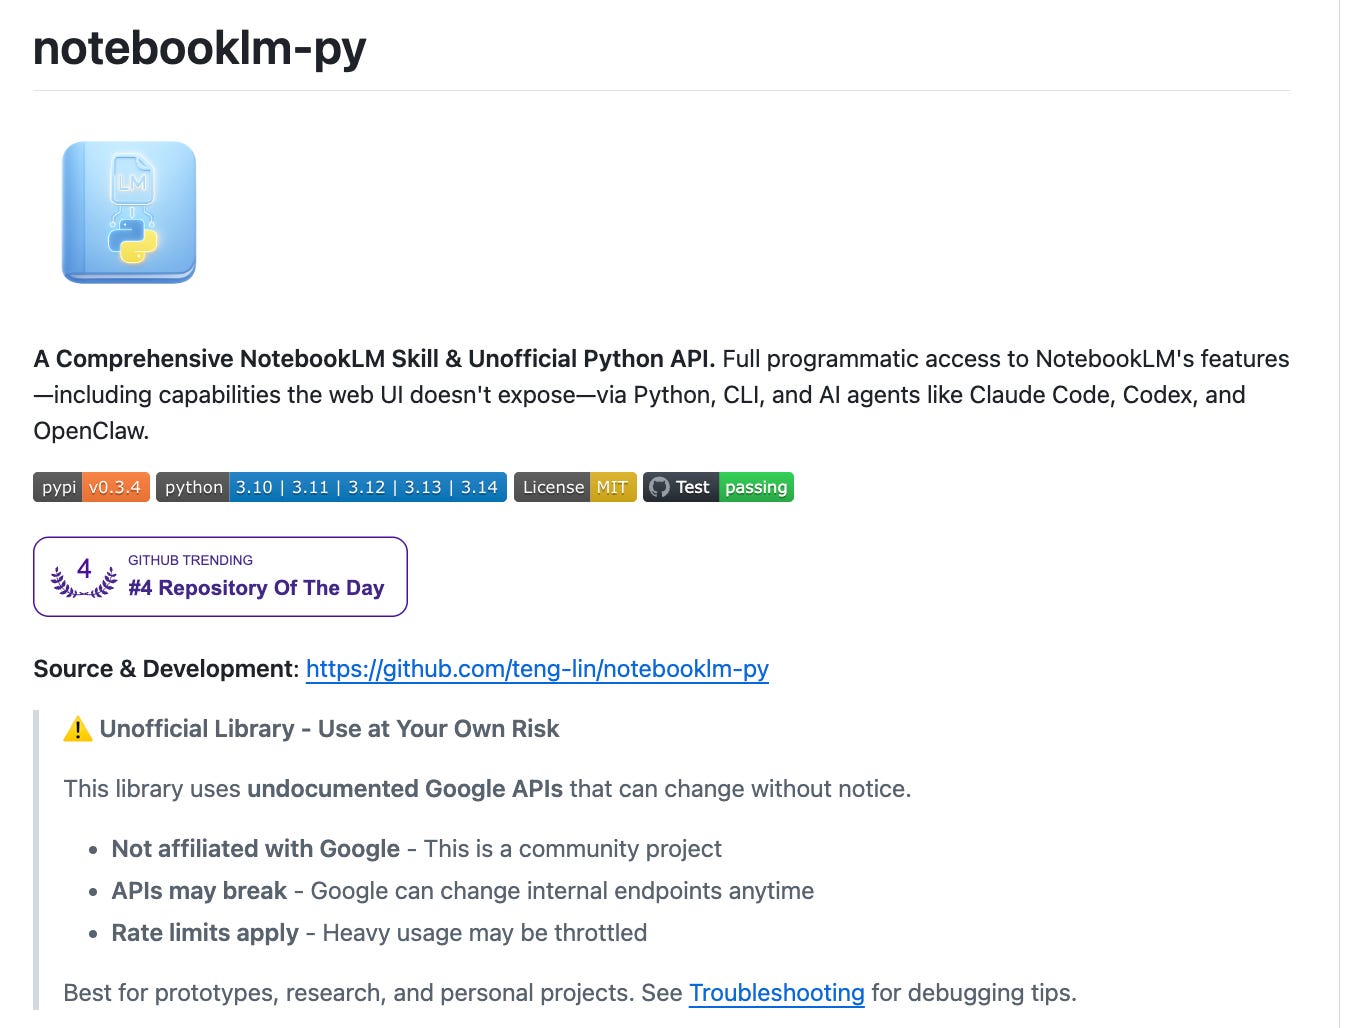
To make this work, I used notebooklm-py, an unofficial skill that lets Claude Code talk to NotebookLM.
The setup: train NotebookLM on your data, install the skill, and prompt Claude Code to build.
Build a production-ready dashboard from my NotebookLM data.
Use Flask backend, Plotly for charts, and Tailwind for styling.
Query NotebookLM for insights first, then build.
The magic is that Claude Code and NotebookLM talk back and forth during the build. Claude asks NotebookLM for data, NotebookLM answers, Claude builds.
The prompt above is the simplified version. The real one is much more detailed.
I recorded everything: the master prompt, the setup, and the full build in 5 minutes. Read How to Build Apps with NotebookLM Better Than 99% of People to see the complete walkthrough.
9. Automate research pipeline
I built a system where Agent 1 reads your meeting notes and trains a NotebookLM. Agent 2 researches the topics it found and trains a second NotebookLM. Agent 3 writes the final report using both.
Create an agent team with 3 teammates.
Agent 1: Read my notes and create a NotebookLM from them.
Agent 2: Research the topics Agent 1 found and create a second NotebookLM.
Agent 3: Write a follow-up report using both NotebookLMs.
In eight minutes, without any manual research or copy-pasting between tabs. The agents talk to each other, and NotebookLM does the heavy lifting.
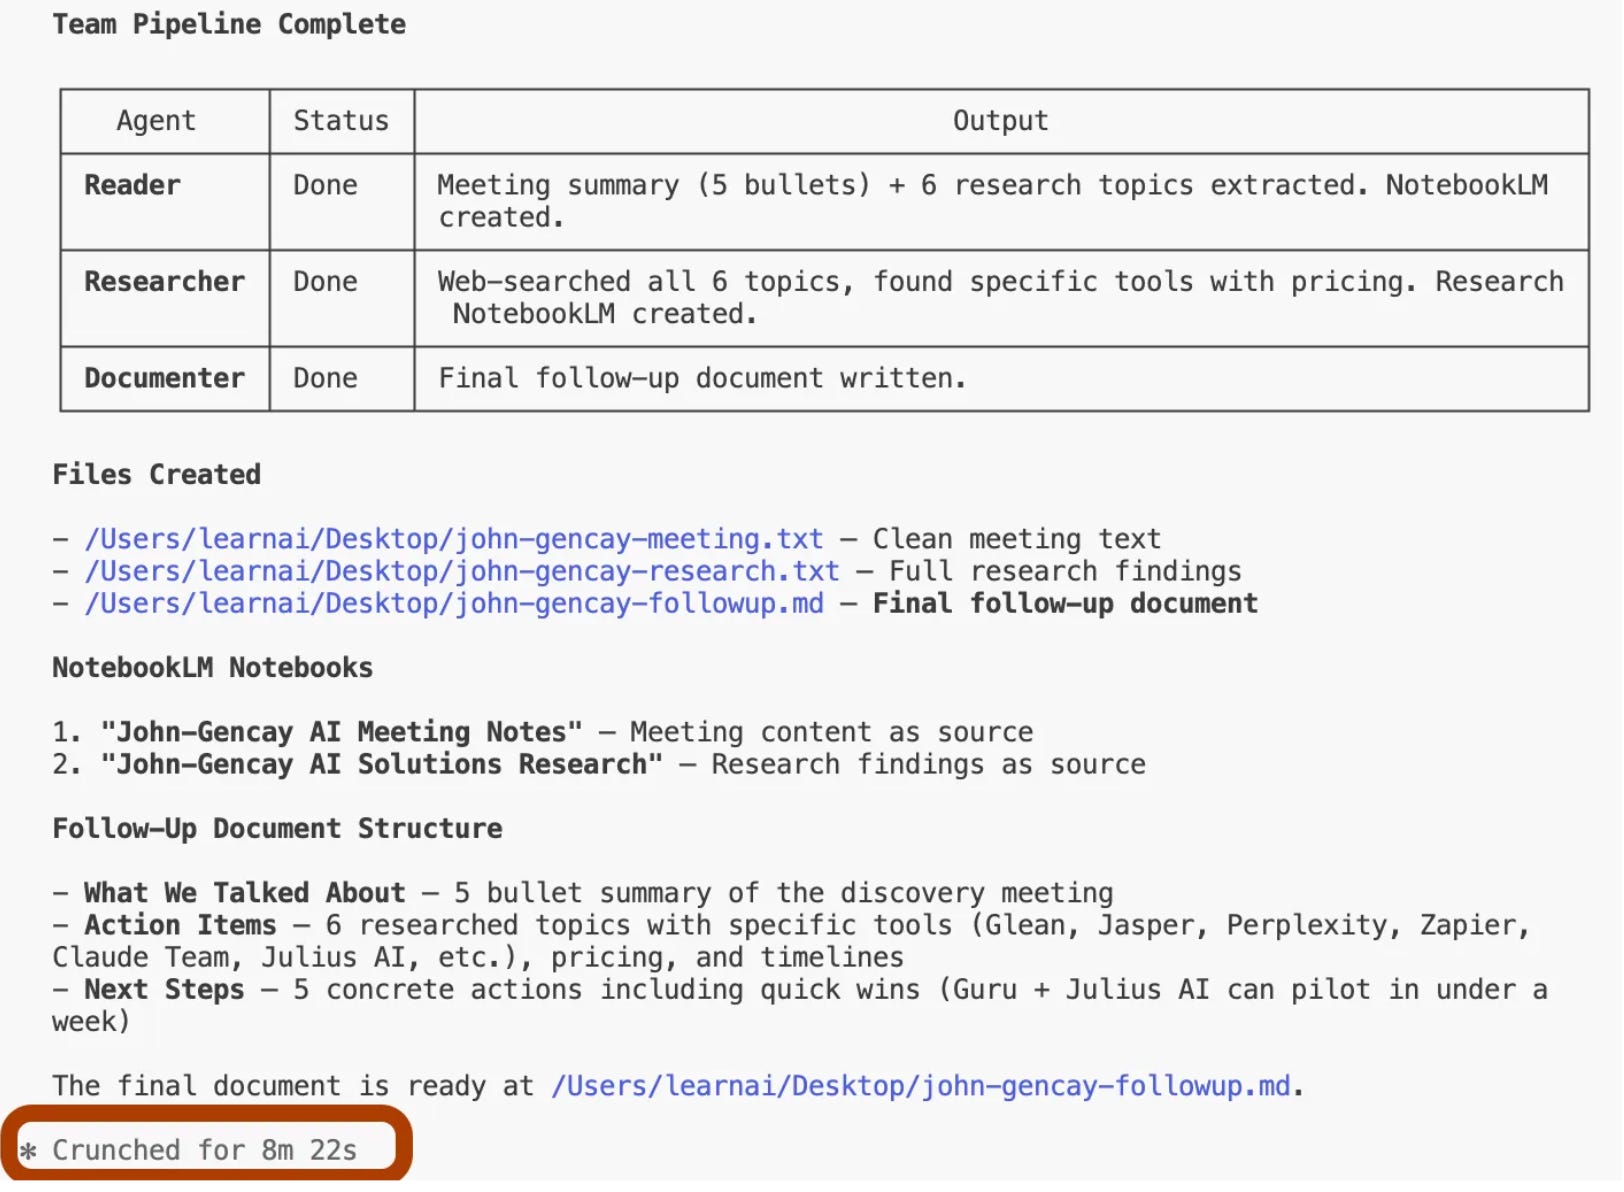
The full prompt with the complete agent configuration is here → NotebookLM & Claude Code Agents.
10- Build AI Apps from YouTube Videos
Any YouTube video can become a working app. No code. Under 10 minutes.
I turned Anthropic’s Prompt Engineering course into a Prompt Advisor app. I turned Stanford’s Machine Learning playlist into an AI Teacher with flashcards, quizzes, and infographics.
The setup: upload a YouTube link to NotebookLM, connect it to Gemini, and prompt.
Develop an interactive app from attached NotebookLM.
Teach the key concepts first, then use flashcards for memorization,
then run an interactive quiz to test understanding.
NotebookLM becomes the brain. Gemini becomes the builder. Your YouTube video becomes a product.
I built both apps step by step with every prompt and screenshot here → NotebookLM & Gemini: I Built 2 AI Apps from YouTube Videos (Zero Code)
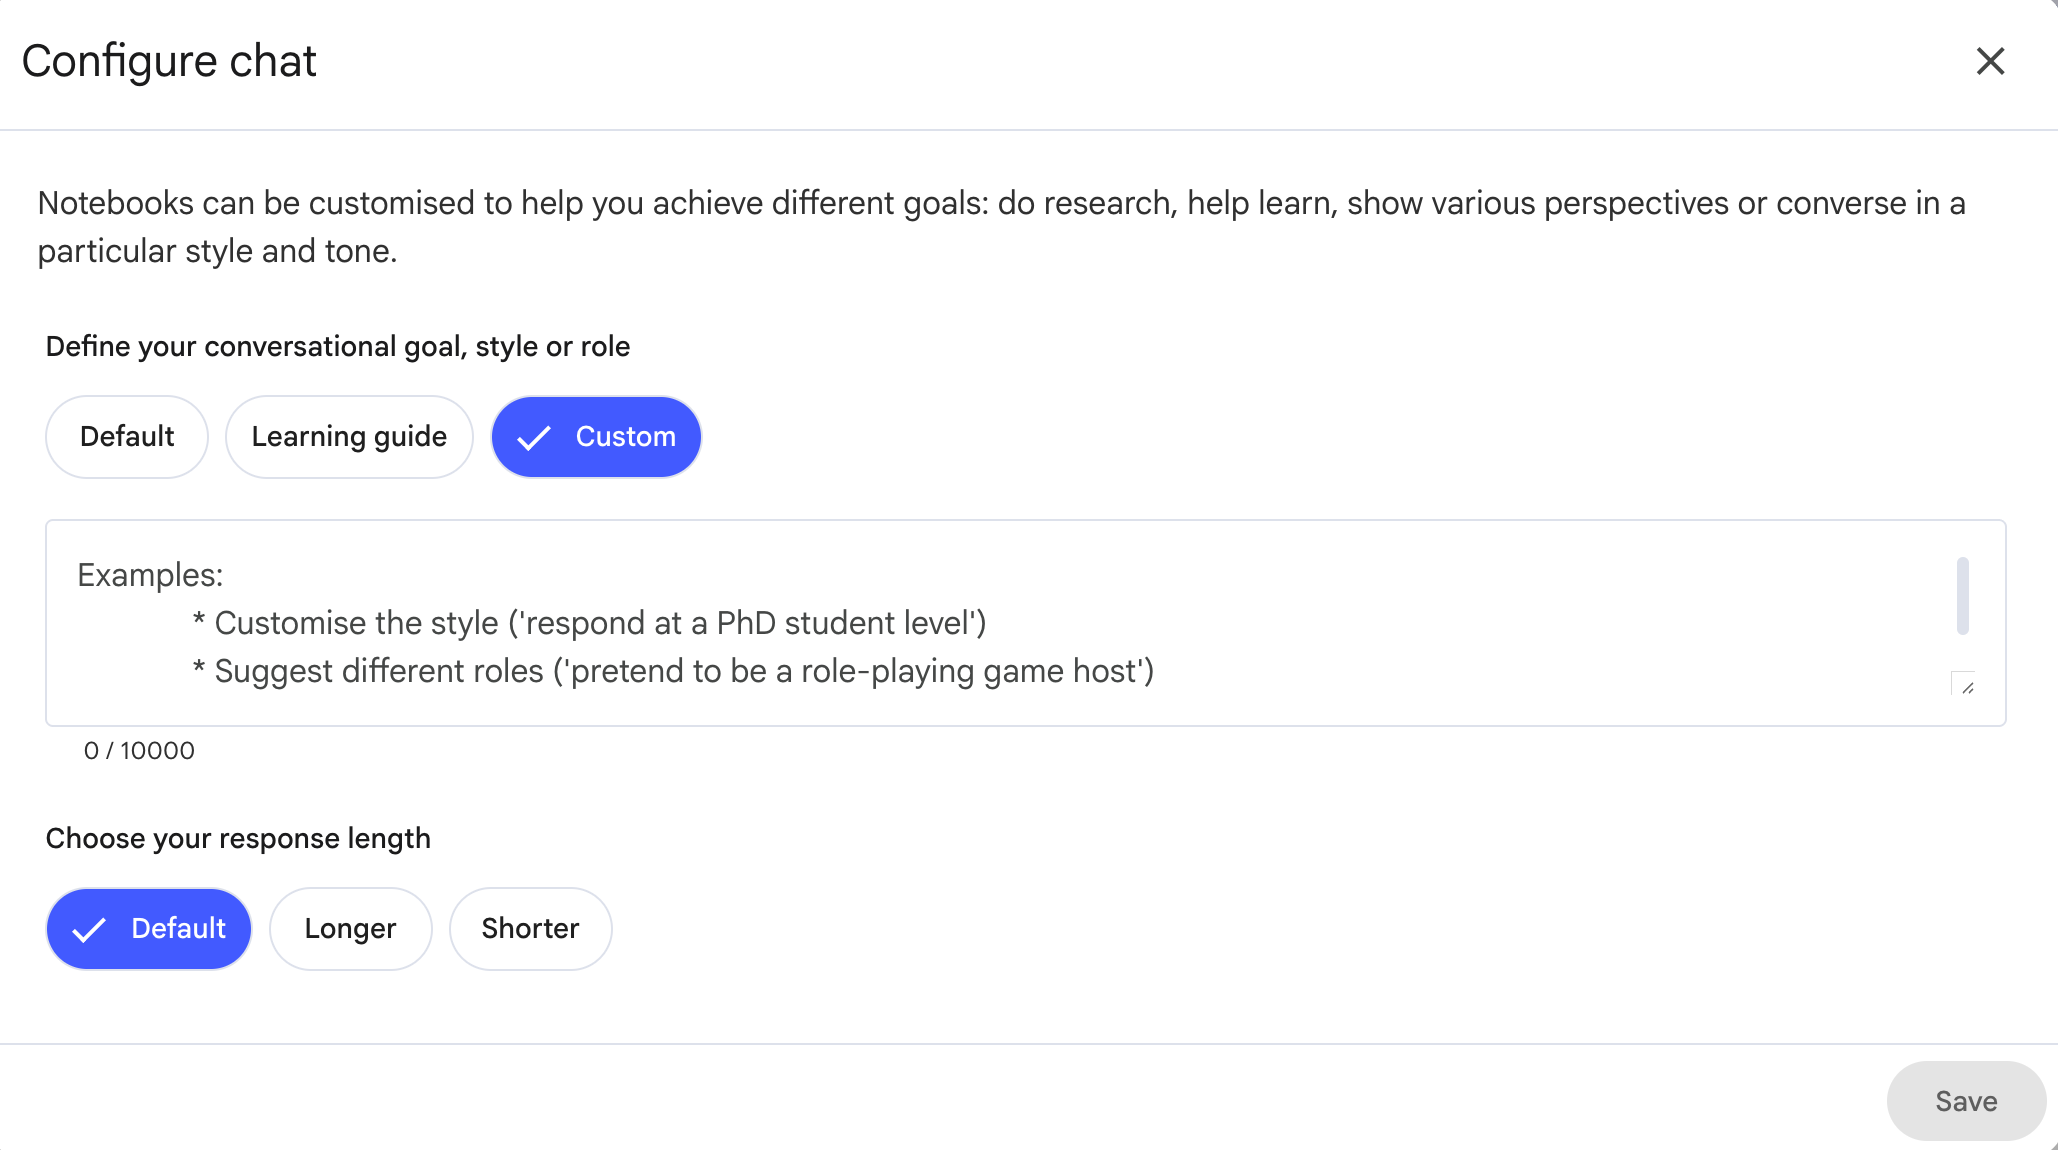
Bonus: Chat Customization
There is one more feature most people miss. You can customize how NotebookLM talks to you.
Click on the settings icon in the top right of your notebook. You will see “Configure chat.”
Three options: Default, Learning guide, or Custom.
Custom is where it gets interesting.
You can set the tone, the role, and the response length.
For instance, I have a NotebookLM trained on Anthropic’s Prompt Engineering course. I learn better when someone is patient and visual, and my elementary school teacher’s name is Nilüfer. So I use this prompt:
Act like Ms. Nilüfer, who is always passionate and patient with my questions,
and explains everything visually so I can learn clearly.
Now my NotebookLM does not sound like a generic AI. It sounds like a teacher who knows me.
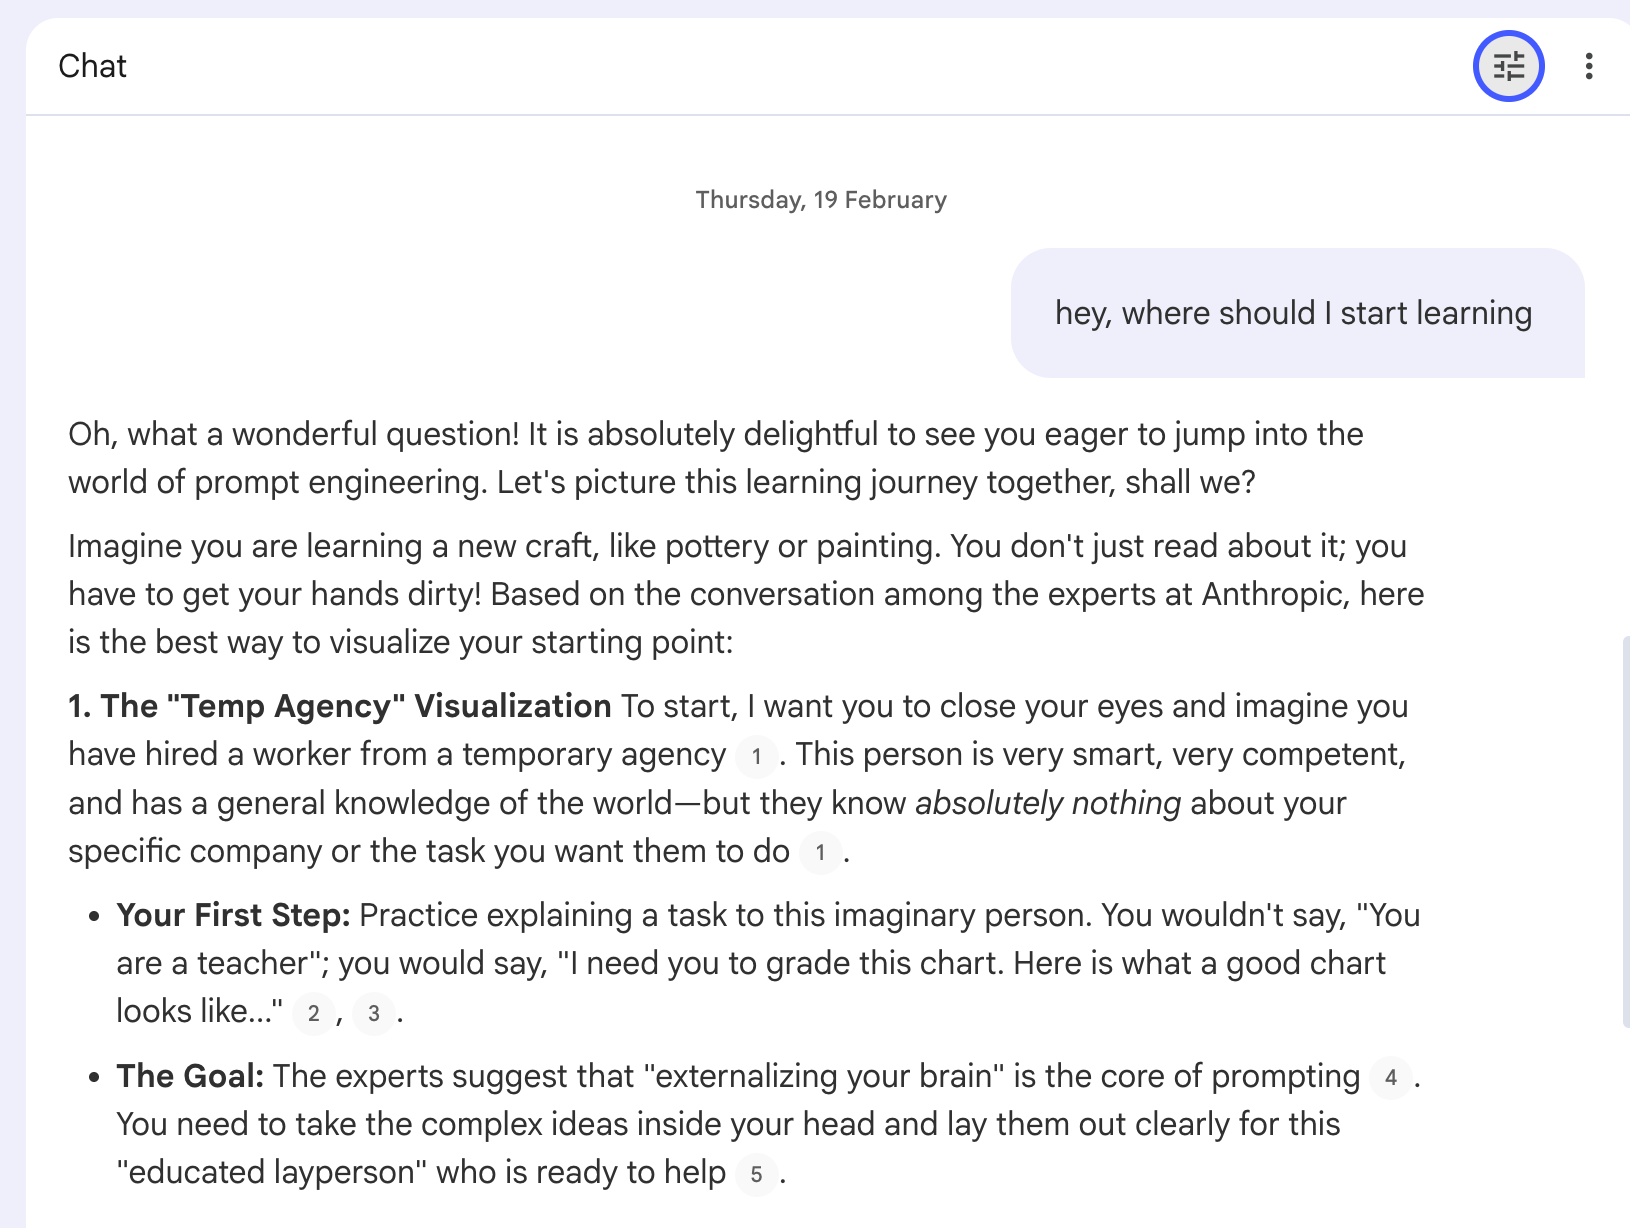
You can make it act like a strict code reviewer, a friendly coach, or a PhD advisor. Same sources, completely different experience.
Final Thoughts
Most people use NotebookLM to summarize PDFs and generate podcasts. That is 10% of what it can do.
With the right prompts, it creates video courses, interactive mind maps, presentation decks, infographics, quizzes, and full reports.
Connect it to Claude Code, and it builds production apps. Connect it to Gemini, and it turns YouTube videos into working tools. Add agent orchestration, and it automates your entire research pipeline.
Same tool. Ten prompts. Different power level.
Thanks for reading!
This post certainly was a lot of new things to try. But it also is a rabbit hole of experimenting that I wonder if there’s an end point.