
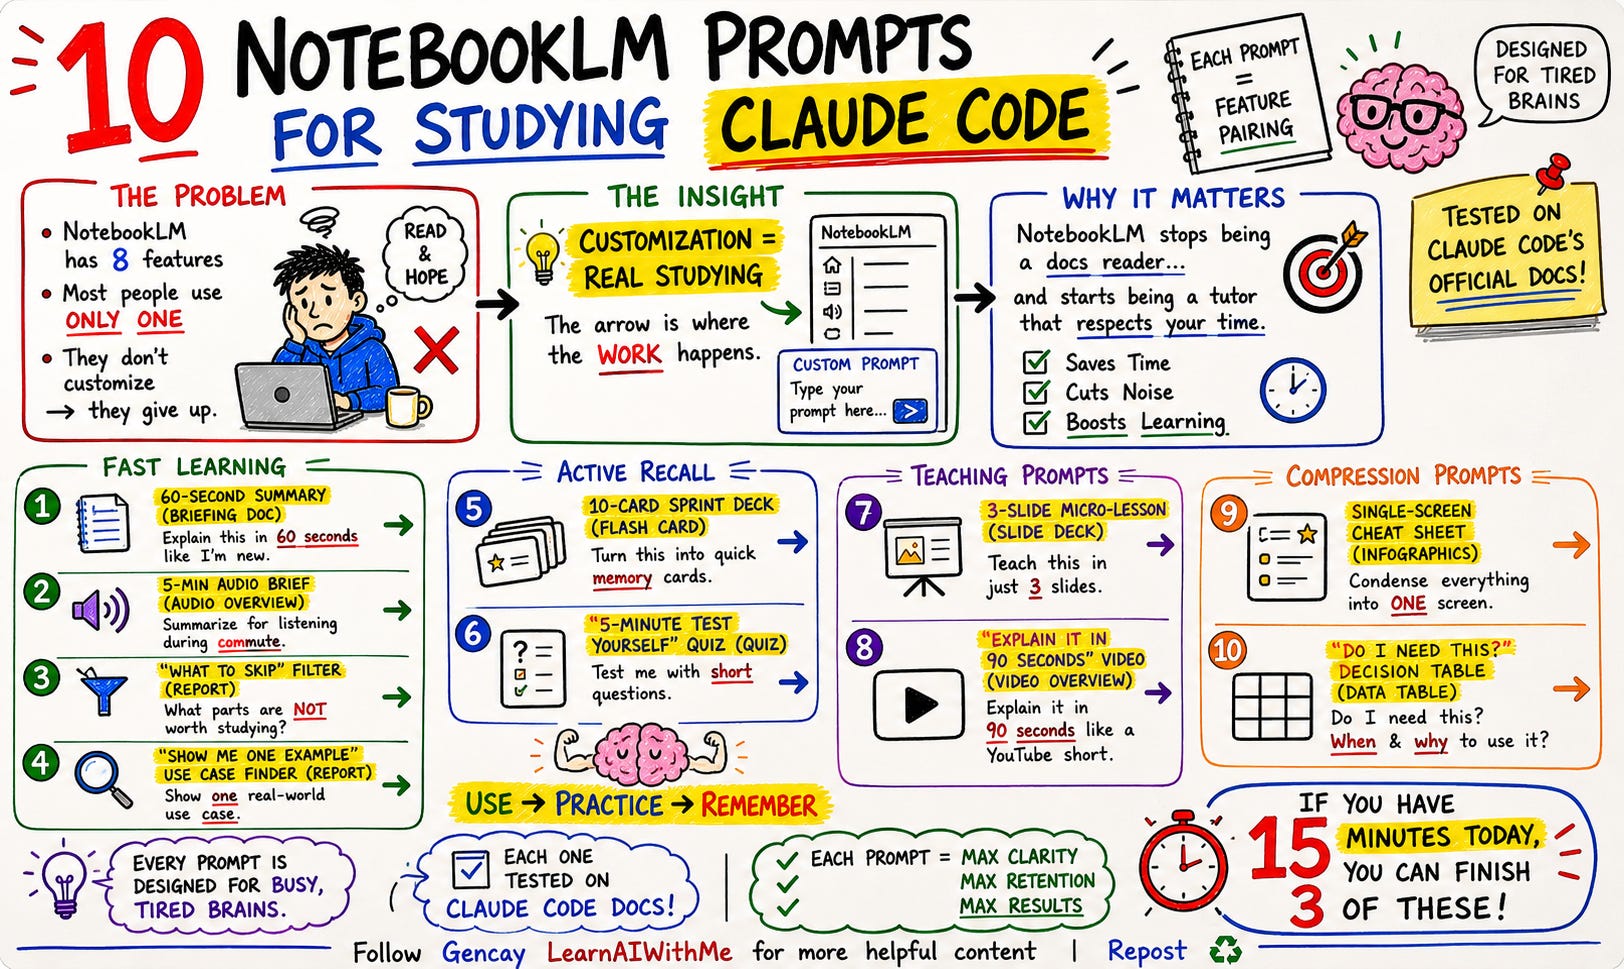
10 NotebookLM Prompts For Studying Faster (Without Burning Out)
Claude Code has 200+ doc pages. You don't need to read them. Ten NotebookLM prompts for studying Claude Code without all-nighters. Tested on official docs.


You want to learn Claude Code. You started reading the official document. Three pages in, you forgot what you came for.
This is not laziness. This is decision fatigue. The docs are excellent. But “excellent” and “200 pages” do not mix when your brain is tired after a workday.
Most people give up here. They go back to outdated YouTube tutorials.
NotebookLM fixes this. The best NotebookLM prompts for studying turn 200 pages into a 15-minute session.
Upload the docs once. Run a prompt. Get what you need in 60 seconds.
Here are ten NotebookLM prompts to learn Claude Code without burning out. Each one tested on Claude Code’s official documentation. Copy-paste ready.
If you have 15 minutes and a tired brain, these are enough.
PS : One favor. If this email landed in promotions, drag it to your inbox and reply with anything.
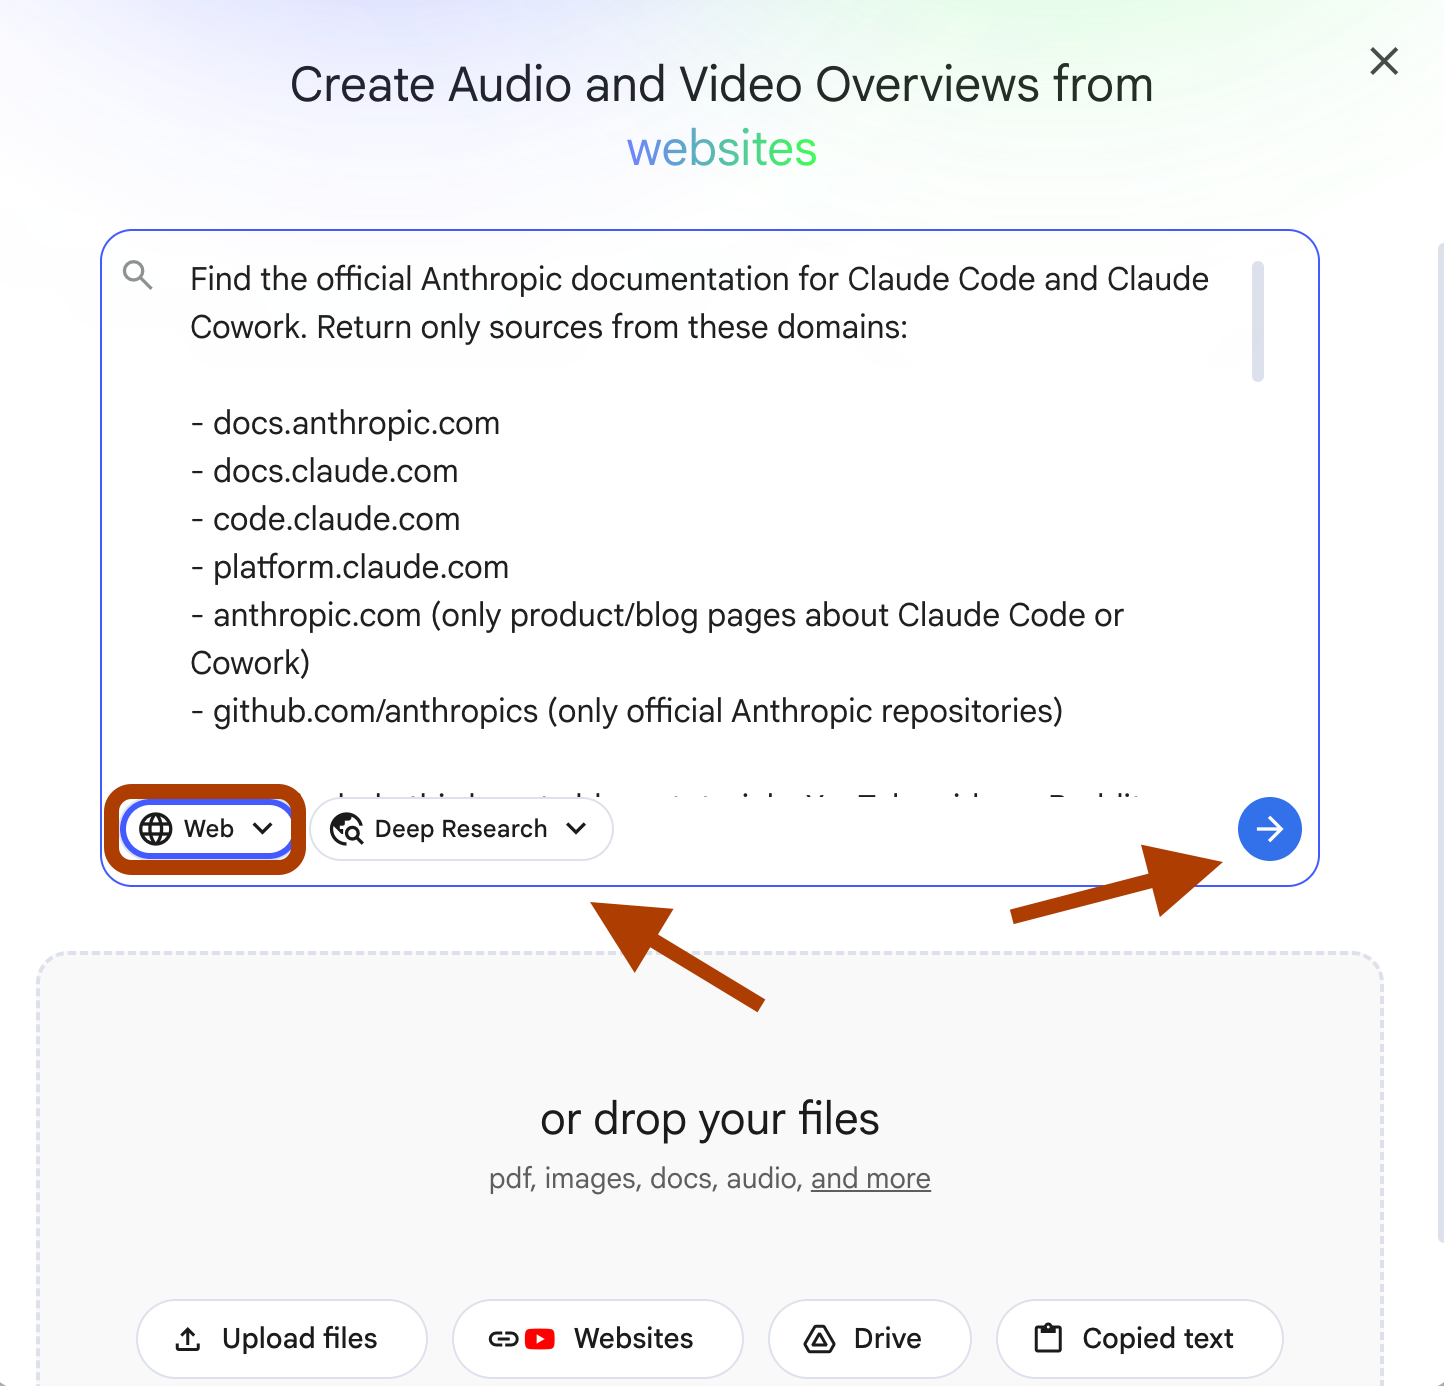
How to train a NotebookLM with deep research?
Steps: Visit NotebookLM → Click on Try → Select Deep Research → Paste the prompt
Before starting, here is how to load the official Claude Code documentation into NotebookLM.
Use this prompt by selecting deep research in NotebookLM
Here is the prompt:
Find the official Anthropic documentation for Claude Code and Claude
Cowork. Return only sources from these domains:

- docs.anthropic.com
- docs.claude.com
- code.claude.com
- platform.claude.com
- anthropic.com (only product/blog pages about Claude Code or Cowork)
- github.com/anthropics (only official Anthropic repositories)

Do not include third-party blogs, tutorials, YouTube videos, Reddit
posts, or community sites like ClaudeLog or claudecodedocs.com.

For Claude Code, find documentation covering these topics:
1. Overview and what Claude Code is
2. Installation and setup
3. CLAUDE.md file and project context
4. Slash commands and built-in commands
5. MCP integration
6. Plugins and extensions
7. IDE integrations (VS Code, JetBrains)
8. GitHub Actions and CI/CD integration
9. Best practices and common workflows
10. Subagents and agent orchestration

For Claude Cowork, find documentation covering:
1. Overview and what Cowork is
2. How Cowork differs from Claude Code
3. File and task management features
4. Setup and getting started

For each source, return:
- Full URL
- Page title
- One-sentence summary of what the page covers
- Topic category from the lists above

Sort the results by topic category, in the order listed above.

Skip any page that is a marketing landing page without technical content.
Skip any page older than 6 months unless it is the only source for that
topic.

Return at least 15 sources total. Cap at 30.
Here how your screen should look like while training a NotebookLM with deep research.
You must wait a while, because we’ve selected deep research.
Now after training, check out the sources manually too.
I caught one link and removed it.
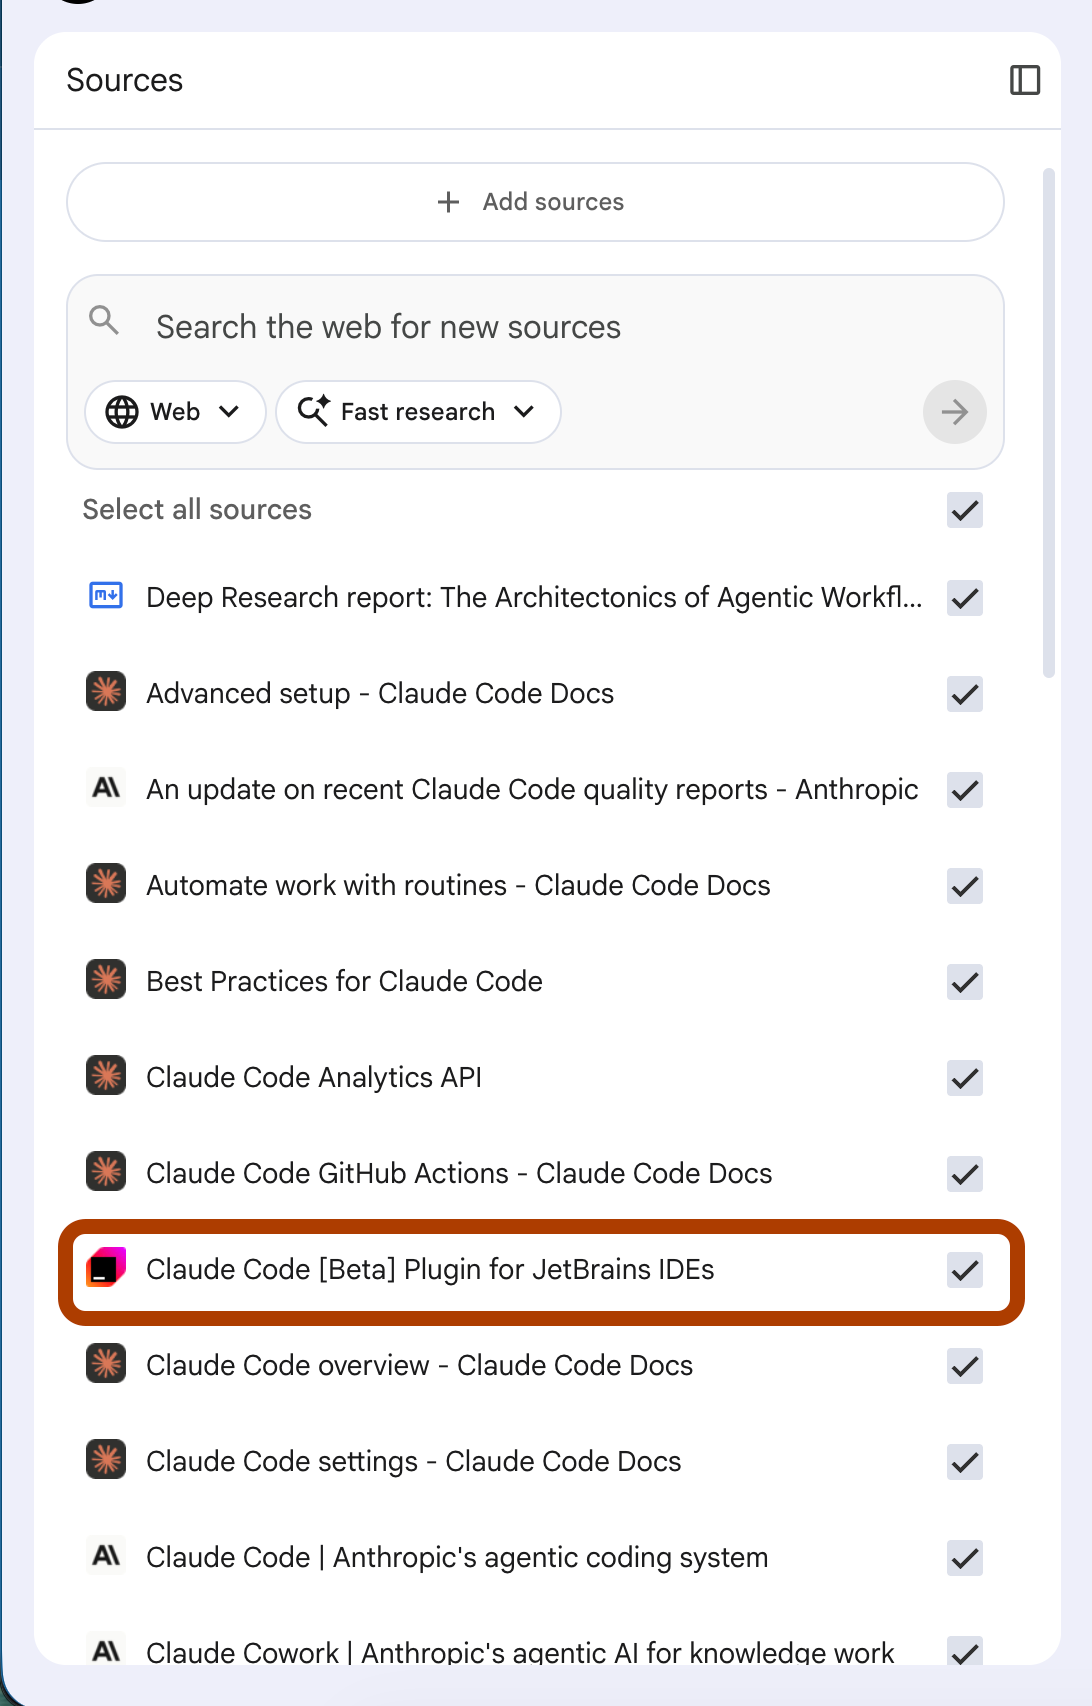
Now you have a notebook trained on the entire Claude Code documentation. Time to use it.
10 NotebookLM Prompts For Studying Claude Code
NotebookLM has 8 features. Most people use one.
Even without customizing them.
And They give up.
Real studying happens when you customize.
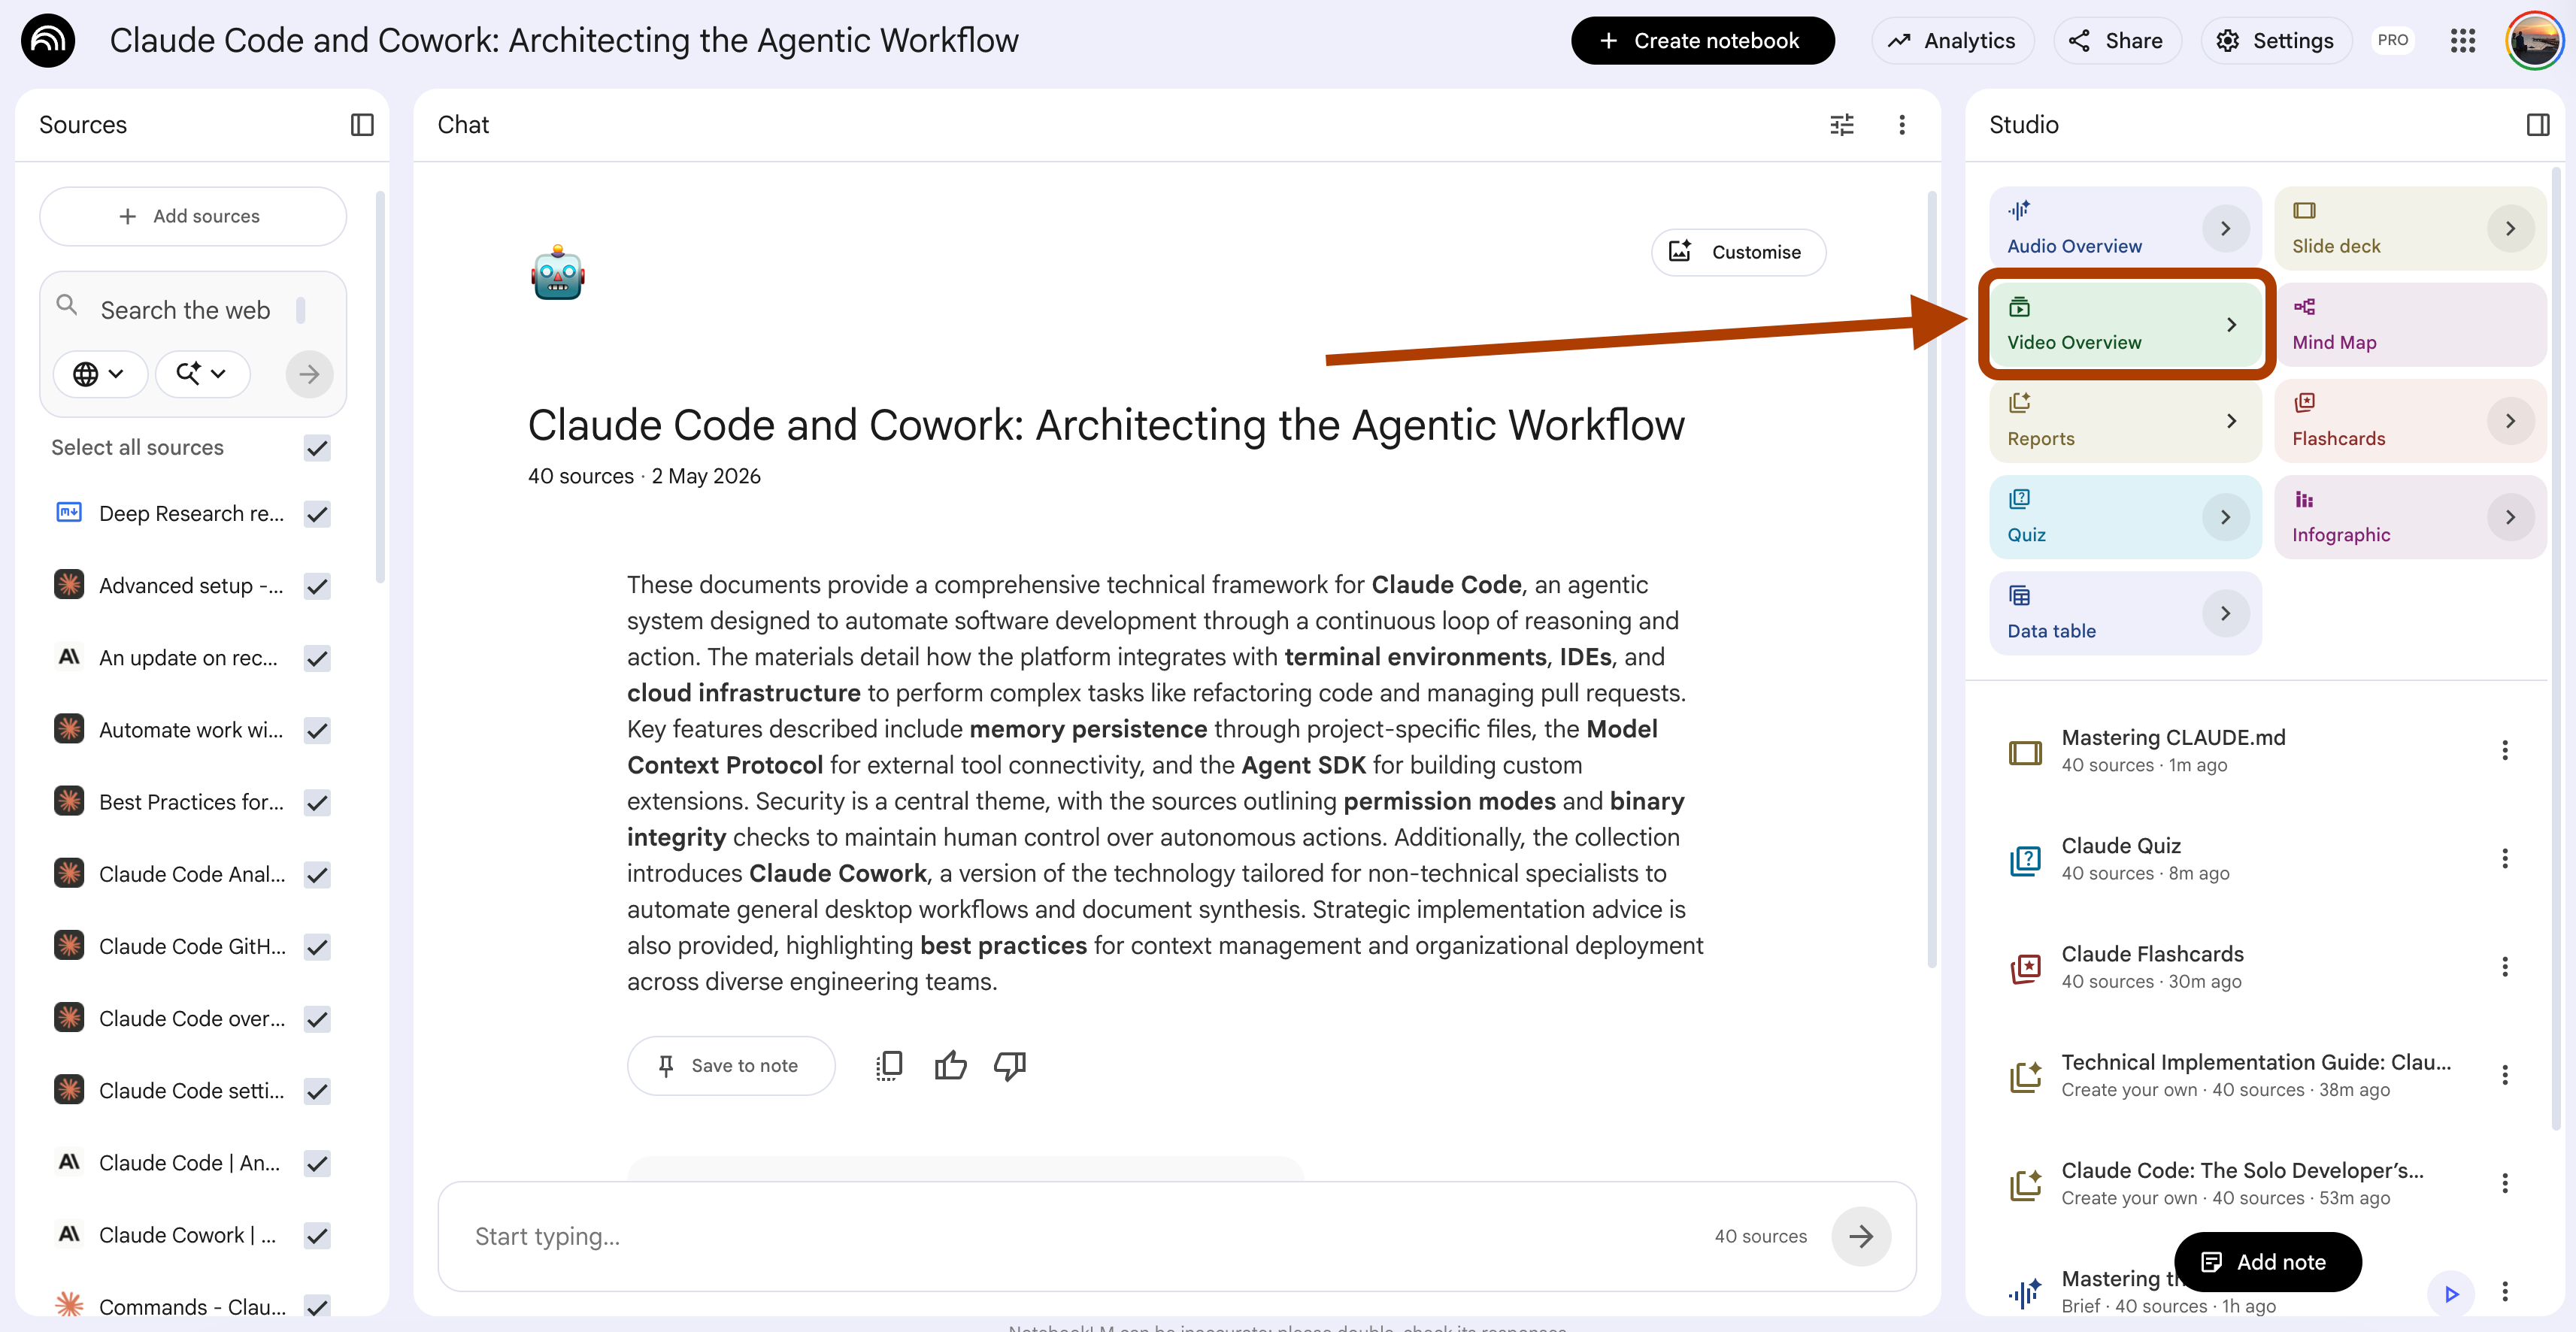
The arrow near almost every feature(except mindmap) is where the work happens.
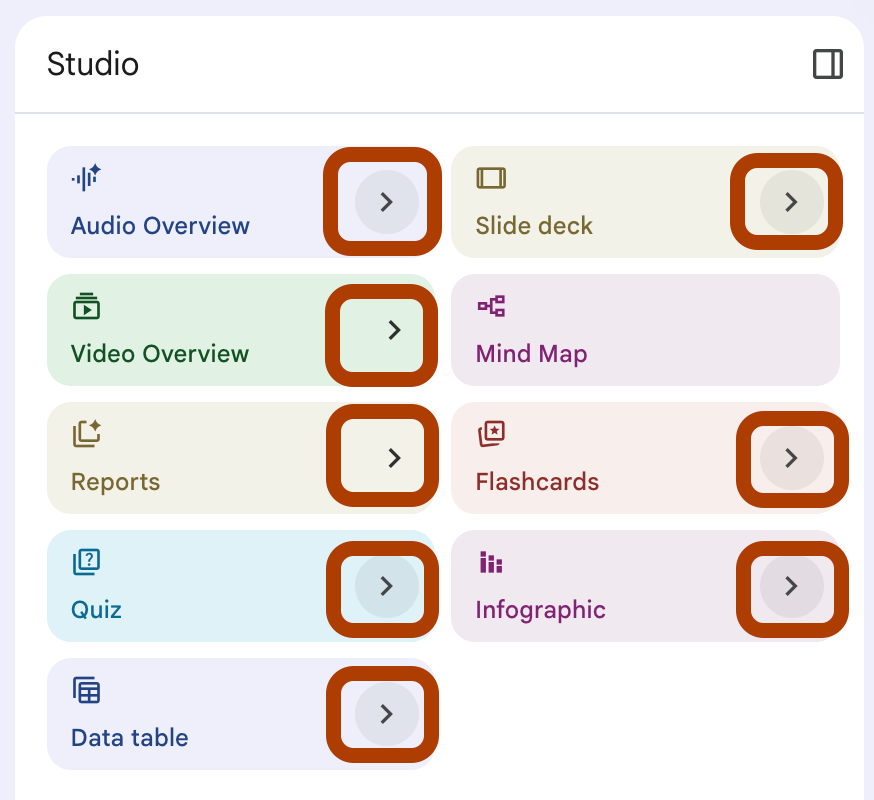
After clicking on here, type your prompt.
NotebookLM stops being a docs reader and starts being a tutor that respects your time.
Here is what we will cover.
Each prompt is paired with the NotebookLM feature that complements it.
Each one is designed for tired brains.
Each one tested on Claude Code’s official documentation.
If you can spare 15 minutes today, you can finish three of these.
PS: If you want to decide what comes next, here is the survey.
1. The 60-Second Claude Code Concept Summary
NotebookLM Feature: Report (Briefing doc)
UI selections: Format → Briefing doc → Customize
The first wall when studying Claude Code is jargon. CLAUDE.md. Subagents. Hooks. MCP. Skills. Plan mode. Slash commands.
You read about MCP, then you hit “subagents”, then you forget what MCP was. Five terms in, your brain taps out.
This prompt fixes that. One concept, one paragraph, sixty seconds to read. No jargon. No build-up. Just enough to use the term in a sentence.
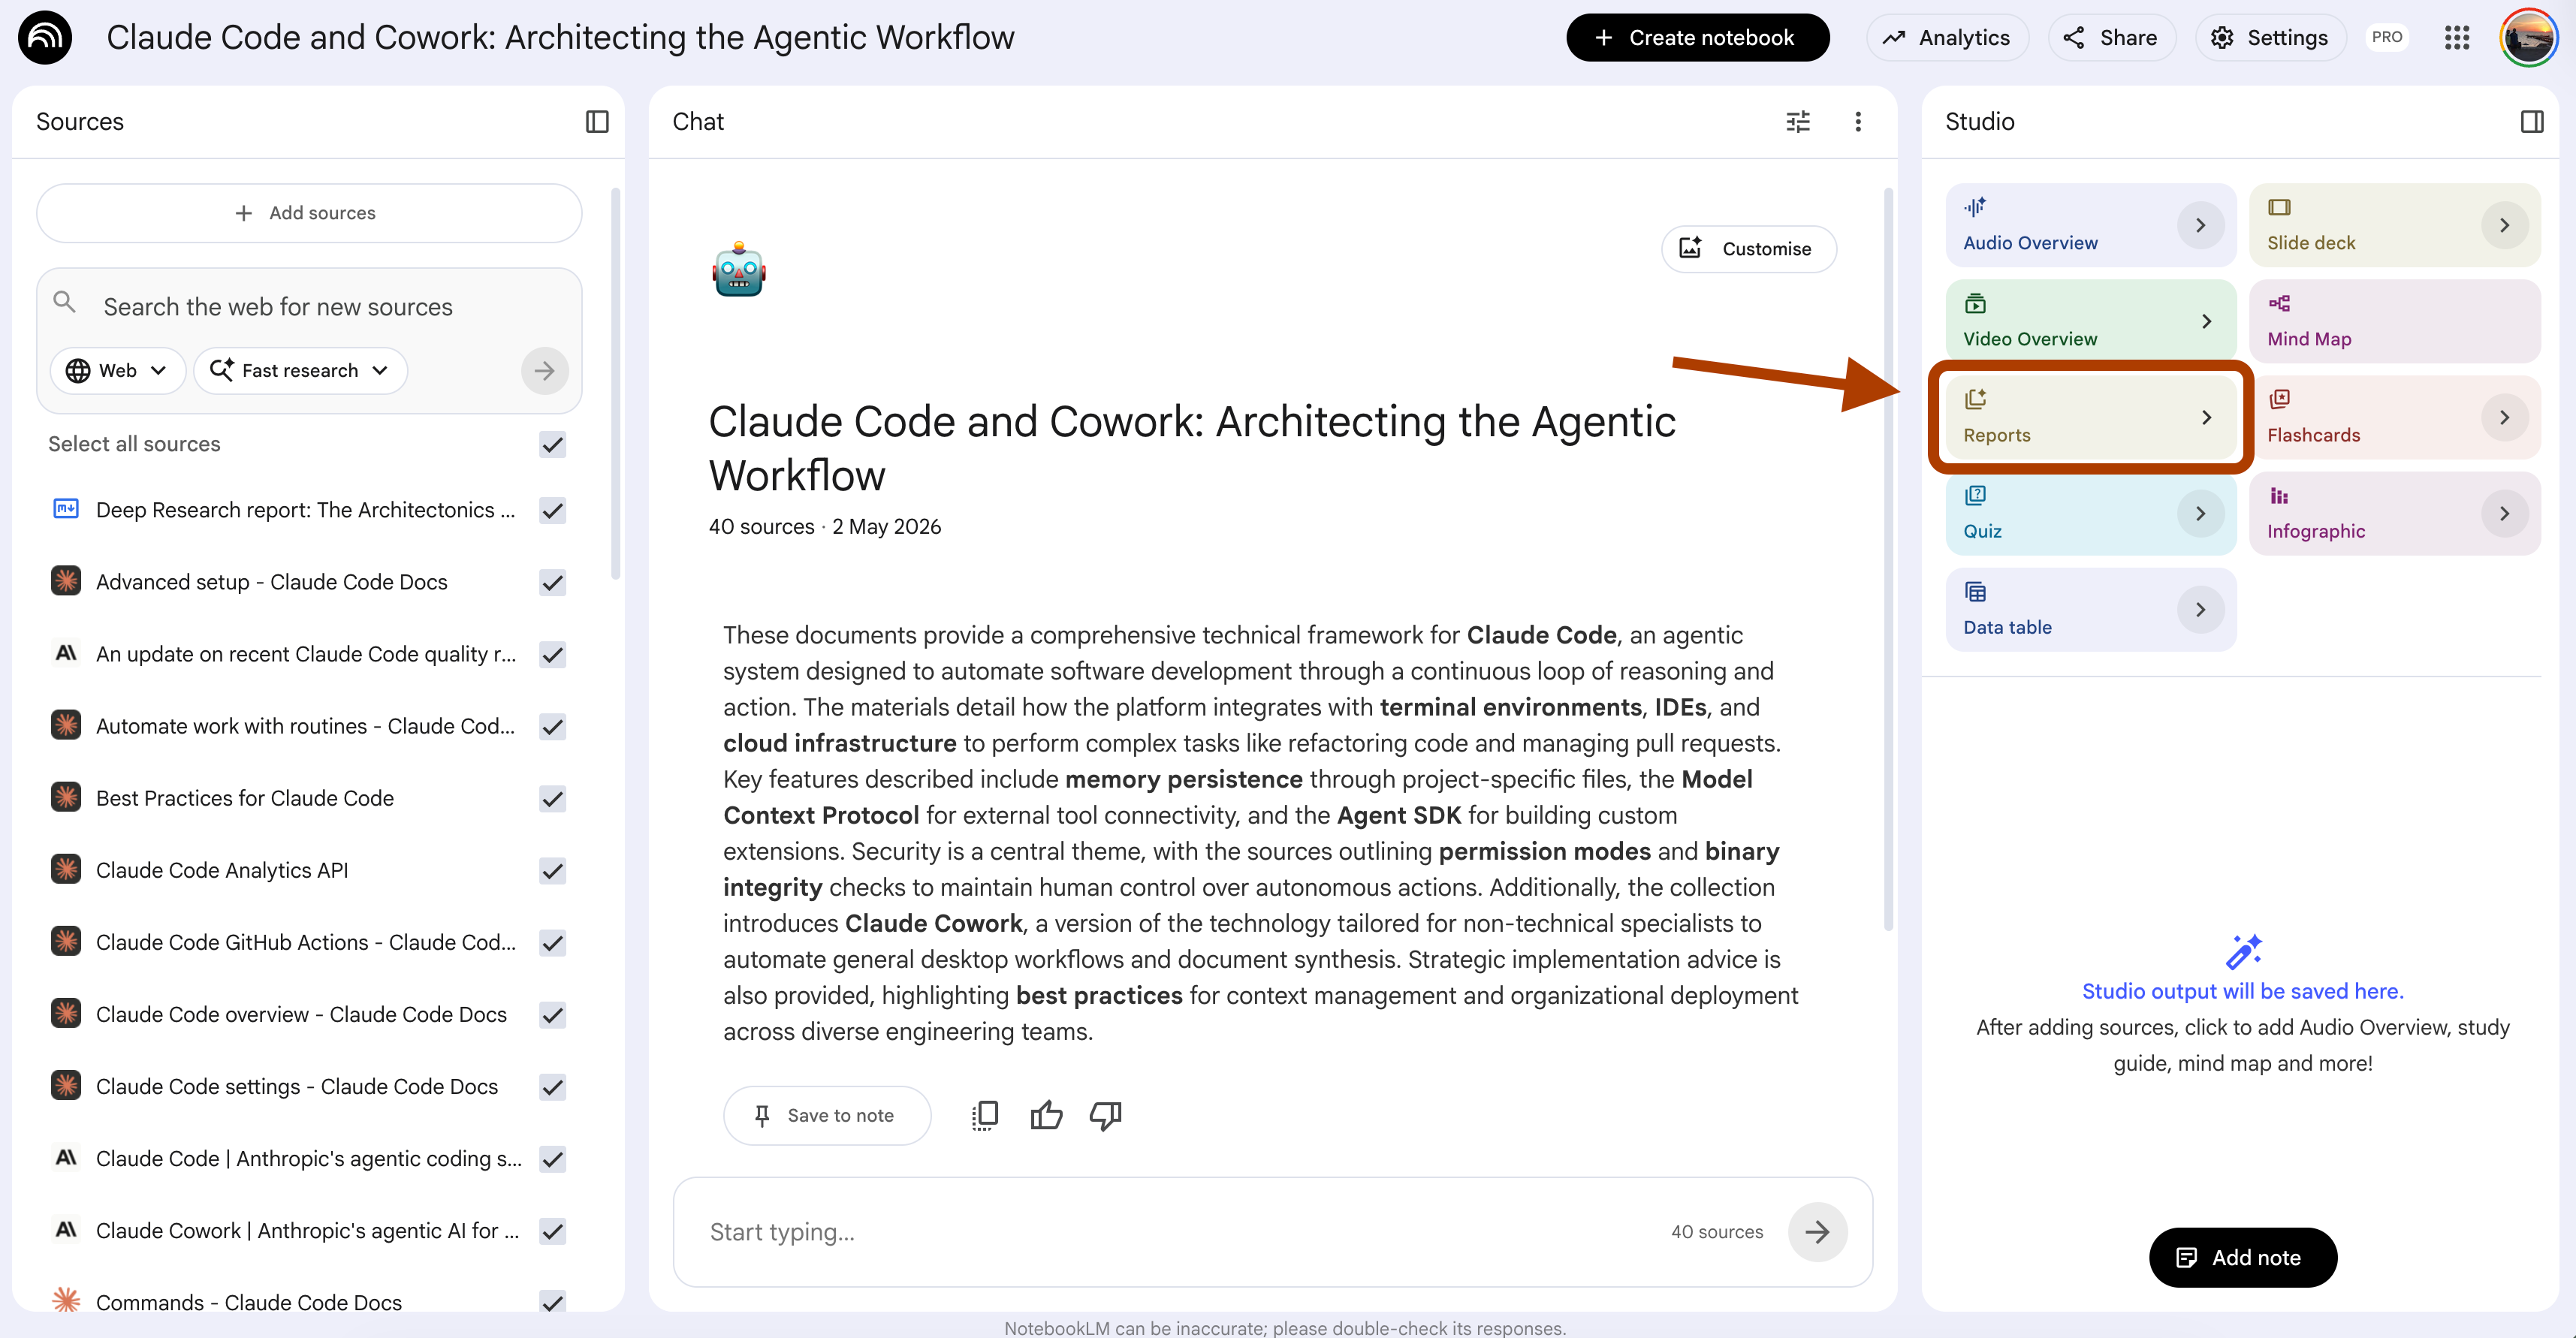
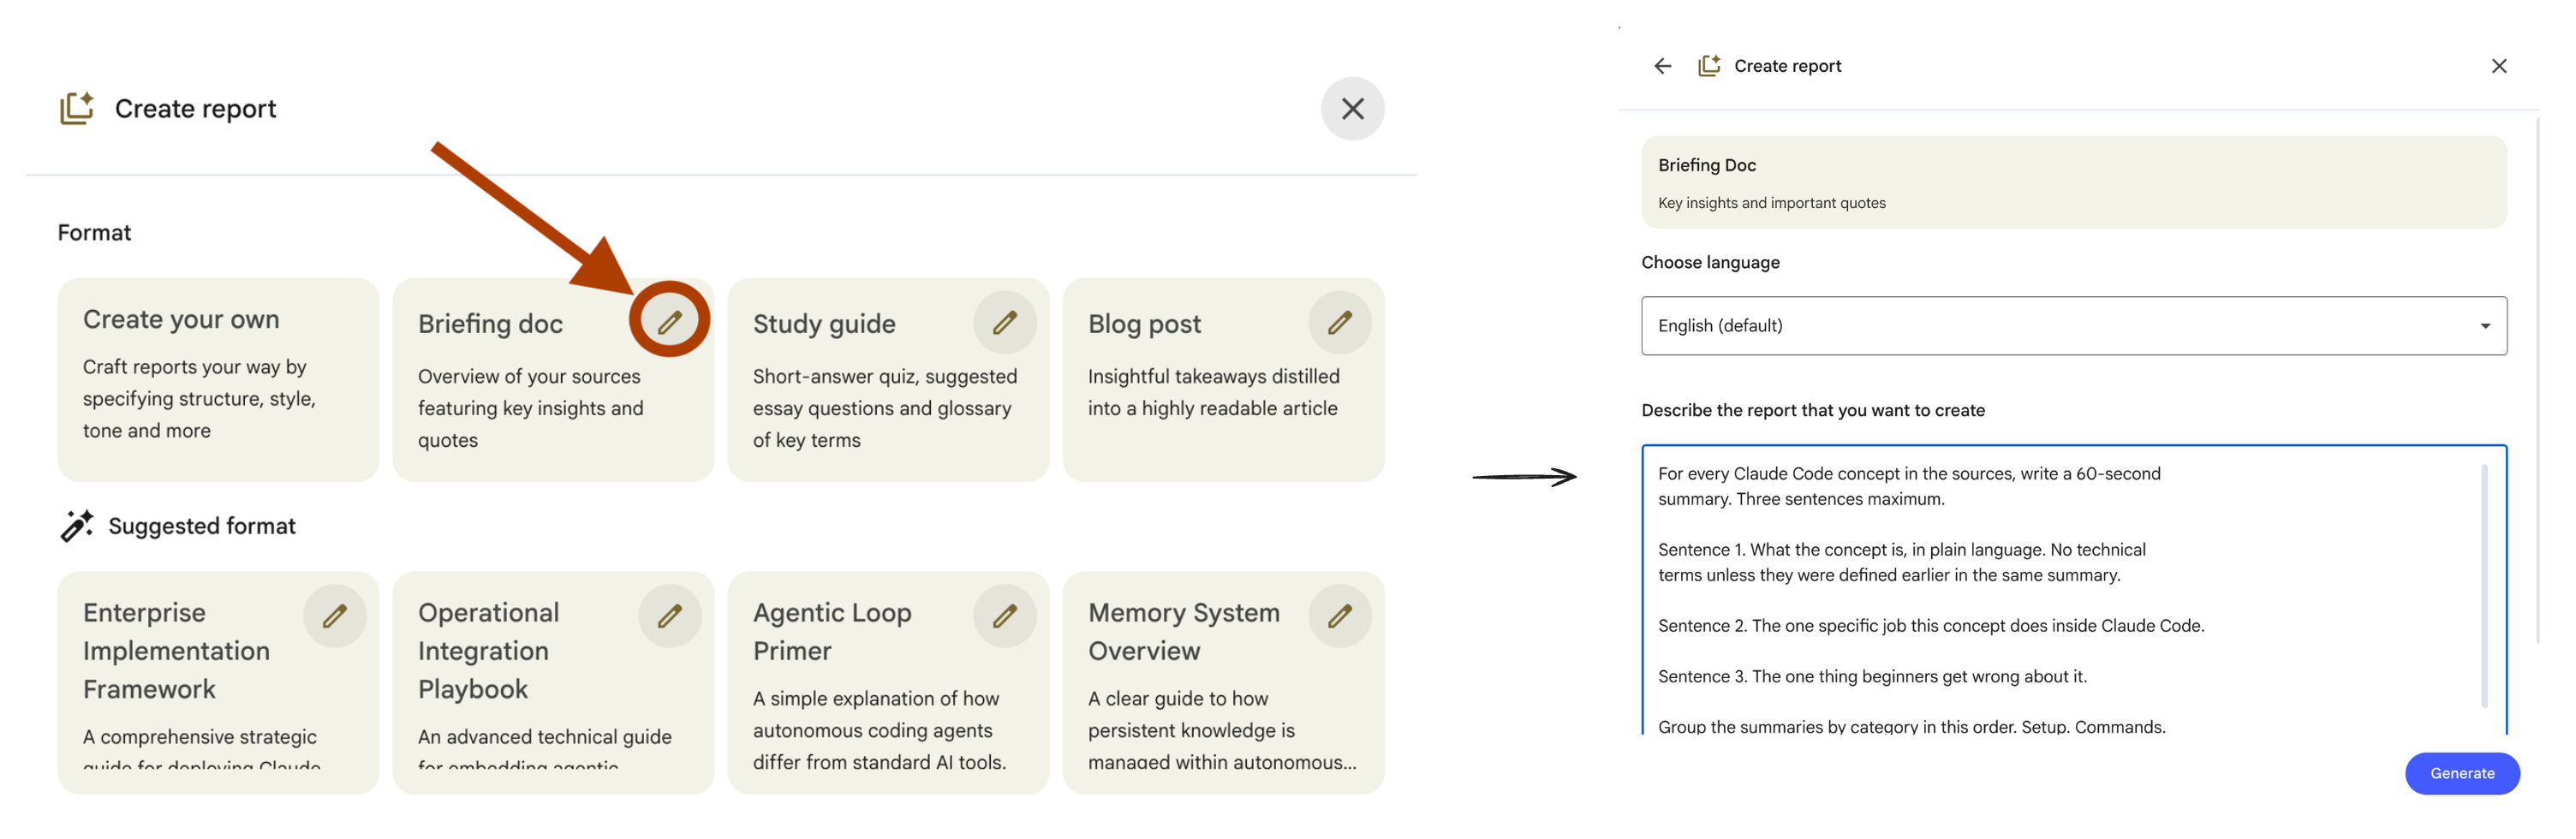
Steps: Open your notebook → In Studio, click Reports → Choose “Briefing doc”.
For every Claude Code concept in the sources, write a 60-second
summary. Three sentences maximum.

Sentence 1. What the concept is, in plain language. No technical
terms unless they were defined earlier in the same summary.

Sentence 2. The one specific job this concept does inside Claude Code.

Sentence 3. The one thing beginners get wrong about it.

Group the summaries by category in this order. Setup. Commands.
Project context. Extensions. Integrations. Workflows.

Skip concepts that need more than three sentences to explain. Mark
them at the end as "needs deeper study" so the reader knows to come
back later.

Each summary must read in under 60 seconds.
I tested this on the Claude Code docs notebook. Here is one summary it produced.
Three sentences. One concept. Sixty seconds.
If a concept does not fit in three sentences, the docs are doing too much. Save it for a deeper session. Move on.
Run this once on a fresh notebook. You get a complete glossary you can scan in 15 minutes.
2. The 5-Minute Claude Code Audio Brief
NotebookLM Feature: Audio Overview
UI selections: Format → Brief. Language → English.
You have a 20-minute commute. You want to learn Claude Code. The default Audio Overview gives you a 25-minute deep dive with two hosts riffing on every detail.
That does not fit your commute. By the time it gets to subagents, you are parking the car.
This prompt builds a sub-5-minute audio that hits only the essentials. No fluff. No “let’s unpack that”. One focused topic, one quick takeaway.
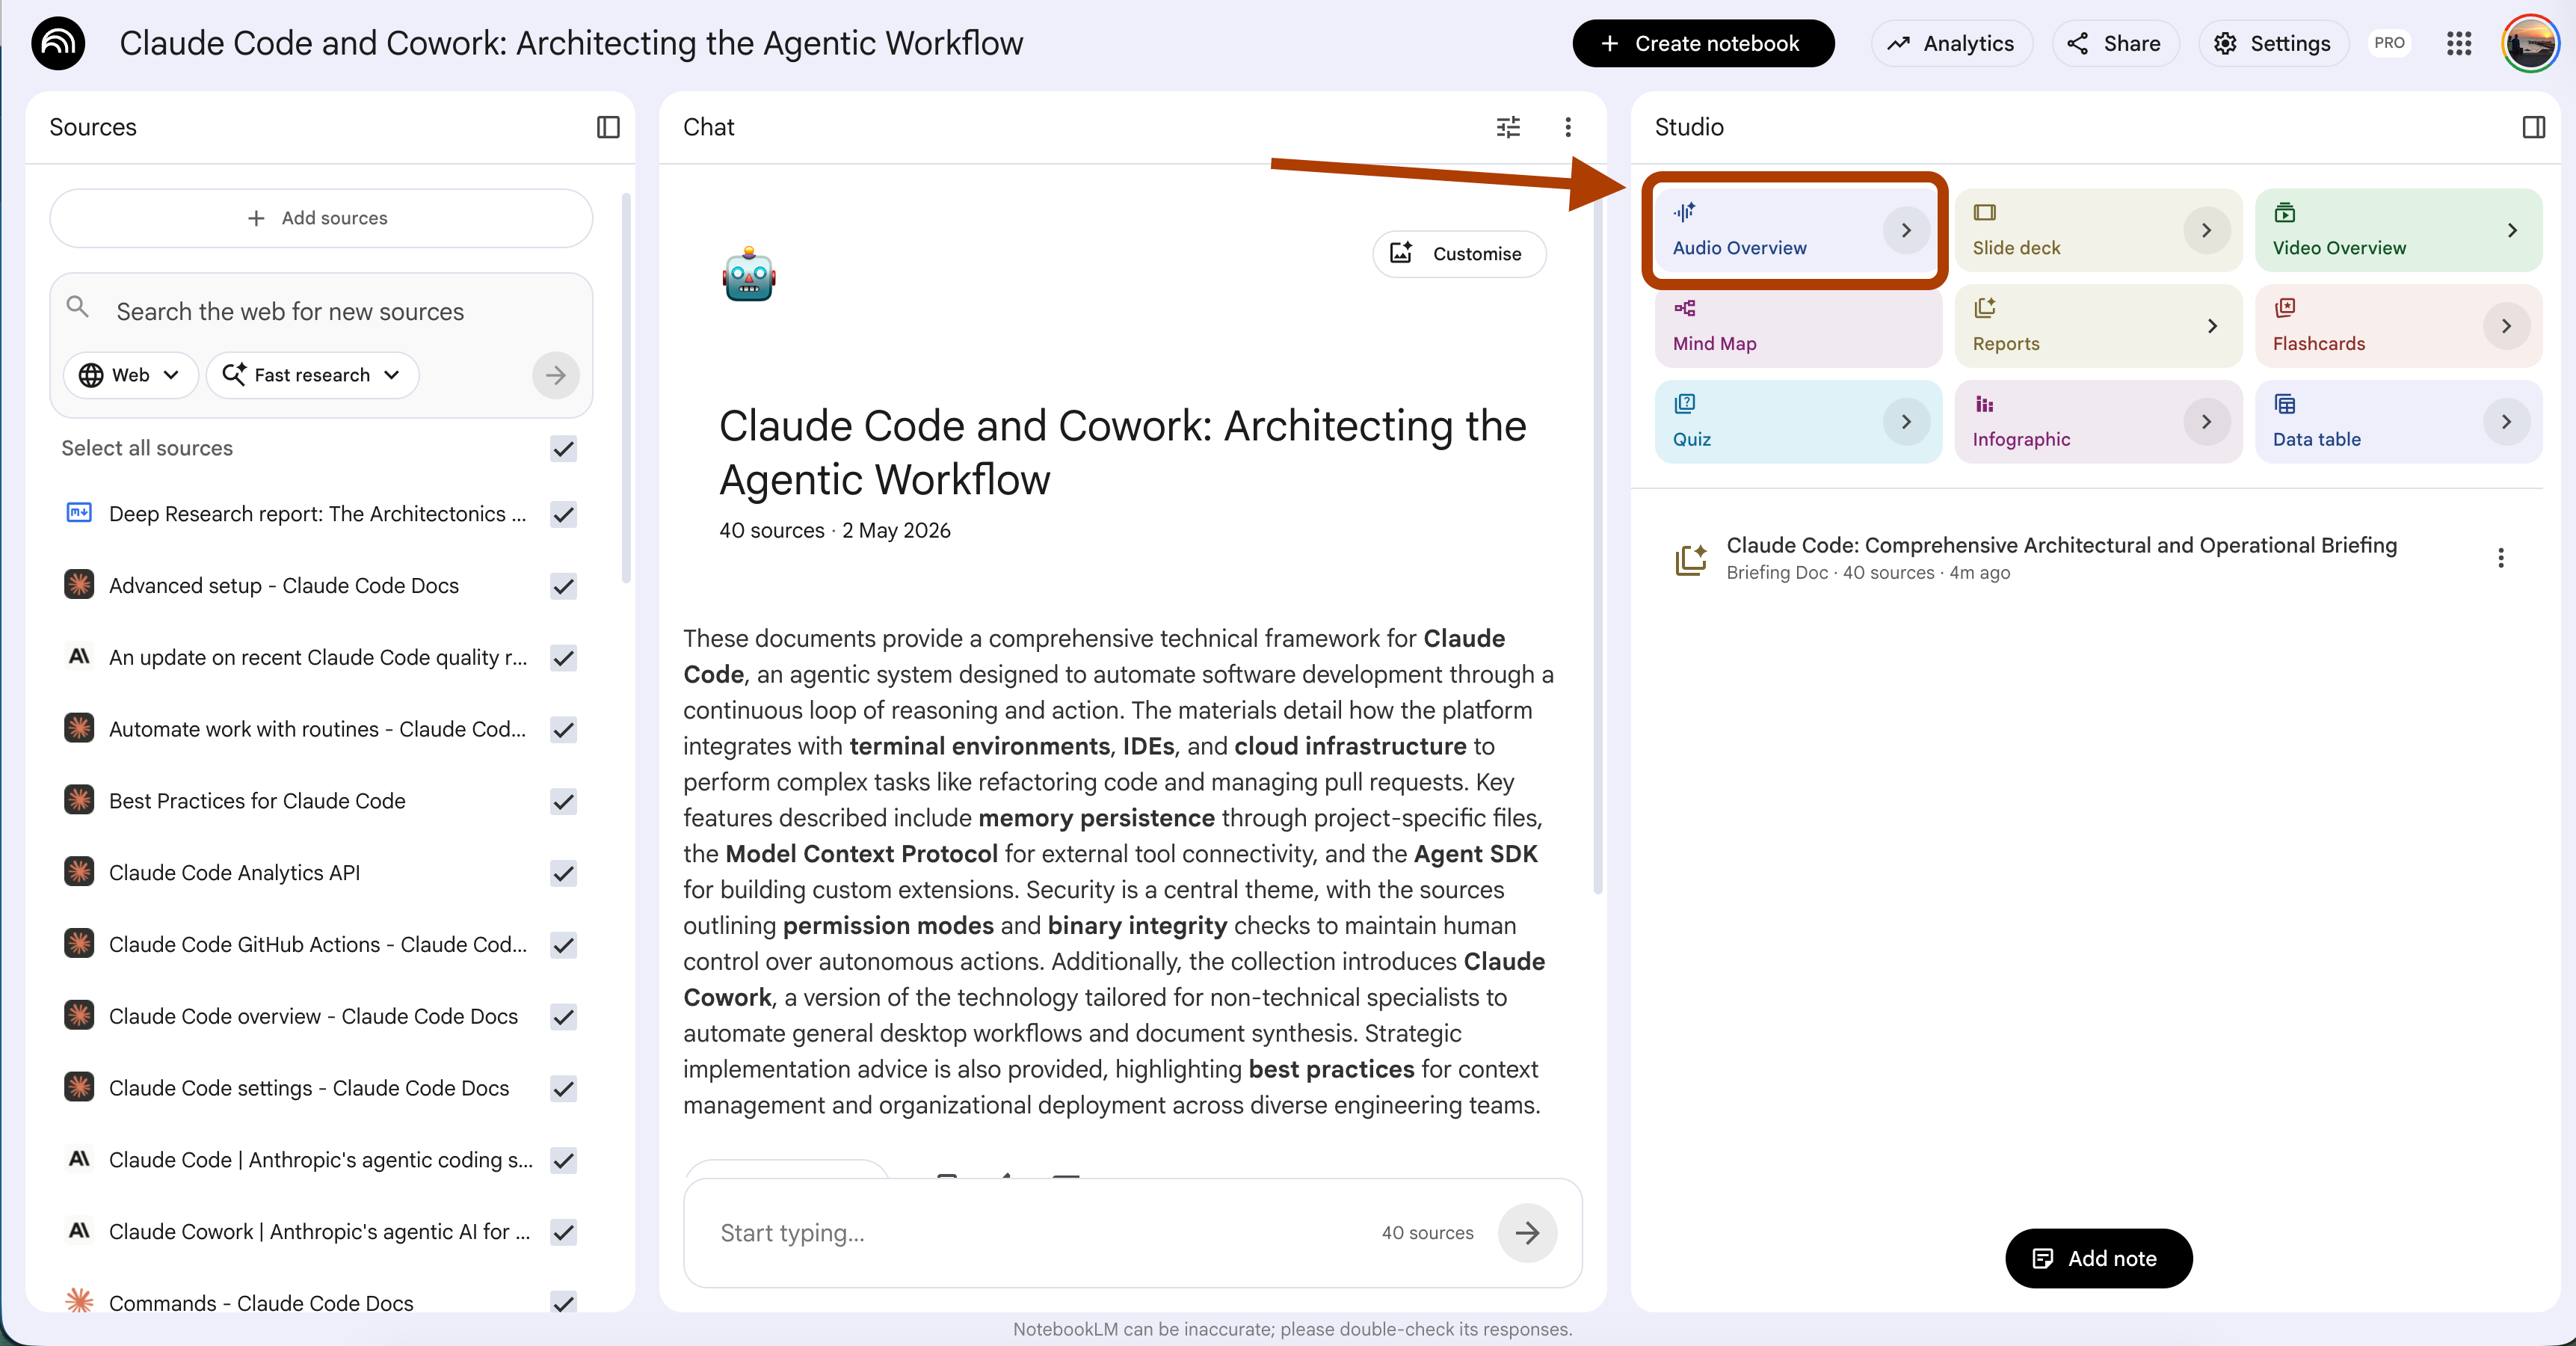
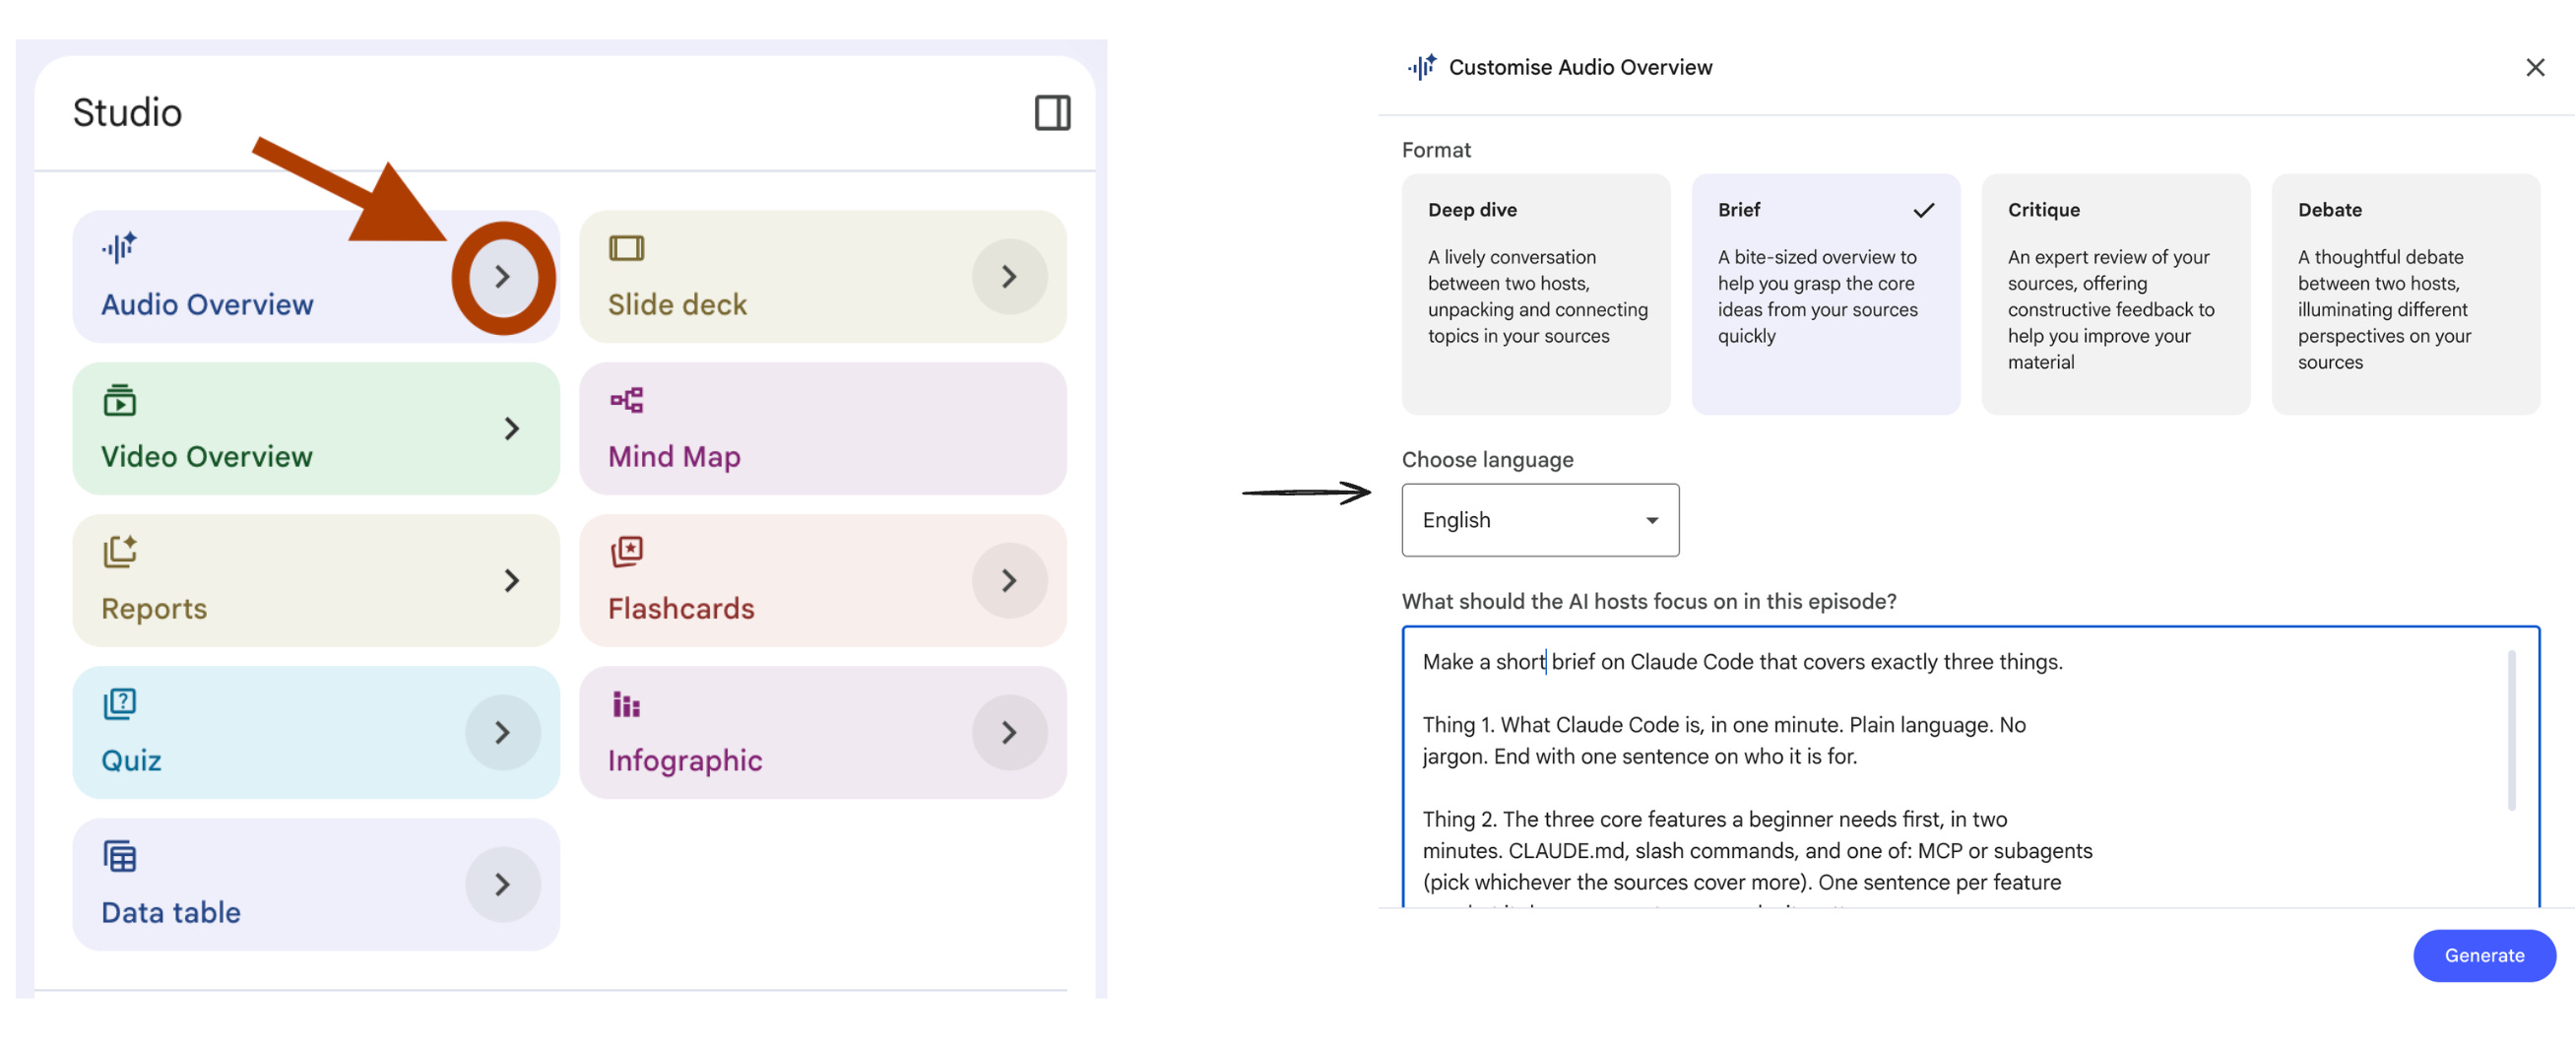
Steps: Open your notebook → In Studio, click Audio Overview → Choose Brief format → Length Shorter.
Make a 5-minute brief on Claude Code that covers exactly three things.

Thing 1. What Claude Code is, in one minute. Plain language. No
jargon. End with one sentence on who it is for.

Thing 2. The three core features a beginner needs first, in two
minutes. CLAUDE.md, slash commands, and one of: MCP or subagents
(pick whichever the sources cover more). One sentence per feature
on what it does, one sentence on why it matters.

Thing 3. The one mistake that wastes the most time for new users,
in 90 seconds. Quote the source if possible.

Wrap with a single takeaway sentence. No "thanks for listening".
No goodbyes. Just the takeaway, then end.

Skip anything that does not fit the time budget. The brief is more
useful at 4 minutes than at 6.
I tested this on the Claude Code docs notebook. The is the brief.
I tested this on the Claude Code docs notebook.
Listen to this on the way to work or school. By the time you sit down at your desk, you know enough about Claude Code.
3. The “What To Skip” Claude Code Study Filter
NotebookLM Feature: Report (Create your own)
UI selections: Format → Create your own.
Most study advice tells you what to learn. Almost no advice tells you what to skip.
This is a problem when studying Claude Code. The docs cover everything from basic install to enterprise CI/CD pipelines. A solo developer building side projects does not need 40% of it. A team lead at a Fortune 500 needs 80%.
Generic study plans waste your time on the wrong 40%.
This prompt builds a personal skip list based on your actual situation. You name what you build. It tells you what to read first, what to read later, and what to ignore for now.
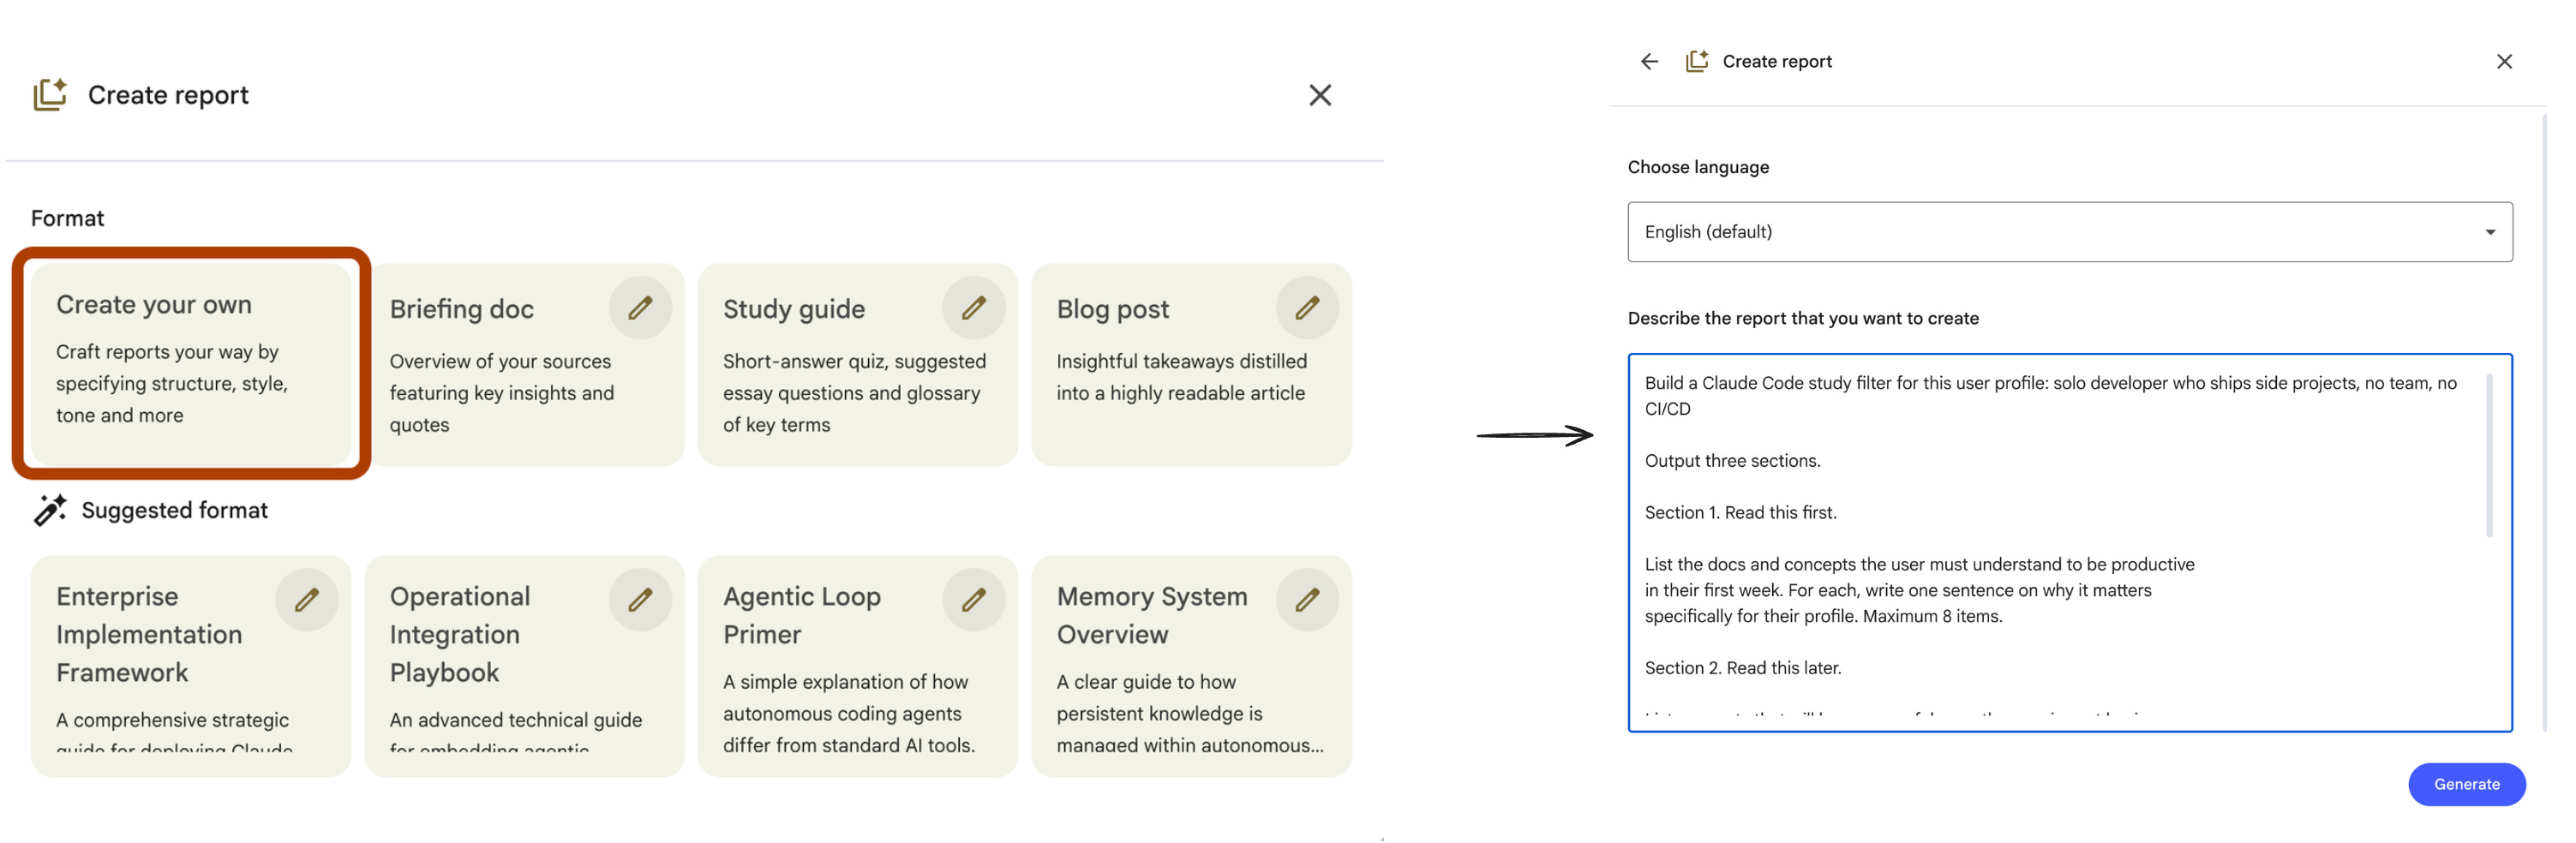
Steps: Open your notebook → In Studio, click Reports → Choose “Create your own”.
Build a Claude Code study filter for this user profile: {user_profile}.

Output three sections.

Section 1. Read this first.

List the docs and concepts the user must understand to be productive
in their first week. For each, write one sentence on why it matters
specifically for their profile. Maximum 8 items.

Section 2. Read this later.

List concepts that will become useful once the user is past basic
productivity. For each, write a trigger ("read this when you start
doing X"). Maximum 6 items.

Section 3. Skip for now.

List concepts that do not apply to this user profile. For each, write
one sentence on why it is irrelevant for their situation. Be direct.
Do not hedge.

Rules. Do not include a concept in more than one section. Every
concept the sources mention must land in exactly one of the three
sections. If a concept is borderline, put it in "Read this later" with
a clear trigger.
I tested this with {user_profile} set to “solo developer who ships side projects, no team, no CI/CD”.
Here is the trimmed output.
The skip list is the most valuable section.
It frees you from guilt about not reading sections that do not apply.
Run this once when you start. Re-run it every six months as your situation changes. The skip list shrinks as you grow.
4. The Claude Code “Show Me One Example” Use Case Finder
NotebookLM Feature: Report (Create your own)
UI selections: Format → Create your own.
Reading abstract documentation is the slowest way to learn Claude Code. “MCP enables external tool integration” tells you nothing. “MCP lets Claude read your Jira tickets” tells you everything.
The docs have examples. They are scattered. They are buried under definitions. By the time you find one, you forgot the question.
This prompt extracts one working example per concept. No theory. No setup explanation. Just “here is what it looks like in real life”.
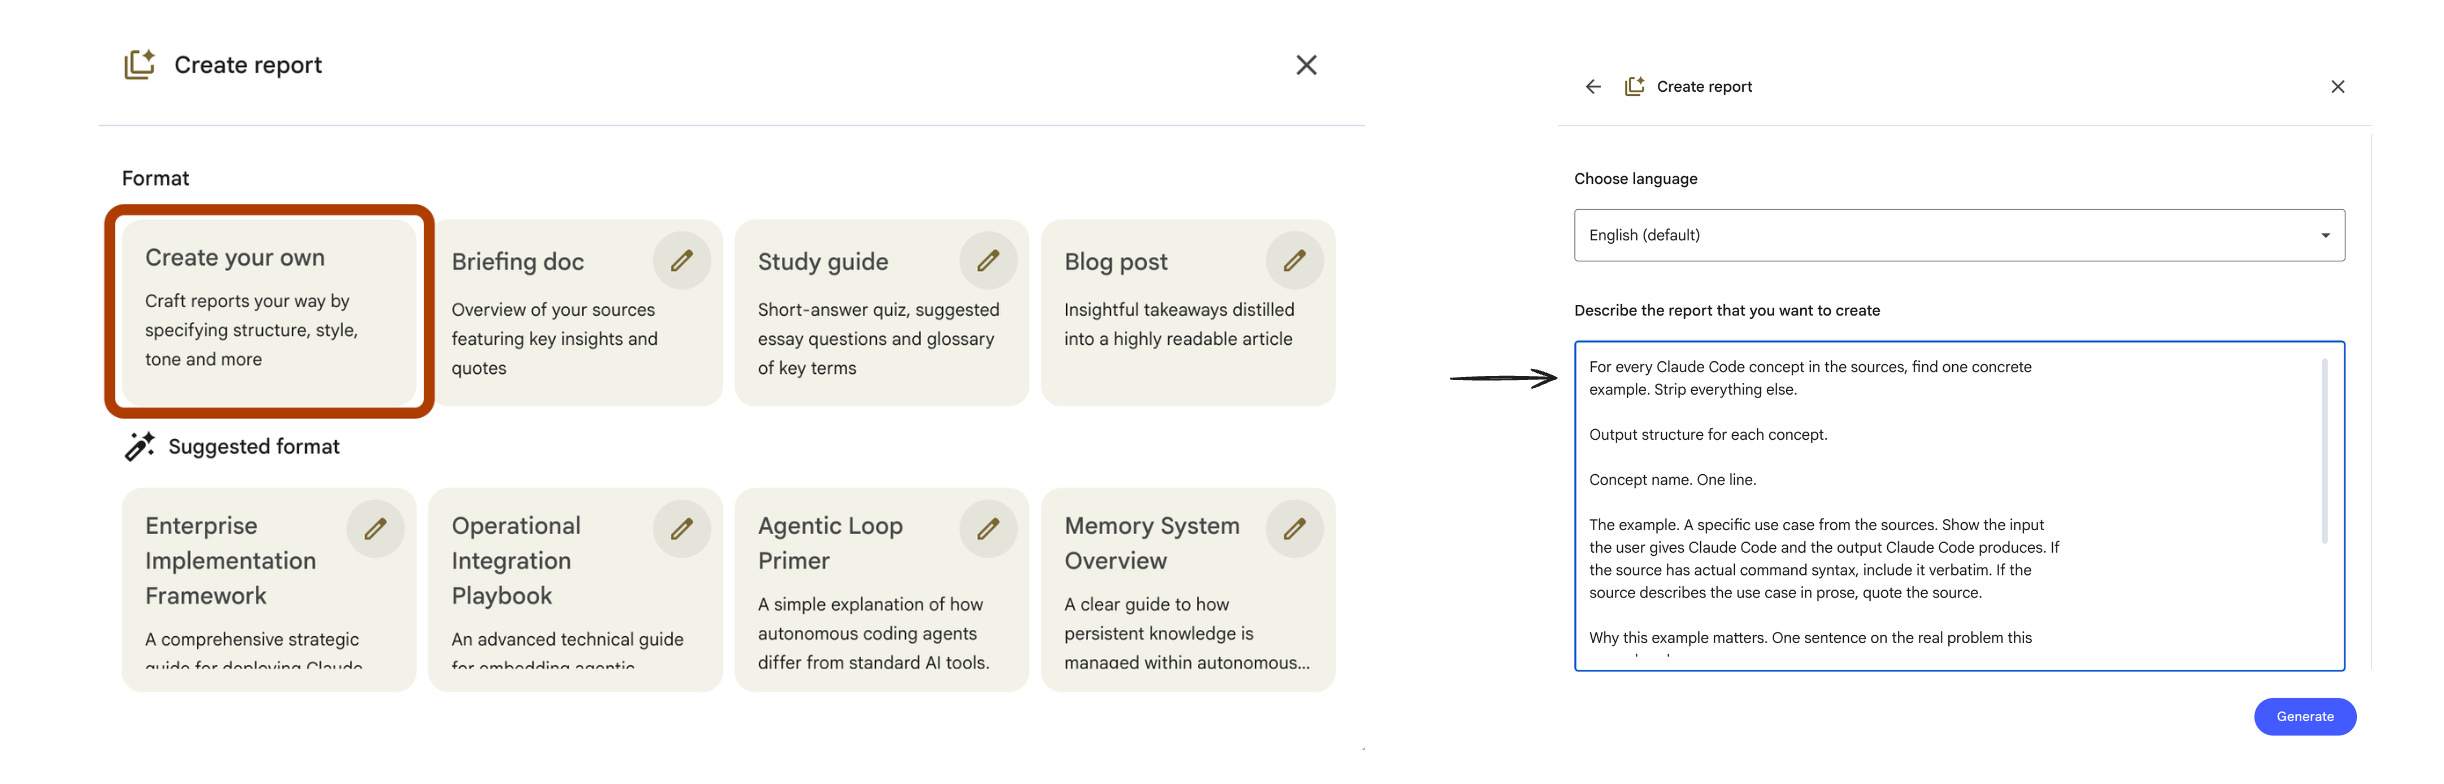
Steps: Open your notebook → In Studio, click Reports → Choose “Create your own”
For every Claude Code concept in the sources, find one concrete
example. Strip everything else.

Output structure for each concept.

Concept name. One line.

The example. A specific use case from the sources. Show the input
the user gives Claude Code and the output Claude Code produces. If
the source has actual command syntax, include it verbatim. If the
source describes the use case in prose, quote the source.

Why this example matters. One sentence on the real problem this
example solves.

Rules. No definitions. No "this concept enables X" abstractions.
Skip concepts where the sources do not contain a concrete example.
Mark them at the end as "no example in docs" so the user knows to
look elsewhere.

Order the concepts from most beginner-relevant to most advanced.
I tested this on the Claude Code docs notebook. Here is one entry it produced.
One concept. One example. One reason it matters.
After running this prompt, you can scan twenty concepts in the time it takes to read three doc pages. The examples stick because your brain remembers concrete situations, not abstract definitions.
Run this once. Bookmark the output. It becomes your “what does Claude Code actually do” cheat sheet.
5. The 10-Card Claude Code Sprint Deck
NotebookLM Feature: Flash Card
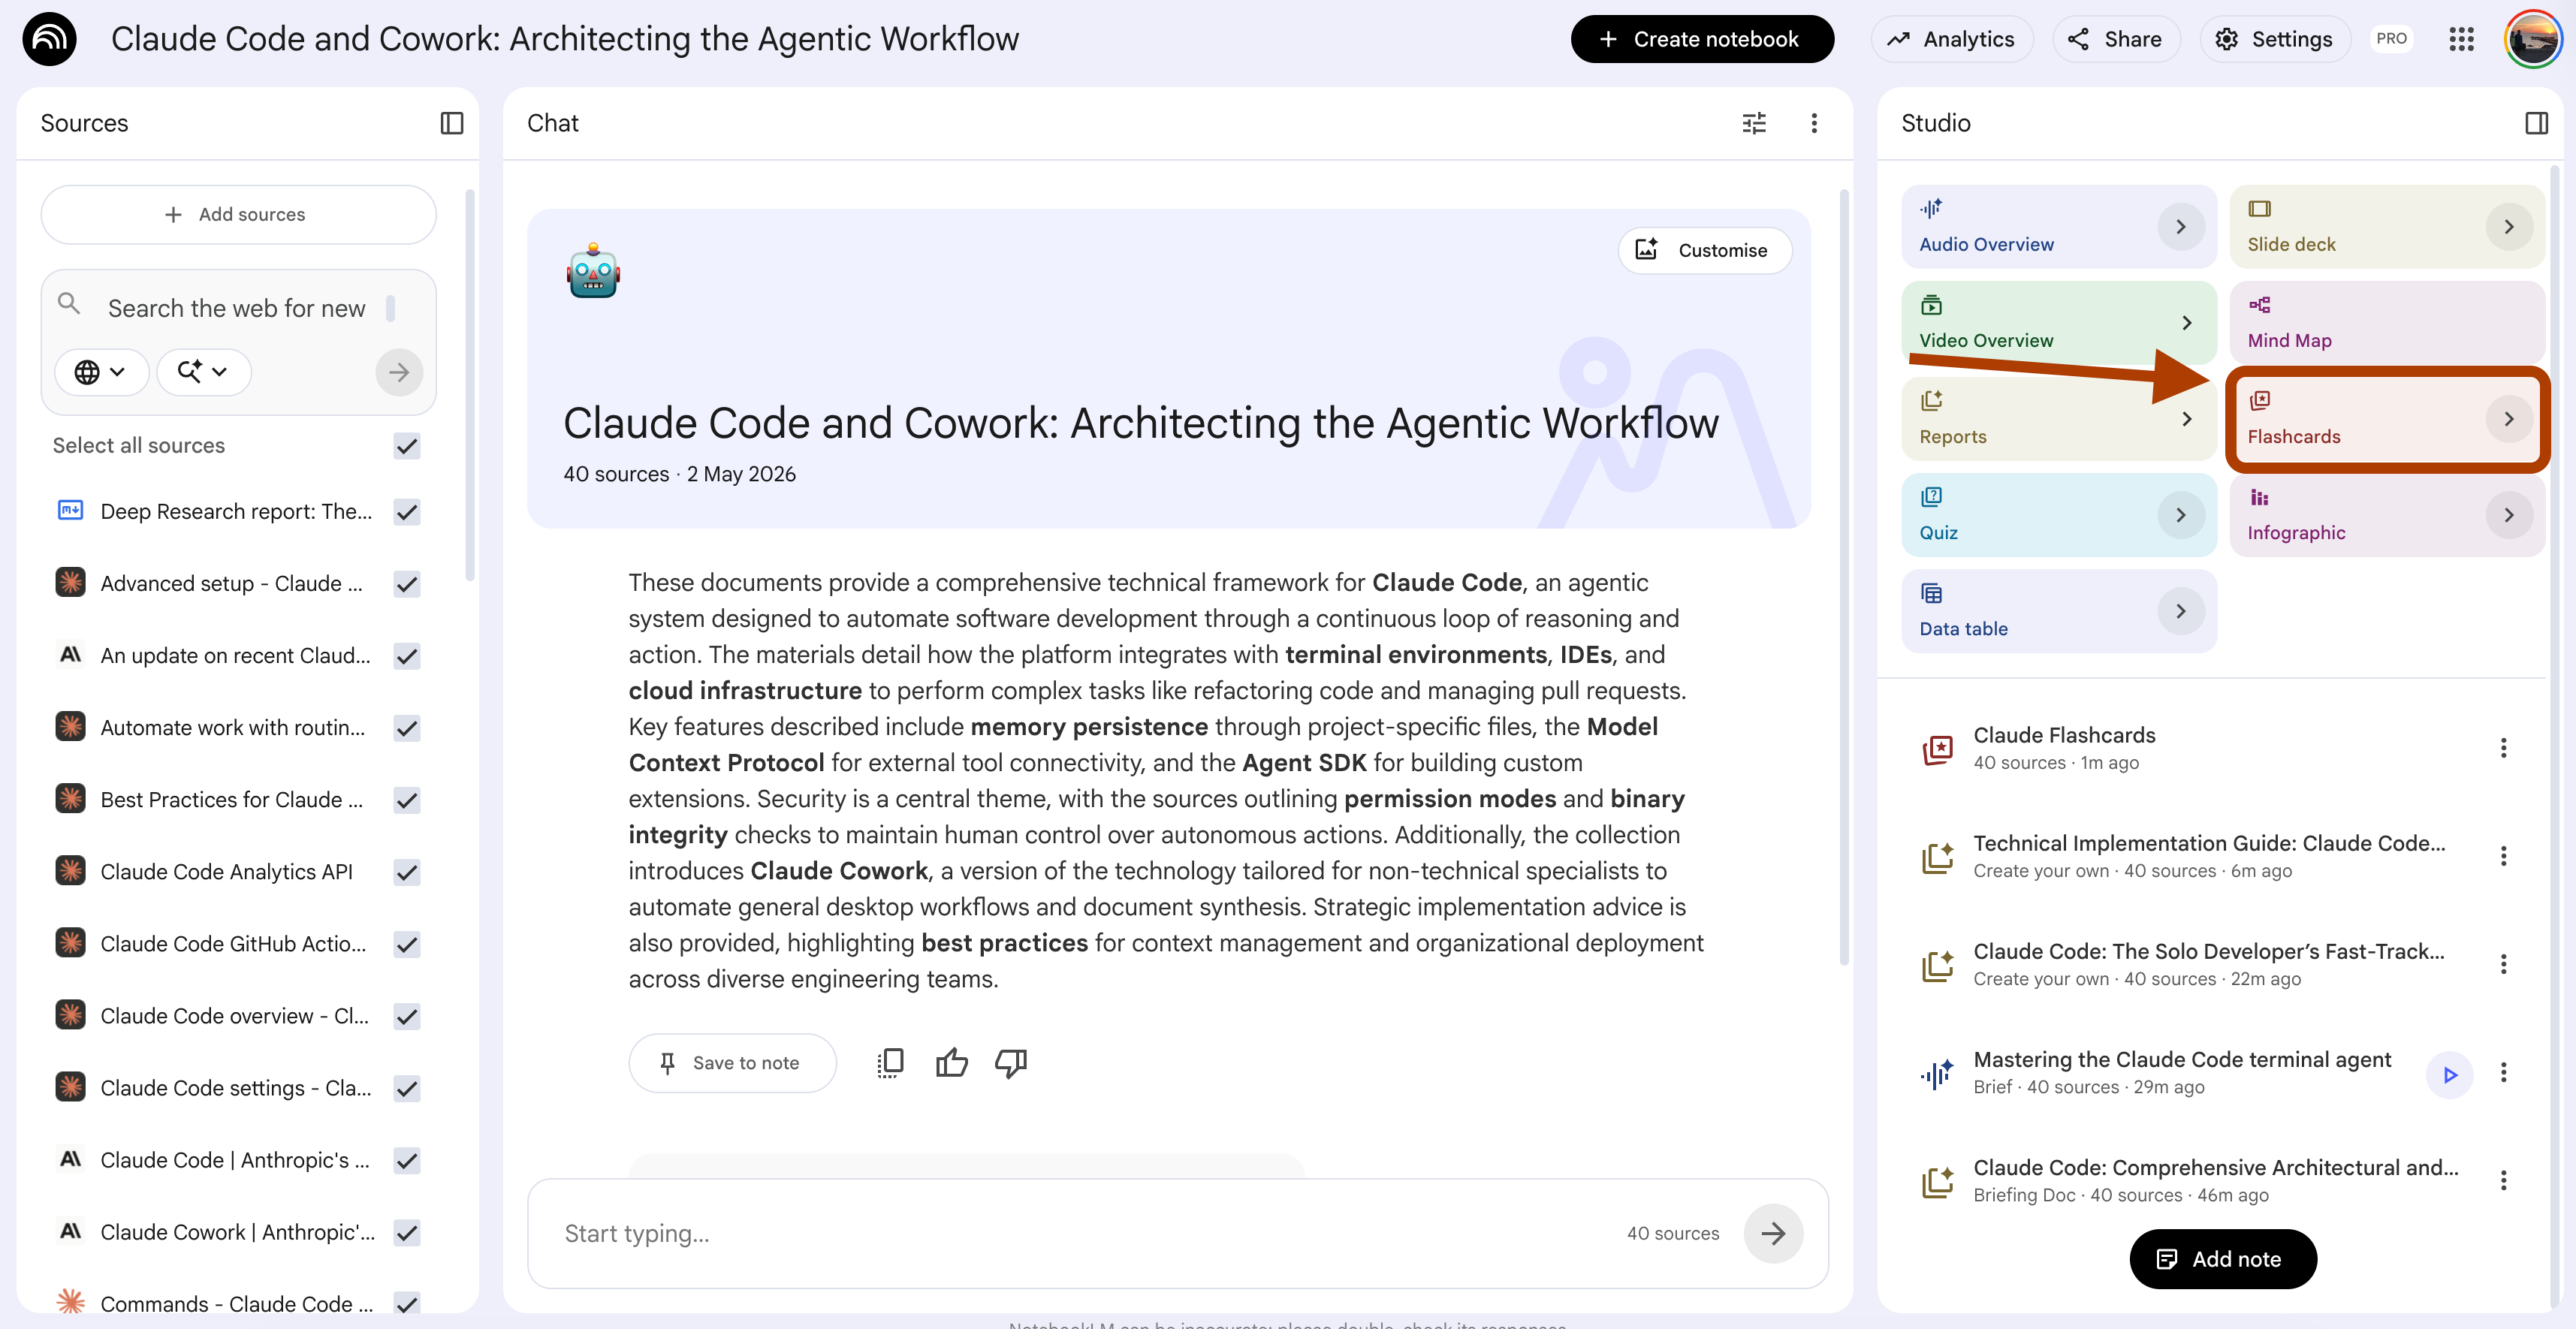
UI selections: Number → Fewer. Difficulty → Easy.
Standard flash card decks have 50 cards.
You start strong. By card 20 you are guessing. By card 35 you are clicking “easy” on everything to make it stop.
This is not learning. This is endurance.
The fix is fewer cards, lower difficulty, and a tight focus.
Ten cards on the basics of Claude Code.
Five-minute review. Done before your coffee gets cold.
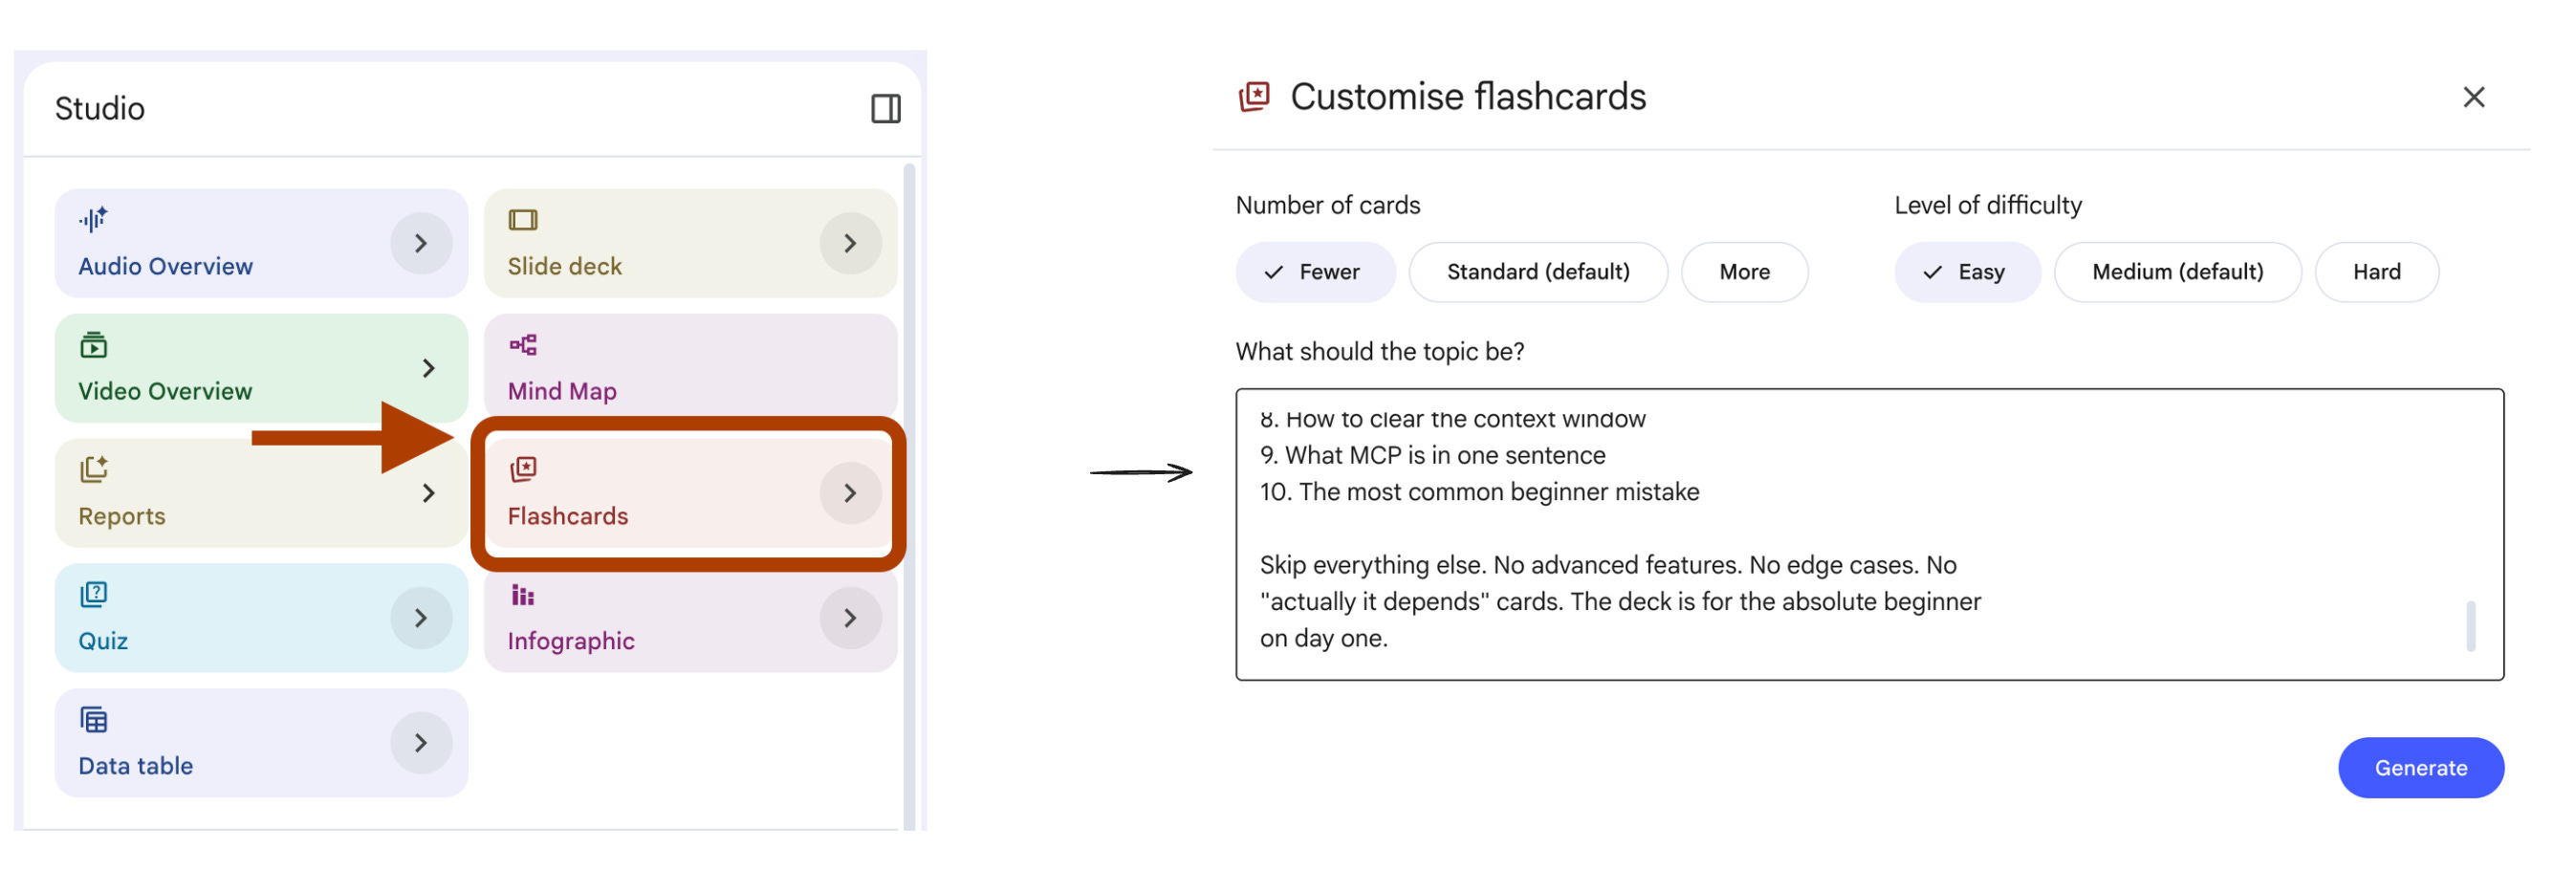
Steps: Open your notebook → In Studio, click Flashcards.
Generate flash cards covering the most basic Claude Code
concepts a beginner needs in their first week.

Card structure.

Front. A short question or fill-in-the-blank about one core concept.
Maximum 12 words. No trick questions. No edge cases.

Back. A direct answer in one sentence, maximum 20 words. Use plain
language. Quote the source phrasing where possible.

Cover these 10 concepts in this exact order.

1. What Claude Code is
2. How to install Claude Code
3. What CLAUDE.md does
4. How to start a session
5. What slash commands are
6. How to give Claude Code permission to edit files
7. What plan mode does
8. How to clear the context window
9. What MCP is in one sentence
10. The most common beginner mistake

Skip everything else. No advanced features. No edge cases. No
"actually it depends" cards. The deck is for the absolute beginner
on day one.
I tested this on the Claude Code docs notebook. Here is one card it produced.
Plain language. No jargon. One concept per card.
Run through the deck once a day for a week. By day three you will know the basics without thinking about them. By day seven you will know more than 90% of people who installed Claude Code last week.
The trick is restraint. Ten cards is enough. Twenty is too many.
6. The 5-Minute Claude Code Quiz
NotebookLM Feature: Quiz
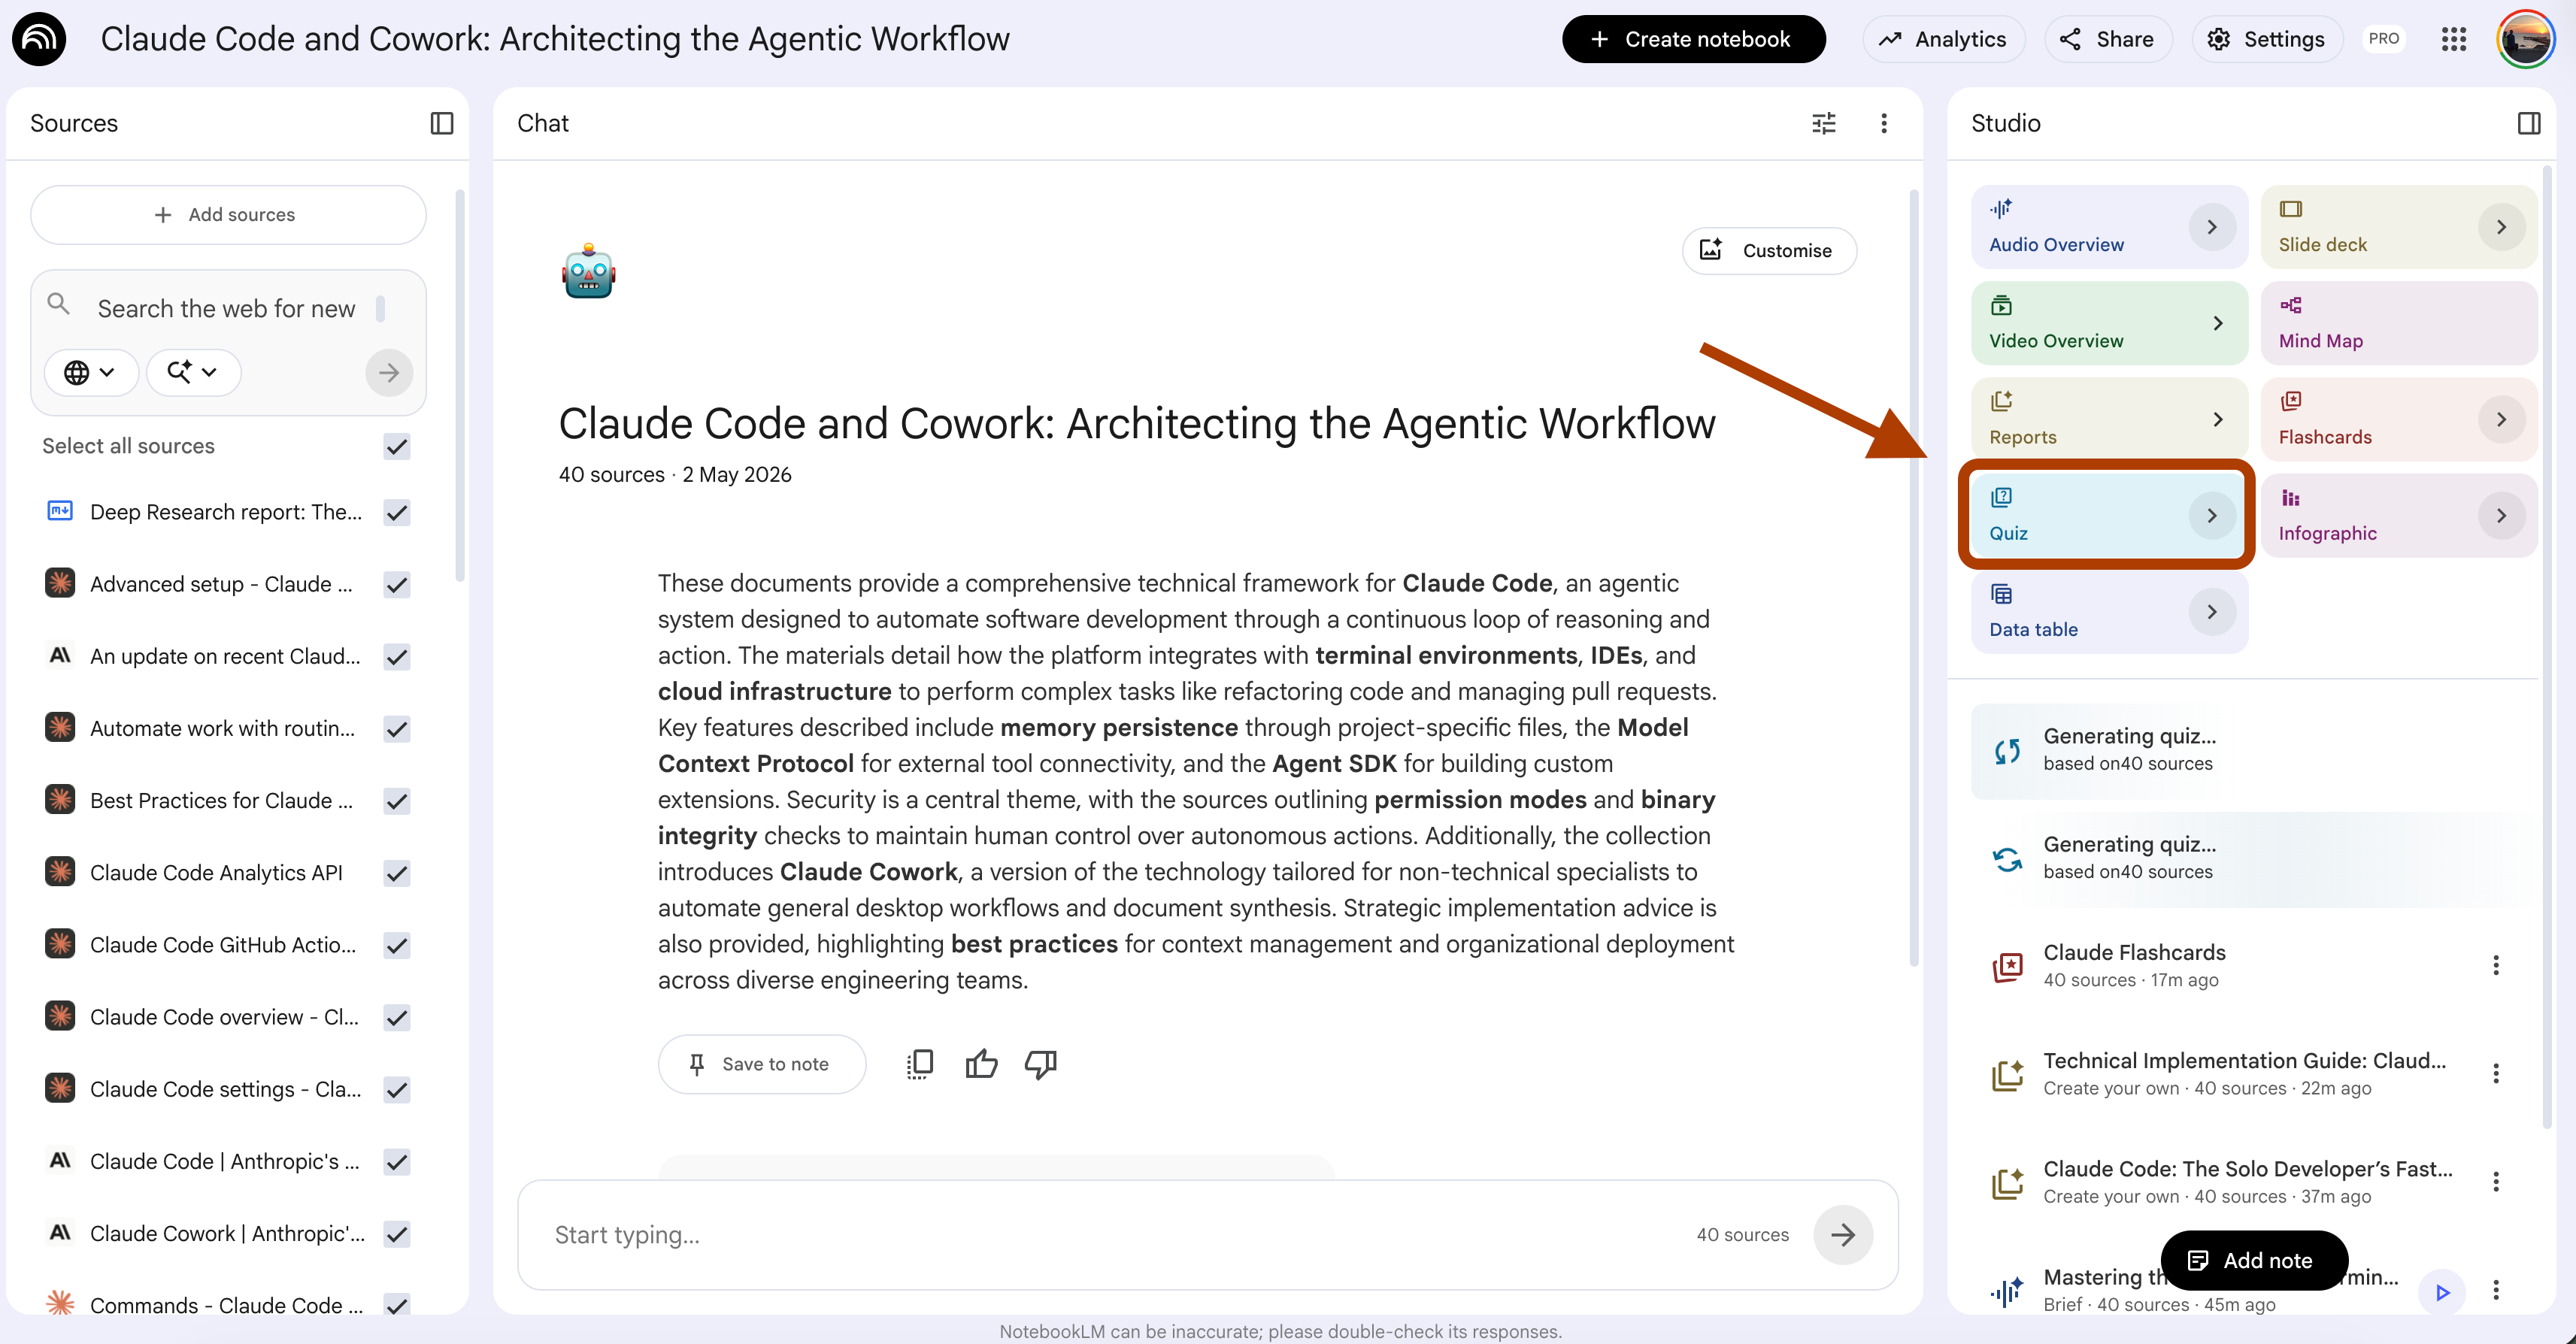
UI selections: Number → Fewer. Difficulty → Medium.
You read the docs. You ran the flash cards. You think you know it.
Then you sit down to use Claude Code and freeze on the first command.
This is the gap between recognition and recall. You recognize the answer when you see it. You cannot produce it from memory. Reading more docs does not fix this. Testing yourself does.
A quick quiz with fewer questions catches the gaps in five minutes. No marathon. No 30-question pile. Just enough to see what stuck.
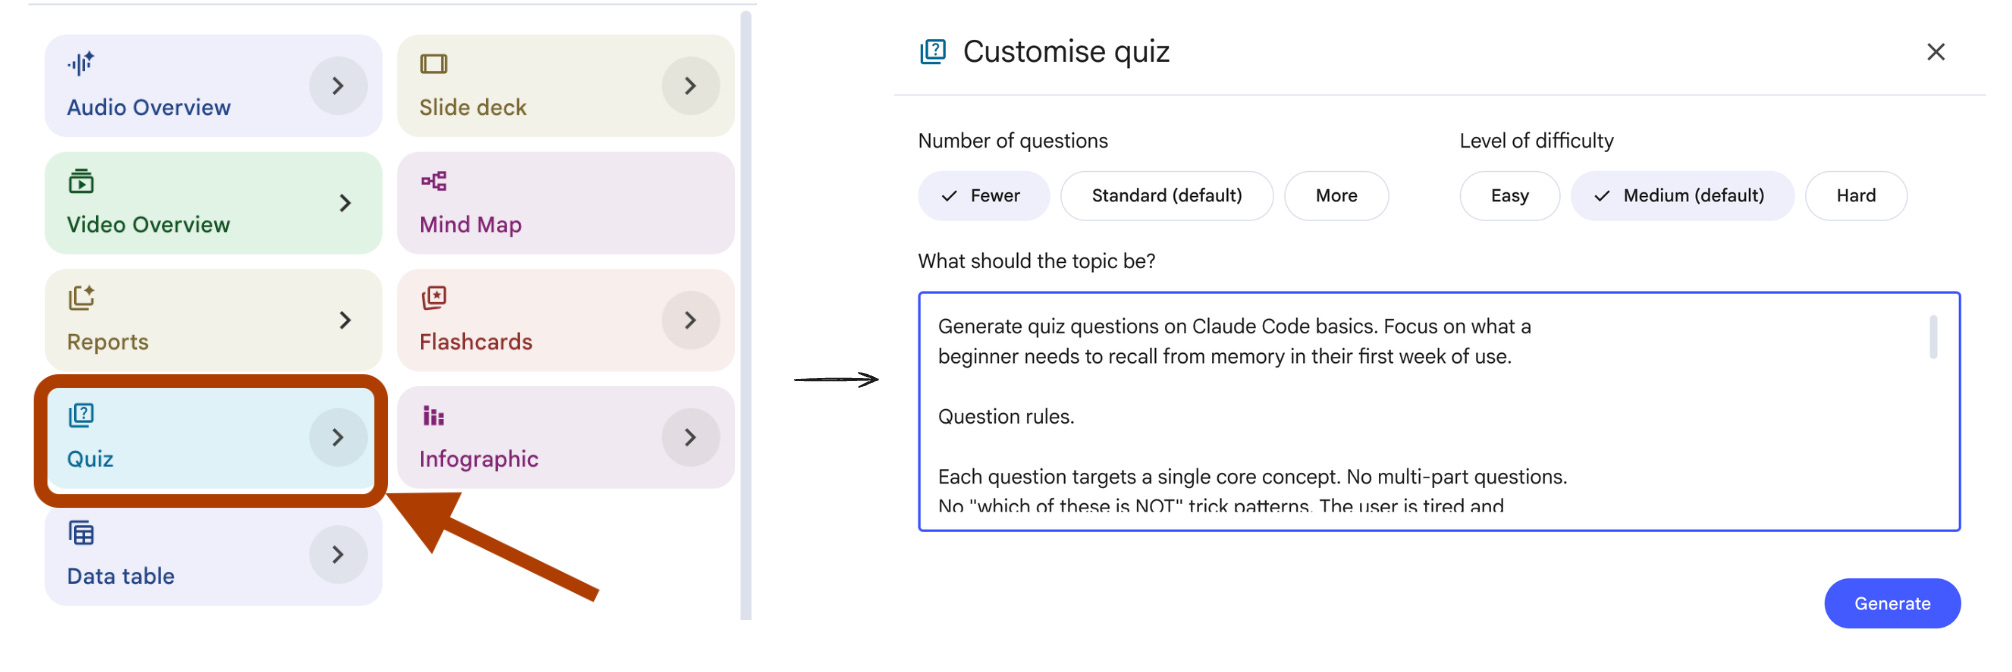
Steps: Open your notebook → In Studio, click Quiz.
Generate quiz questions on Claude Code basics. Focus on what a
beginner needs to recall from memory in their first week of use.

Question rules.

Each question targets a single core concept. No multi-part questions.
No "which of these is NOT" trick patterns. The user is tired and
testing themselves, not taking the SAT.

Mix two question styles only.

Style 1. Recall. "What does CLAUDE.md do?" The answer should be one
sentence the user can say out loud.

Style 2. Application. "You want Claude Code to follow your team's
naming conventions. Where do you put the rules?" The answer should
be a single concept name plus one sentence on why.

Cover these areas in order. Setup. Project context. Slash commands.
Permissions. Plan mode. Context management. MCP basics.

After each question, include a one-sentence explanation that
reinforces the why, not just the what.

Skip questions on advanced features (subagents, hooks, custom skills,
CI/CD). Those belong in a later quiz.
I tested this on the Claude Code docs notebook. Here is one question it produced.
This question tests application, not recall. The user has to connect a symptom to a cause. That is the kind of thinking they will need on day one with Claude Code.
Run this once a week for the first month. The questions you miss tell you exactly which doc page to re-read. The questions you nail tell you what is already in your fingers.
The gaps shrink fast.
7. The 3-Slide Claude Code Micro-Lesson
NotebookLM Feature: Slide Deck
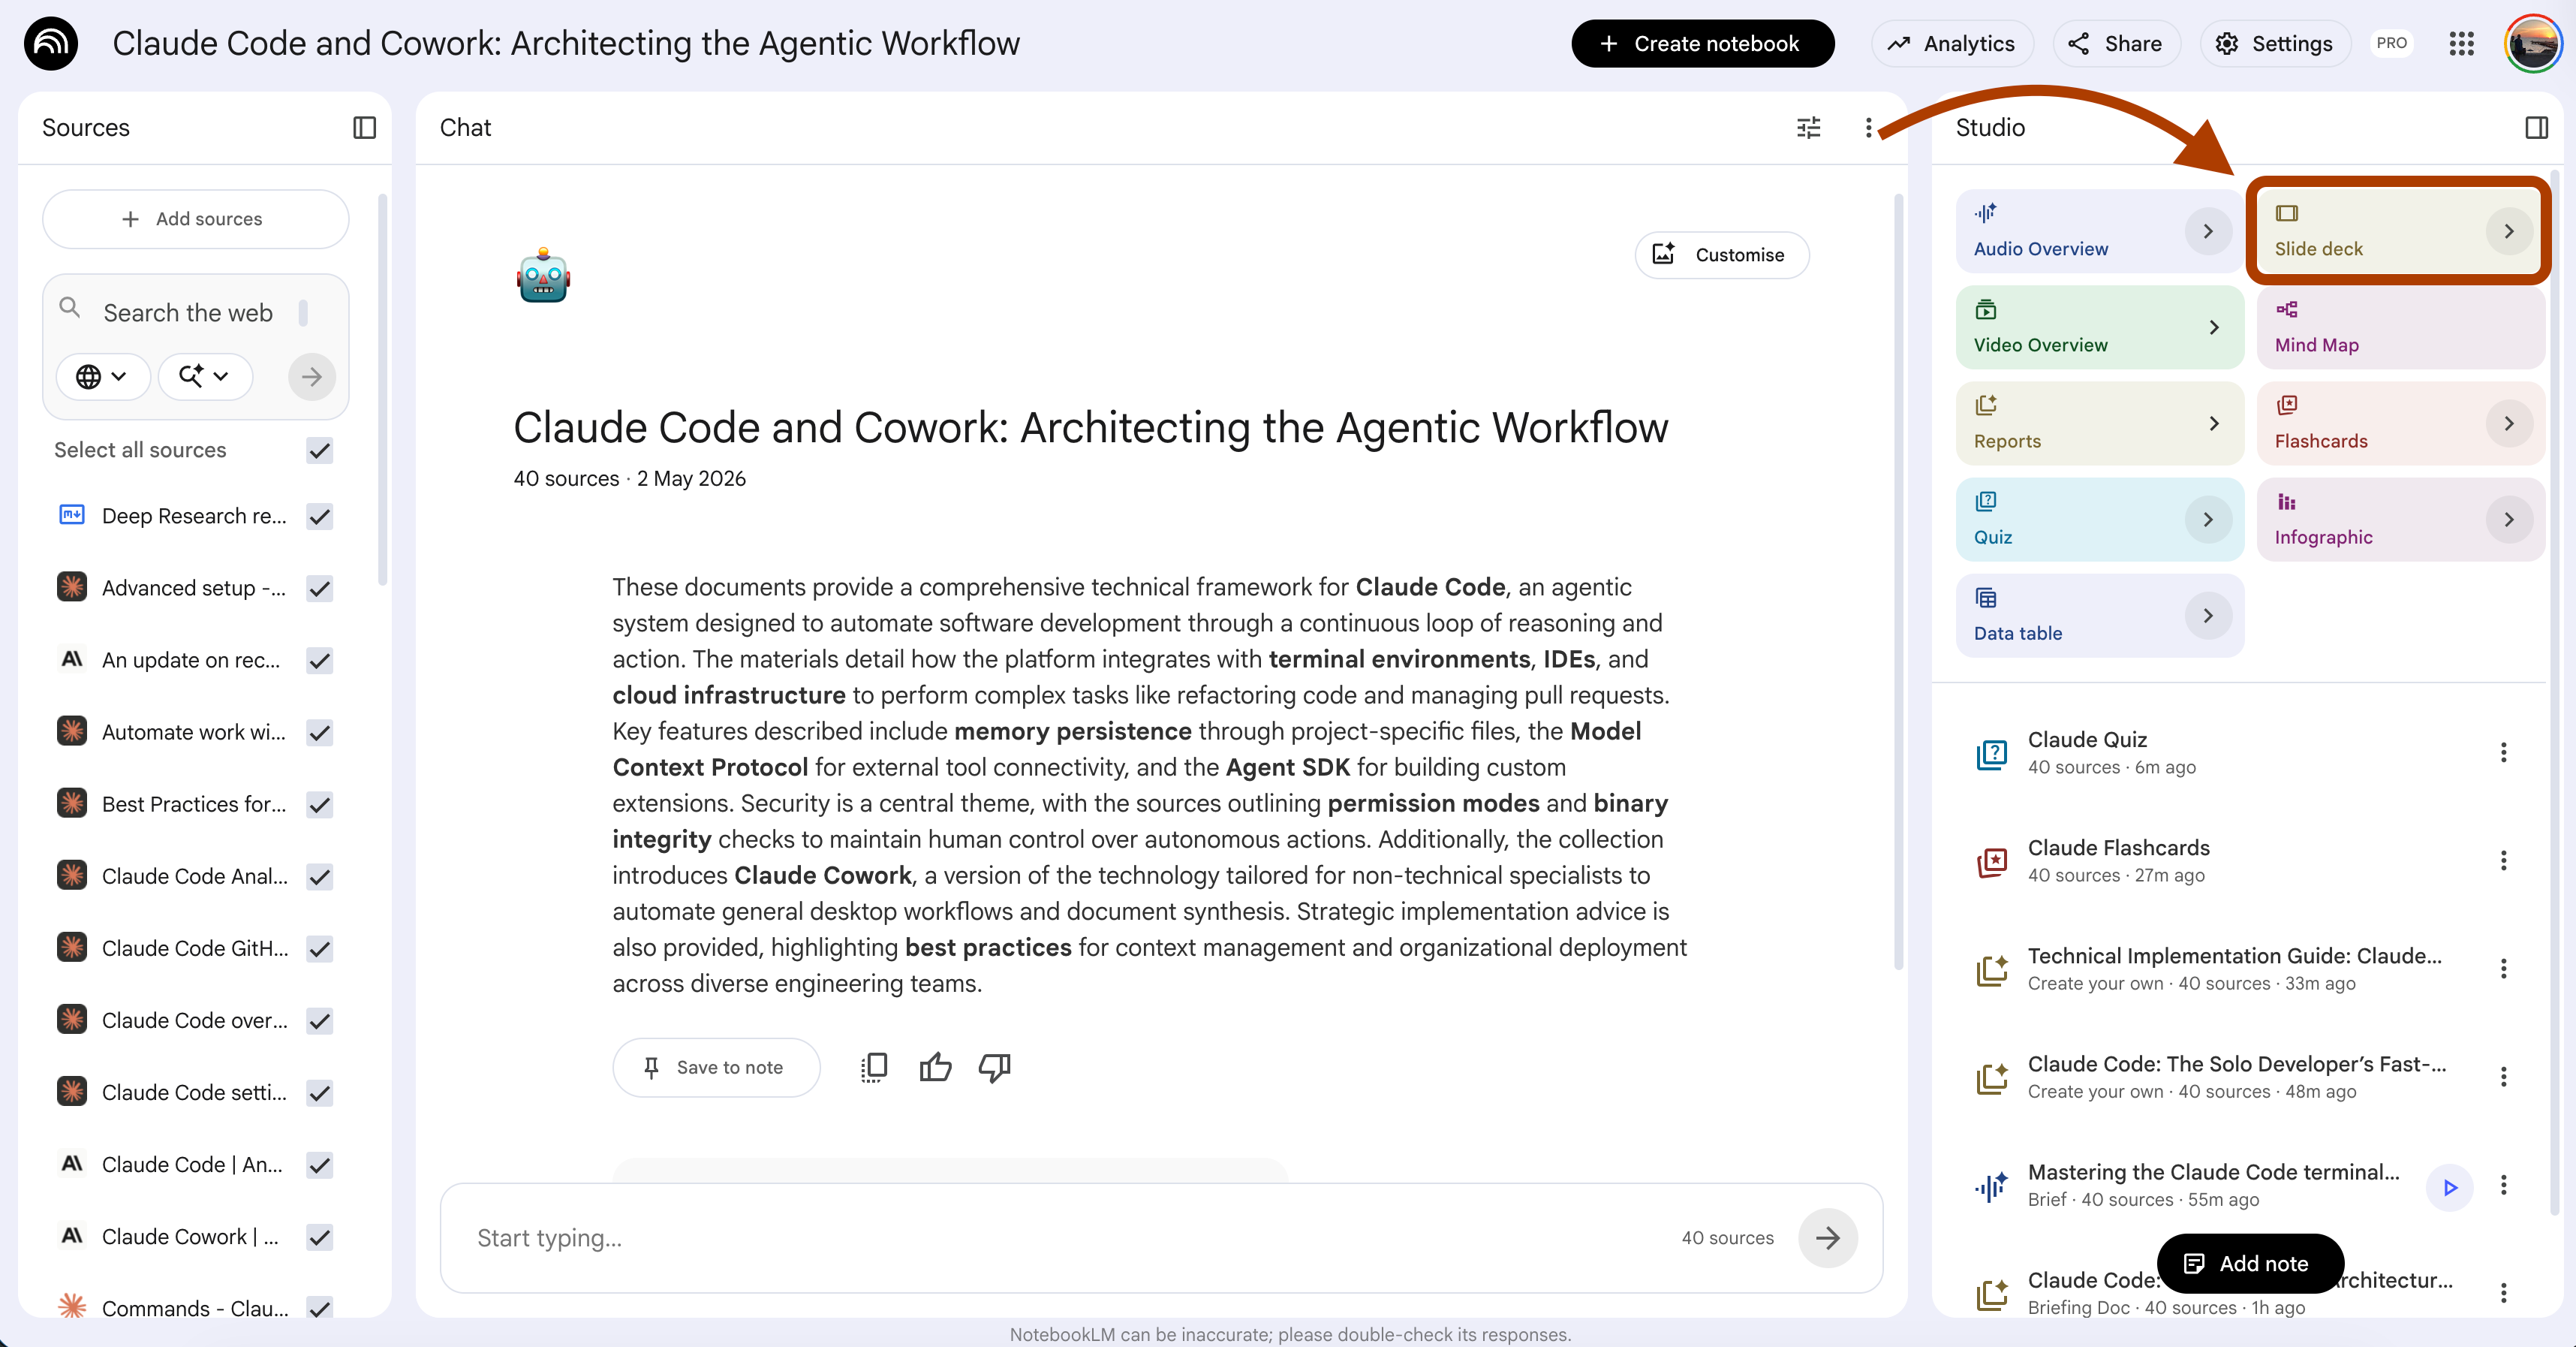
UI selections: Length → Short, Format → Presenter Slides
A full slide deck on Claude Code is 30+ slides. By slide 10 you are skimming. By slide 20 you are scrolling. By slide 30 you forgot why you opened it.
The fix is brutal compression. Three slides per concept. Title slide. Content slide. Takeaway slide. That is the full lesson.
This forces you to learn one thing well instead of ten things badly.
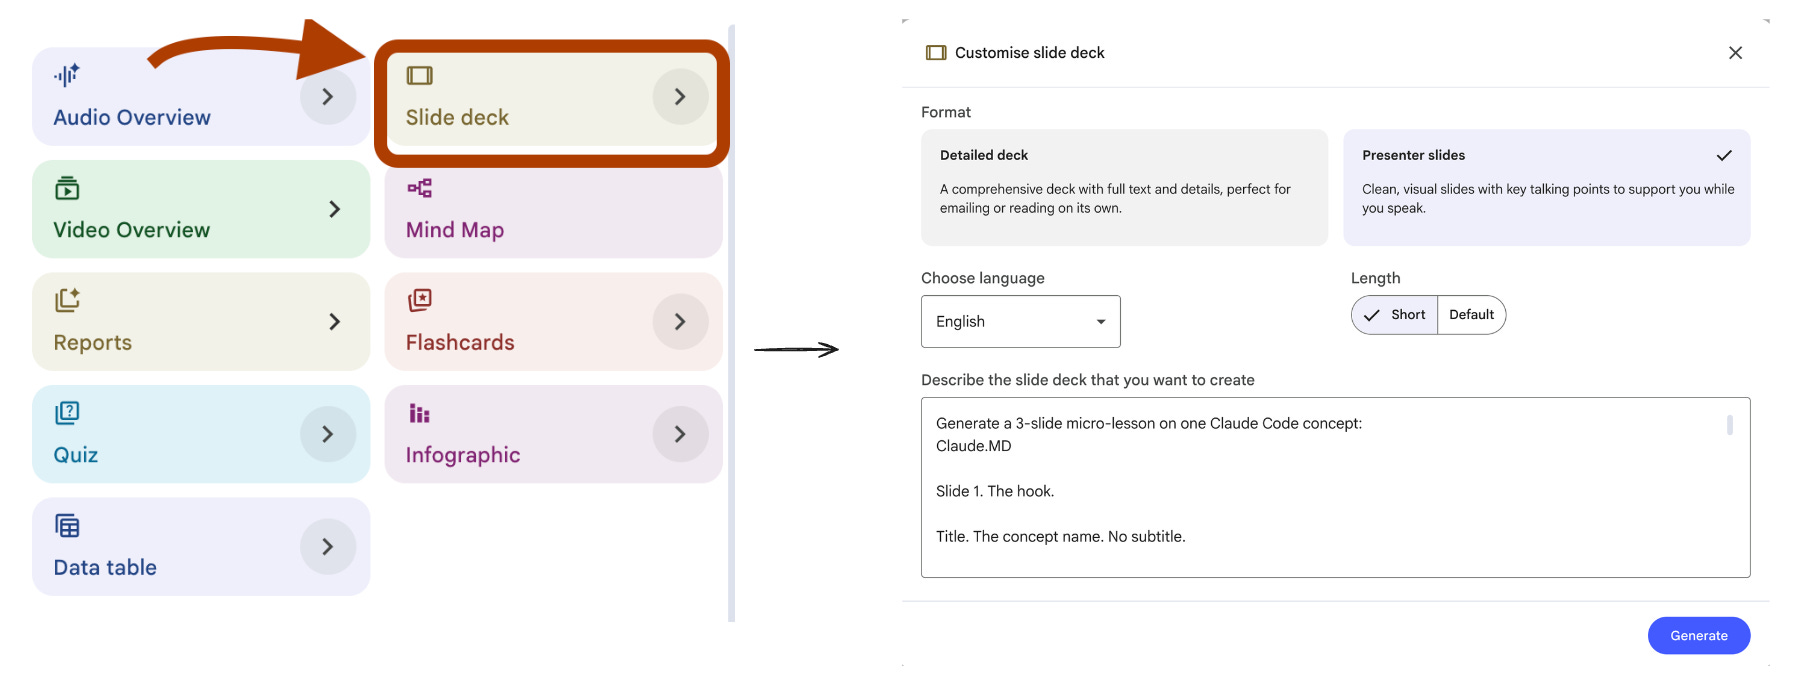
Steps: Open your notebook → In Studio, click Slide Deck → Length Short.
Generate a 3-slide micro-lesson on one Claude Code concept:
{concept_name}.

Slide 1. The hook.

Title. The concept name. No subtitle.

Three bullets. Bullet 1 is the one-sentence definition. Bullet 2 is
the specific job it does inside Claude Code. Bullet 3 is who needs to
care about it (which user profile).

Speaker notes. Two sentences. Sentence 1 is a real-world analogy that
makes the concept click. Sentence 2 is the question a beginner would
ask after reading the bullets.

Slide 2. The mechanism.

Title. "How it actually works."

Three bullets. Each bullet is one step in the lifecycle of using this
concept. Maximum 12 words per bullet. The three bullets together must
tell the full story from setup to result.

Speaker notes. Two sentences. Sentence 1 is the input the user
provides. Sentence 2 is the output Claude Code produces.

Slide 3. The takeaway.

Title. "What to remember."

Three bullets. Bullet 1 is the one thing you must do to use this
concept. Bullet 2 is the most common beginner mistake to avoid.
Bullet 3 is when to use it instead of an alternative.

Speaker notes. One sentence. The minimal action the user can take
today to start using this concept.

Skip filler slides. No "agenda" slide. No "summary" slide. The deck
is exactly three slides for exactly one concept.
I tested this on the Claude Code docs notebook with {concept_name} set to CLAUDE.md.
Here is the trimmed deck.
Three slides. One concept. Five minutes to read. You can present this back to yourself out loud and remember it.
Run this for each concept that confuses you. After ten concepts you have a personal Claude Code library. Each lesson is short enough that you actually open it again.
8. The 90-Second Claude Code Explainer Video
NotebookLM Feature: Video Overview
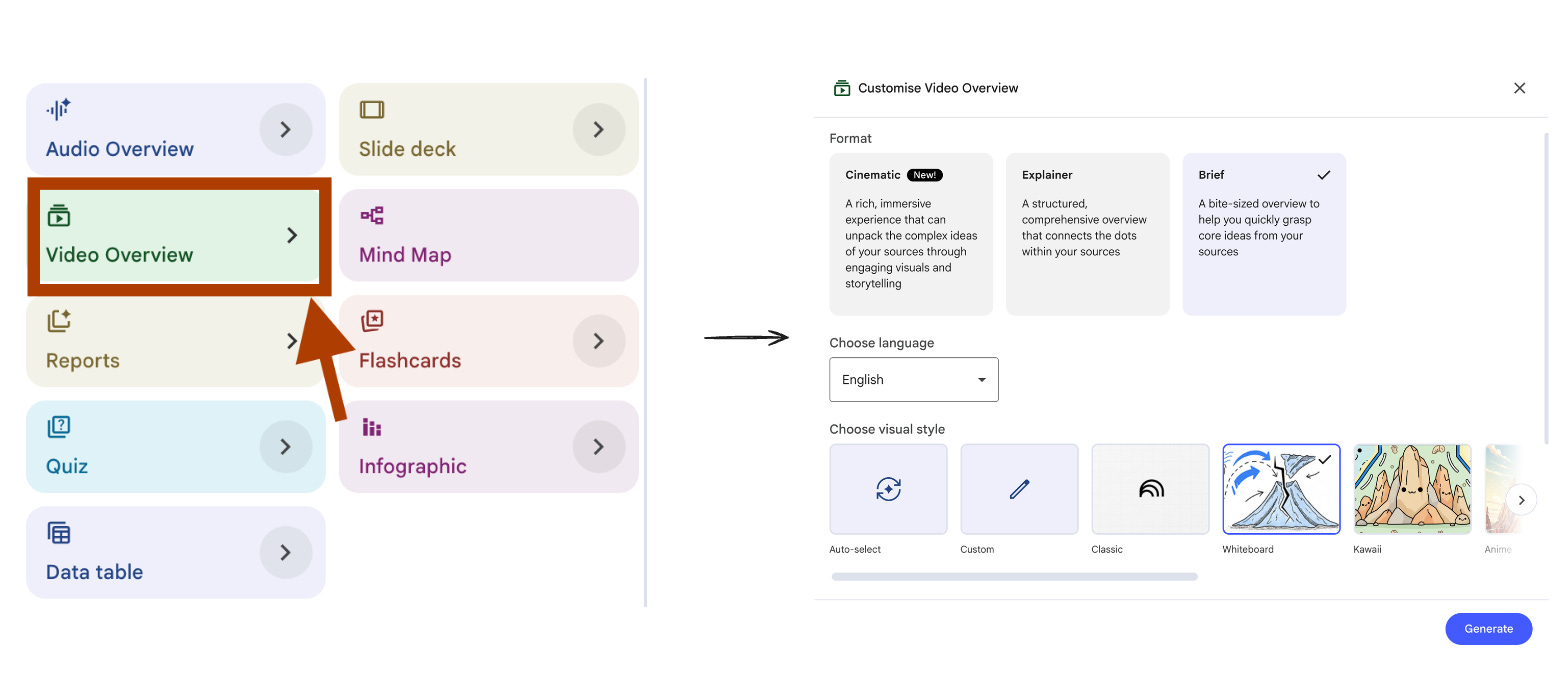
UI selections: Format → Brief, Visual Style → Handwritten
You are stuck on one thing in Claude Code. CLAUDE.md syntax. MCP setup. Plan mode behavior. Whatever it is.
You search the docs. You scroll through three pages of context. You still do not get it.
What you need is 90 seconds of focused explanation. Not a 12-minute walkthrough. Not a podcast. A short video that hits the one thing you do not understand and stops.
This prompt builds that.
Steps: Open your notebook → In Studio, click Video Overview → Choose Brief format.
Build a 90-second explainer video on one Claude Code concept:
{concept_name}.

Structure the script in three beats.

Beat 1. The hook

Open with the exact pain the viewer is feeling. Not "today we will
discuss". Start with the symptom. "You wrote a CLAUDE.md file but
Claude Code is still ignoring your conventions. Here is why."

Beat 2. The core

Explain the concept with one analogy and one example.

The analogy must come from outside software. Cooking, sports,
construction, anything physical the viewer already knows.

The example must come from the sources. Show what the user types
and what Claude Code does in response.

Do not define jargon mid-explanation. If a technical term comes up,
either skip it or replace it with a plain word.

Beat 3. The takeaway

End with one action the viewer can take in the next five minutes.
Specific. Concrete. No "explore the docs". No "experiment with it".

Visual theme. Match the concept to a single recurring visual element
the video can return to. Examples. CLAUDE.md is a recipe card. Plan
mode is a checklist. MCP is a power outlet. Pick one and stick to it.

Do not summarize the rest of Claude Code. Stay locked on
{concept_name}. If the sources do not cover one of the three beats,
say so directly instead of filling space.
I tested this on the Claude Code docs notebook with {concept_name} set to Plan Mode. The video came in at 63 seconds long.
Here is the video it produced.
PS: The vault includes 250+ NotebookLM prompts. To access it, read this.
9. The Single-Screen Claude Code Cheat Sheet
NotebookLM Feature: Infographics
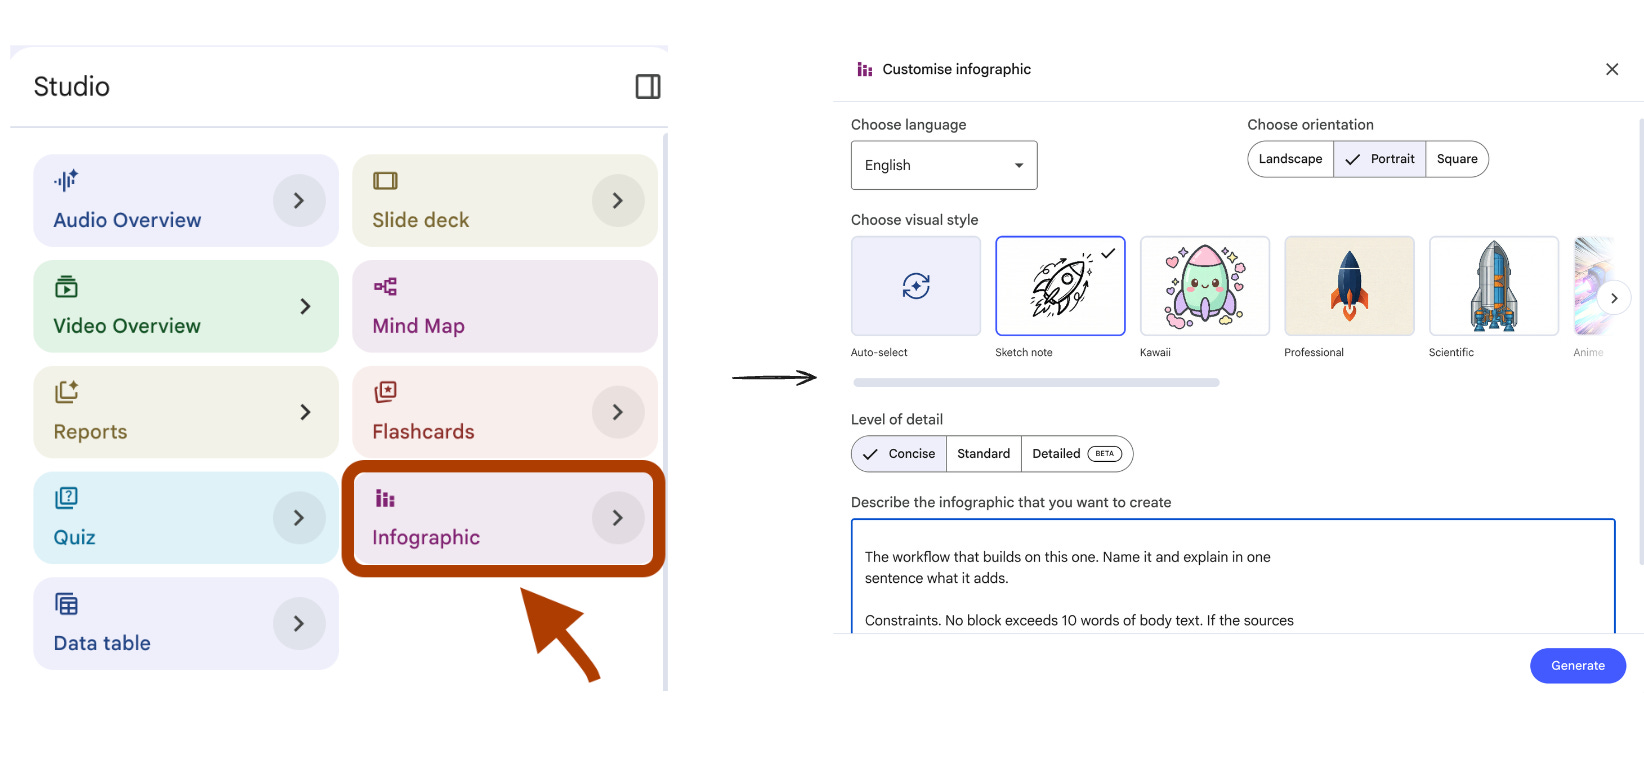
UI selections: Visual Style → Bento Grid. Orientation → Portrait. Detail Level → Concise.
A 12-tab browser is where Claude Code knowledge goes to die. You open the docs in tab 7. By tab 9 you forgot what you were looking for. By tab 12 you are checking Slack.
What you need is one screen. Six blocks. Everything in one glance.
This is not a poster on the wall. This is the screenshot you keep on your second monitor while you actually use Claude Code.
Steps: Open your notebook → In Studio, click Infographics → Choose Bento Grid.
Build a Bento Grid cheat sheet on one Claude Code workflow:
{workflow_name}.

Output structure.

Headline block. The workflow name and a one-line description of what
it produces. Maximum 12 words combined.

Block 1. The trigger.

When to use this workflow. One sentence describing the situation that
calls for it. Maximum 10 words.

Block 2. The command.

The exact command or slash command the user types in Claude Code.
Quote the syntax verbatim from the sources. If multiple commands are
involved, list them in order separated by arrows.

Block 3. The input.

What the user provides alongside the command. Examples. A file path.
A question. A code block. Maximum 8 words of context.

Block 4. The output.

What Claude Code produces in response. One sentence. Quote the source
phrasing where possible.

Block 5. The gotcha.

The one thing that breaks this workflow for beginners. Quote the
source warning if there is one.

Block 6. The next step.

The workflow that builds on this one. Name it and explain in one
sentence what it adds.

Constraints. No block exceeds 10 words of body text. If the sources
do not cover one of the blocks, write "not in docs" rather than
filling space.
I tested this on the Claude Code docs notebook with {workflow_name} set to “Starting a new project with Claude Code”.
Here is the structure it produced.
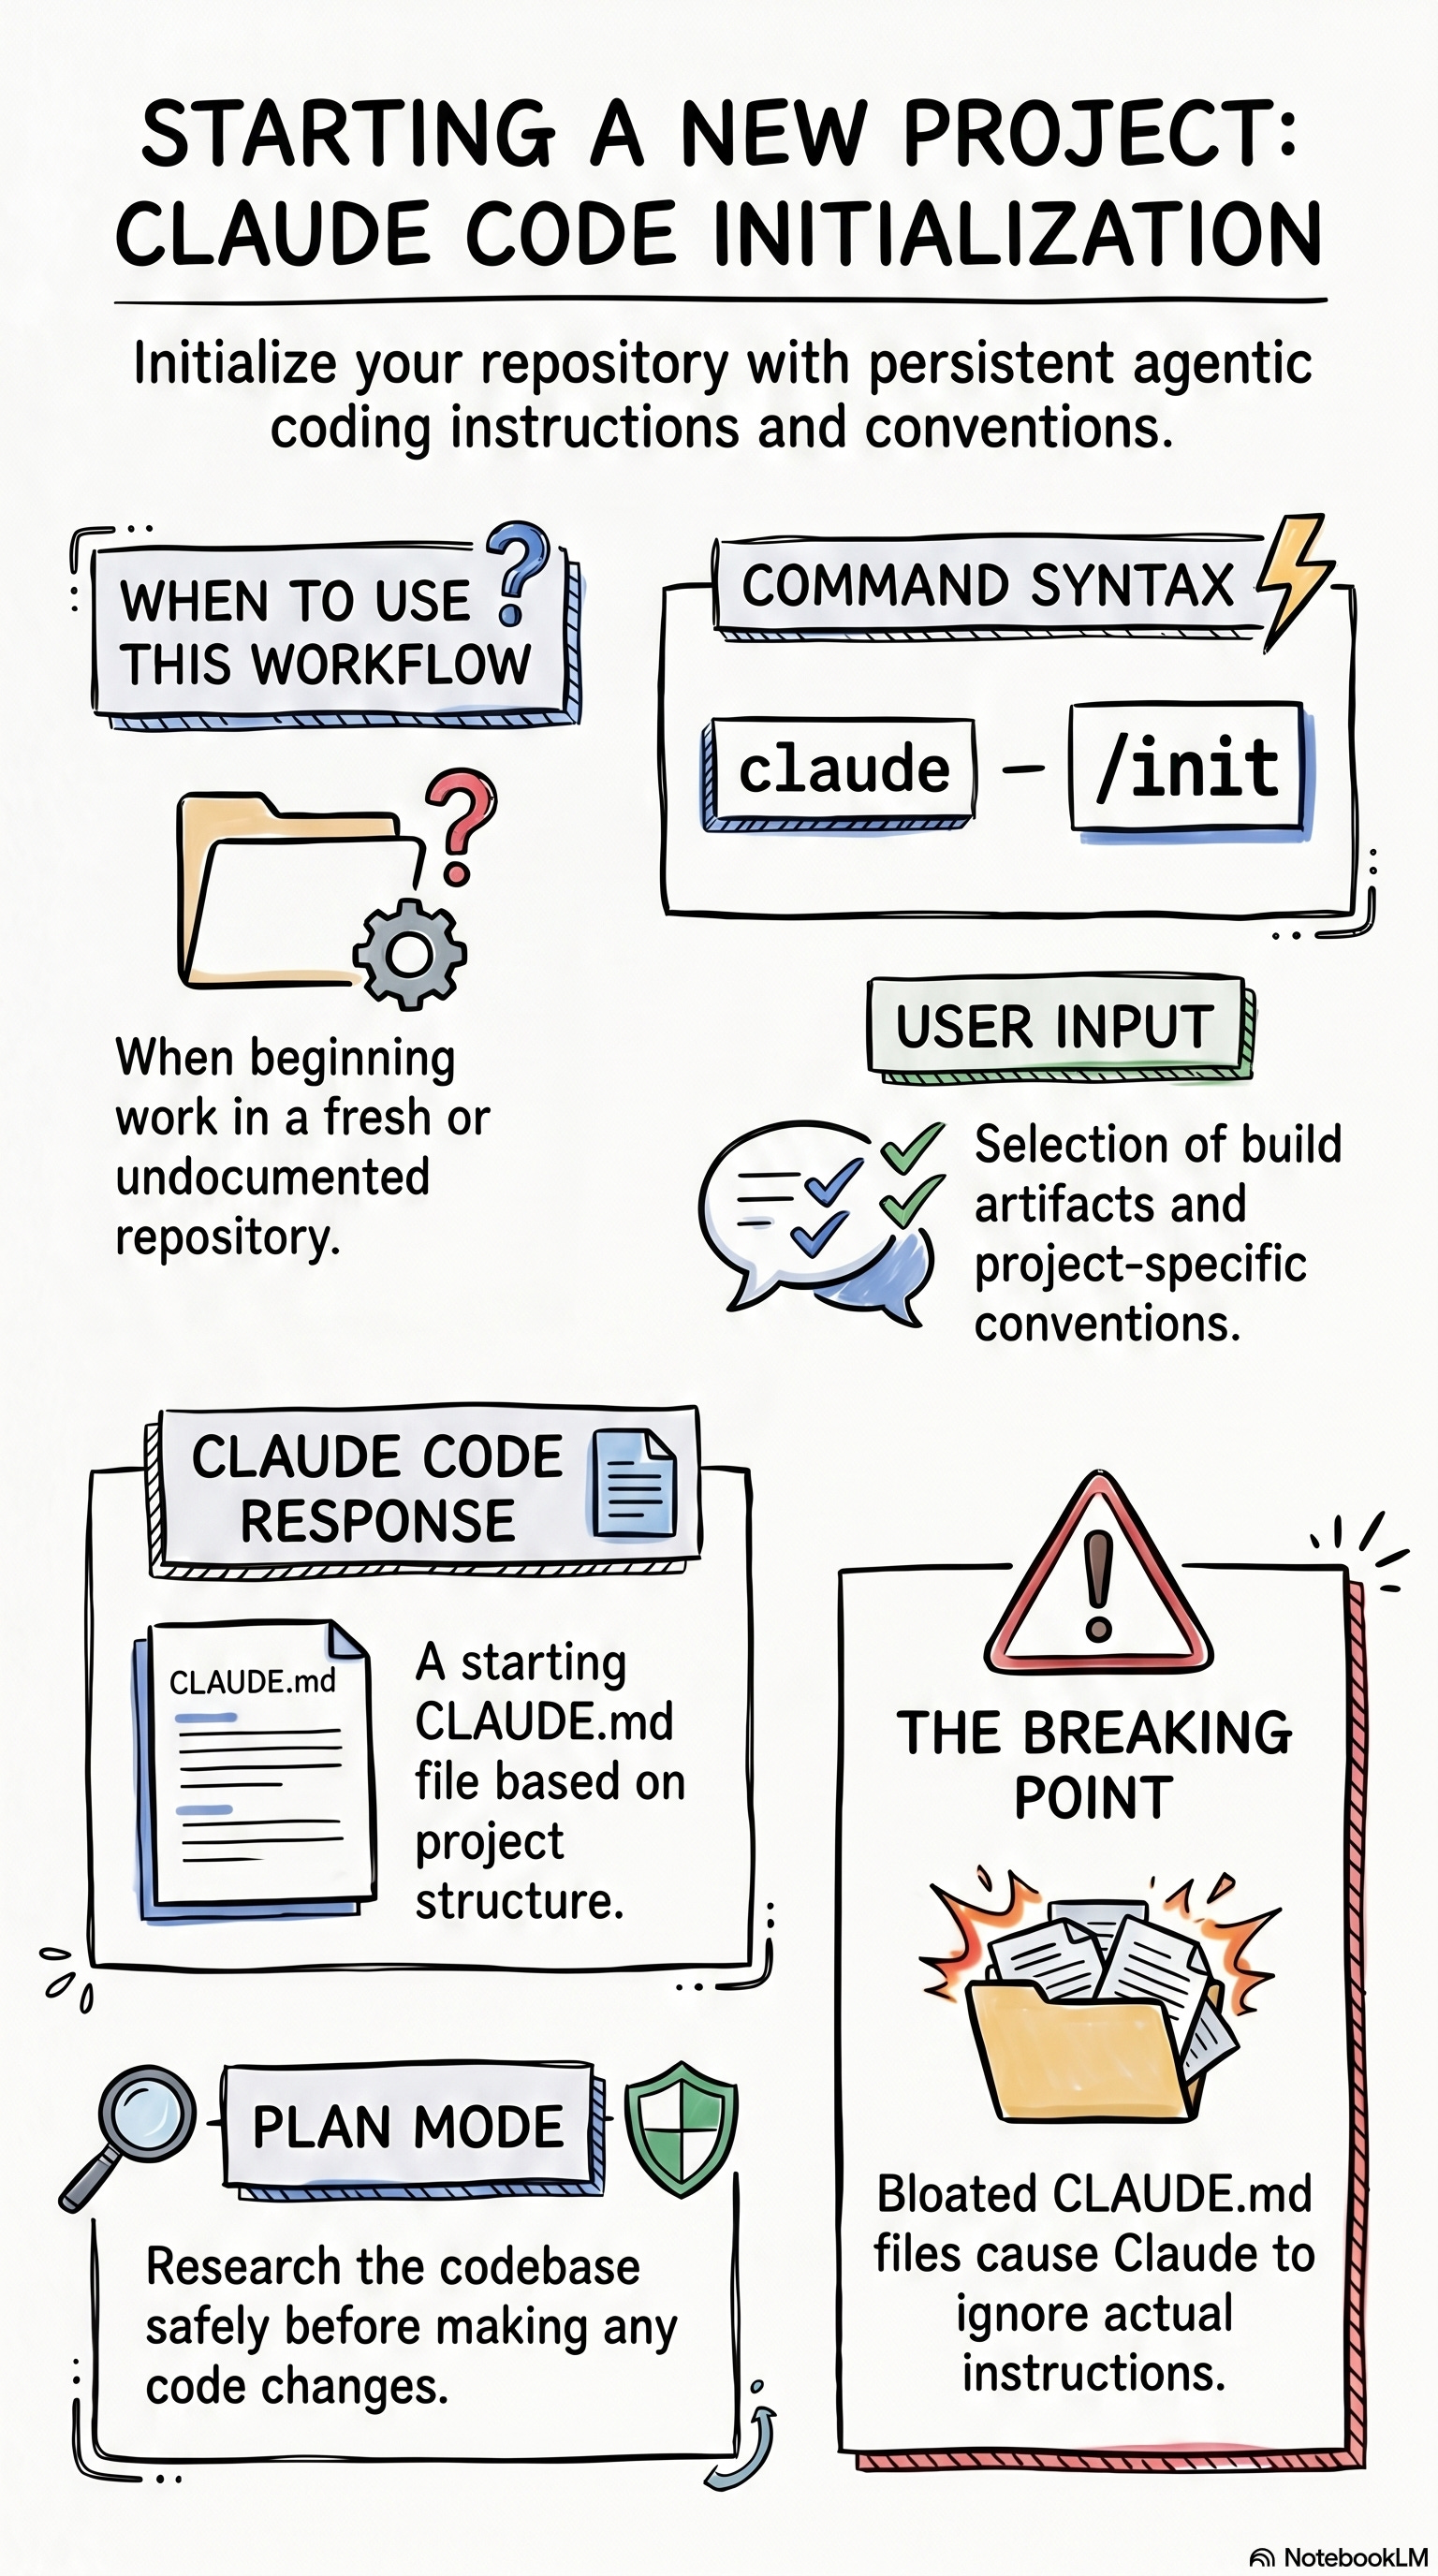
Six blocks. One workflow. One screen.
The Breaking Point is the part that saves you the most time.
Most beginners discover it after wasting an entire week of sessions.
Run this for each workflow you use weekly.
Save the outputs as a folder of cheat sheets.
Open one before you start that workflow. Close it when done.
You stop tab-hopping. Your brain stops bleeding context every ten minutes.
10. The Claude Code “Do I Need This?” Decision Table
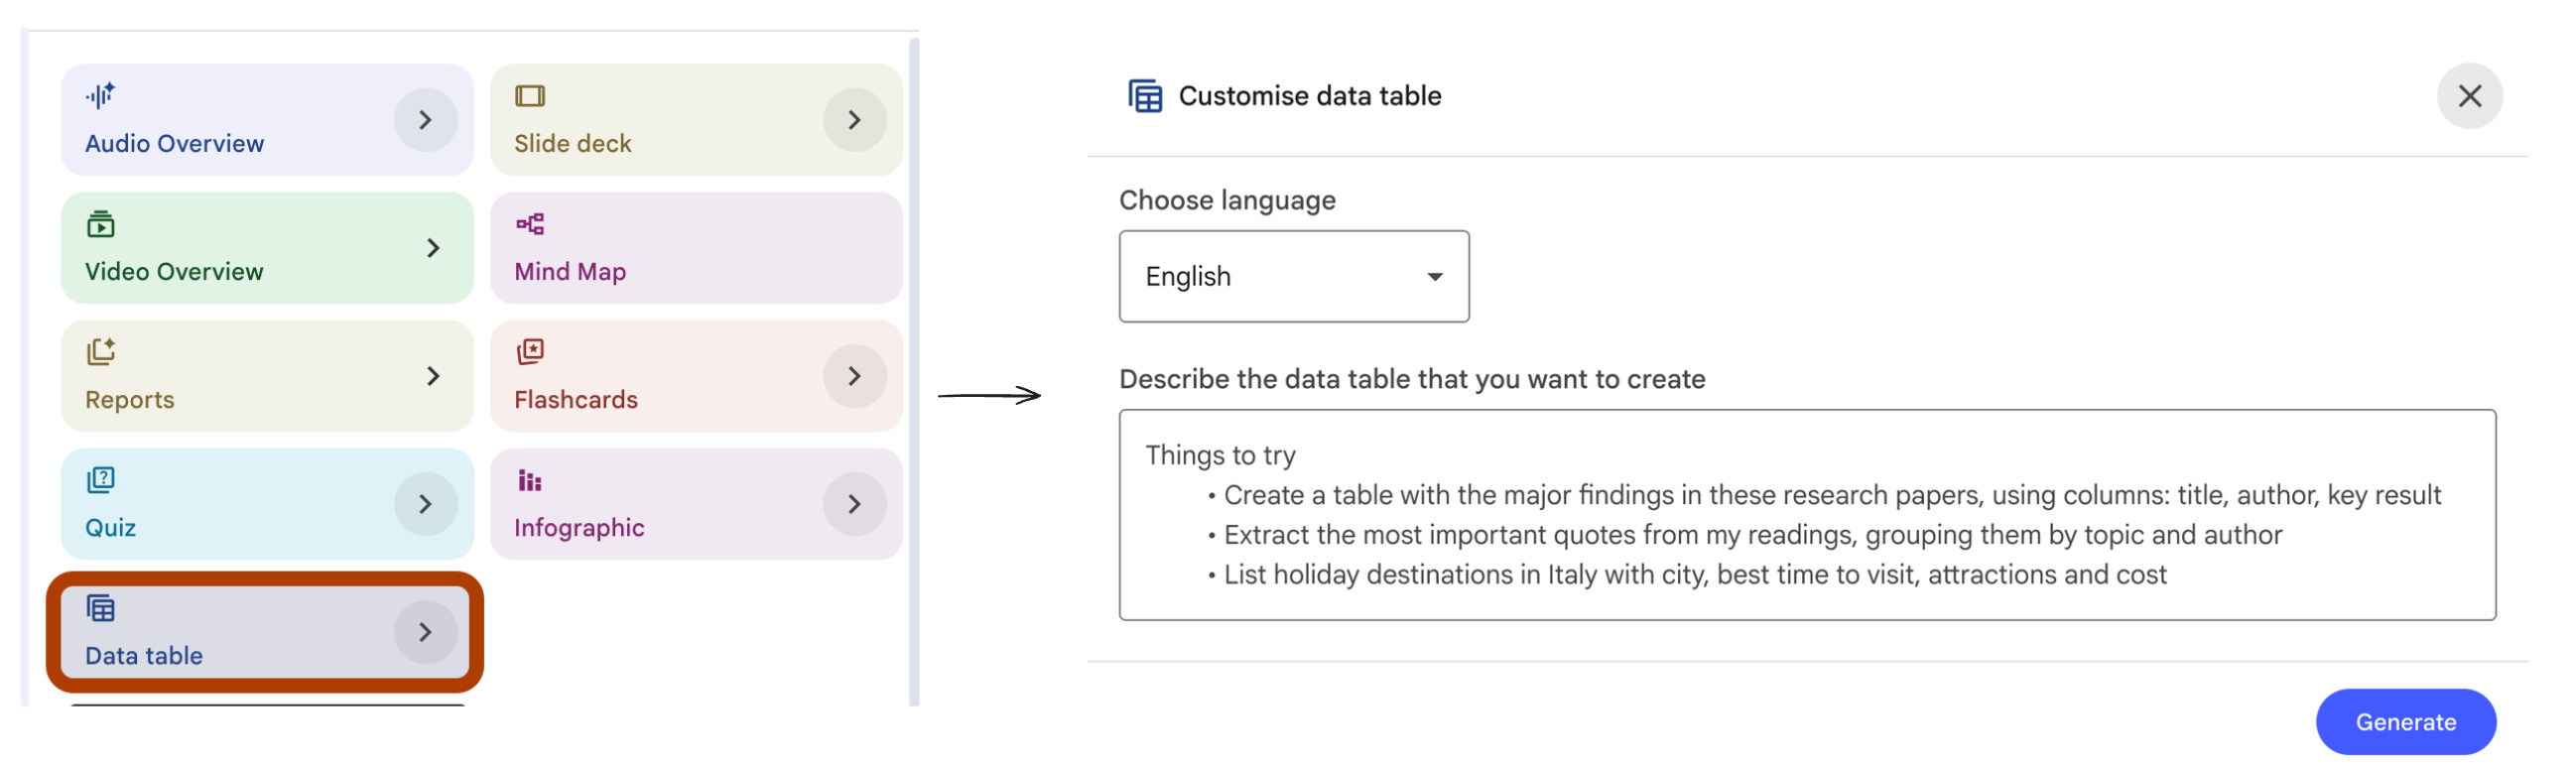
NotebookLM Feature: Data Table
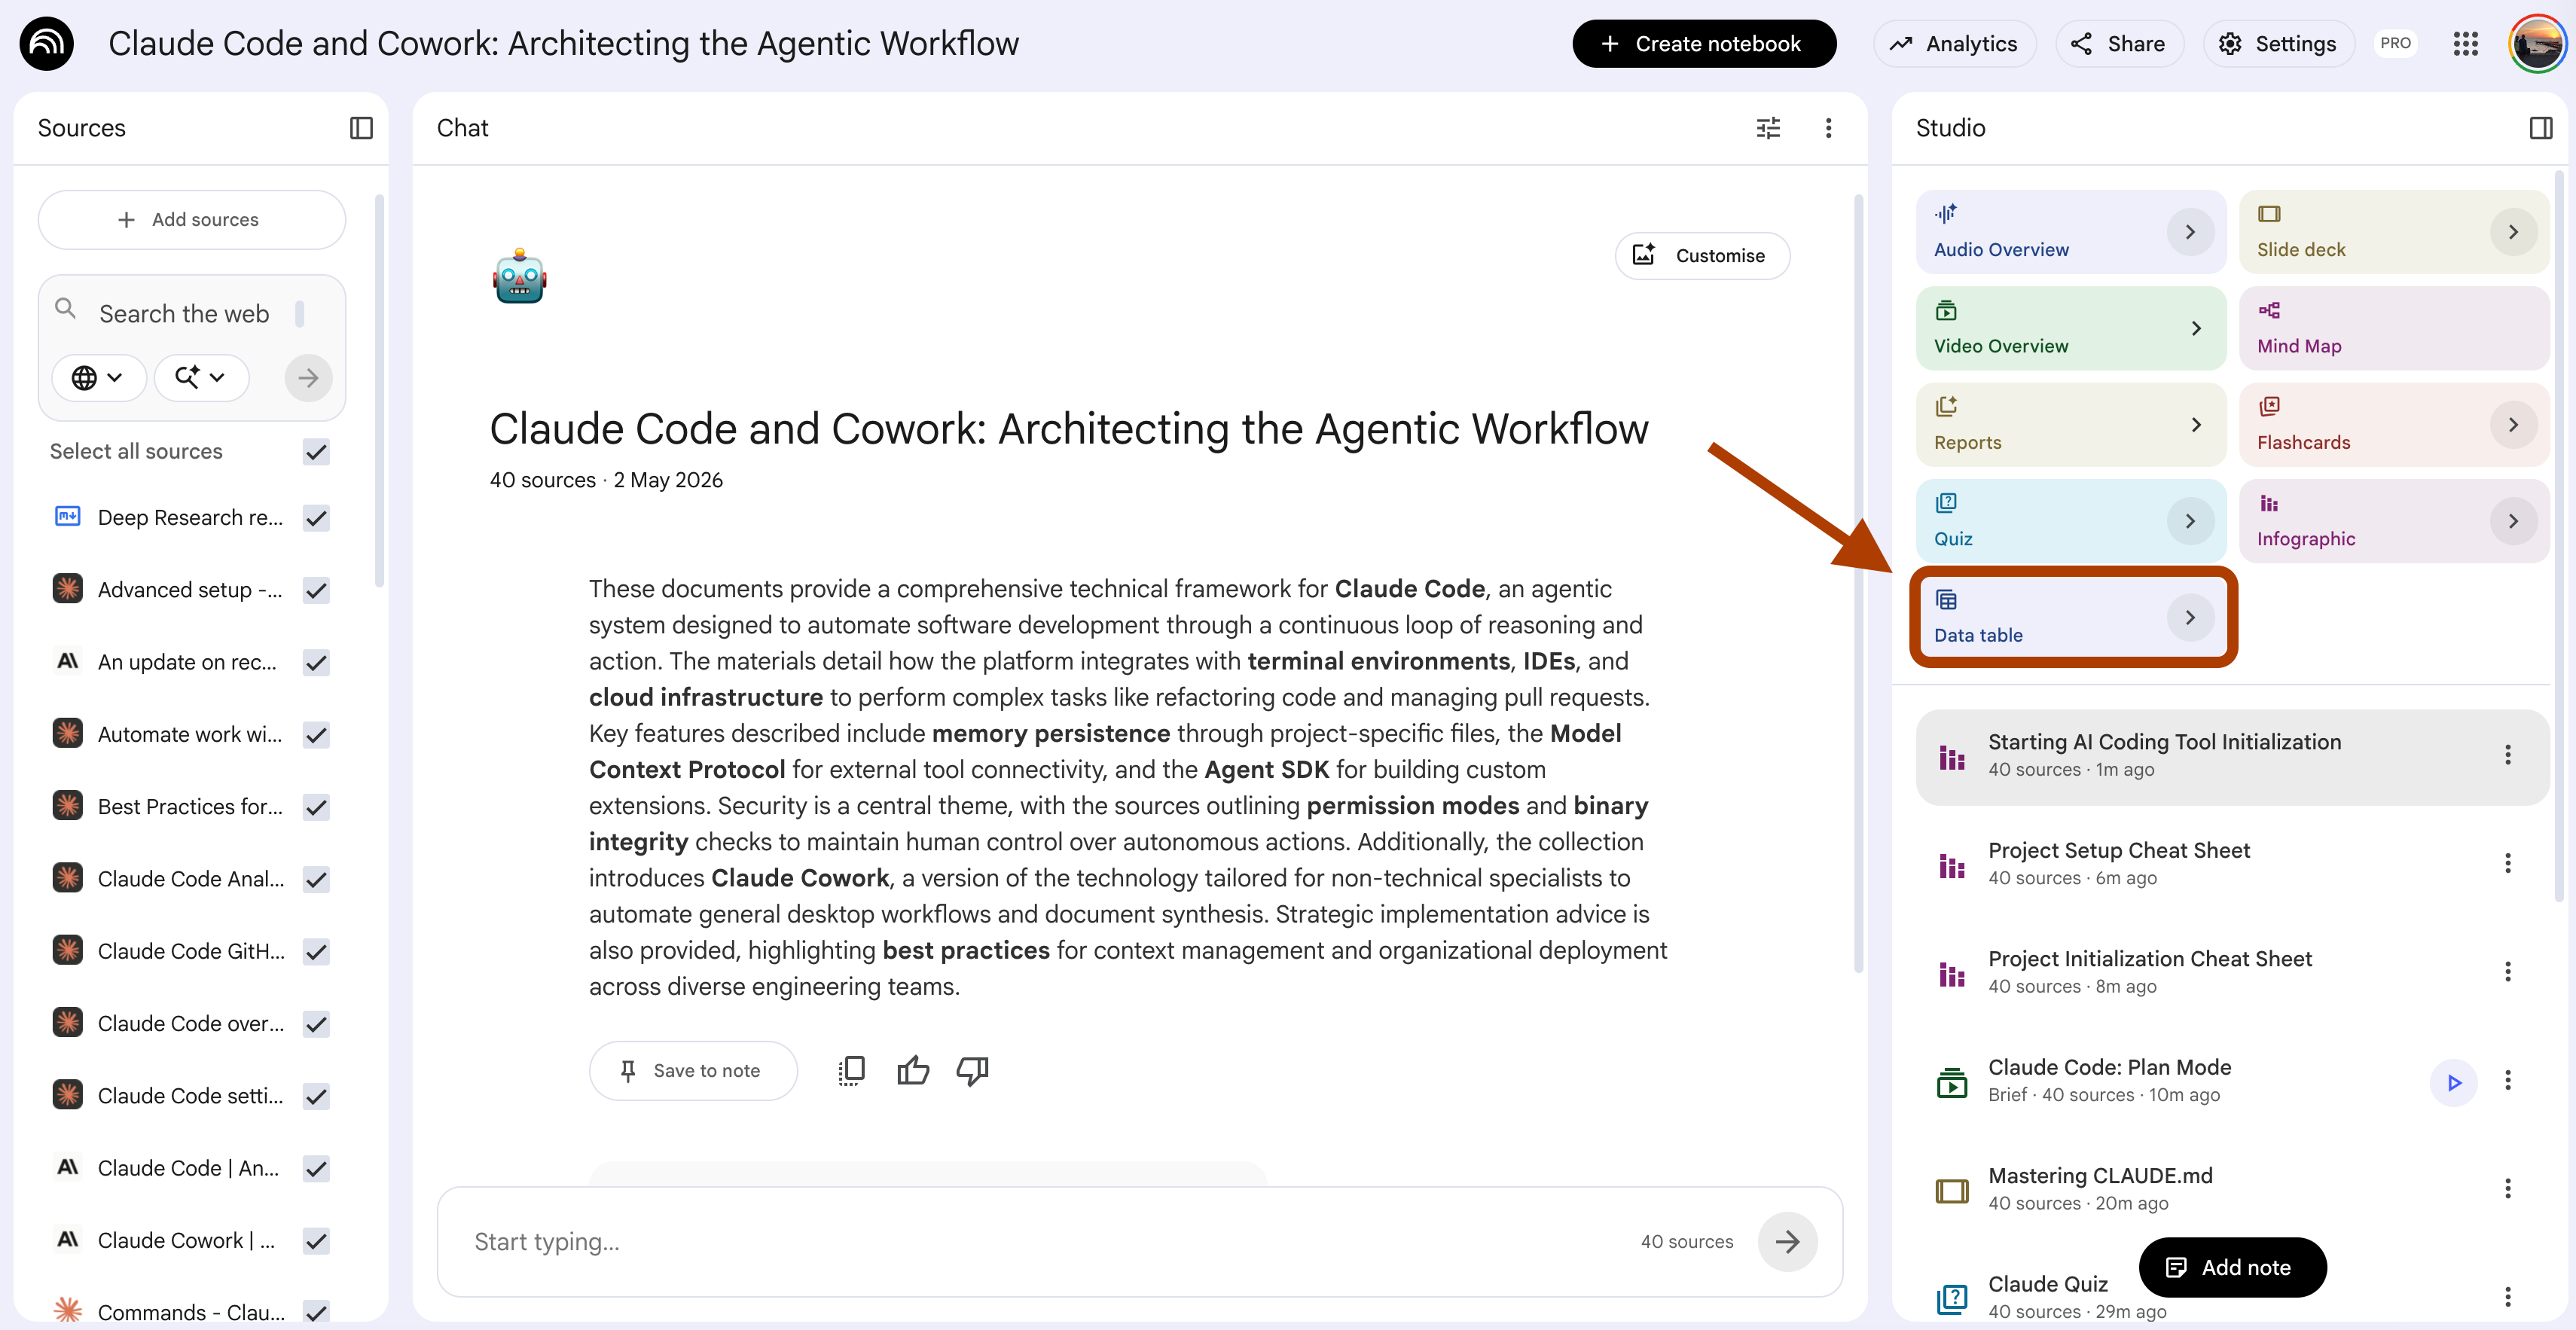
UI selections: Language → English.
Claude Code has a lot of features. CLAUDE.md. Slash commands. MCP. Subagents. Hooks. Skills. Plan mode. Custom commands. Memory.
You read about each one. Each one sounds important. None of them tell you whether you actually need it.
Generic feature lists are useless when you are tired. What you need is a decision table. Same columns for every feature. Apples to apples. One screen, one decision, one minute.
This prompt builds that table from the docs. You scan it once. You know what to learn next and what to skip forever.
Steps: Open your notebook → In Studio, click Data Table.
Extract a decision table from the sources covering every Claude Code
feature mentioned.

Use these exact columns.

Column 1. Feature. The feature name as it appears in the sources.

Column 2. What it does. The job in 8 words or less. Plain language.
No jargon.

Column 3. You need this if. The user situation that makes this
feature worth learning. One short condition. Maximum 12 words.

Column 4. You can skip if. The user situation where this feature is
overkill or irrelevant. One short condition. Maximum 12 words.

Column 5. Setup time. Mark "5 min" if the feature works out of the
box, "30 min" if it requires configuration, "1 hour+" if it requires
custom code or integration setup.

Column 6. Priority. Mark "Day 1" for features beginners need first
week, "Month 1" for features that pay off after basic productivity,
"Later" for features only power users need.

Rules.

Do not invent features. Only include items the sources name
explicitly.

If a cell cannot be filled from the sources, populate it with "N/A"
and do not guess.

Order the rows by Priority column. Day 1 features first. Later
features last. Within the same priority, order by setup time,
shortest first.

If two features overlap in purpose, place them in adjacent rows so
the comparison reads clearly.
I tested this on the Claude Code docs notebook. Here is the trimmed table.
All features. Same six columns. One screen.
The “You can skip if” column is the most useful.
Most feature lists tell you what each thing does. They never tell you who should not bother. This column saves you from learning features you will never use.
Run this once on a fresh notebook. Print the result. Keep it next to your monitor for the first month. After month one, half the features you marked “Later” will start to make sense.
The other half you can keep skipping forever.
What’s Next?
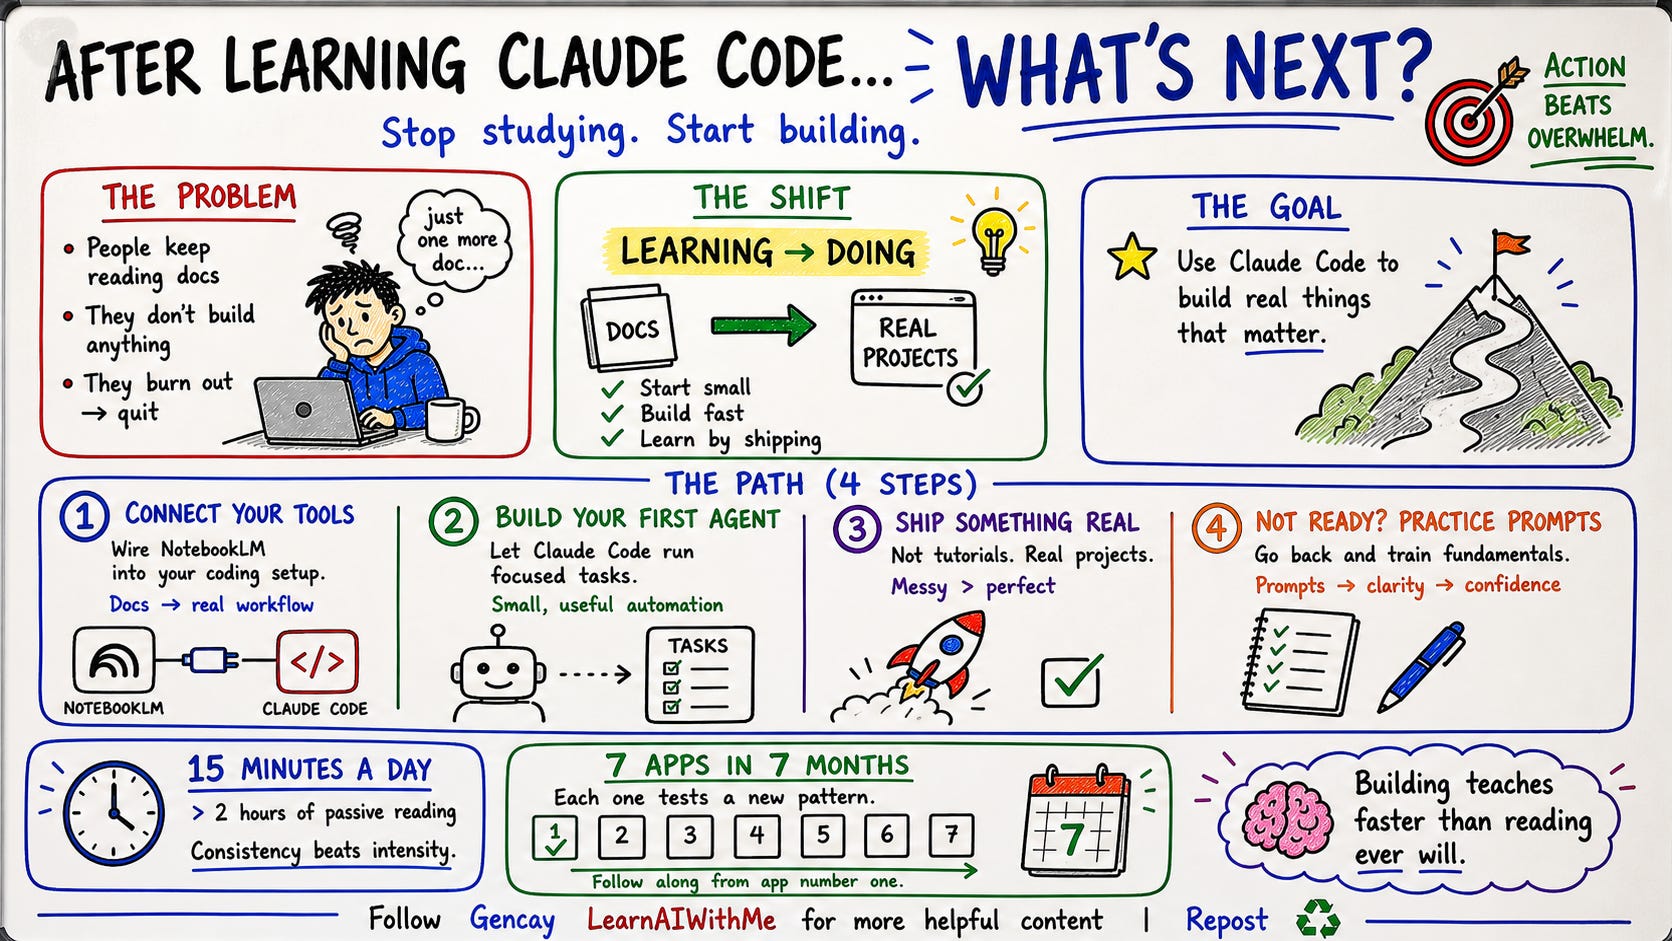
You learned how to study Claude Code without burning out.
Now it is time to use it.
Start small. Build something. Here is the path.
Step 1. Connect NotebookLM to Claude Code.
Once you know the docs, the next move is wiring NotebookLM into your actual coding setup. Read Connect NotebookLM to Any Coding Tool to see how I do it.
Step 2. Build your first agent.
Claude Code is at its best when it runs autonomously on a focused task. Read NotebookLM & Claude Code Agents for the agent pattern I use across 12 clients.
Step 3. Ship something real.
Not a tutorial project. A real one. Read Claude Code: Build. Ship. Repeat. to follow my 7-apps-in-7-months series. App #1 is live.
Step 4. Want more NotebookLM prompts first?
If you are not ready to build yet, read 10 NotebookLM Prompts For Studying for the more prompts.
Studying Claude Code does not have to be a weekend project.
Fifteen minutes a day with these prompts beats two hours of doc scrolling.