
10 NotebookLM Prompts For Studying (Beat 99% of Students)
10 NotebookLM prompts that turn any textbook, paper, or lecture into study guides, flashcards, and exam prep. Copy-paste ready for 2026.


NotebookLM prompts for studying textbooks and lecture notes - Created with MidjourneyMost students use NotebookLM like a smarter Google.
Type a question. Get a paragraph back. Close the tab.
That’s not studying. That’s looking things up.
Studying needs structure. Flashcards, practice exams, weakness analysis, schedules, and teach-back sessions. NotebookLM can do every one of these, but only if you prompt it the right way.
Most students never reach their full potential because they treat the tool as a search engine instead of a study system.
This post fixes that.
Ten NotebookLM prompts for studying, research, and learning.
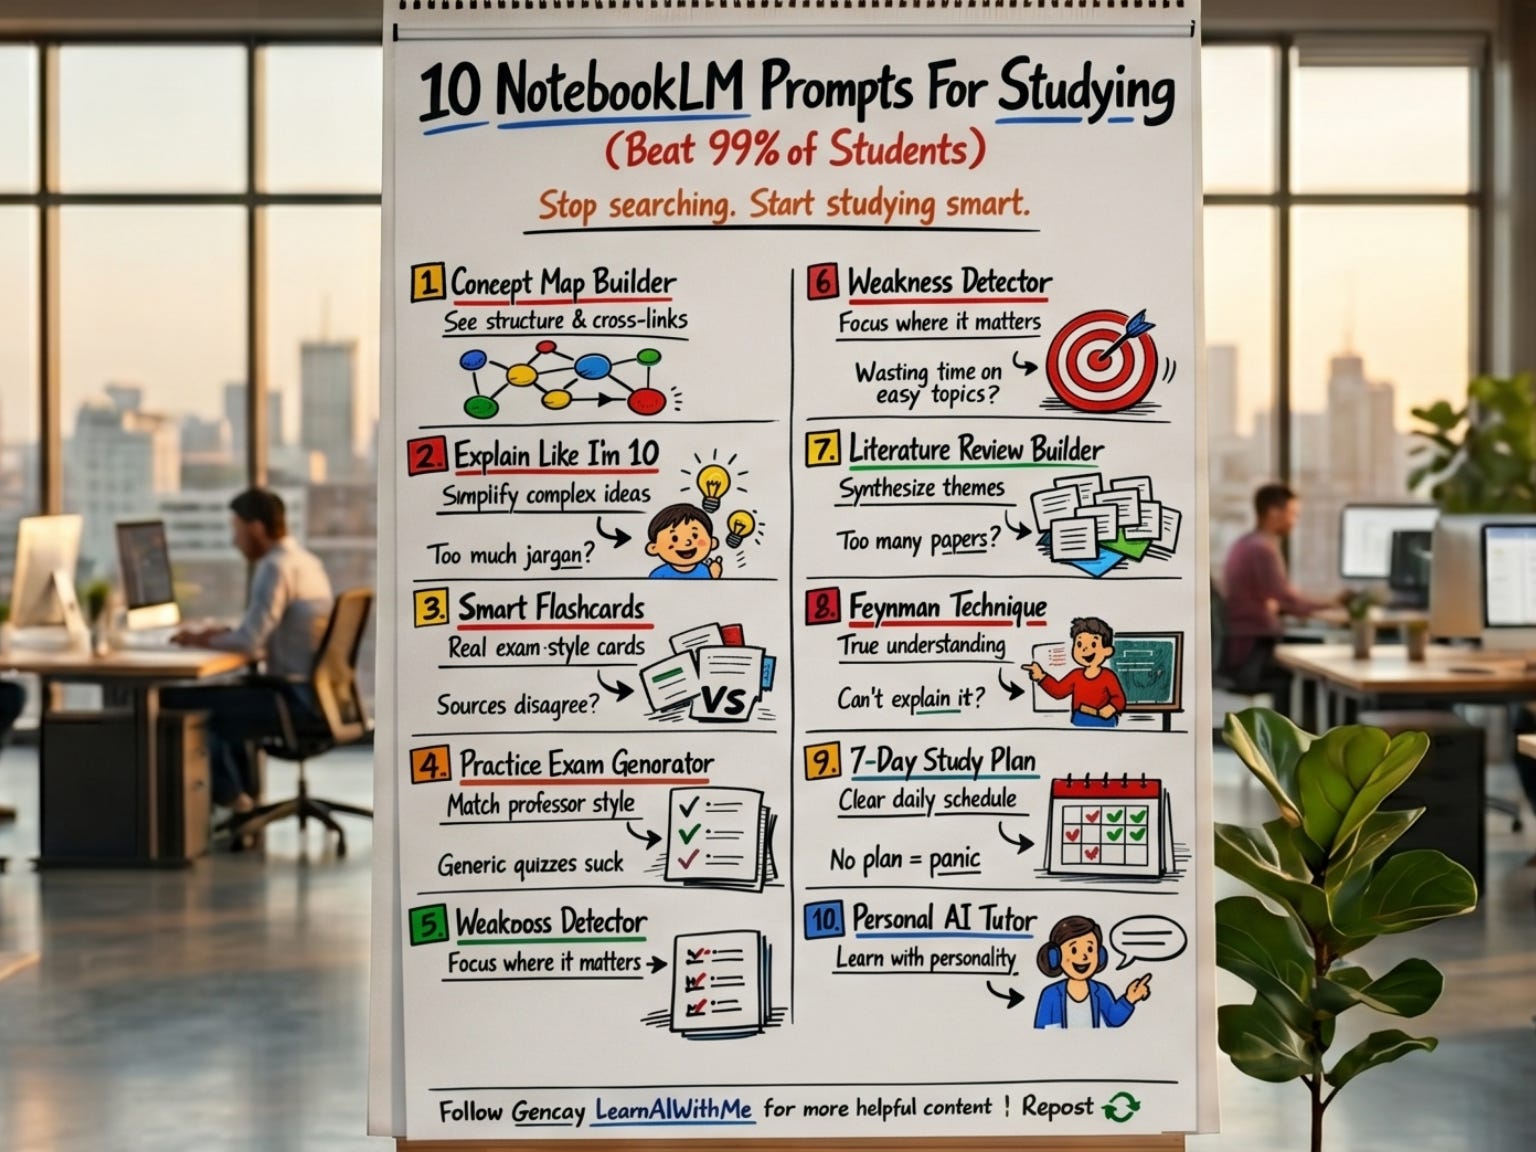
Each one is paired with the Studio feature that complements it.
Each one has a fill-in template you can copy. Each one was tested on a real notebook (mine is trained on Anthropic’s “AI Prompt Engineering: A Deep Dive”).
Zero coding. Nothing to install. Everything happens inside NotebookLM.
If you are a student, these will replace half the apps in your study stack.
If you learn things on the job, papers, internal docs, and technical manuals, the same prompts work.
Let’s start with why NotebookLM beats every other AI tool for this specific job.
What is NotebookLM?
NotebookLM is designed to be an AI research tool.
It is designed to help students or researchers.
You can learn anything faster, using this one, so we’ll discover.
But first, let’s see how to train NotebookLM.
Note: NotebookLM is more than a AI research tool, you can connect with Gemini.
How to train NotebookLM?
To train NotebookLM, follow these steps;
Steps: Visit here → Click on “Try NotebookLM” → Click on “Create new” → Add any source
And you’re done.
As you can see, all actions are done here in the Studio.
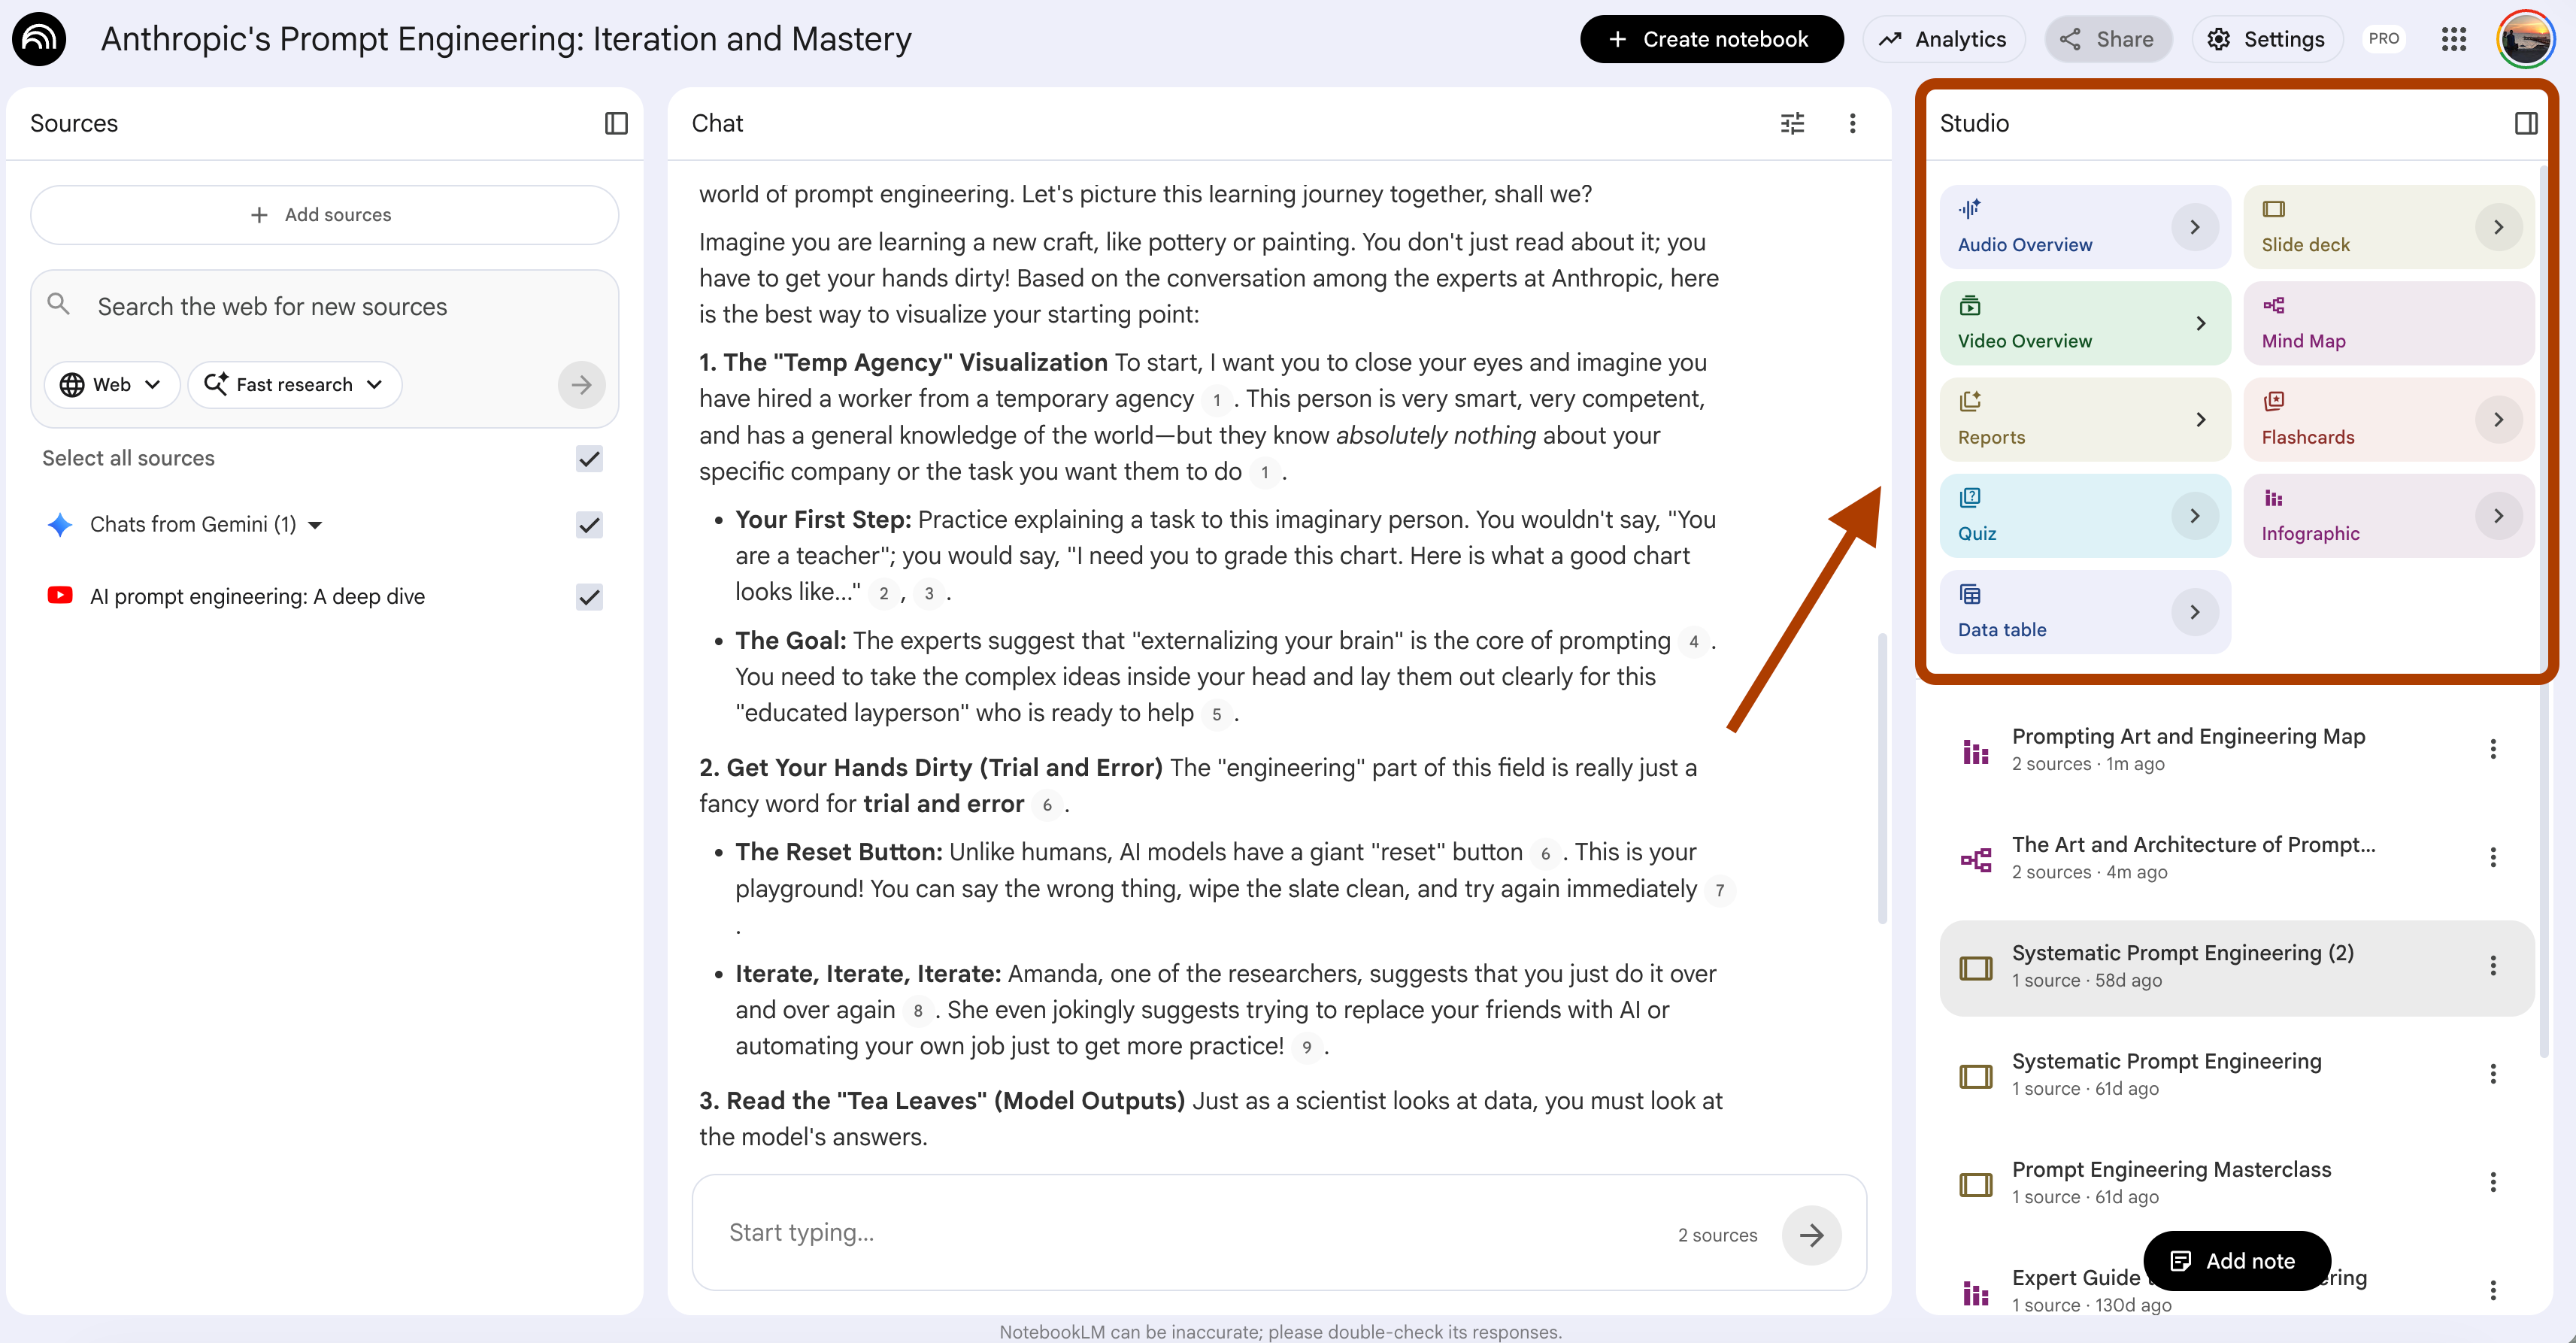
This is where we’ll explore.
Note: NotebookLM is more than a AI research tool, you can connect with Gemini.
Prompt 1: Turn Any Lecture Into a Concept Map (Mind Map Feature + Custom Prompt)
You leave a 2-hour lecture with 10 pages of notes.
A week later, you can’t remember how anything connects.
The 1-click way: Mind Map feature
Open your notebook.
In the Studio panel, click Mind Map.
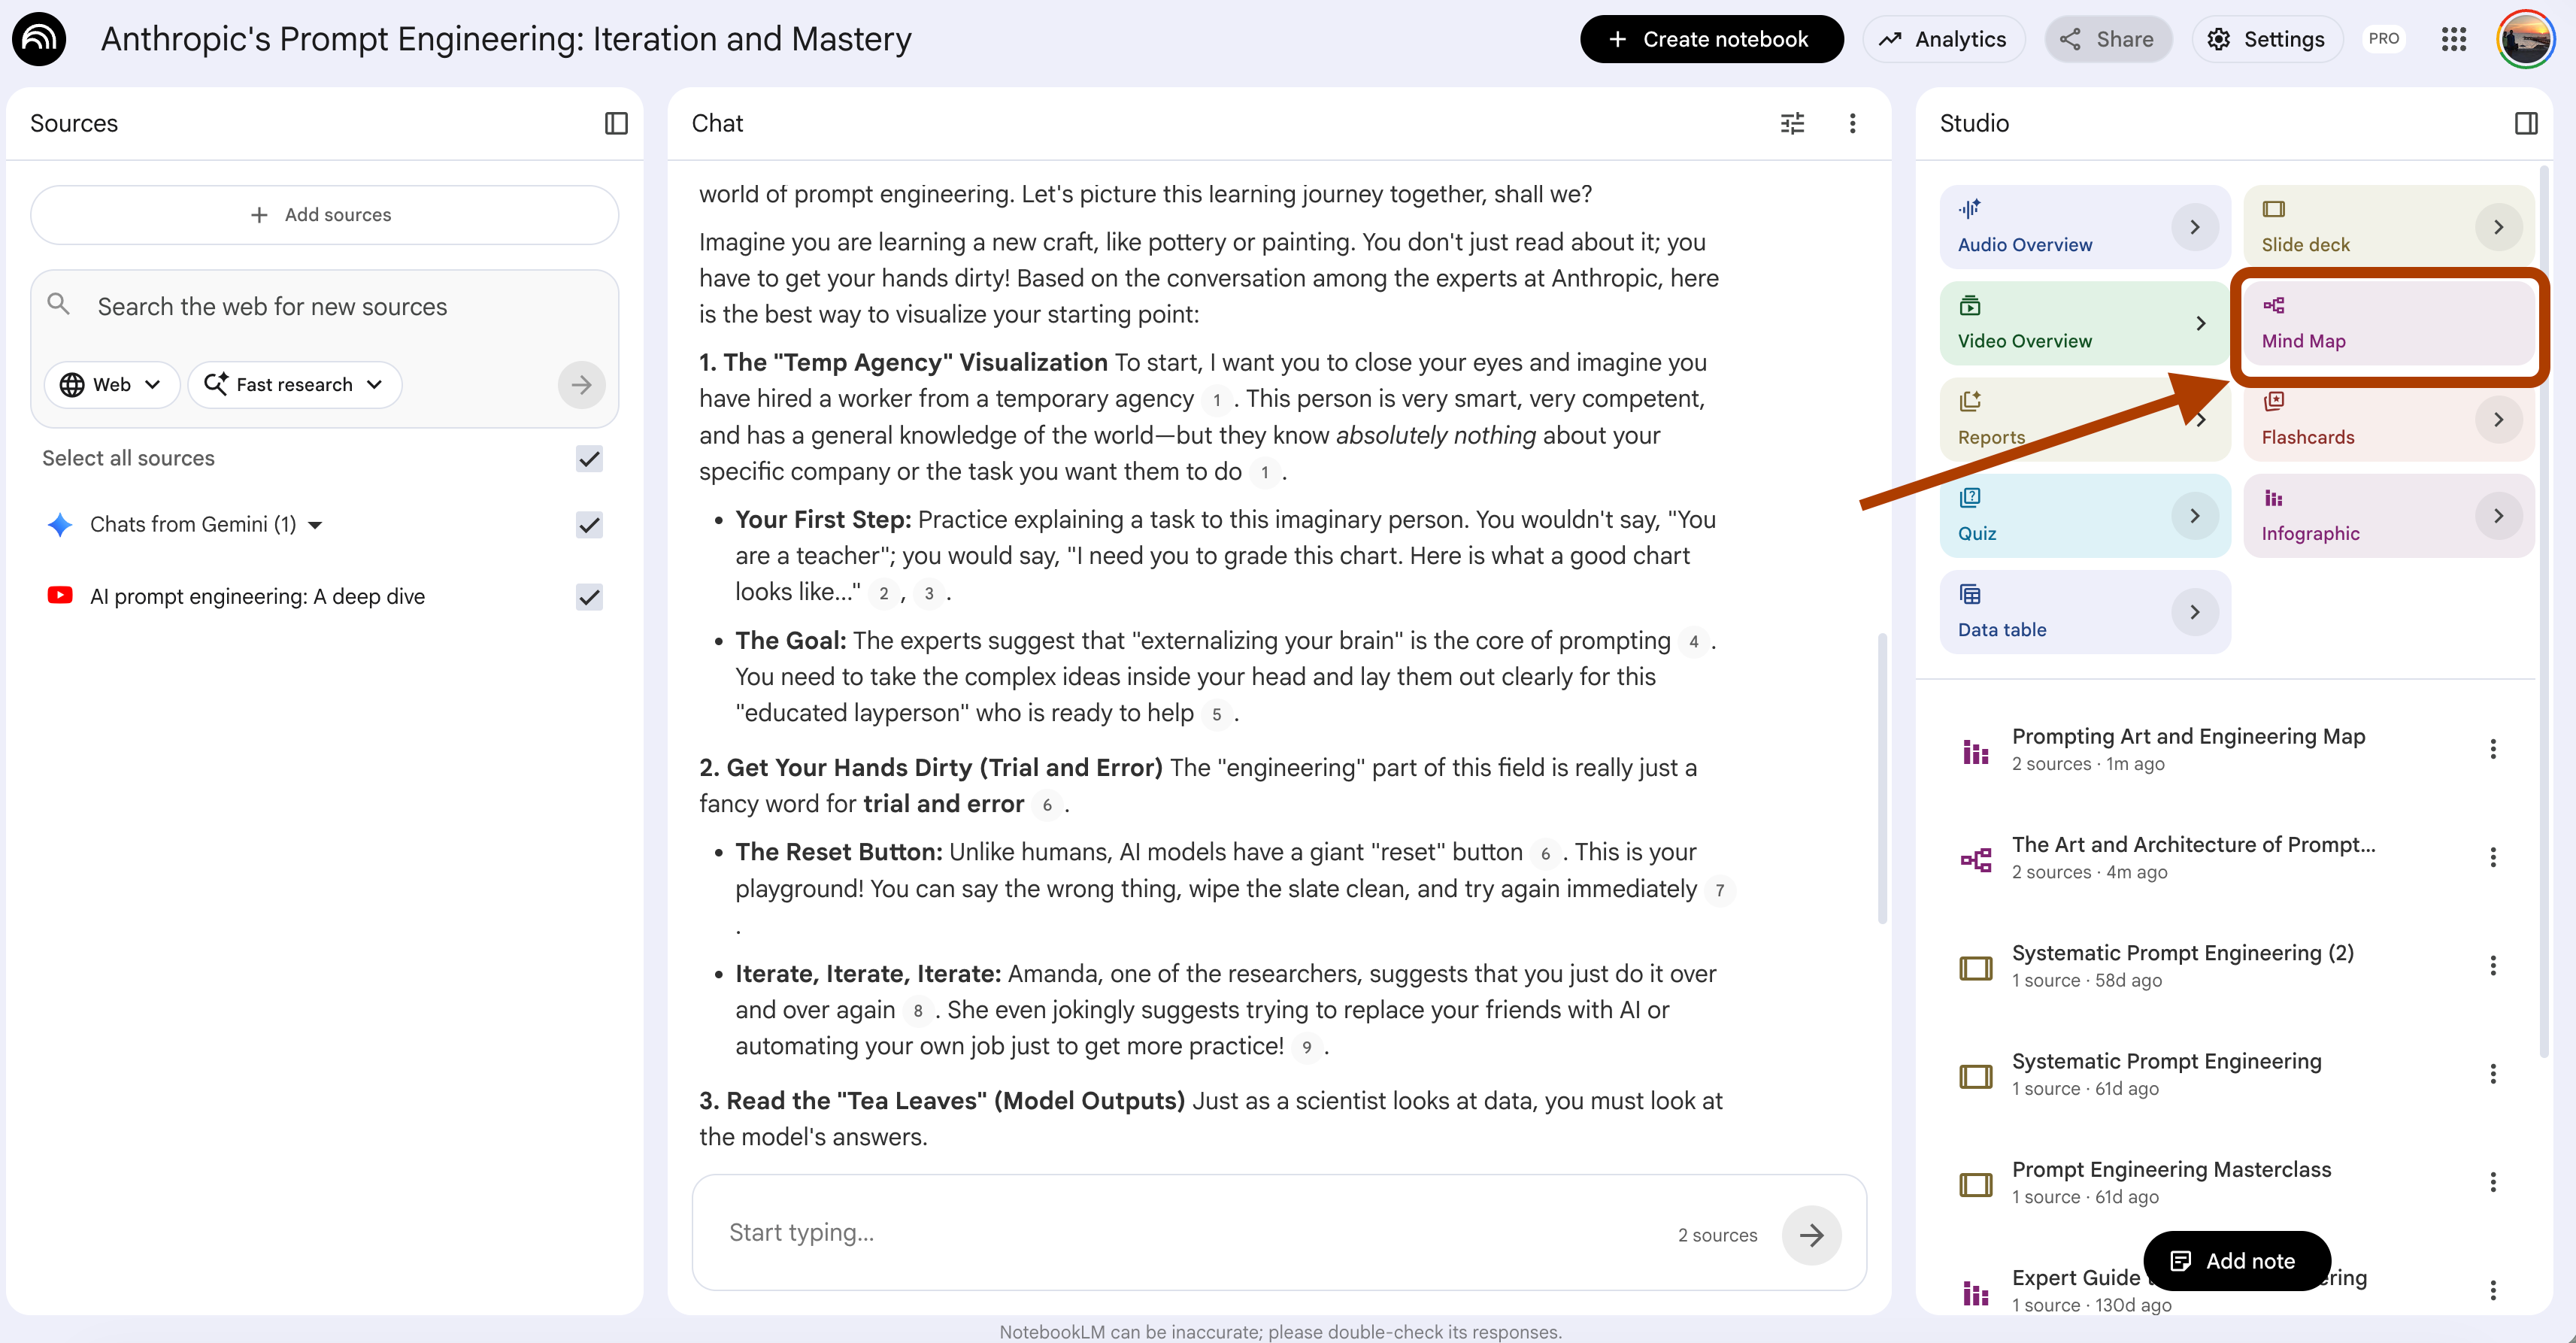
In seconds, NotebookLM builds a hierarchical map from your sources. Zoom in, zoom out, expand branches.
No prompt needed.
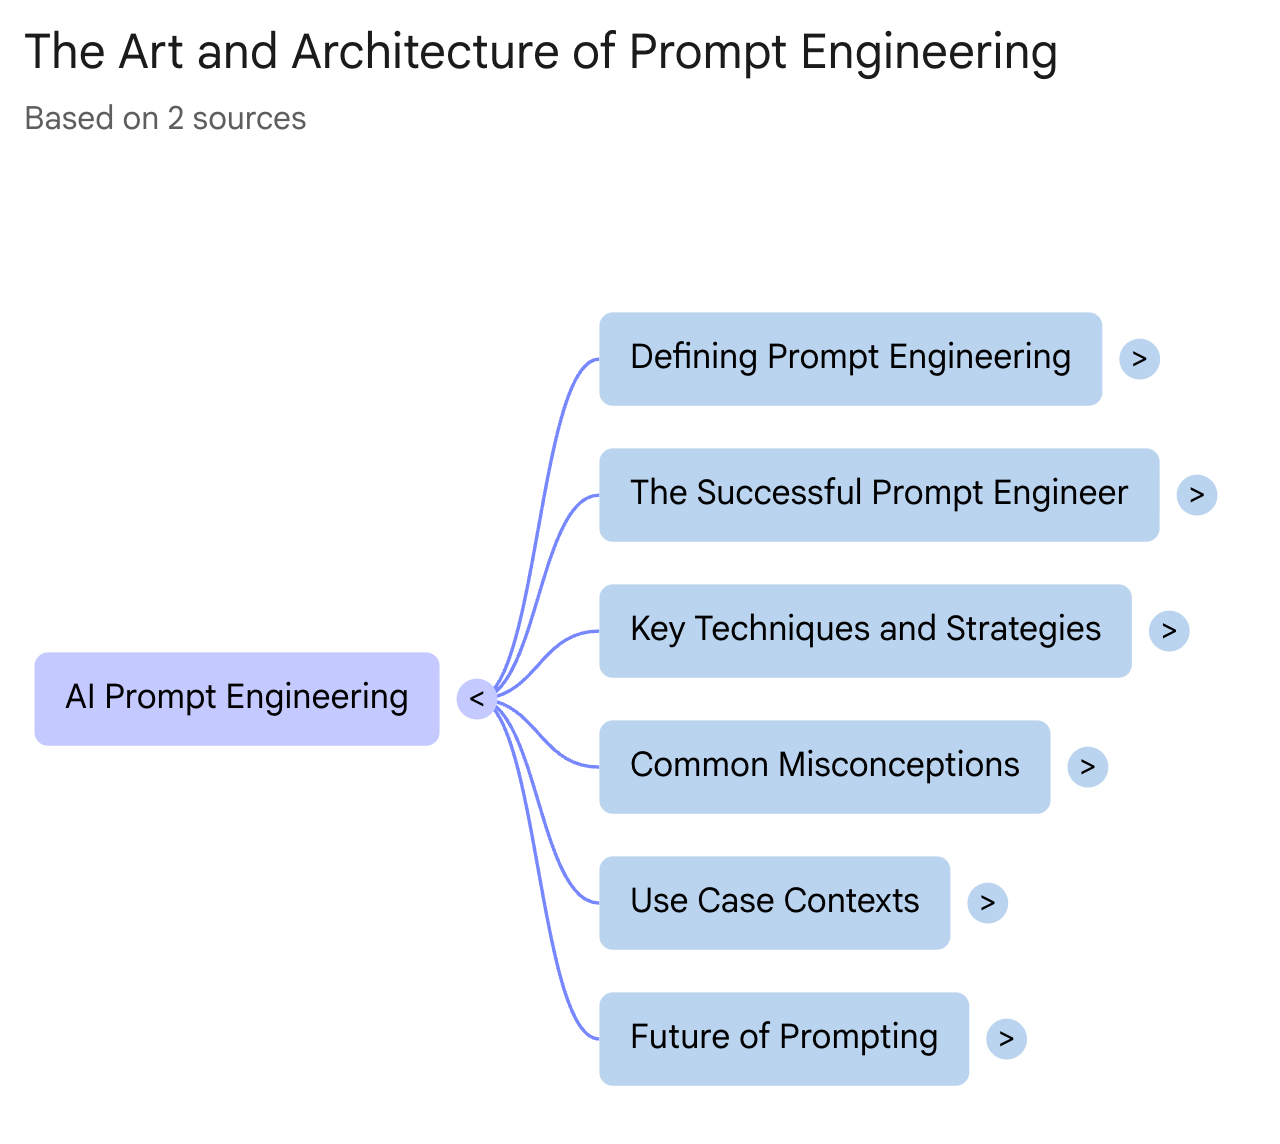
This is enough when you need a quick overview of the night before a test, or when you want to recall the structure fast.
Click on any of these concepts and continue from here.
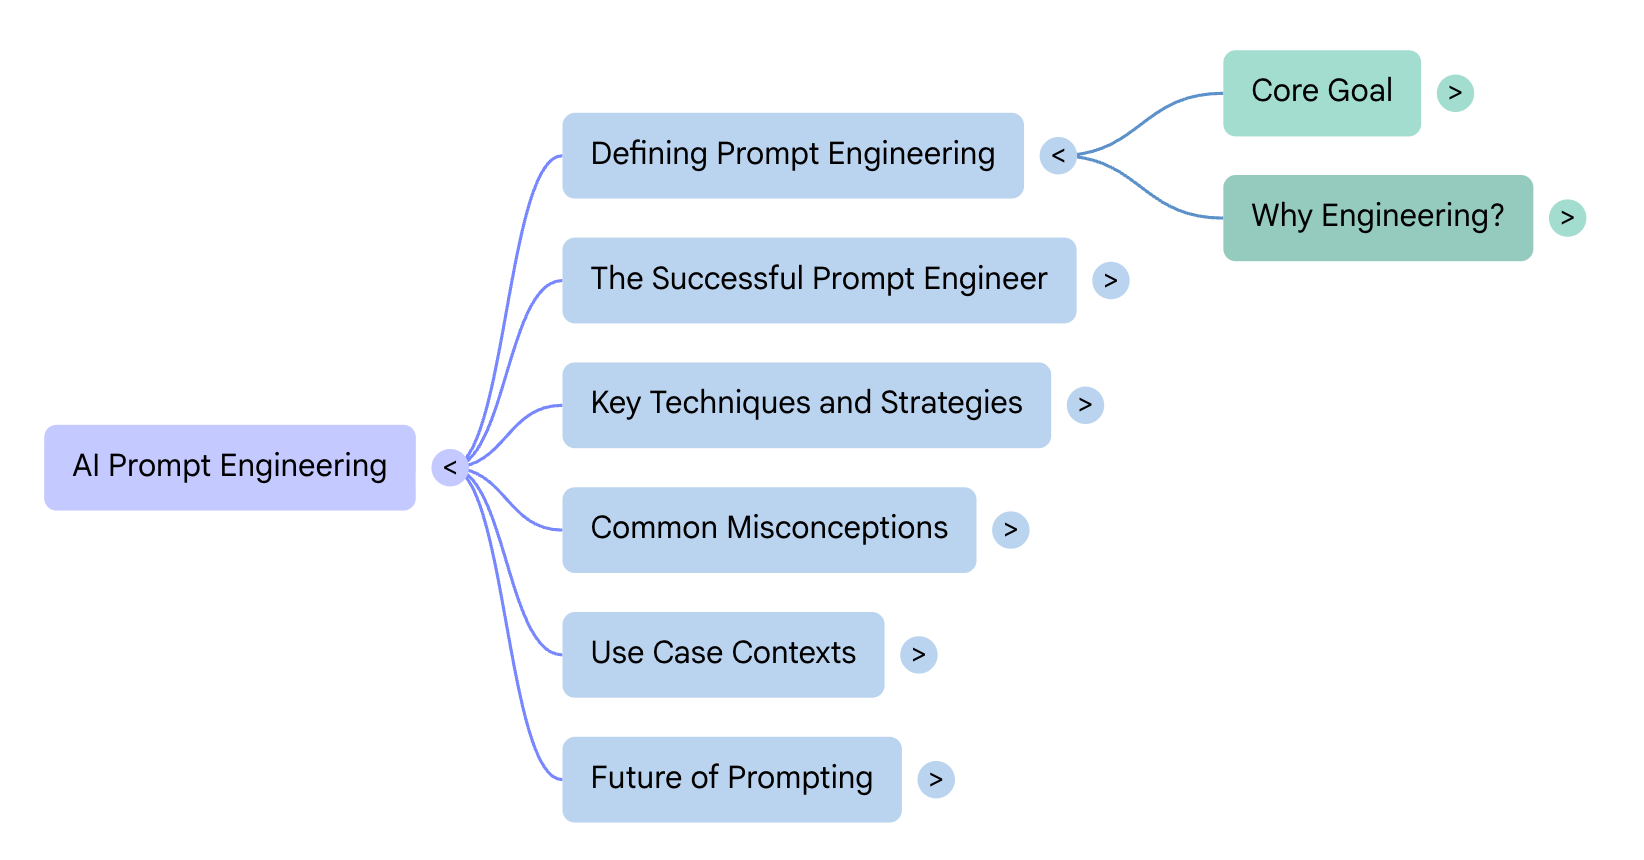
But Mind Map has a limit. It shows hierarchy. It does not show cross-connections — the links between ideas in different branches.
That’s where most of learning actually lives.
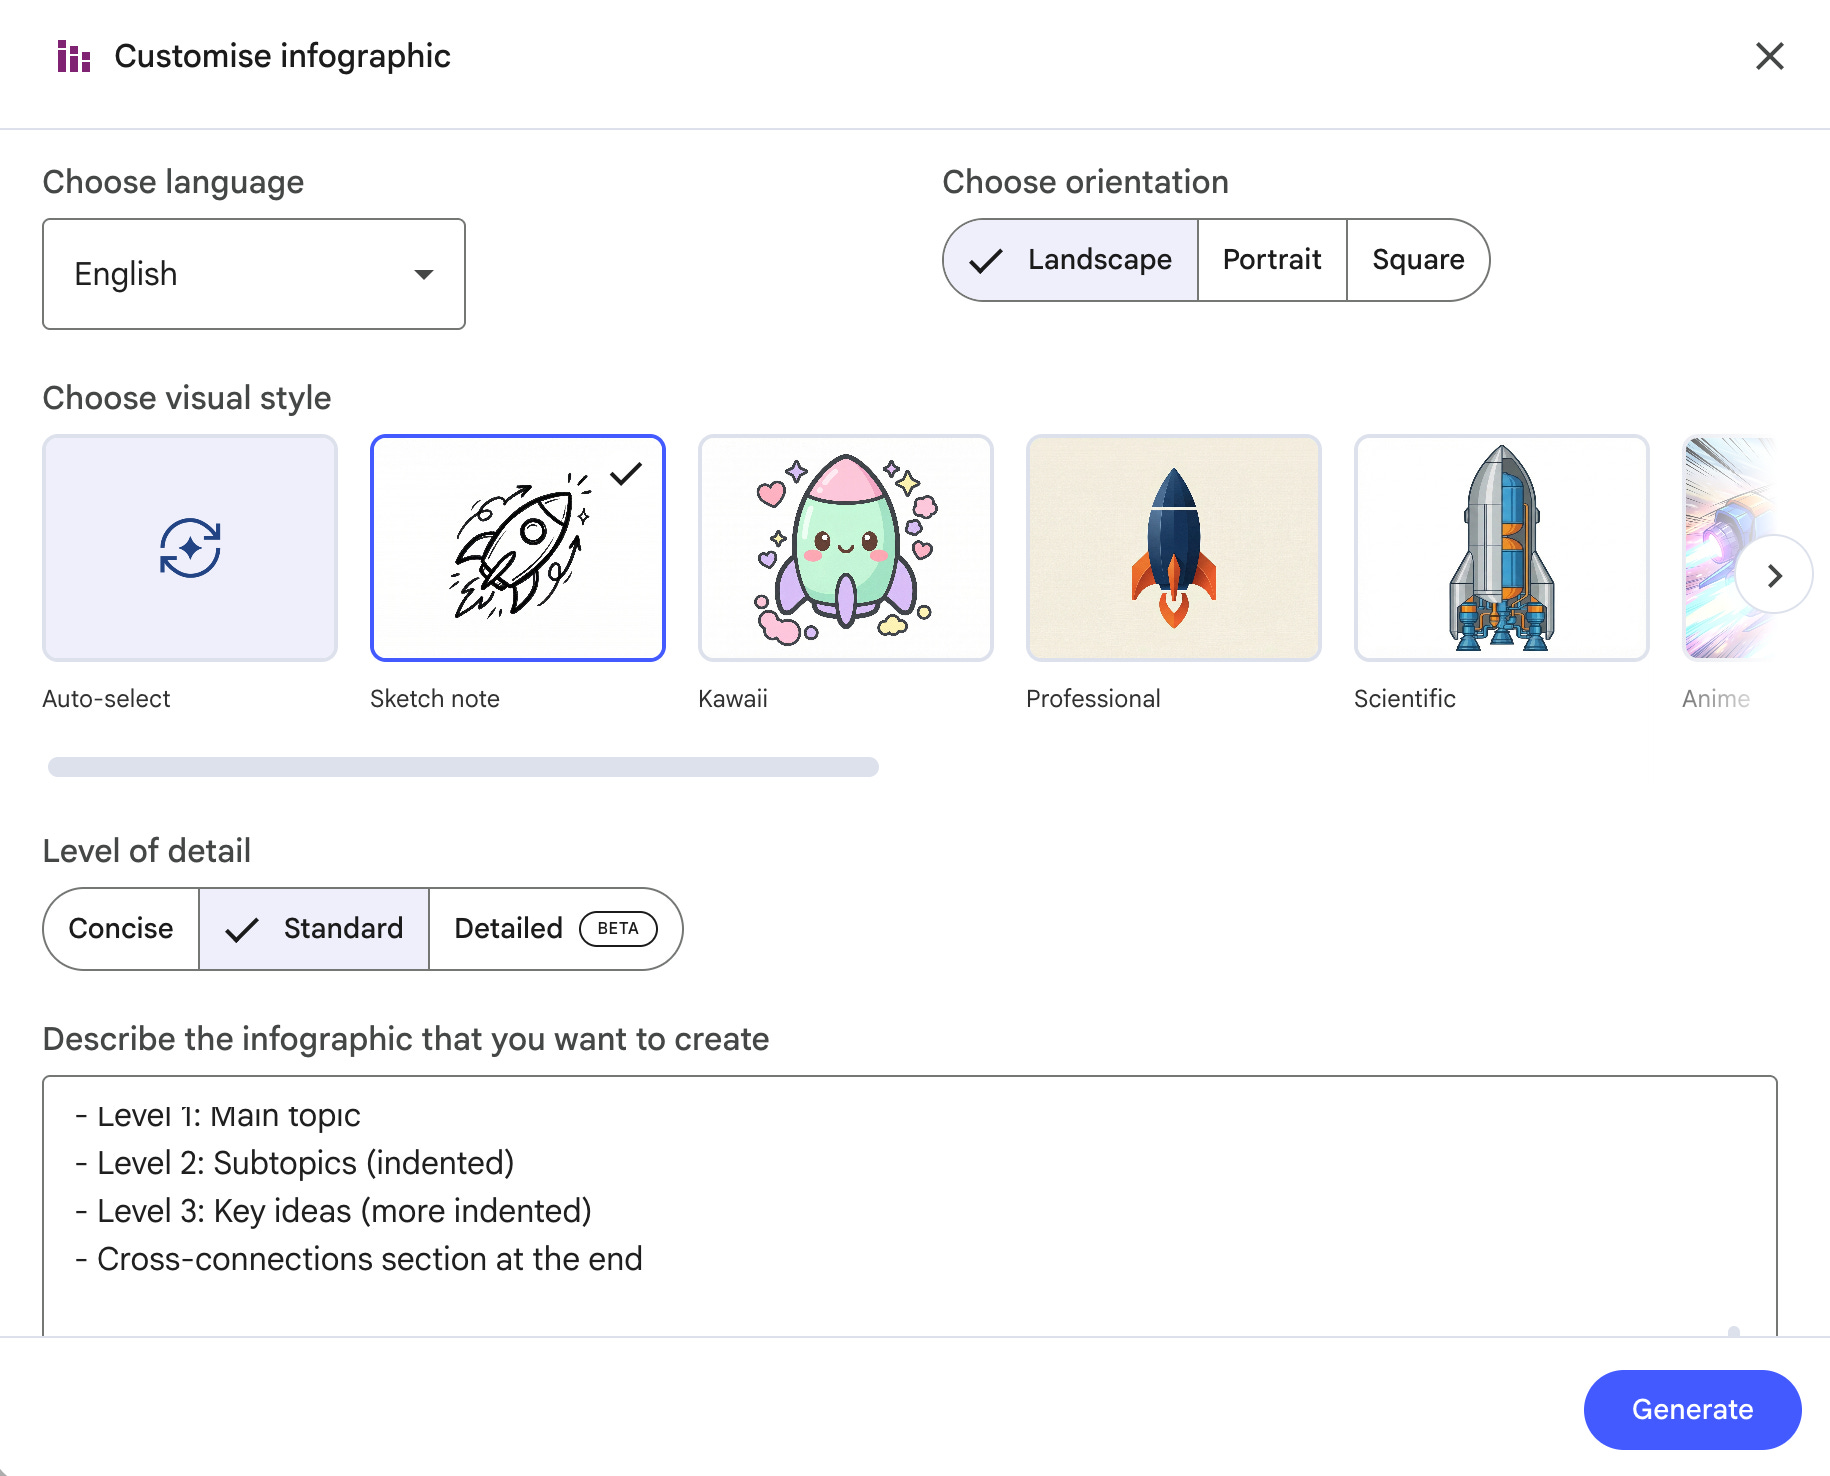
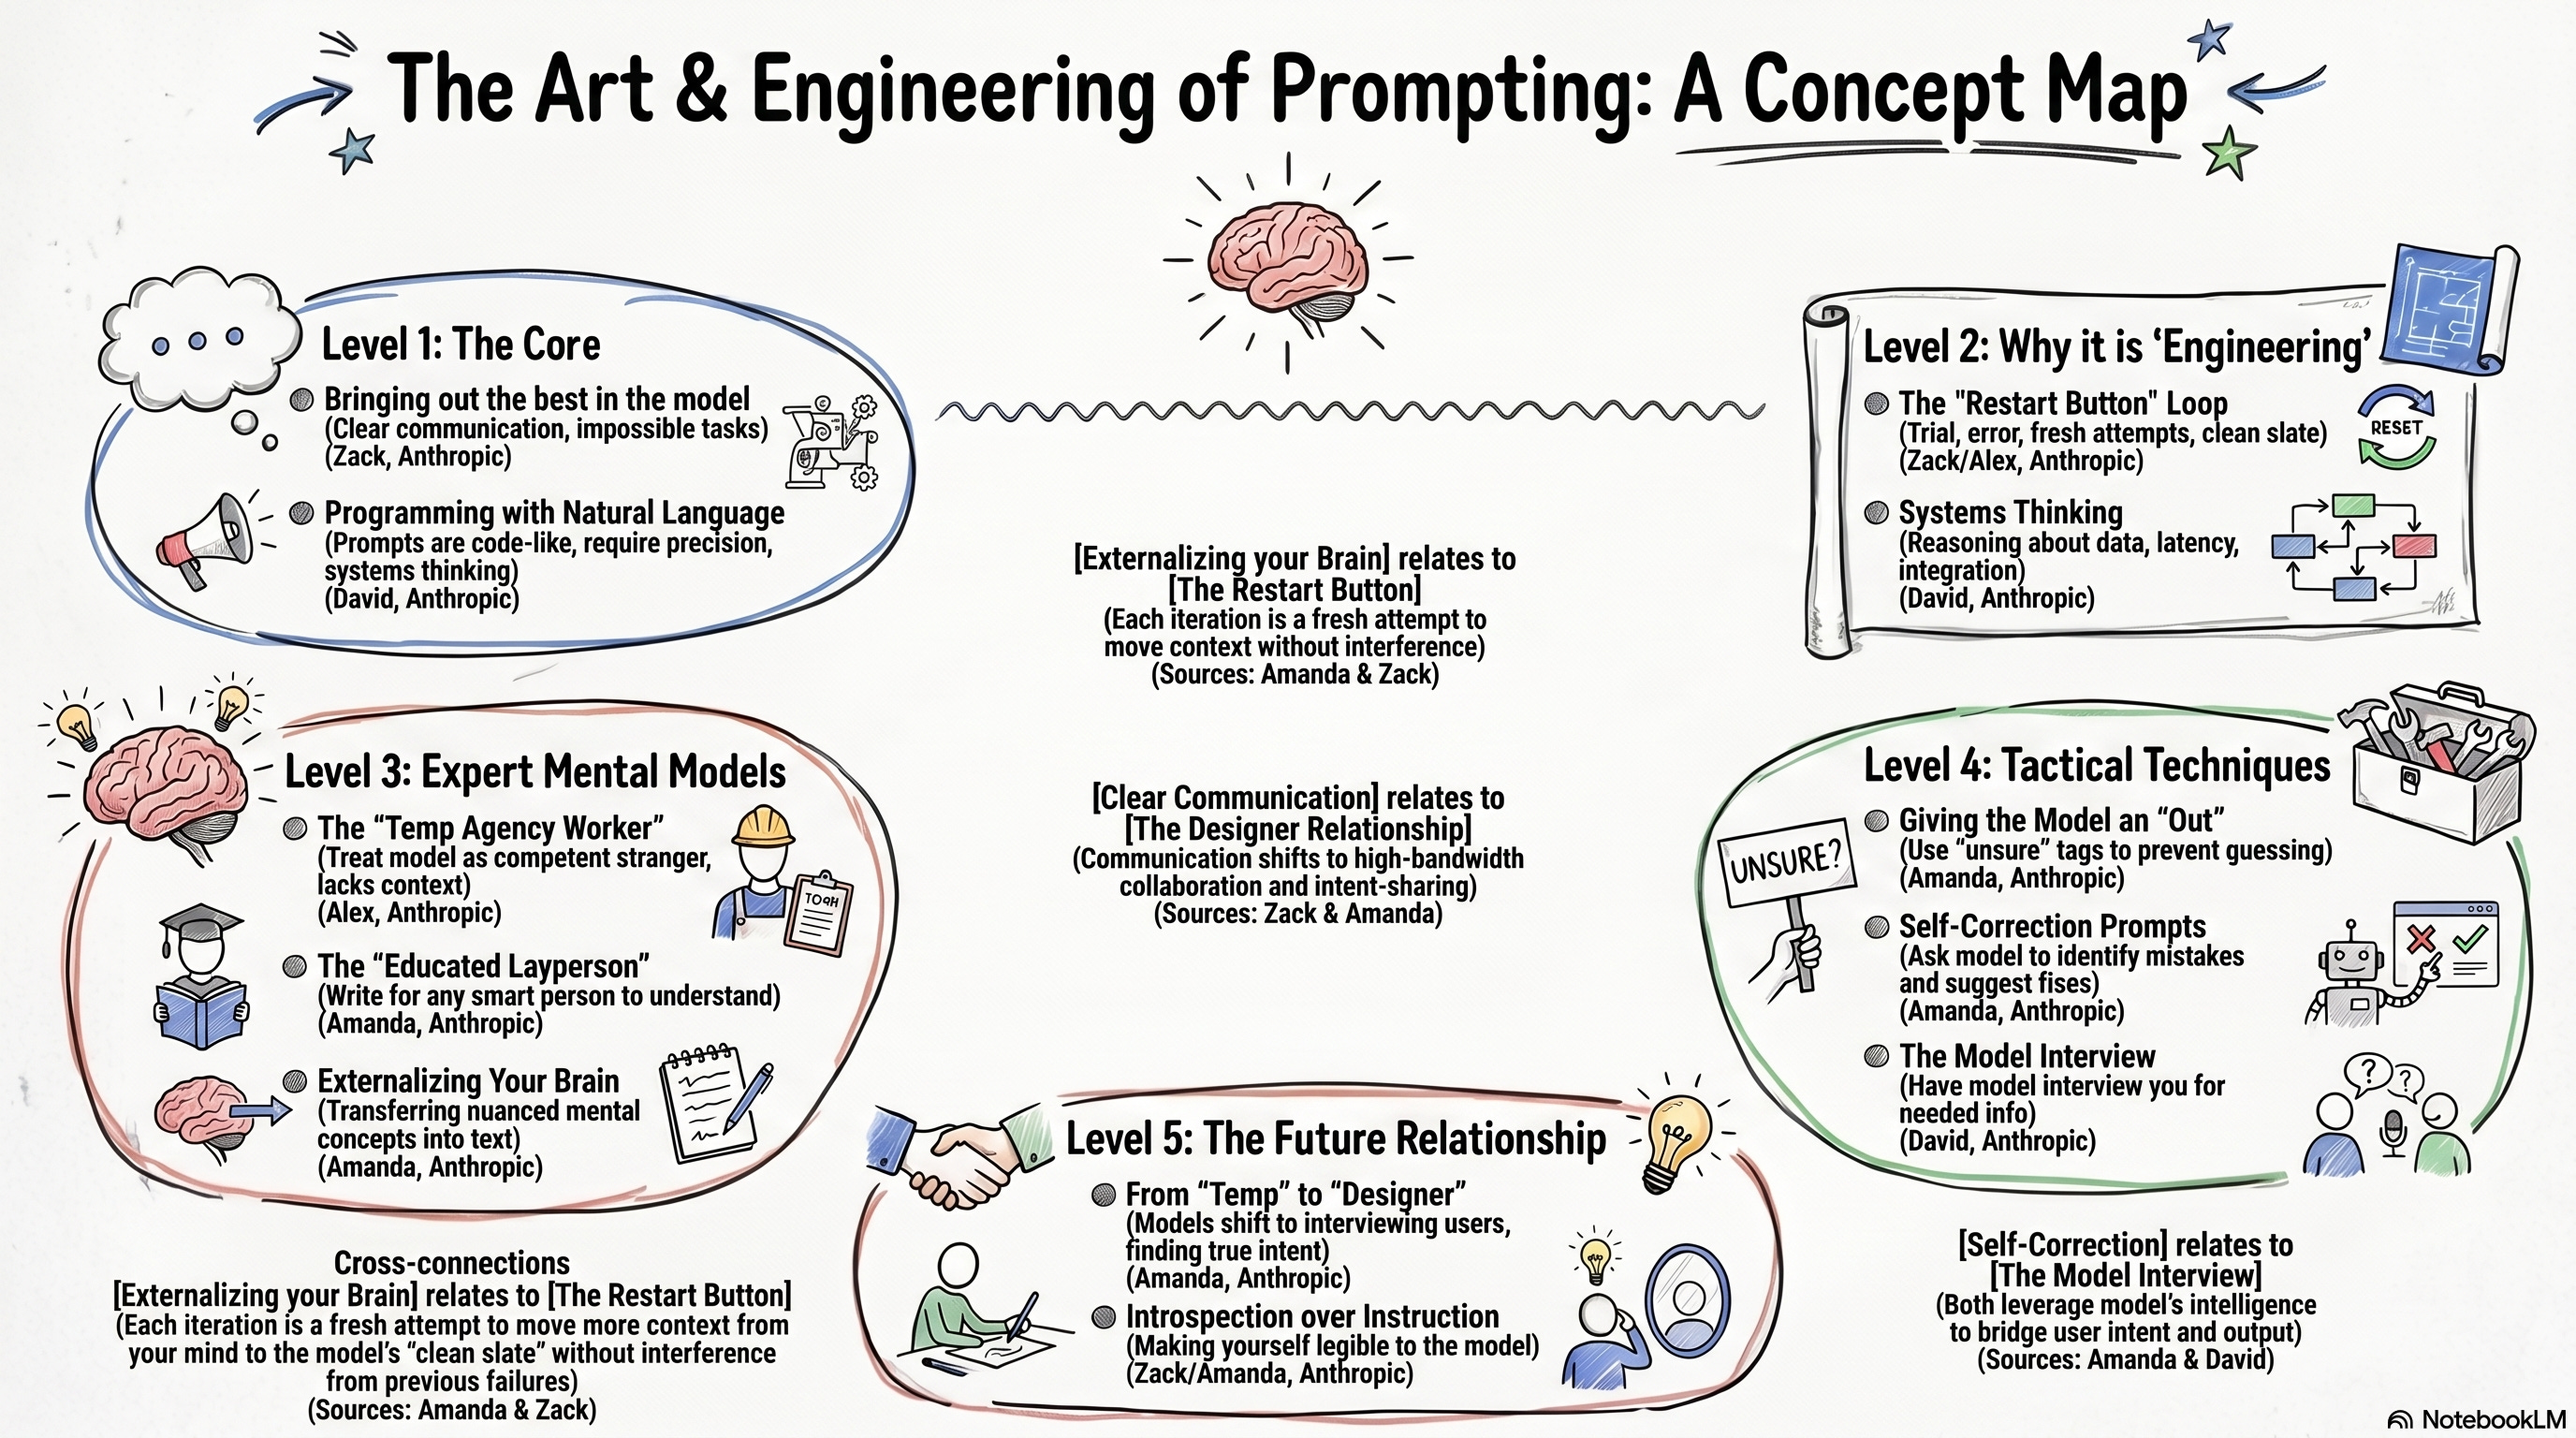
(Select Infographics at the studio, click on “Sketch” as a style.)
Here is the entire prompt.
From my lecture notes in this notebook, create a concept map
with cross-connections.

Structure:
1. Central topic at the top.
2. 4-6 main subtopics branching from it.
3. Under each subtopic, 2-3 key ideas or terms.
4. Then — and this is what Mind Map misses — list the
   cross-connections across subtopics:
   "[Idea A from Subtopic 1] relates to [Idea B from Subtopic 3]
   because..."

Format:
- Level 1: Main topic
- Level 2: Subtopics (indented)
- Level 3: Key ideas (more indented)
- Cross-connections section at the end

Use only information from my sources. Cite the source for each
concept.
Let’s show.
When to use which?
Mind Map feature → Quick review, exam morning, memory refresh.
Custom prompt → Final exams, term papers, essays. Anything where you need to connect ideas, not just list them.
Prompt 2: Explain Anything Like I’m 10 (Plus the Video Overview Shortcut)
You are reading Chapter 7.
Every paragraph uses three terms you don't know. You look them up.
Those definitions use five more terms you don't know.
An hour later, you have 15 browser tabs open and still don't understand the original concept.
The 1-click way: Video Overview feature
Open your notebook.
In the Studio panel, click Video Overview.
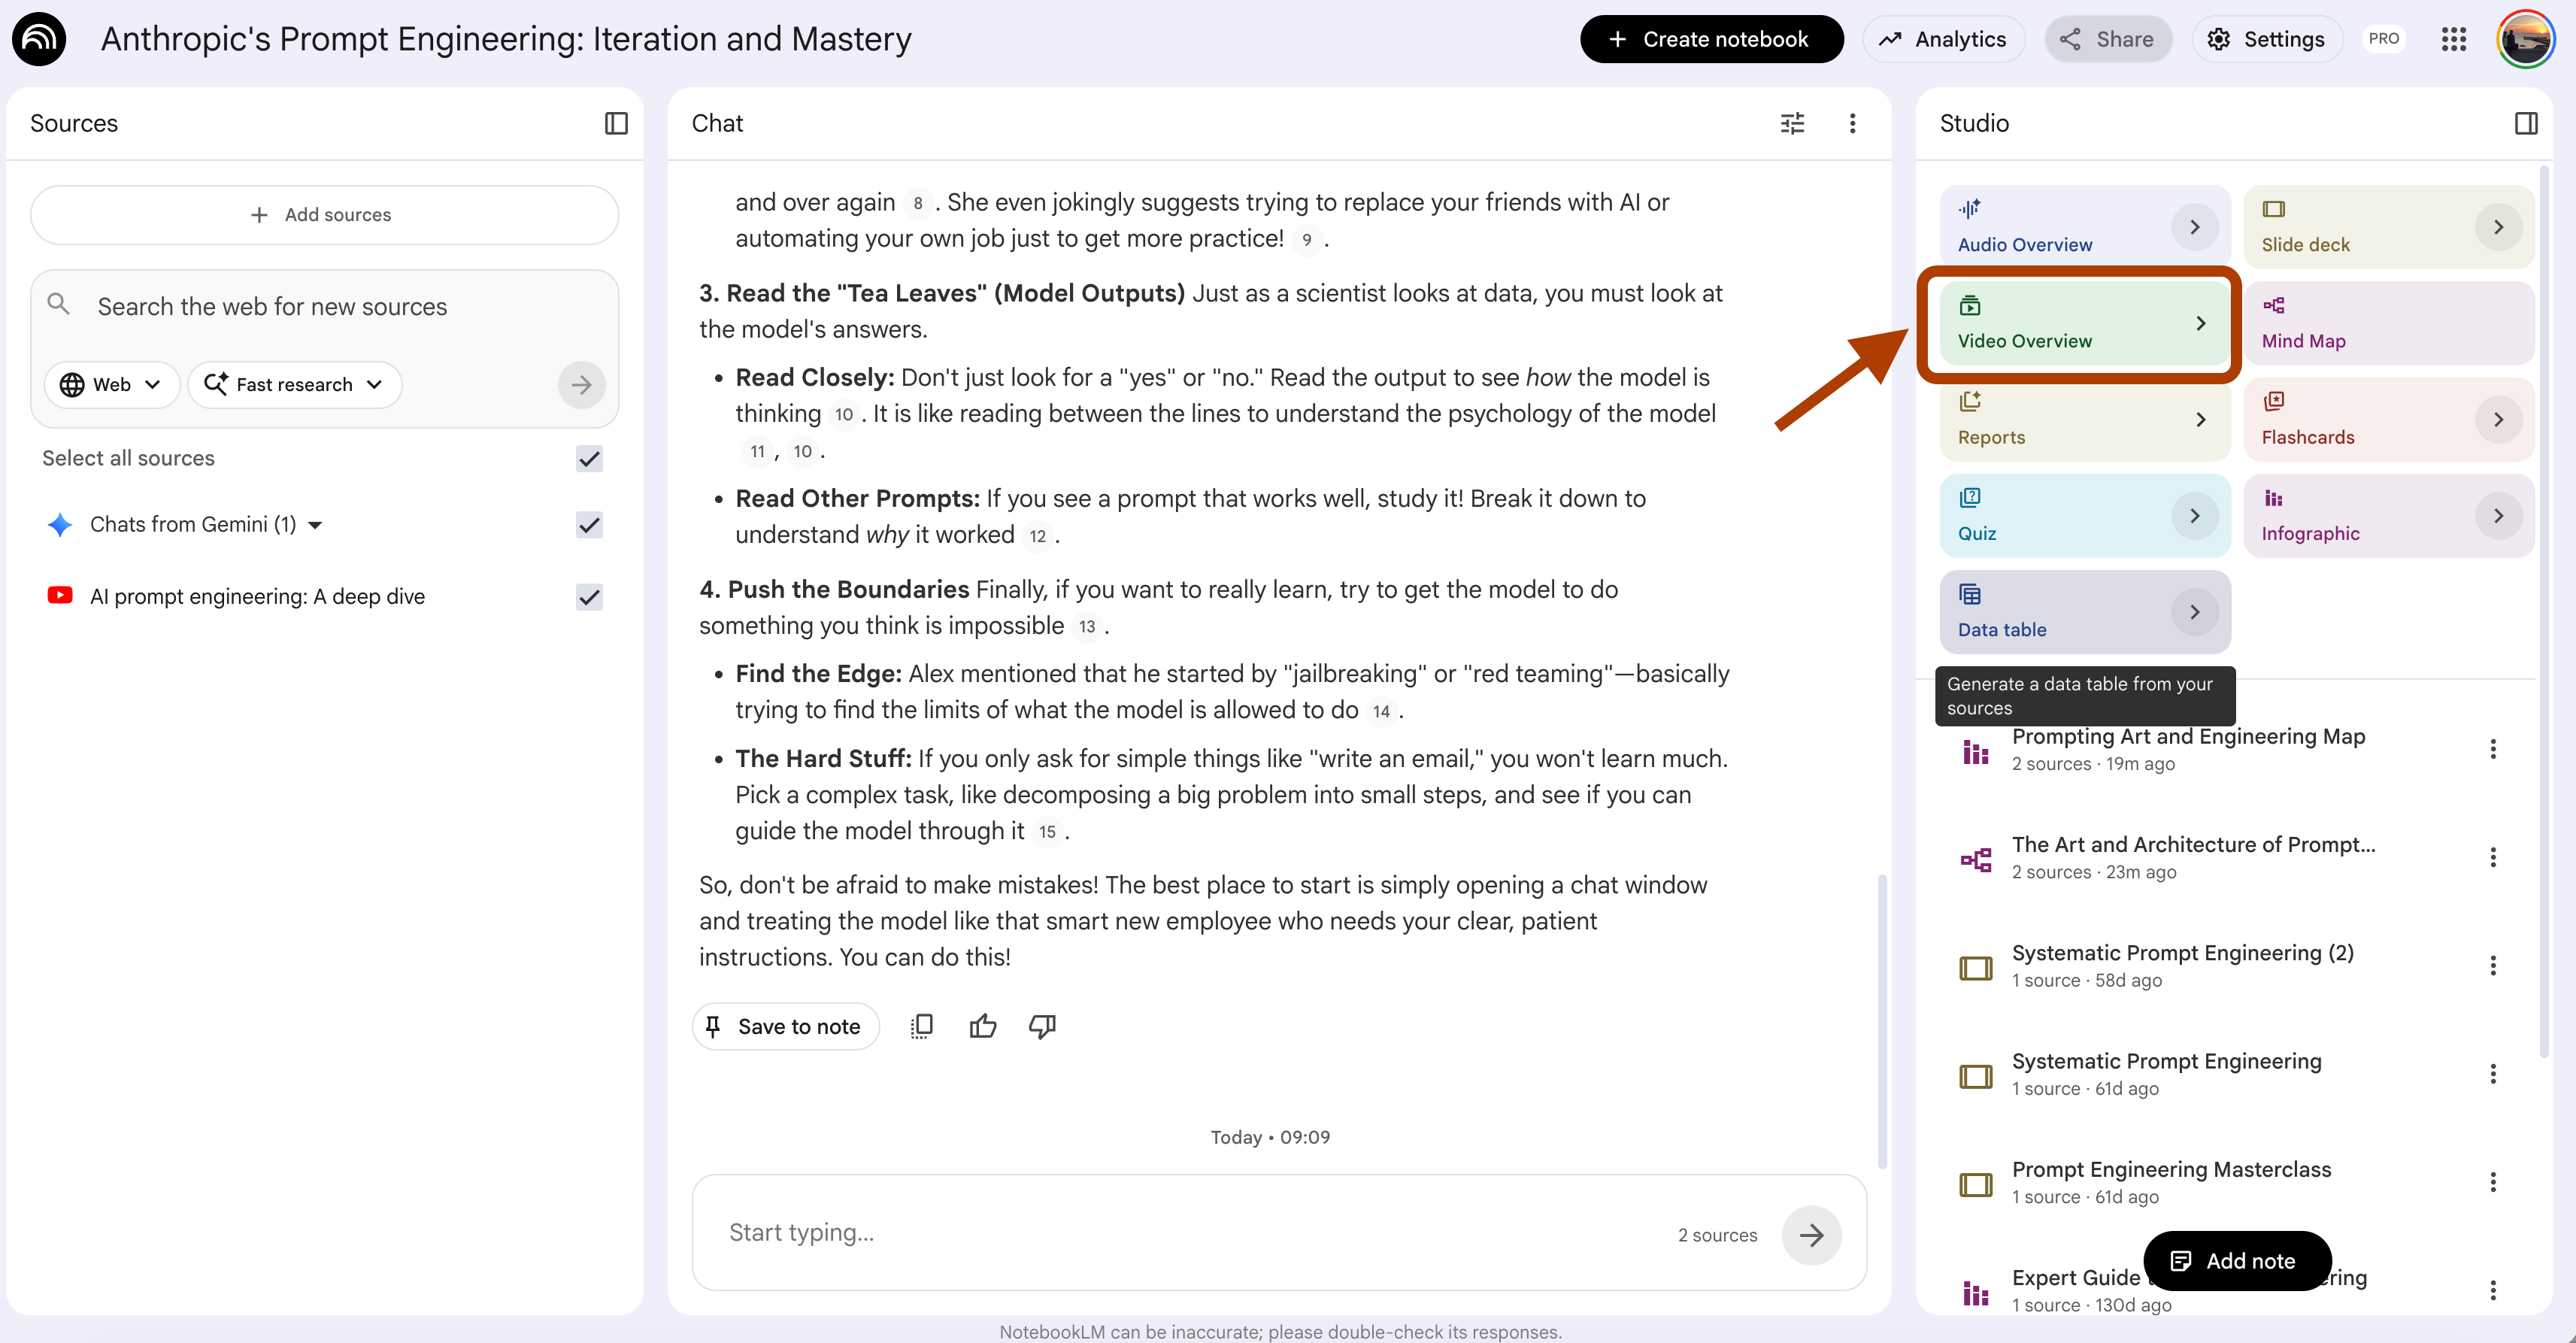
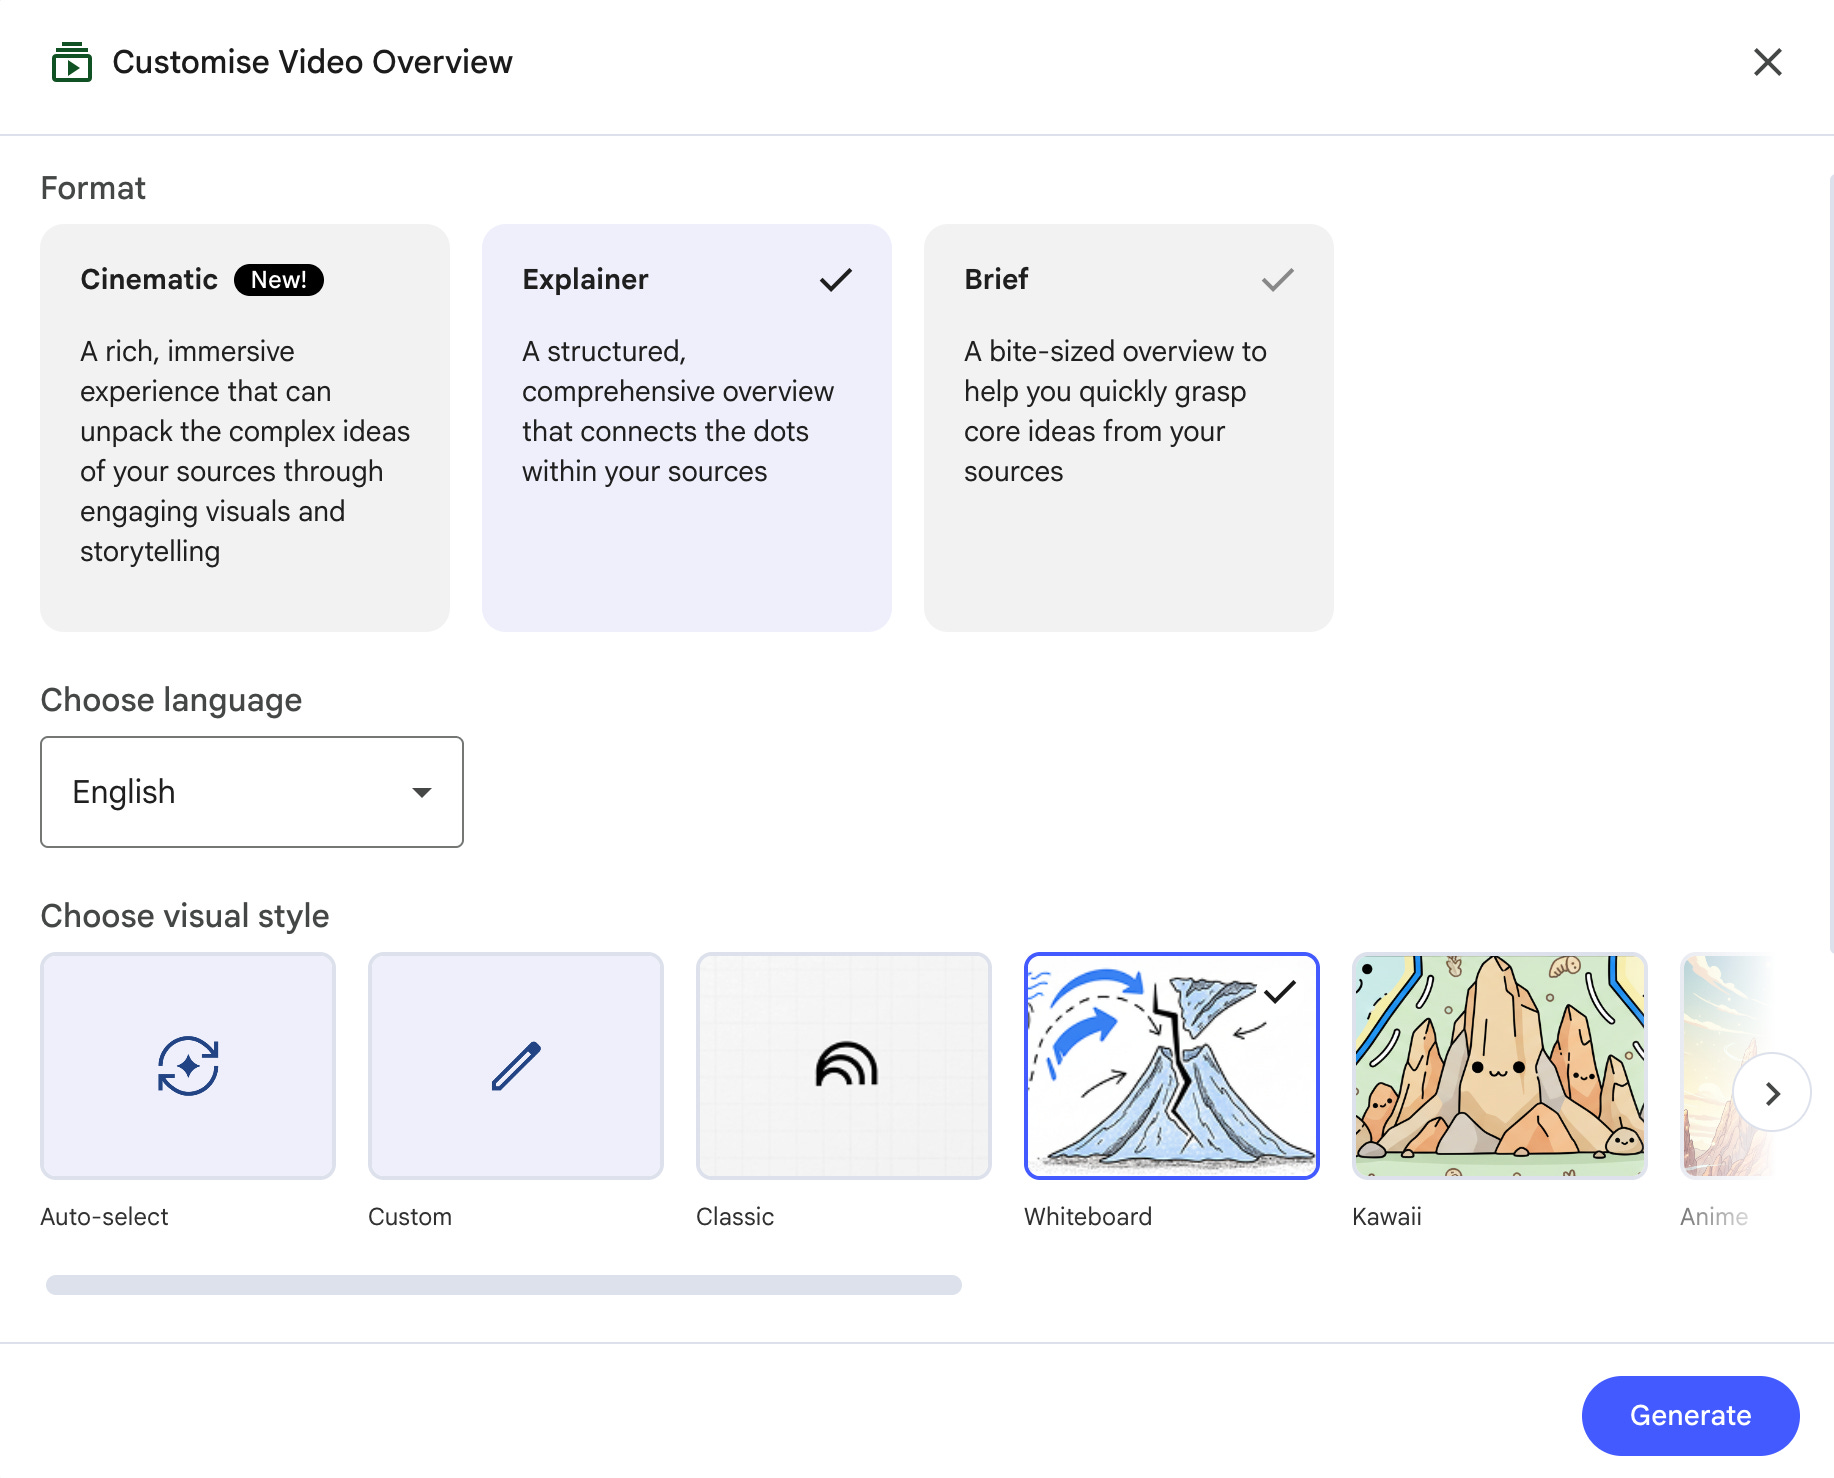
If you click “>”, you can also customize it.
NotebookLM turns your sources into a narrated explainer video.
Like a mini YouTube lecture built from your own textbook.
This works when the concept is a topic.
Tips: It might take 10-15 minutes to create a video, especially if you selected Cinematic
Here is the explainer video:
But Video Overview has a ceiling.
It explains at the same level as your source does.
If the source is a PhD-level paper using jargon, the video uses the same jargon.
You wanted simple. You got shorter.
That’s when you prompt.
The custom prompt:
Explain [concept name from my sources] like I'm 10 years old.

Rules:
1. Start with an analogy from everyday life. Something a 10-year-old
   would see: kitchen, playground, video game, school.
2. Then explain the concept in 3 sentences using that analogy.
3. Then add ONE technical term at a time. Define it simply before using it.
4. End with the textbook definition from my source — so I can recognize
   it on the exam.

Do not skip steps. Do not use jargon without defining it first.
Use only what's in my sources.
Example output:
When to use which?
Video Overview feature → You need an overview of a topic. You have 20 minutes. You’re a commuter or a visual learner.
Custom prompt → You’re stuck on ONE specific concept. The textbook lost you. You need it unlocked before the next class.
Prompt 3: NotebookLM Flashcards That Beat Generic Decks
Tomorrow’s exam has 200 terms on it.
You don’t have time to write flashcards by hand.
You also don’t have time to make bad ones,cards that test the wrong thing and miss what the professor actually asks.
The 1-click way: Flashcards feature
Open your notebook.
In the Studio panel, click Flashcards.
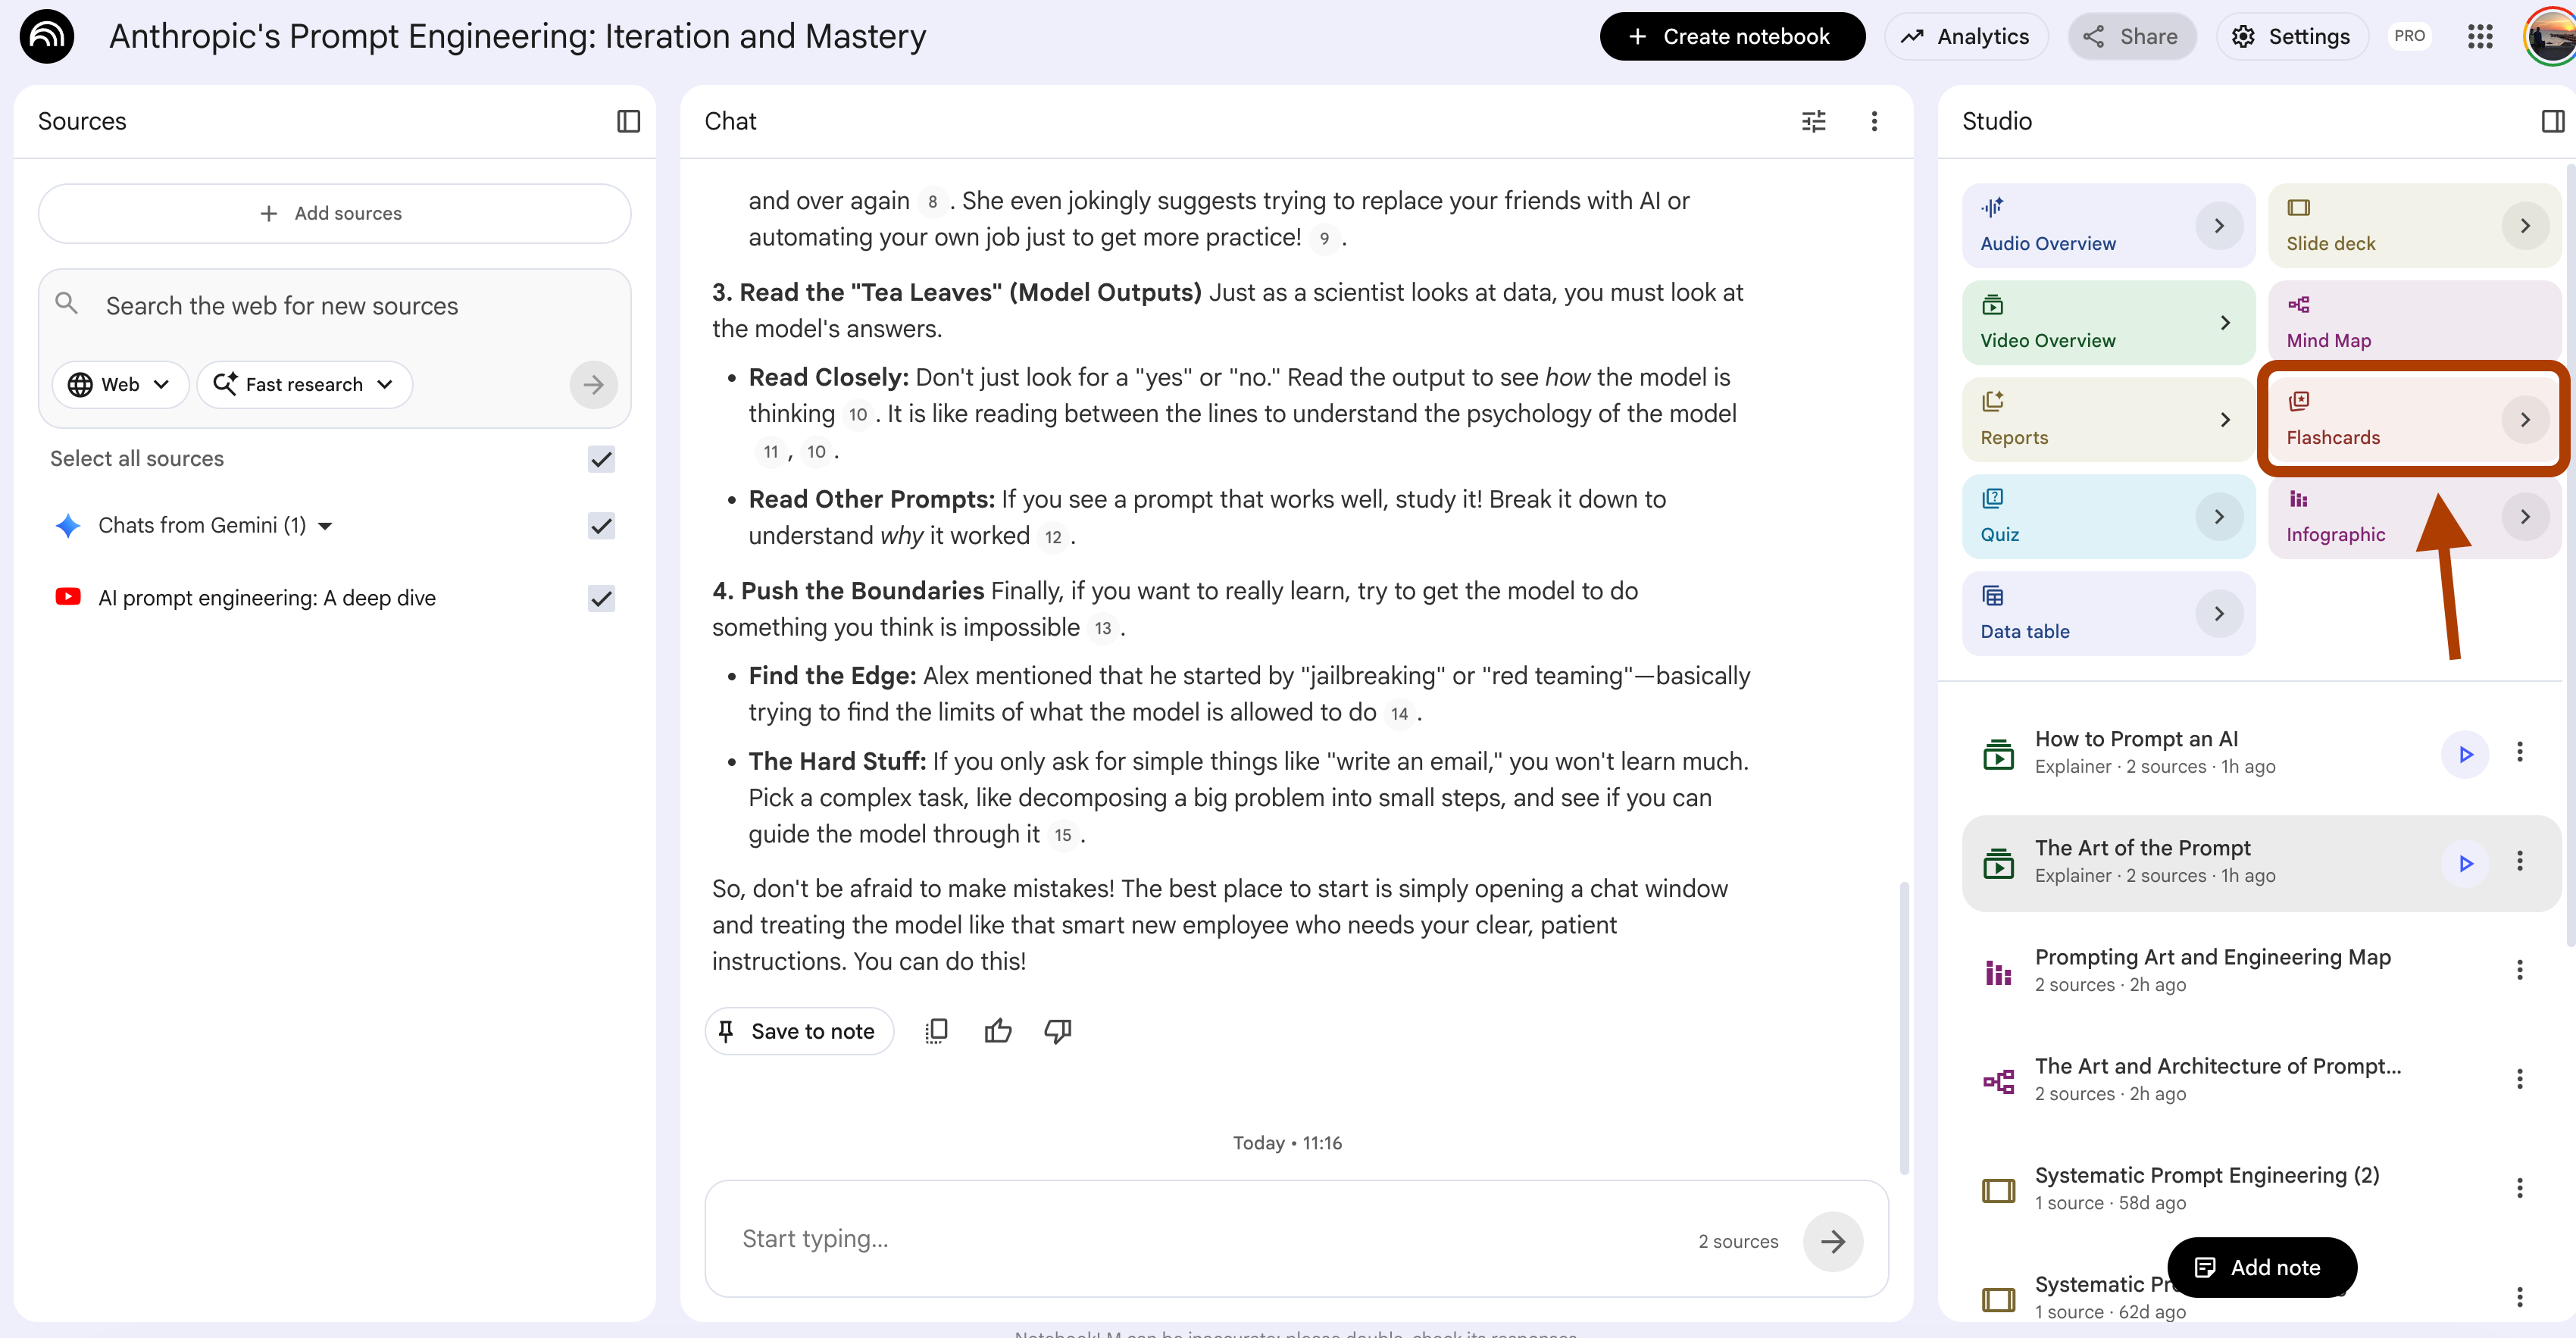
NotebookLM scans your sources and generates a deck automatically. Here is what it looks like.
Fast. Zero setup. Good enough for a first pass.
But here is what I noticed after using this feature on three different subjects: it generates cards the way a textbook index would.
Real exams don’t ask “What is photosynthesis?” They ask, “Why does photosynthesis stop working above 40°C, and which part of the process breaks first?”
For that, you prompt.
The custom prompt:
Turn the key content of my sources into flashcards for exam prep.

Mix these 4 card types (not just definitions):

1. Definition cards (5 cards):
   Front: term. Back: definition + one real-world example.

2. Cause-effect cards (8 cards):
   Front: "What happens when [X]?"
   Back: the effect + why it happens.

3. Comparison cards (6 cards):
   Front: "How is [A] different from [B]?"
   Back: 3 key differences in a table format.

4. Application cards (6 cards):
   Front: a real scenario or problem.
   Back: which concept from my source applies + how to solve it.

Focus on material my professor is most likely to test —
anything repeated across sources, anything in bold in my textbook,
anything that shows up in the summary sections.

Cite the source and page for each card.
And here are the flashcards as they look now.
When to use which?
Flashcards feature → First pass on vocabulary. When you’re just starting a subject and need basic term recall.
Custom prompt → Midterm and final prep. When the exam will test application, not just the definition.
Prompt 4: Find Where Your Sources Disagree (The Contradiction Detector)
You’re writing an essay. Your textbook says X. The research paper you downloaded last week says not-X. You didn’t notice until you were halfway through writing. Now your whole argument is shaky, and you have 12 hours to fix it.
Most students never catch these contradictions. They cite both sources, contradict themselves in the same paragraph, and lose easy points.
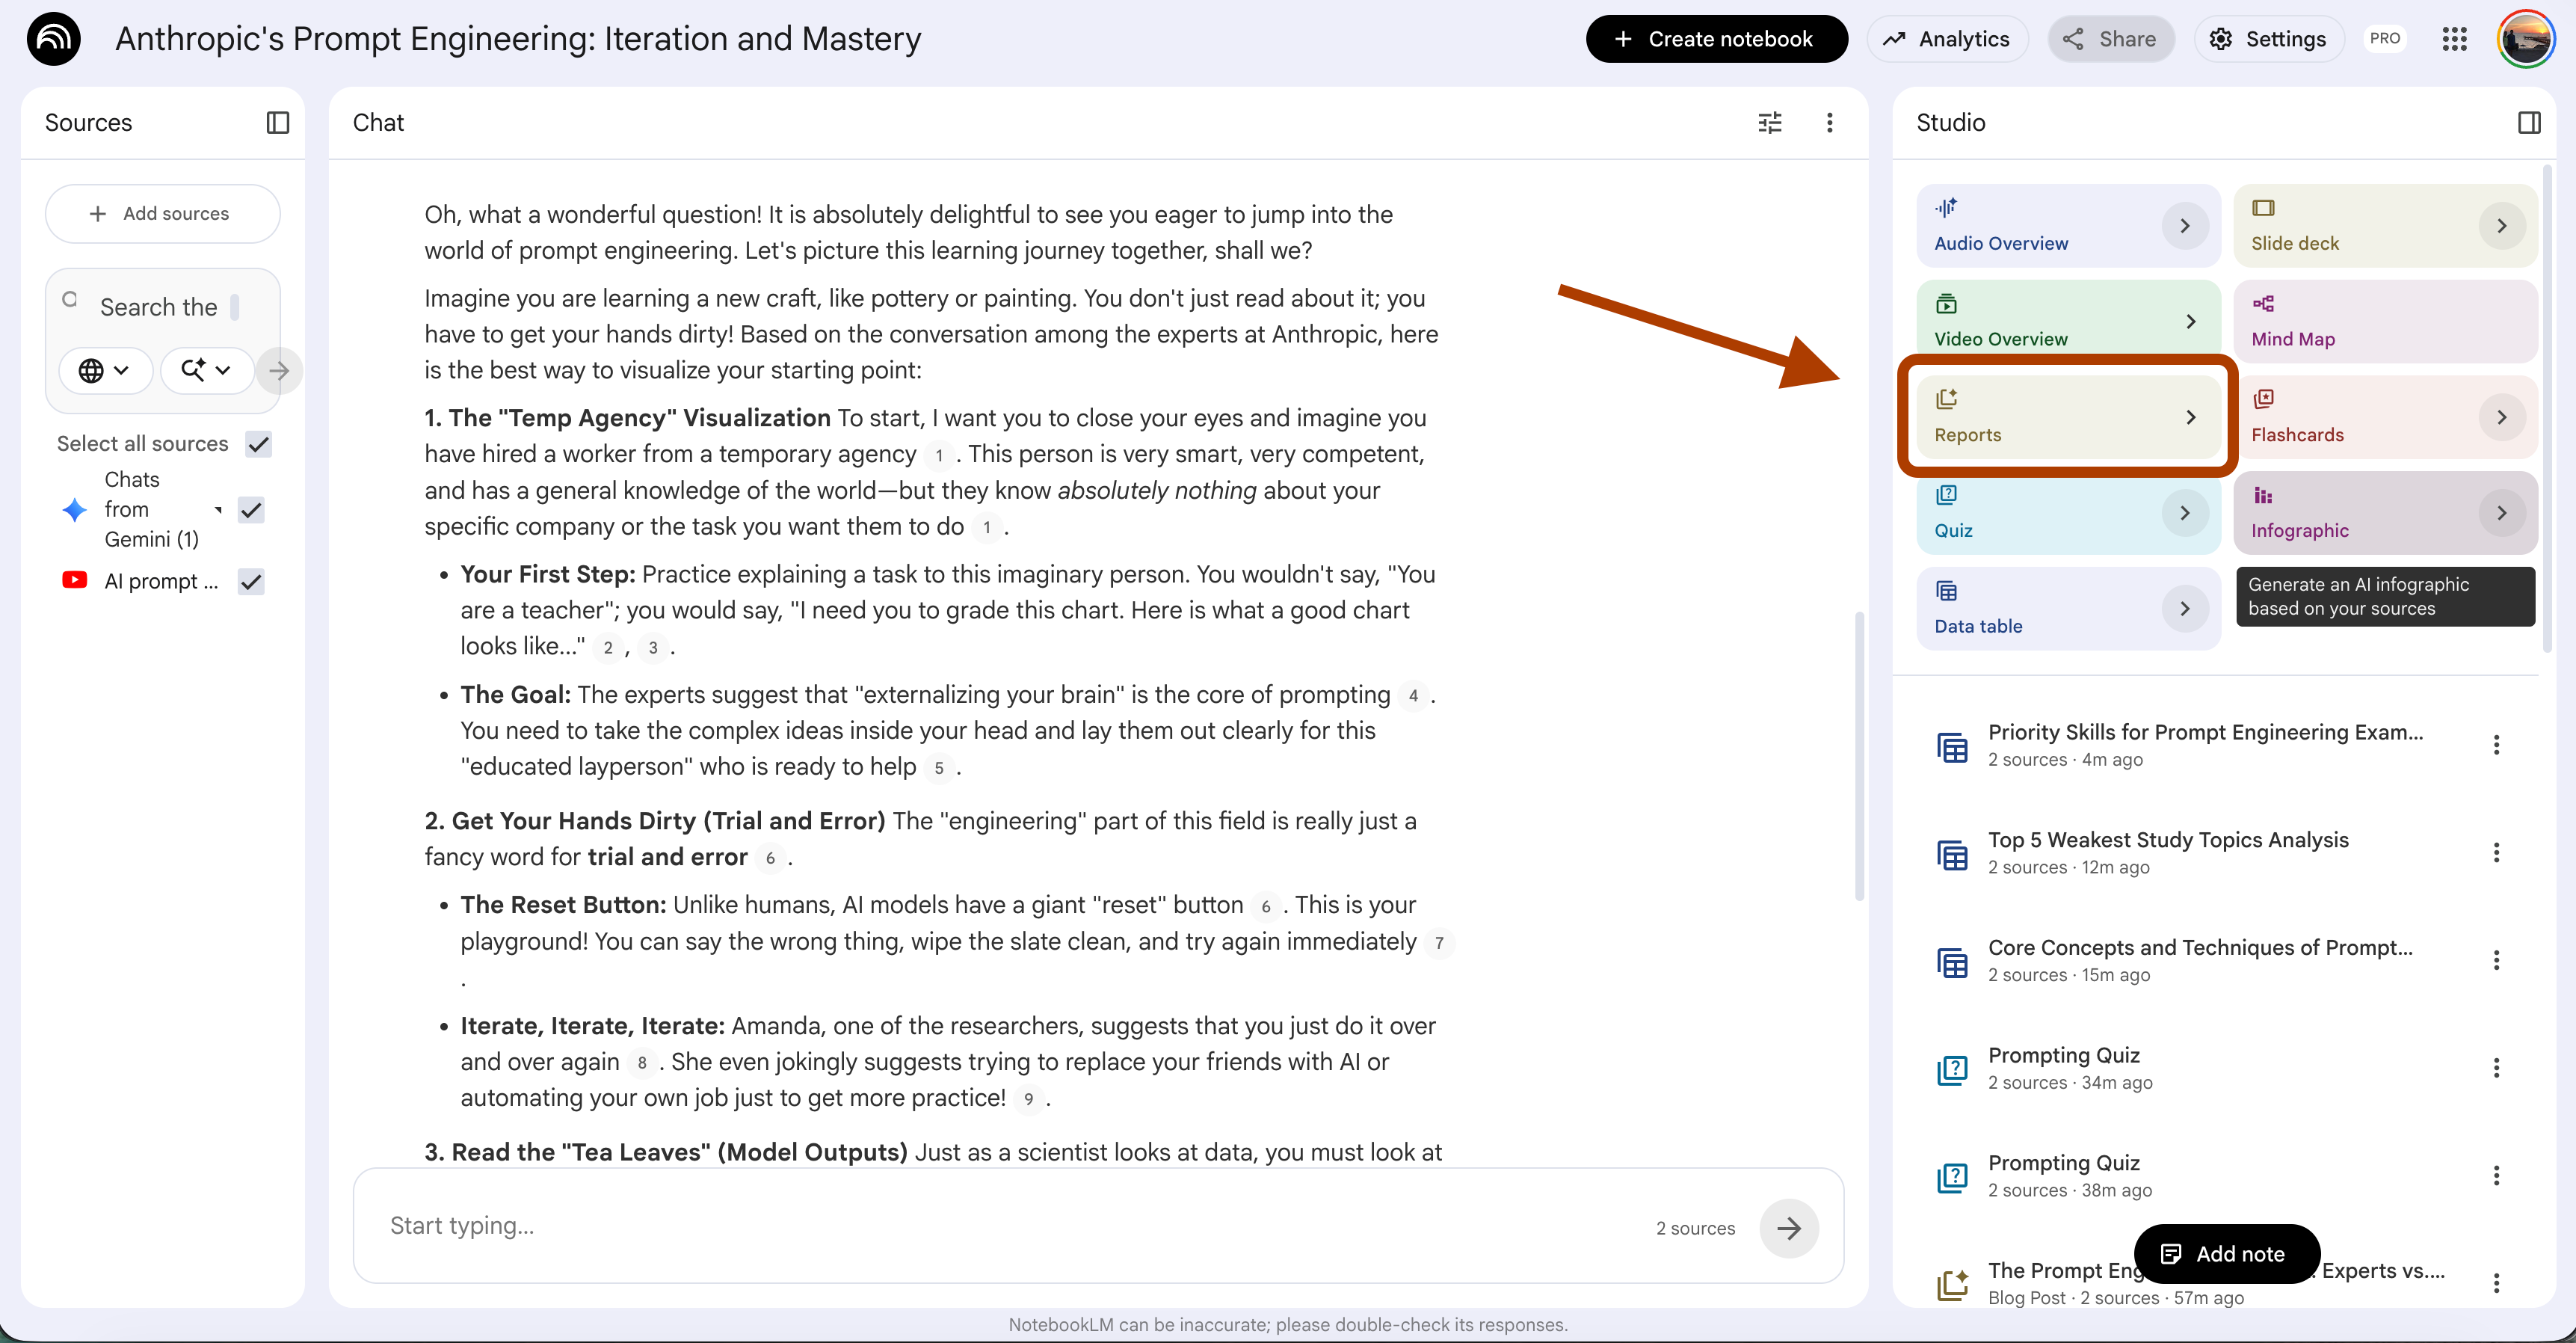
The 1-click way: Reports feature
Open your notebook.
In the Studio panel, click Reports.
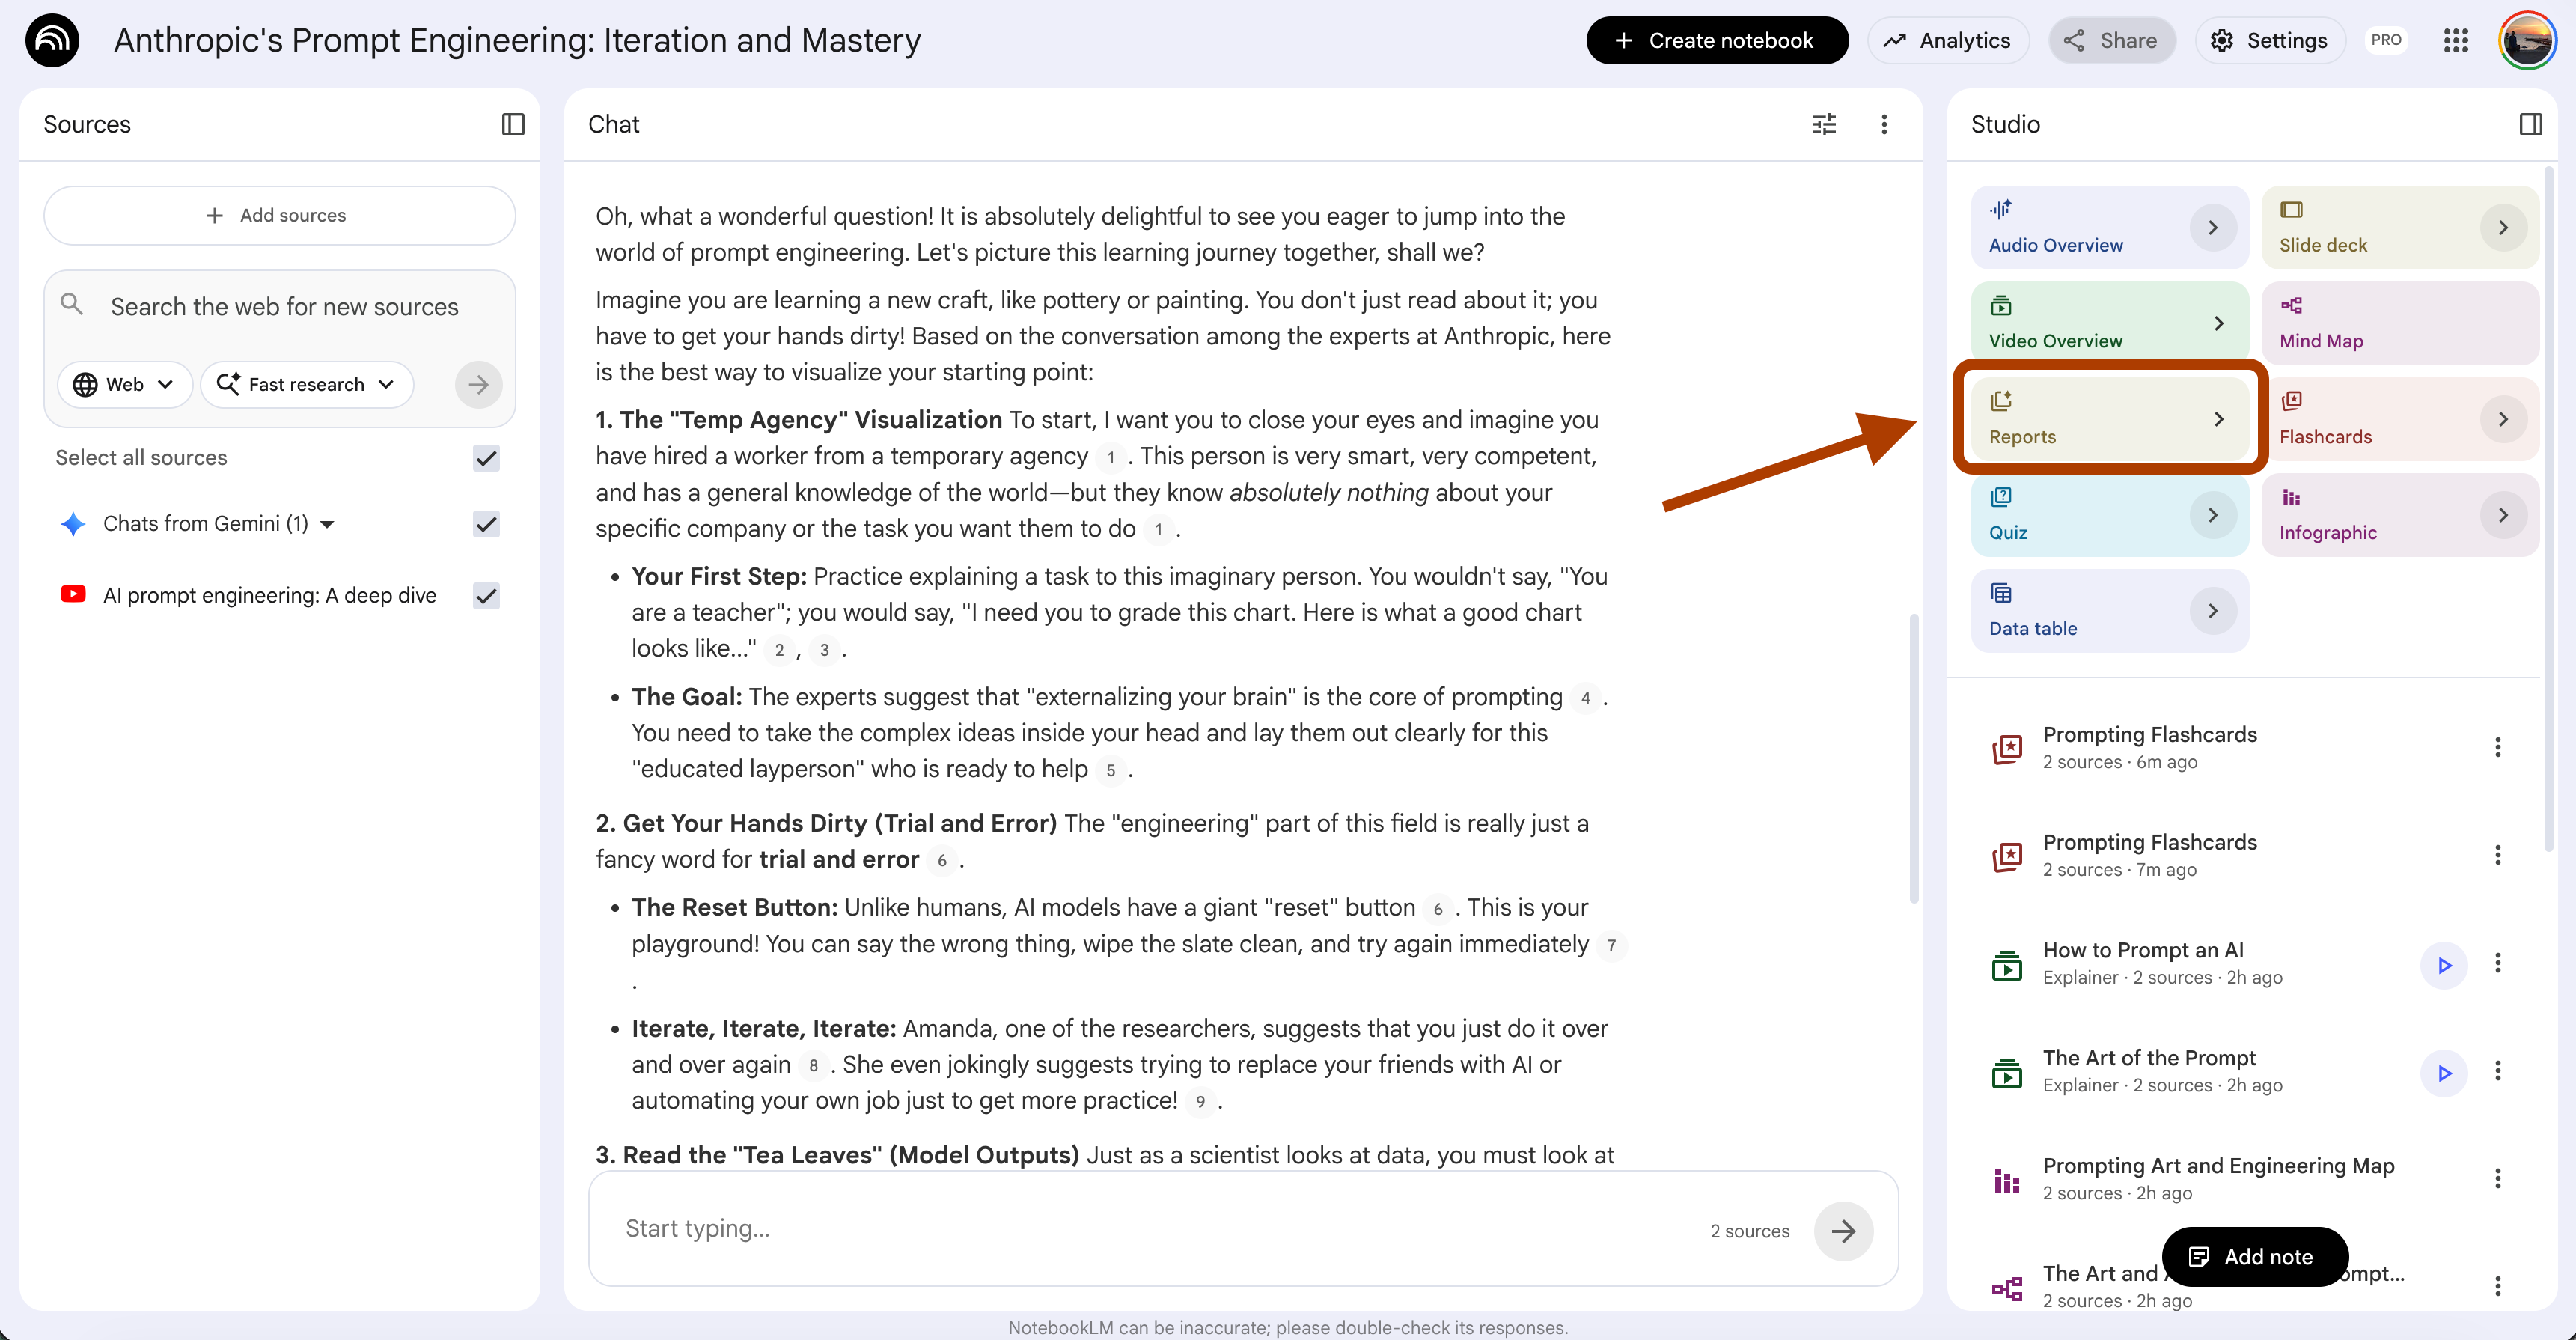
Customize, briefing, story guide, or blog post.

NotebookLM also suggests different formats, using your sources.
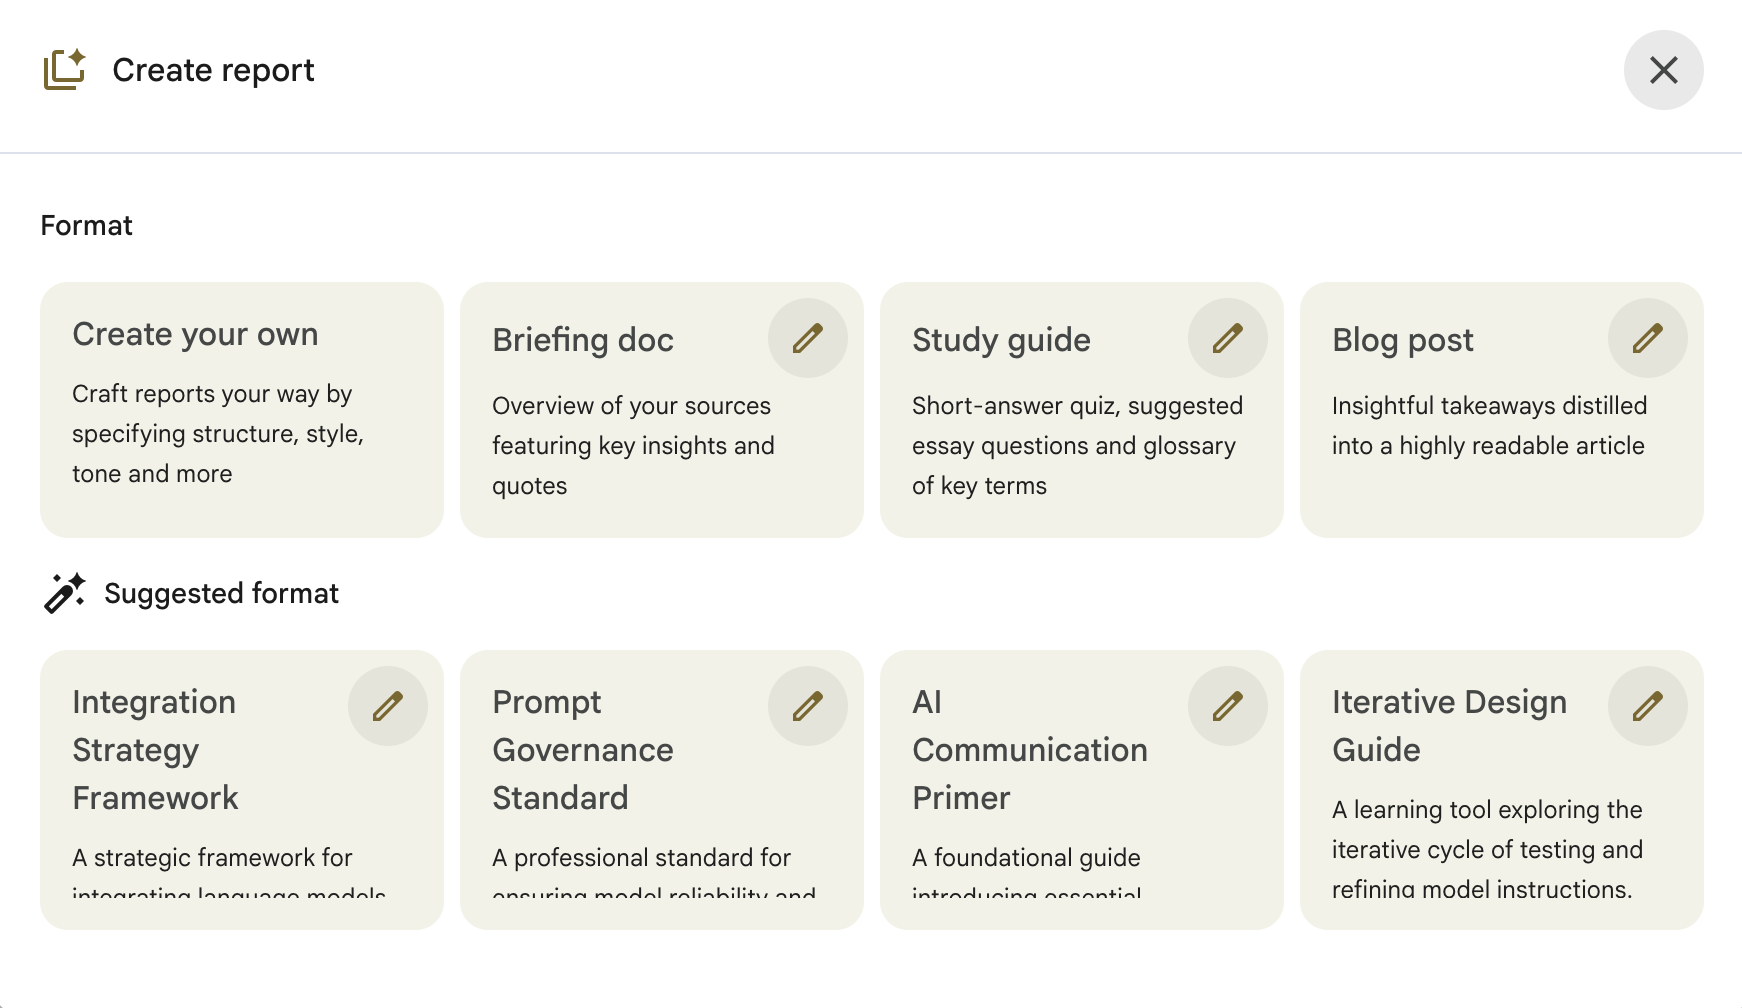
Click on “Blog post”. Here is the output.
Reports are good if you have only one source.
But if you added more than one source, what if your sources contradict each other?
But that’s also the problem. Reports smooth over disagreements. If two sources contradict, the Report quietly picks one and moves on. You never see the conflict. You cite a contested claim as if it were settled.
For essays and research papers, you need the opposite. You need the contradictions surfaced, not hidden.
The custom prompt:
Compare my sources and find every disagreement between them.

For each contradiction, give me:

1. The claim itself — in one sentence.
2. Which source makes each side — cite directly.
3. The strength of the evidence each side uses
   (data, sample size, date, author credibility).
4. Which side I should trust for my current essay topic —
   and your reasoning.
5. How I can acknowledge the disagreement in my writing
   without weakening my argument.

Ignore trivial wording differences. Focus on claims where
the sources reach different conclusions about the same thing.

Sort by how much the contradiction matters to my topic —
most important first.
Here is the output.
When to use which:
Reports feature → First draft research. When you want a unified overview and don’t need to write with nuance.
Custom prompt → Essays, research papers, thesis chapters. Anywhere you’re synthesizing multiple sources, and your grade depends on catching disagreements before your professor does.
Prompt 5: Turn Past Exams Into a Practice Test (What the Quiz Feature Can’t Do)
You have three past exams from previous semesters.
You have the current textbook. You have your notes.
The actual exam is in 5 days.
You need a practice test that looks and feels like the real one, not a generic quiz with random questions.
The 1-click way: Quiz feature
Open your notebook.
In the Studio panel, click Quiz.
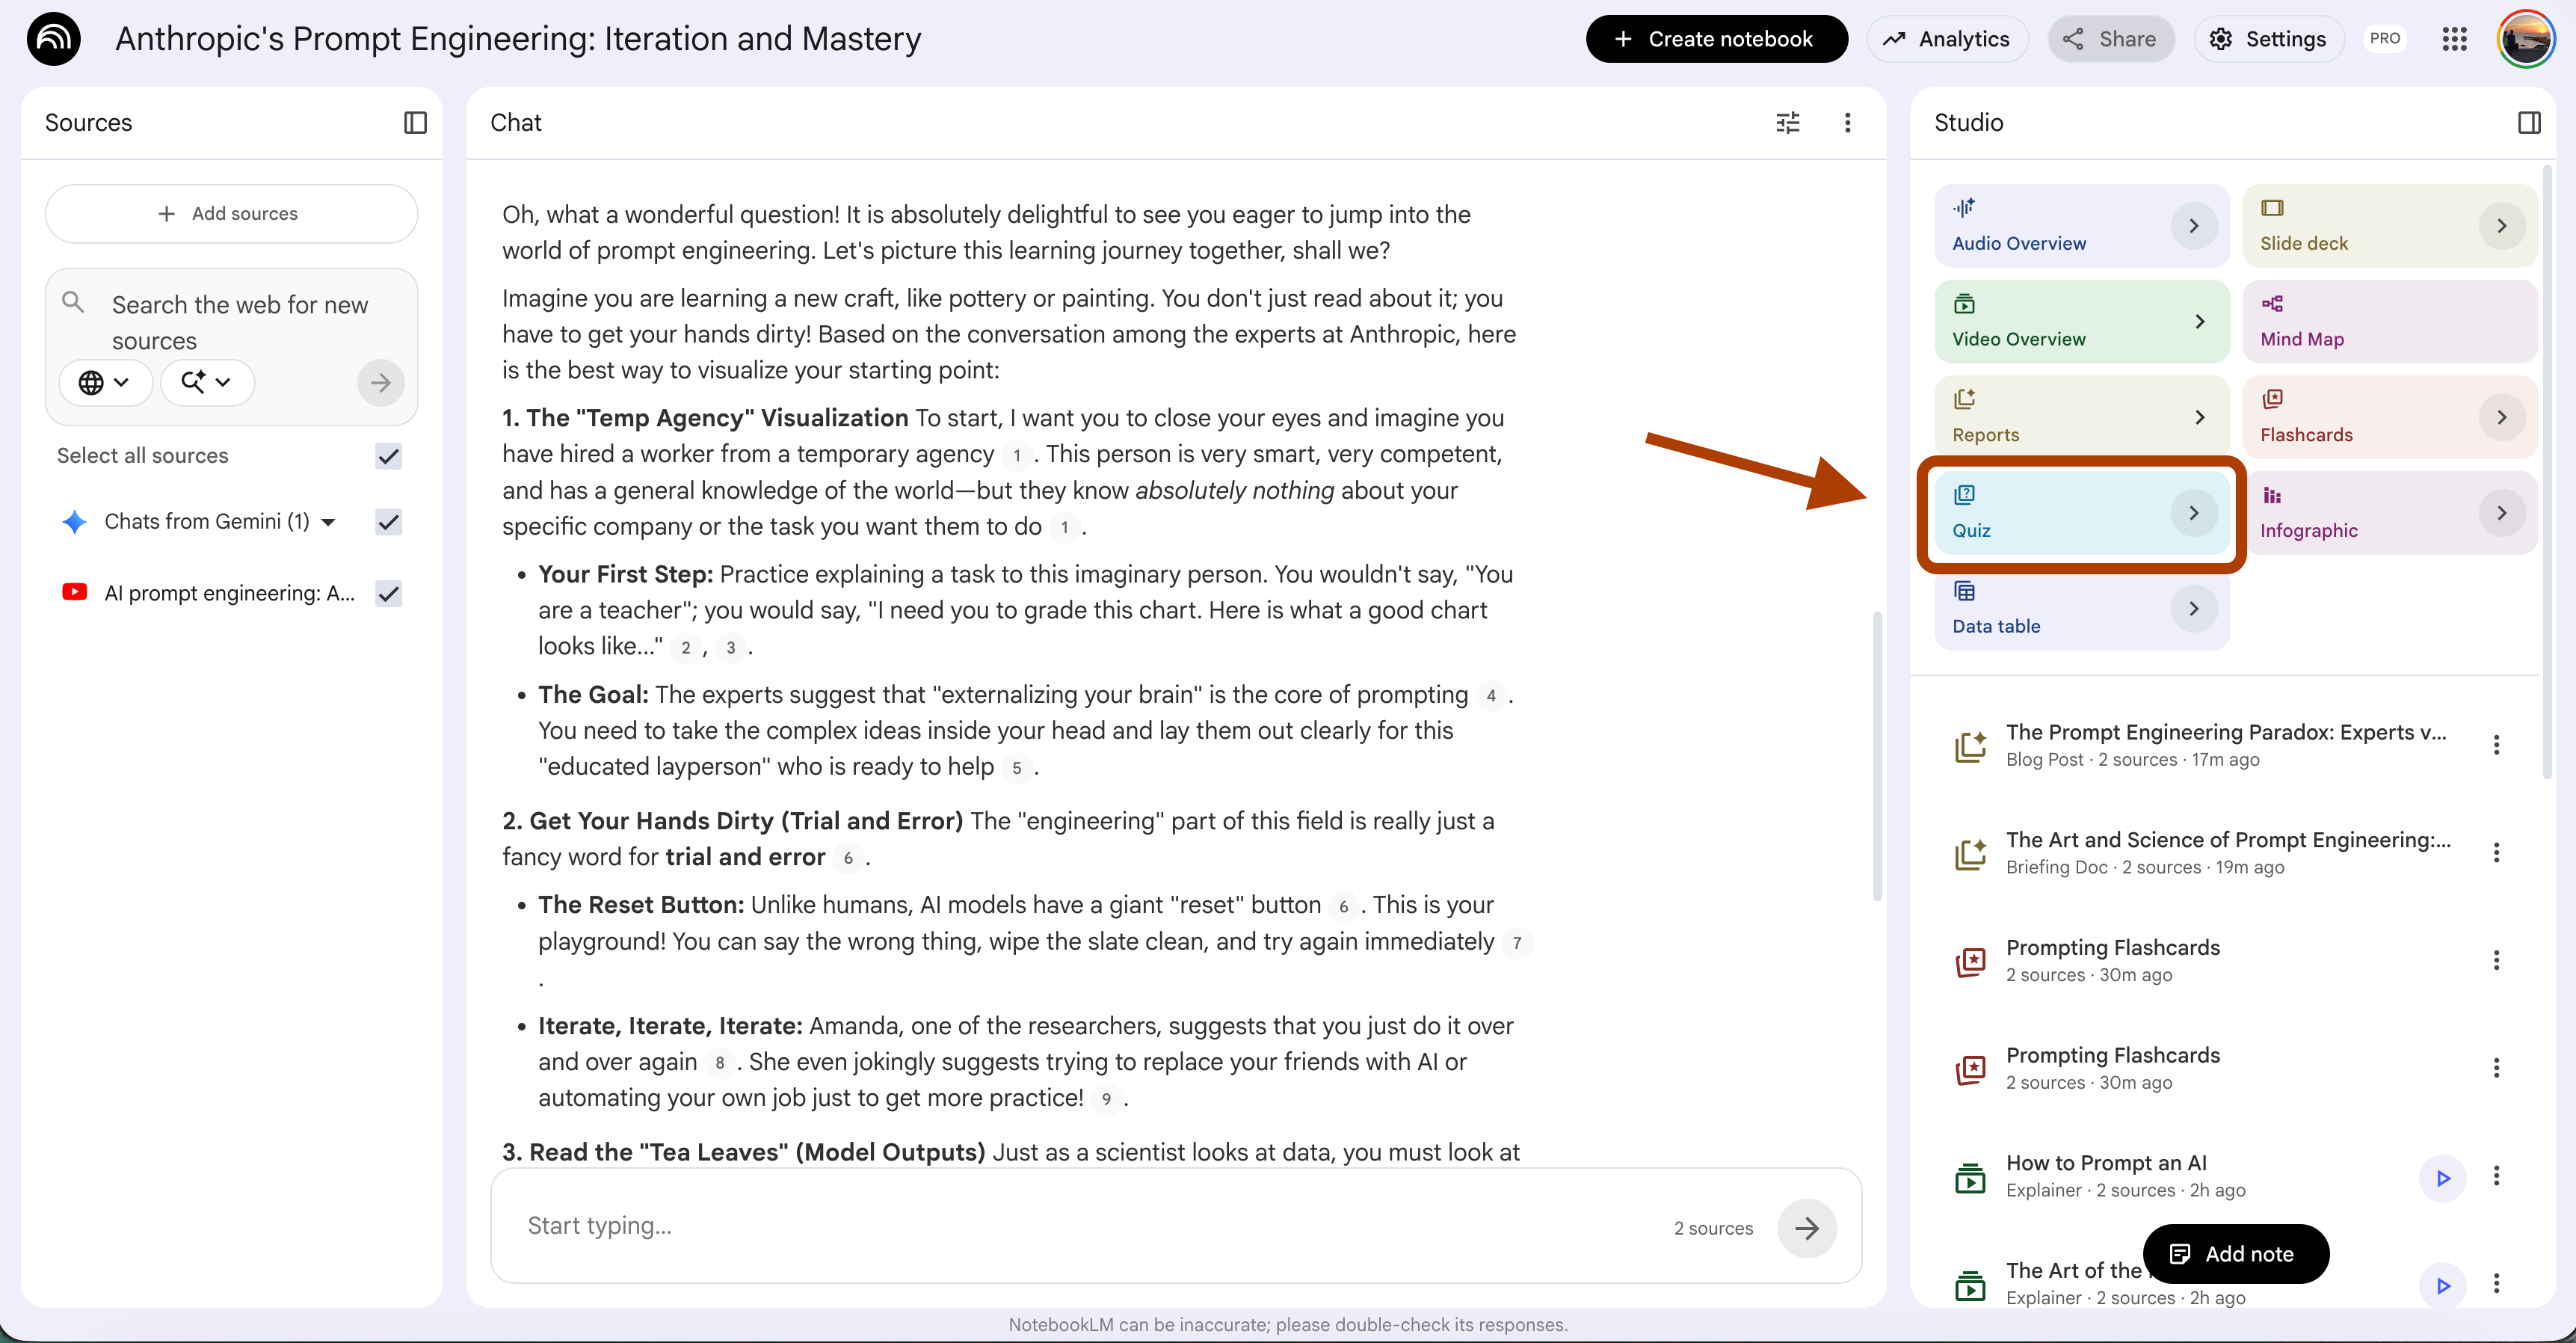
NotebookLM generates multiple-choice questions from your sources.
This is great for active recall. You answer, it scores, and you see what you missed. Much better than just re-reading notes.
But here is the problem. The Quiz feature ignores exam patterns. It generates questions in its own style, not your professor’s style. Real professors repeat question types. They love certain formulas. They always ask about the three topics they mentioned twice in the lecture.
Generic AI quizzes miss all of this.
If you have past exams in your notebook, you can force NotebookLM to match their style.
The Custom Prompt
Generate a practice exam from my course materials,
matching my professor's style.

--- MY PROFESSOR'S STYLE (fill this in) ---

Question types I expect:
[e.g., "60% calculation, 30% short answer, 10% derivations"]

Favorite phrasings my professor uses:
[e.g., "calculate", "derive", "explain why", "compare and contrast"]

Topics my professor emphasizes in lectures:
[e.g., "Rankine cycles, heat transfer, entropy"]

Topics in the textbook my professor barely covers:
[e.g., "statistical mechanics"]

Difficulty and time pressure:
[e.g., "2-hour exam, 20 questions, partial credit given"]

Special rules:
[e.g., "open book", "formula sheet allowed", "no calculator"]

--- GENERATE THE EXAM ---

Now generate questions using new content from my textbook
and notes.

Structure:
- Match the question type mix above.
- Use my professor's phrasings word-for-word where relevant.
- Weight the questions toward emphasized topics, not textbook-only topics.
- Answer key at the end with full explanations.
- Mark high-priority topics (the ones my professor emphasizes).
- Flag any topic that I should spend more time on based on
  difficulty and frequency.
Here is the output.
(I didn’t go into much detail about what I’d do if I were currently at university (hello Hüseyin Bayıroğlu, yes you), but you get the idea.)
Prompt 6: Find Study Weaknesses Before You Waste Hours
You have 20 hours to study before the exam.
You open the textbook and start from Chapter 1. Five hours in, you realize you already knew Chapters 1 and 2 cold.
The topics you actually struggle with are in Chapters 7, 8, and 9, and now you have 15 hours left.
Most students study linearly. That’s why they run out of time on the hard stuff.
The 1-click way: Data Table feature
Open your notebook.
In the Studio panel, click Data Table.
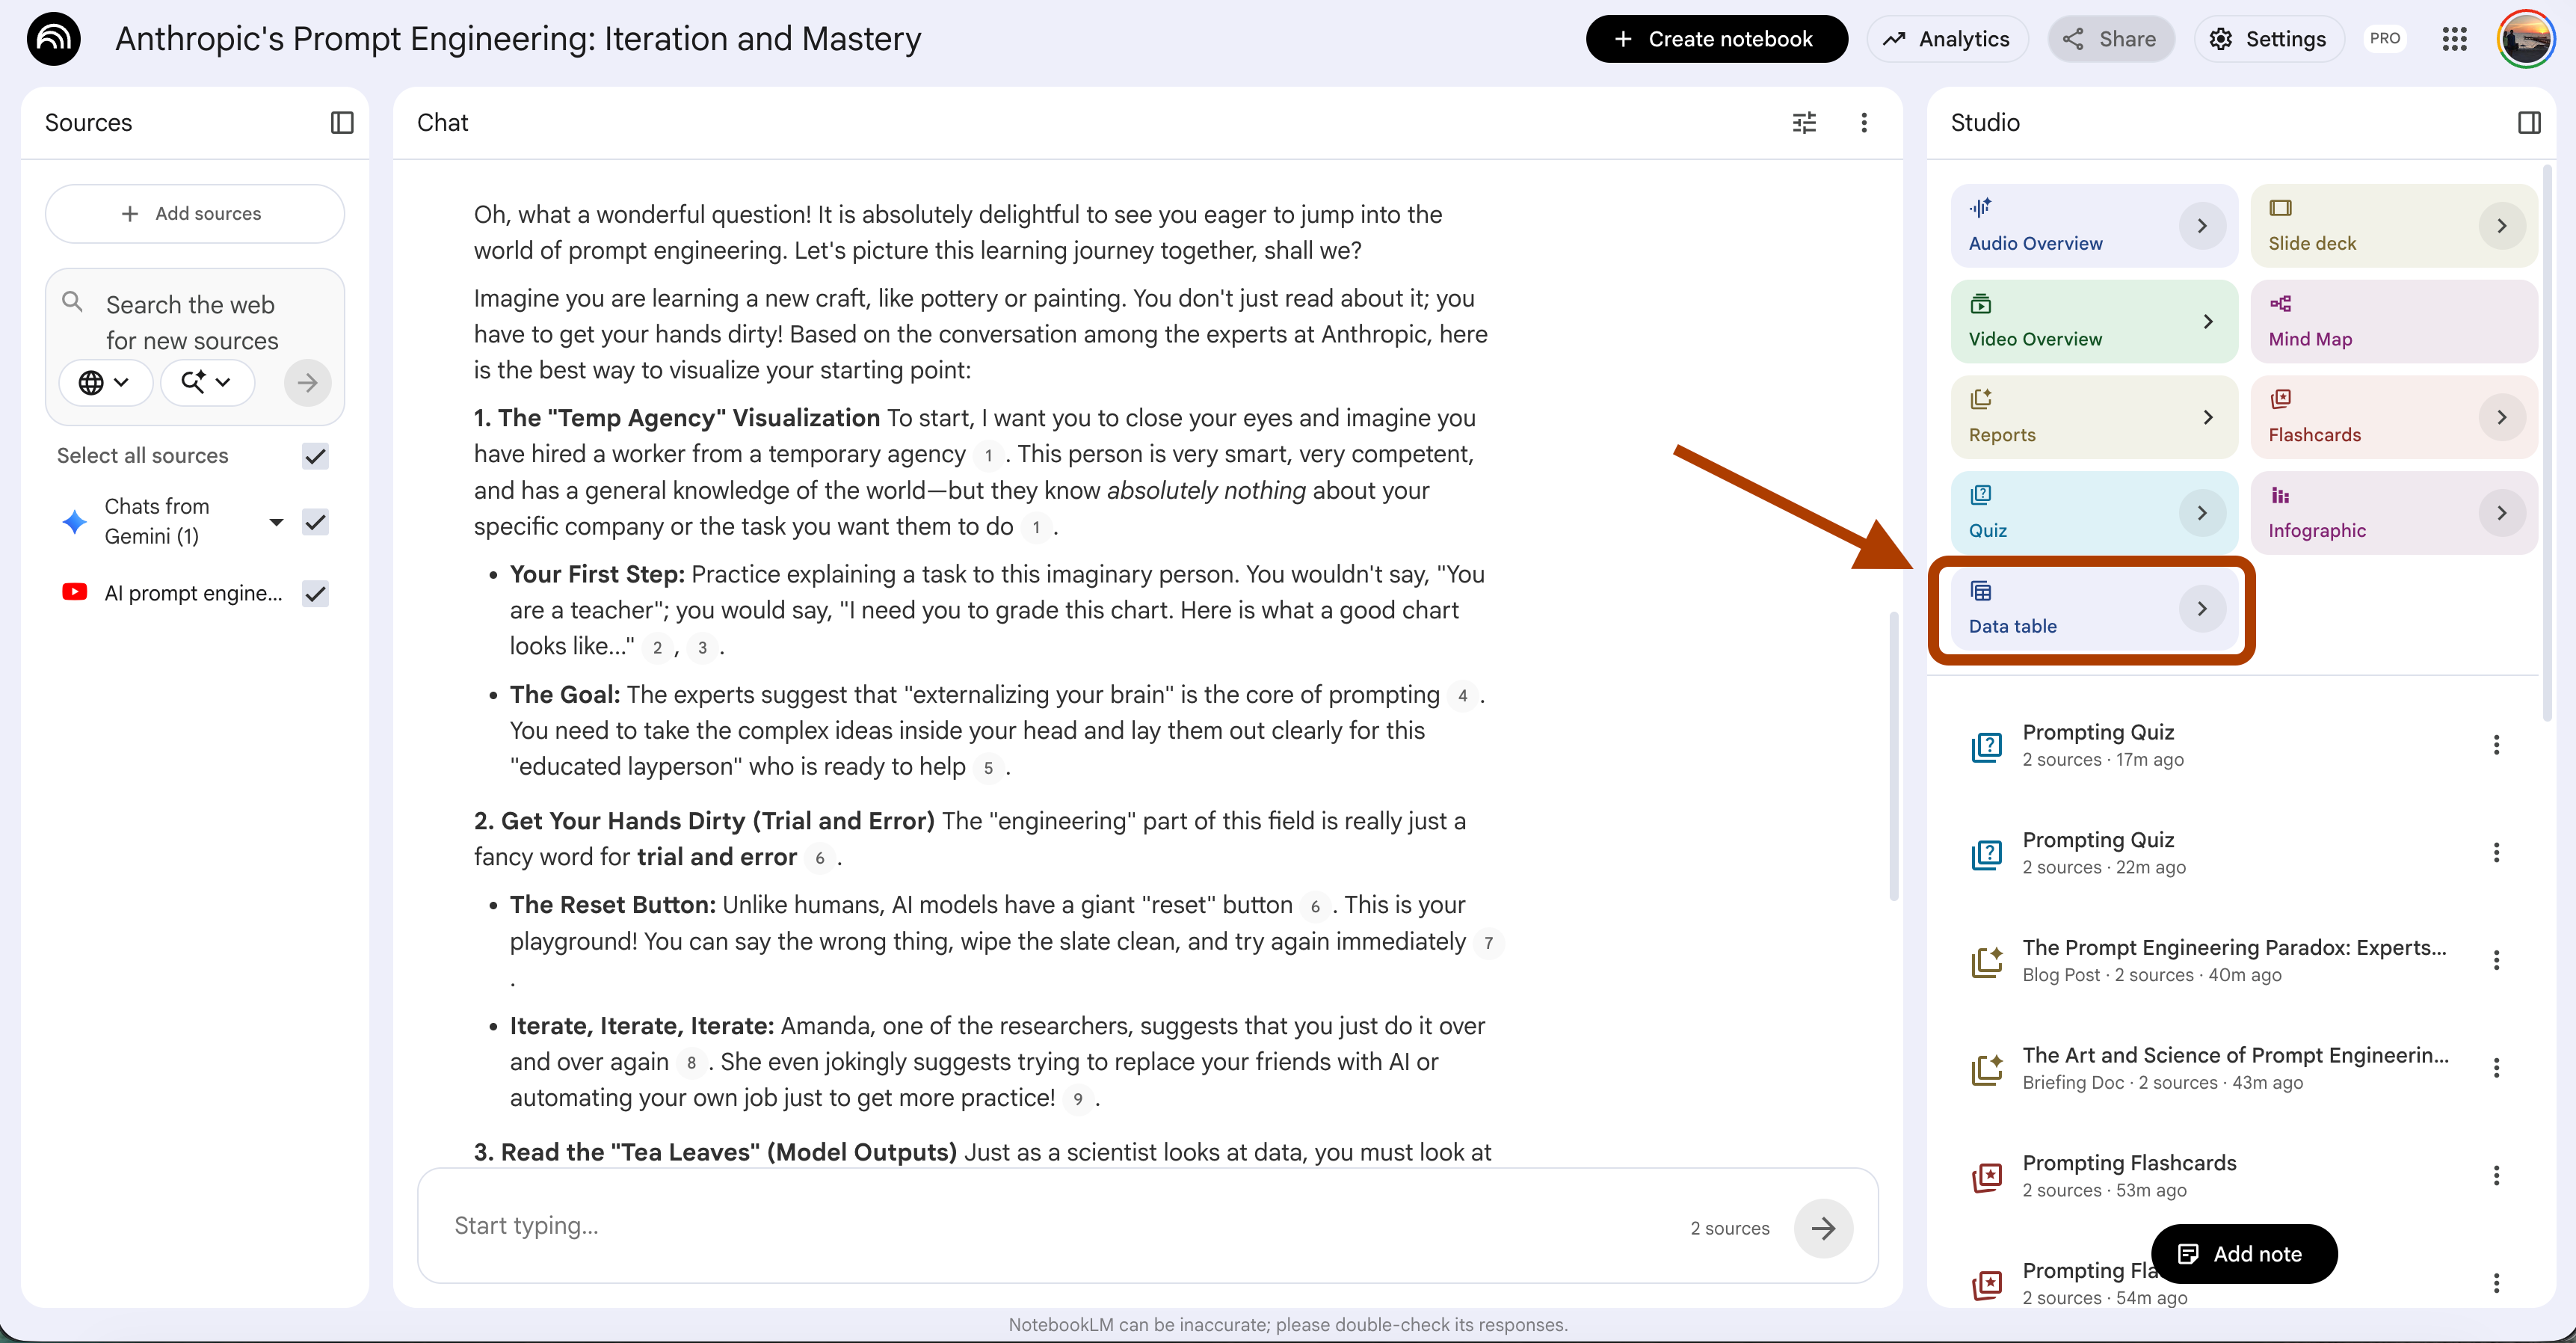
NotebookLM organizes key concepts from your sources into a structured table, terms, definitions, relationships, and examples.
But the Data Table is descriptive.
It shows you what’s there, not where you’re weak.
It treats every cell the same.
The cell for a concept you already understand looks identical to the cell for something you’ve never seen before.
You need a prompt that makes NotebookLM evaluate you, not just the material.
The custom prompt:
Based on my notes and my sources, here are my weakest areas.

--- MY CONTEXT (fill this in) ---

Subject I'm studying:
[e.g., "Prompt Engineering"]

What I'm preparing for:
[e.g., "client work", "exam", "general mastery"]

Topics I already know well (skip these):
[e.g., "basic prompting, personas"]

My available time:
[e.g., "5 hours this week"]

--- WEAKNESS SIGNALS TO USE ---

Use these signals from my notes to judge weakness:

1. Topics my notes barely cover compared to the source.
2. Topics where my notes have errors, vague statements,
   or question marks.
3. Topics that appear often in the source but I only
   wrote one or two lines about.
4. Topics connected to concepts I skipped — if I don't
   understand the prerequisite, I probably don't understand
   what builds on it.
5. Topics with specific techniques, formulas, or examples —
   these are the most common weak points when notes are sparse.

For each of the 5 weakest topics, give me:

- Topic name and where it lives in my sources.
- Why I'm probably weak there — based on specific evidence
  from my notes.
- What to review first — the single chapter, section, or
  concept to start with.
- How much time to spend — 30 min, 1 hour, 2 hours.
- A quick self-check question to know when I've actually
  learned it.

Rank from most weakness to least. Focus on what will hurt
my grade most, not what's easiest to catch up on.
Here is the output.
When to use which:
Data Table feature → Building a reference sheet. When you want all concepts in one place for later lookup.
Custom prompt → The start of a study week. When you have limited time and need to know where to point it.
Prompt 7: Turn 10 Research Papers Into a Literature Review Draft
You have 10 papers open in your browser. Three days until the literature review is due. You’ve read maybe four of them closely.
The others you skimmed.
Now you need to write 8 pages synthesizing all of them, finding themes, grouping arguments, and showing where the field agrees and disagrees.
Most students either cite papers one by one (”Smith said X. Jones said Y. Patel said Z.”) or give up and write about their three favorite papers. Both lose points.
The 1-click way: Reports feature
Open your notebook.
In the Studio panel, click Reports. Pick the Briefing Doc preset.
NotebookLM produces a synthesis across your sources.
This is faster than writing anything yourself.
You get a unified document with key points from every source.
But a Briefing Doc is not a literature review.
The two formats have different goals:
A Briefing Doc tells a reader what the sources say.
A Literature Review tells a reader what the field says, and where it’s going.
Briefing Docs list. Literature Reviews synthesize.
The Report feature gives you the first.
You need a prompt for the second.
The custom prompt:
Draft a literature review from my sources.

--- MY CONTEXT (fill this in) ---

Topic of the review:
[e.g., "chain-of-thought prompting in large language models"]

Field or discipline:
[e.g., "AI research", "organic chemistry", "educational psychology"]

Target length:
[e.g., "1500 words", "6 pages", "short section for a thesis"]

Target audience:
[e.g., "my professor who specializes in this area",
"a general academic reader", "a grant committee"]

Specific angle I want to argue or explore:
[e.g., "chain-of-thought works better for reasoning tasks
than for creative tasks" — or "no angle yet, help me find one"]

--- STRUCTURE ---

Use this structure:

1. Introduction (one paragraph): define the topic, state why
   it matters, preview the themes you found across sources.

2. Thematic sections (3-5 themes): group sources by theme,
   not by author. Each theme should:
   - Name the theme clearly.
   - Show which sources agree on it, with direct citations.
   - Show which sources push back or disagree, with citations.
   - End with one sentence on what remains unresolved.

3. Gaps in the current research (one paragraph):
   what questions do the sources leave open? Which topics
   are underexplored?

4. Conclusion (one paragraph): tie the themes together,
   point toward where the field should go next.

--- RULES ---

- Cite every claim. Format: (Author Year) or (Source name).
- Do not list sources one by one. Group them by idea.
- Flag any source that contradicts the others — don't hide it.
- If my angle above is "no angle yet, help me find one,"
  suggest three possible angles at the end with the
  strongest supporting evidence for each.
- Use only what's in my sources. Do not invent citations.
Here is the sample output.
When to use which:
Reports feature (Briefing Doc) → You need a reference document to skim during research. Not a draft.
Custom prompt → You’re writing the review. You need something that synthesizes by theme, surfaces disagreements, and can even suggest an angle when you’re stuck.
Prompt 8: Feynman Technique for Studying with NotebookLM
You read the chapter. You understood every sentence. You highlighted the important parts. You wrote good notes.
Then the professor calls on you in class and asks
“Can you explain this to the class?”
You freeze.
The words you read don’t come out. You knew this five minutes ago.
This is the gap between recognition and understanding. You recognize concepts when you read them. You can’t produce them from memory. Richard Feynman had one rule for this: if you can’t explain it simply, you don’t understand it.
The 1-click way: None
No Studio feature does this. The quiz tests your recognition; it gives you multiple-choice or short-answer questions with known answers. That’s recall. Teach-back is different. You produce the explanation, then something pokes holes in it.
That’s a prompt, not a feature.
And we’ll do it by customizing the “Chat”, how?
Click here.
Click on "Custom” and paste your prompt here.
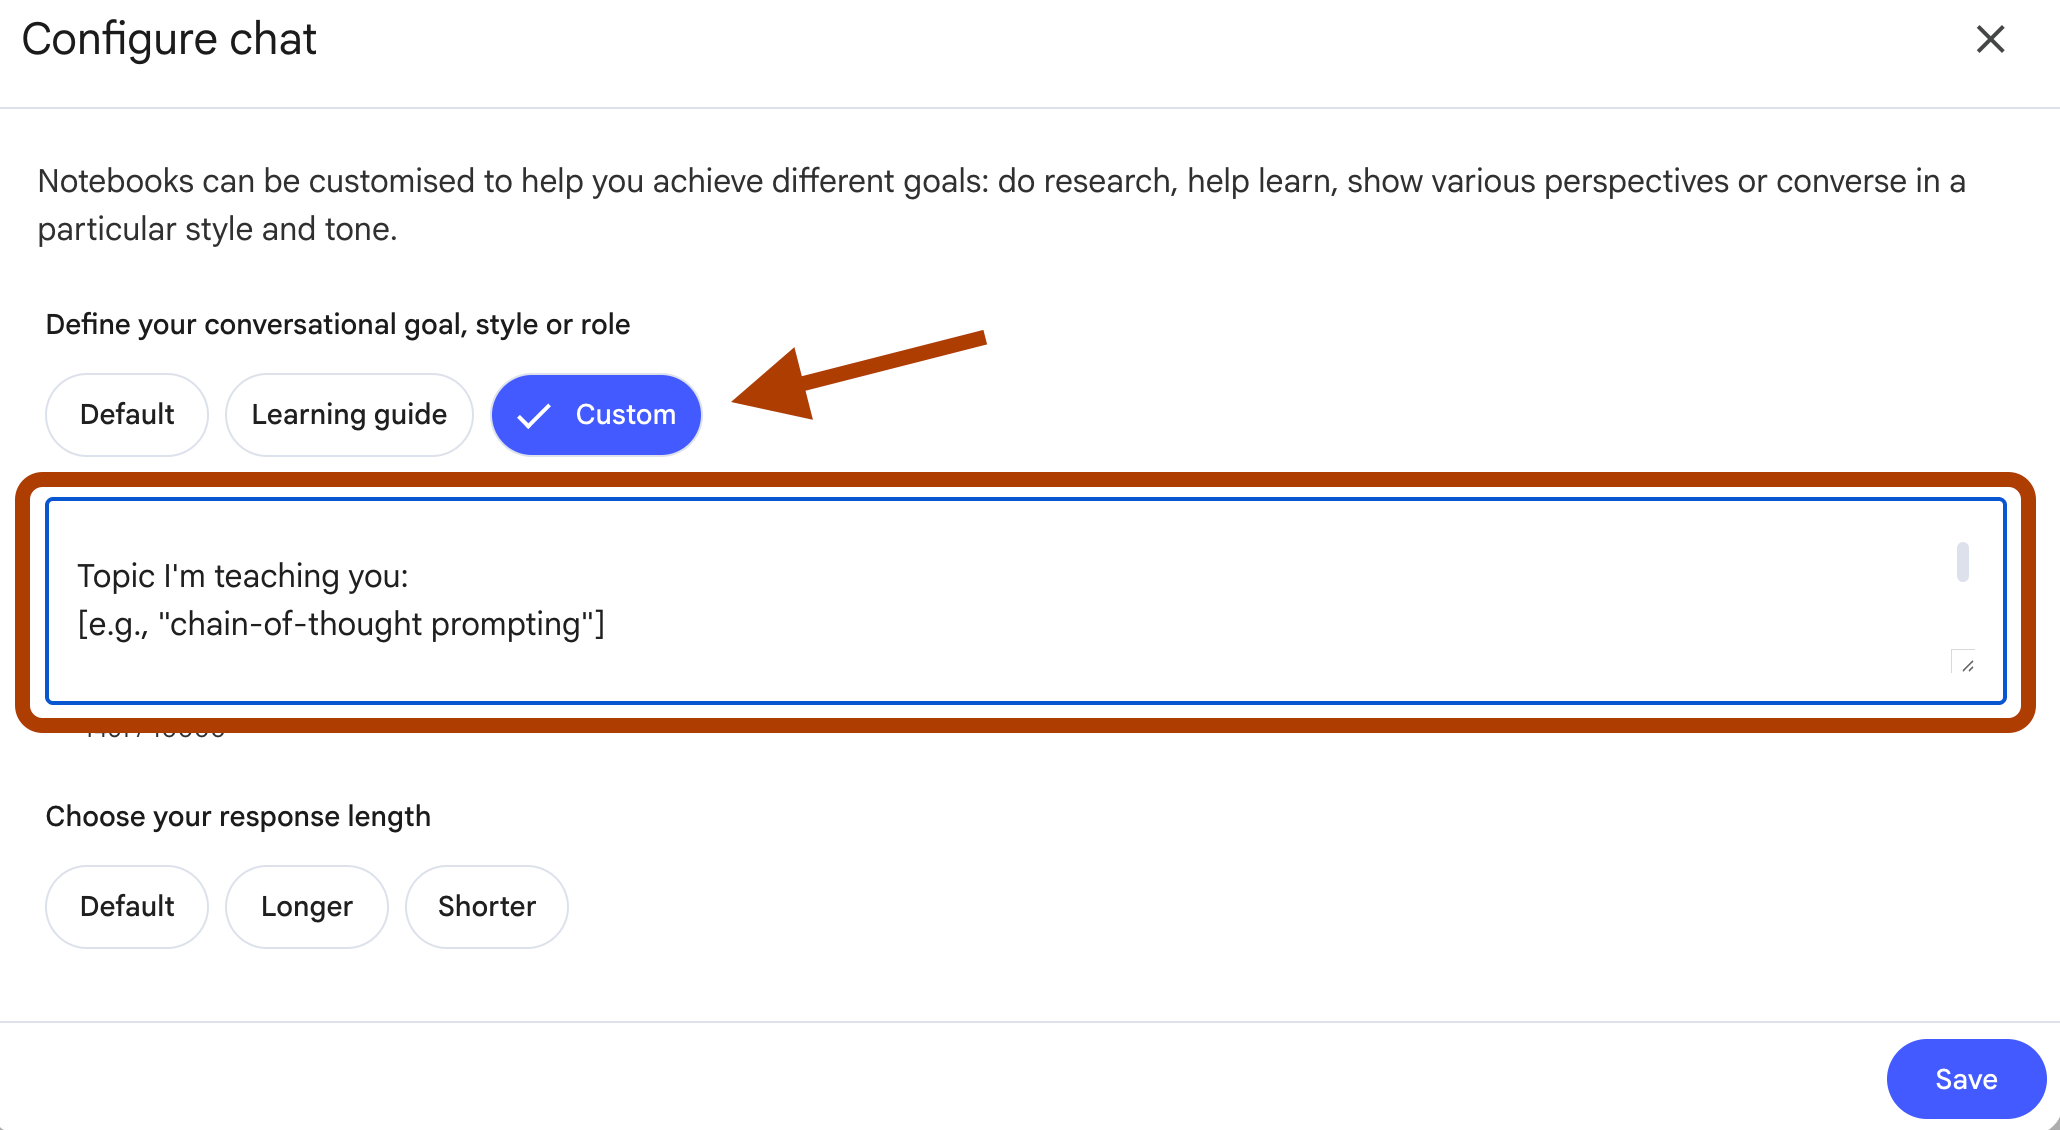
The custom prompt:
Flip our roles. You are the student. I am the teacher.

--- MY CONTEXT (fill this in) ---

Topic I'm teaching you:
[e.g., "chain-of-thought prompting"]

My level (so you know how to push back):
[e.g., "undergraduate", "master's student", "self-taught"]

How hard I want you to be:
[e.g., "curious beginner", "sharp student who asks follow-ups",
"skeptical professor who tests every claim"]

--- HOW THIS WORKS ---

1. I will explain the topic to you in my own words.
   Do not interrupt my first explanation.

2. After I finish, play the student I described above.
   Ask me 3 questions:
   - One basic question about something I might have
     skipped or oversimplified.
   - One follow-up that tests whether I understand
     why the concept works, not just what it is.
   - One hard question that probes an edge case or
     connection to other concepts in my sources.

3. Use only what's in my sources to generate your
   questions. If I say something that contradicts
   my sources, point it out.

4. After I answer each question, tell me:
   - Whether my answer is correct.
   - What I missed, if anything.
   - Which part of my sources I should revisit.

5. At the end, score my understanding from 1 to 10
   and tell me what to study next.

Ready? I'll start teaching when I type "Here's my
explanation:"
After customizing, I used this prompt;
Here's my
explanation: Chain of thought is a system where I'll explain to AI in steps
Here is the output.
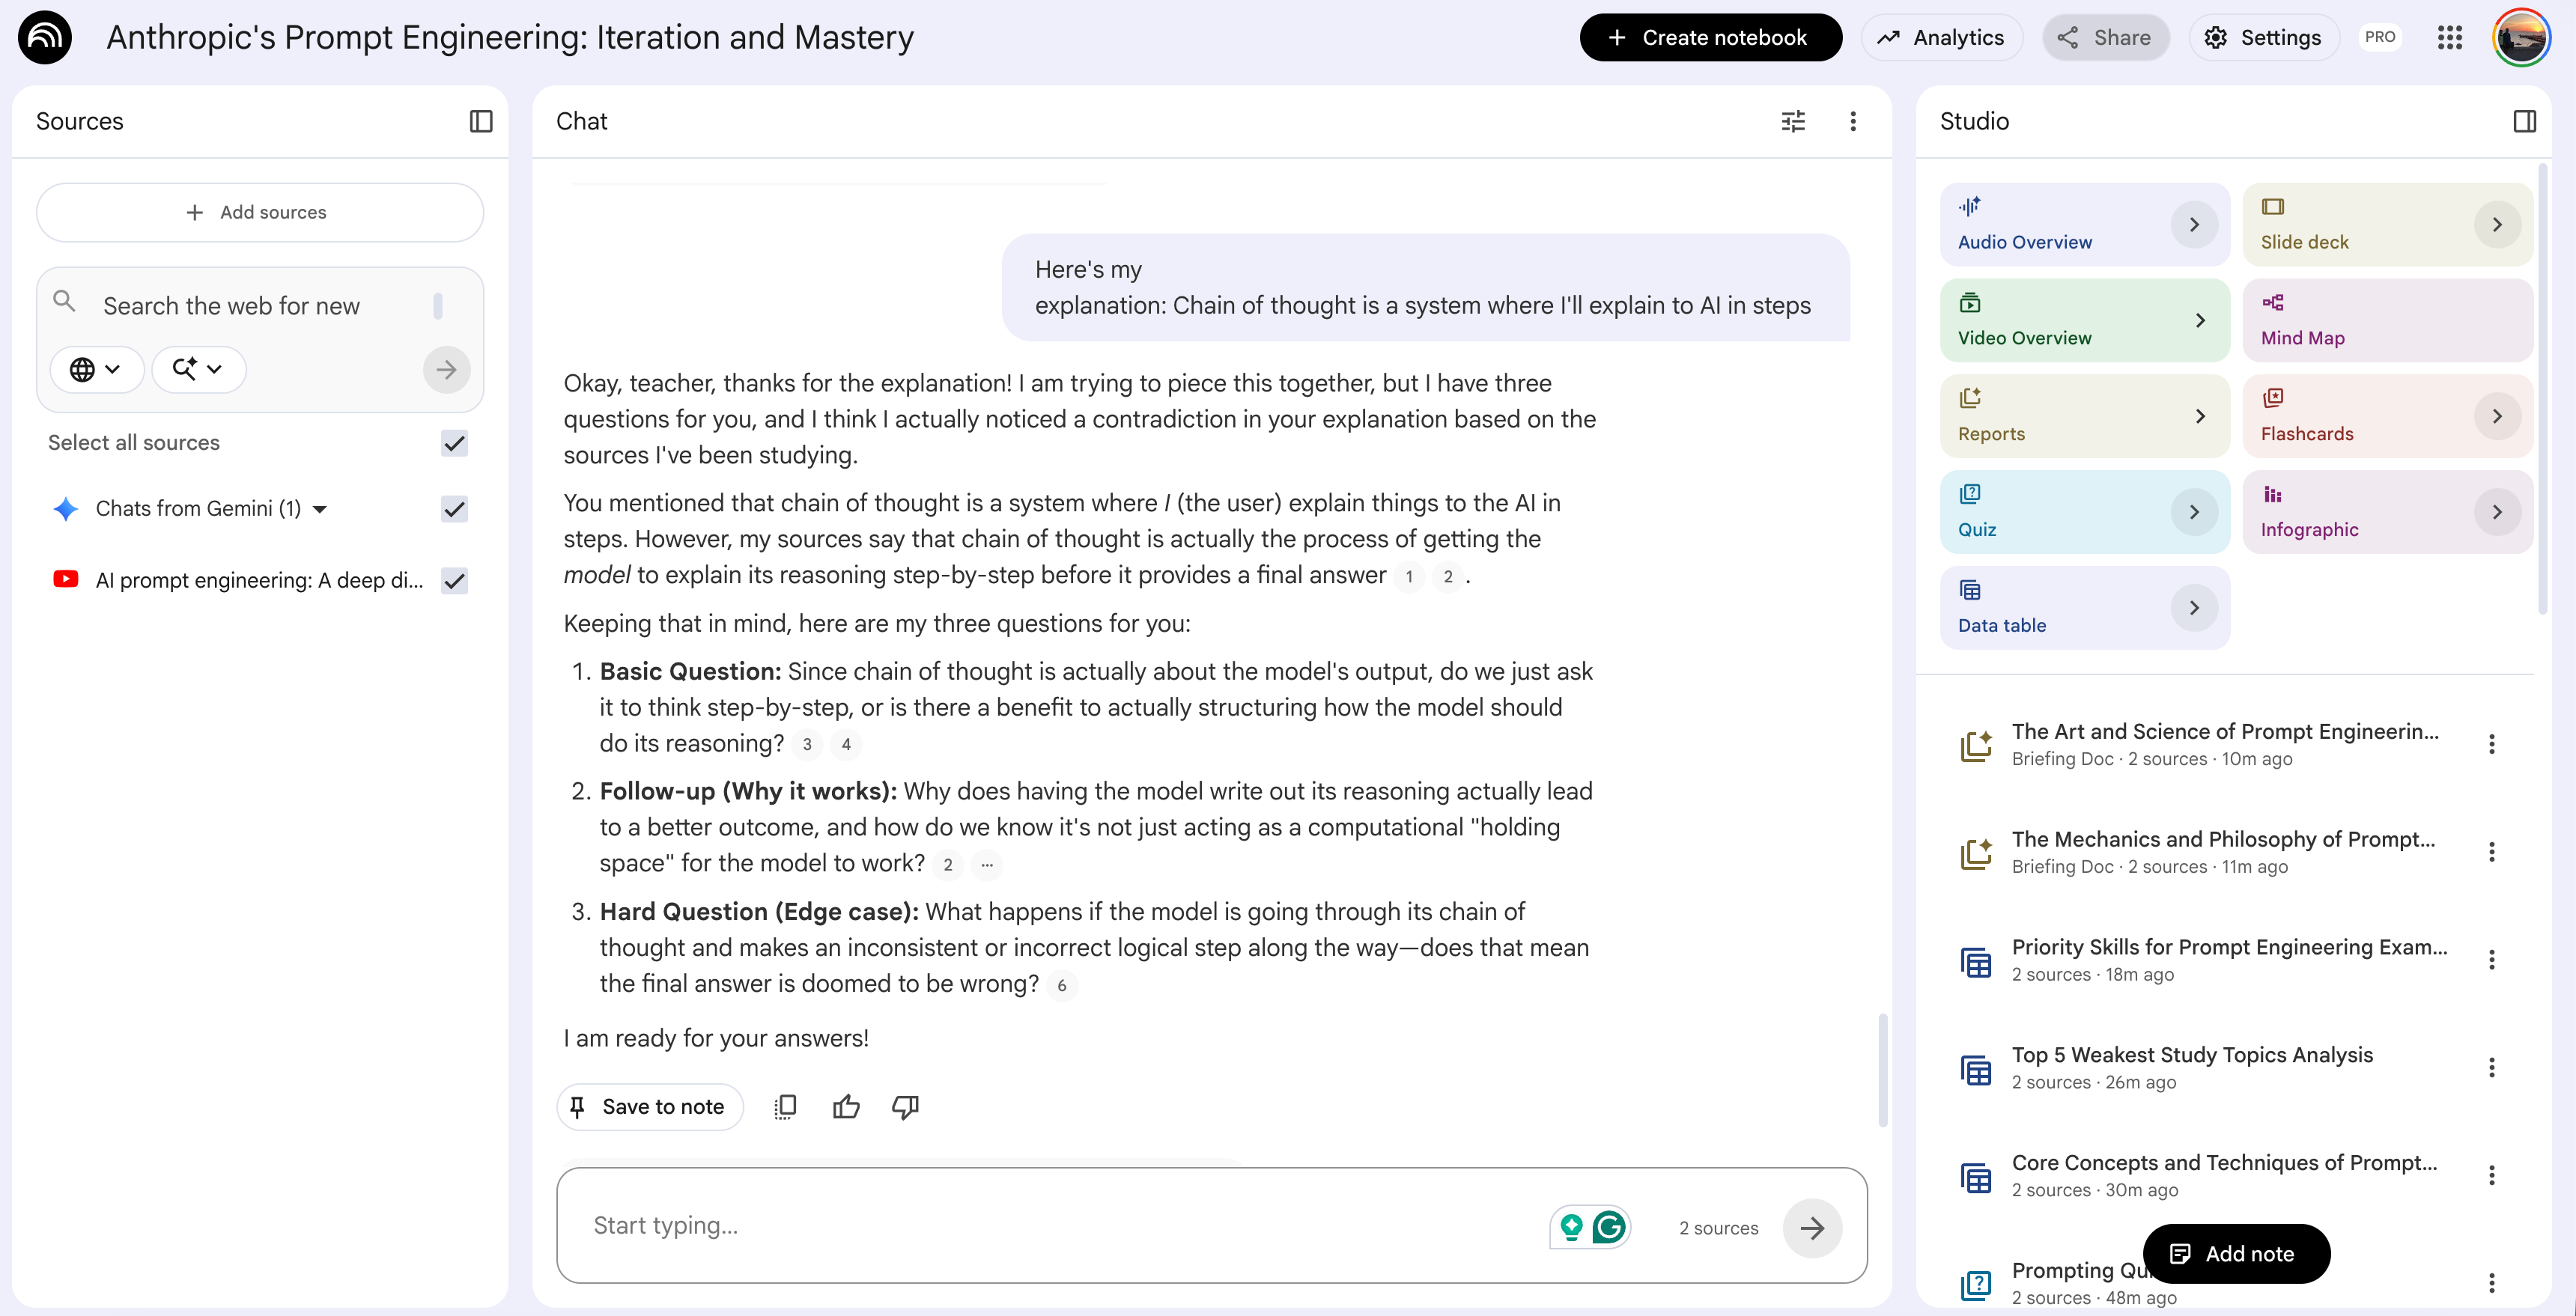
We just switched the role!
When to use:
Before any oral exam, presentation, or client meeting.
Any time you need to produce understanding, not just recognize it.
Also, the day before a written exam, teach-back surfaces gaps that silent re-reading hides.
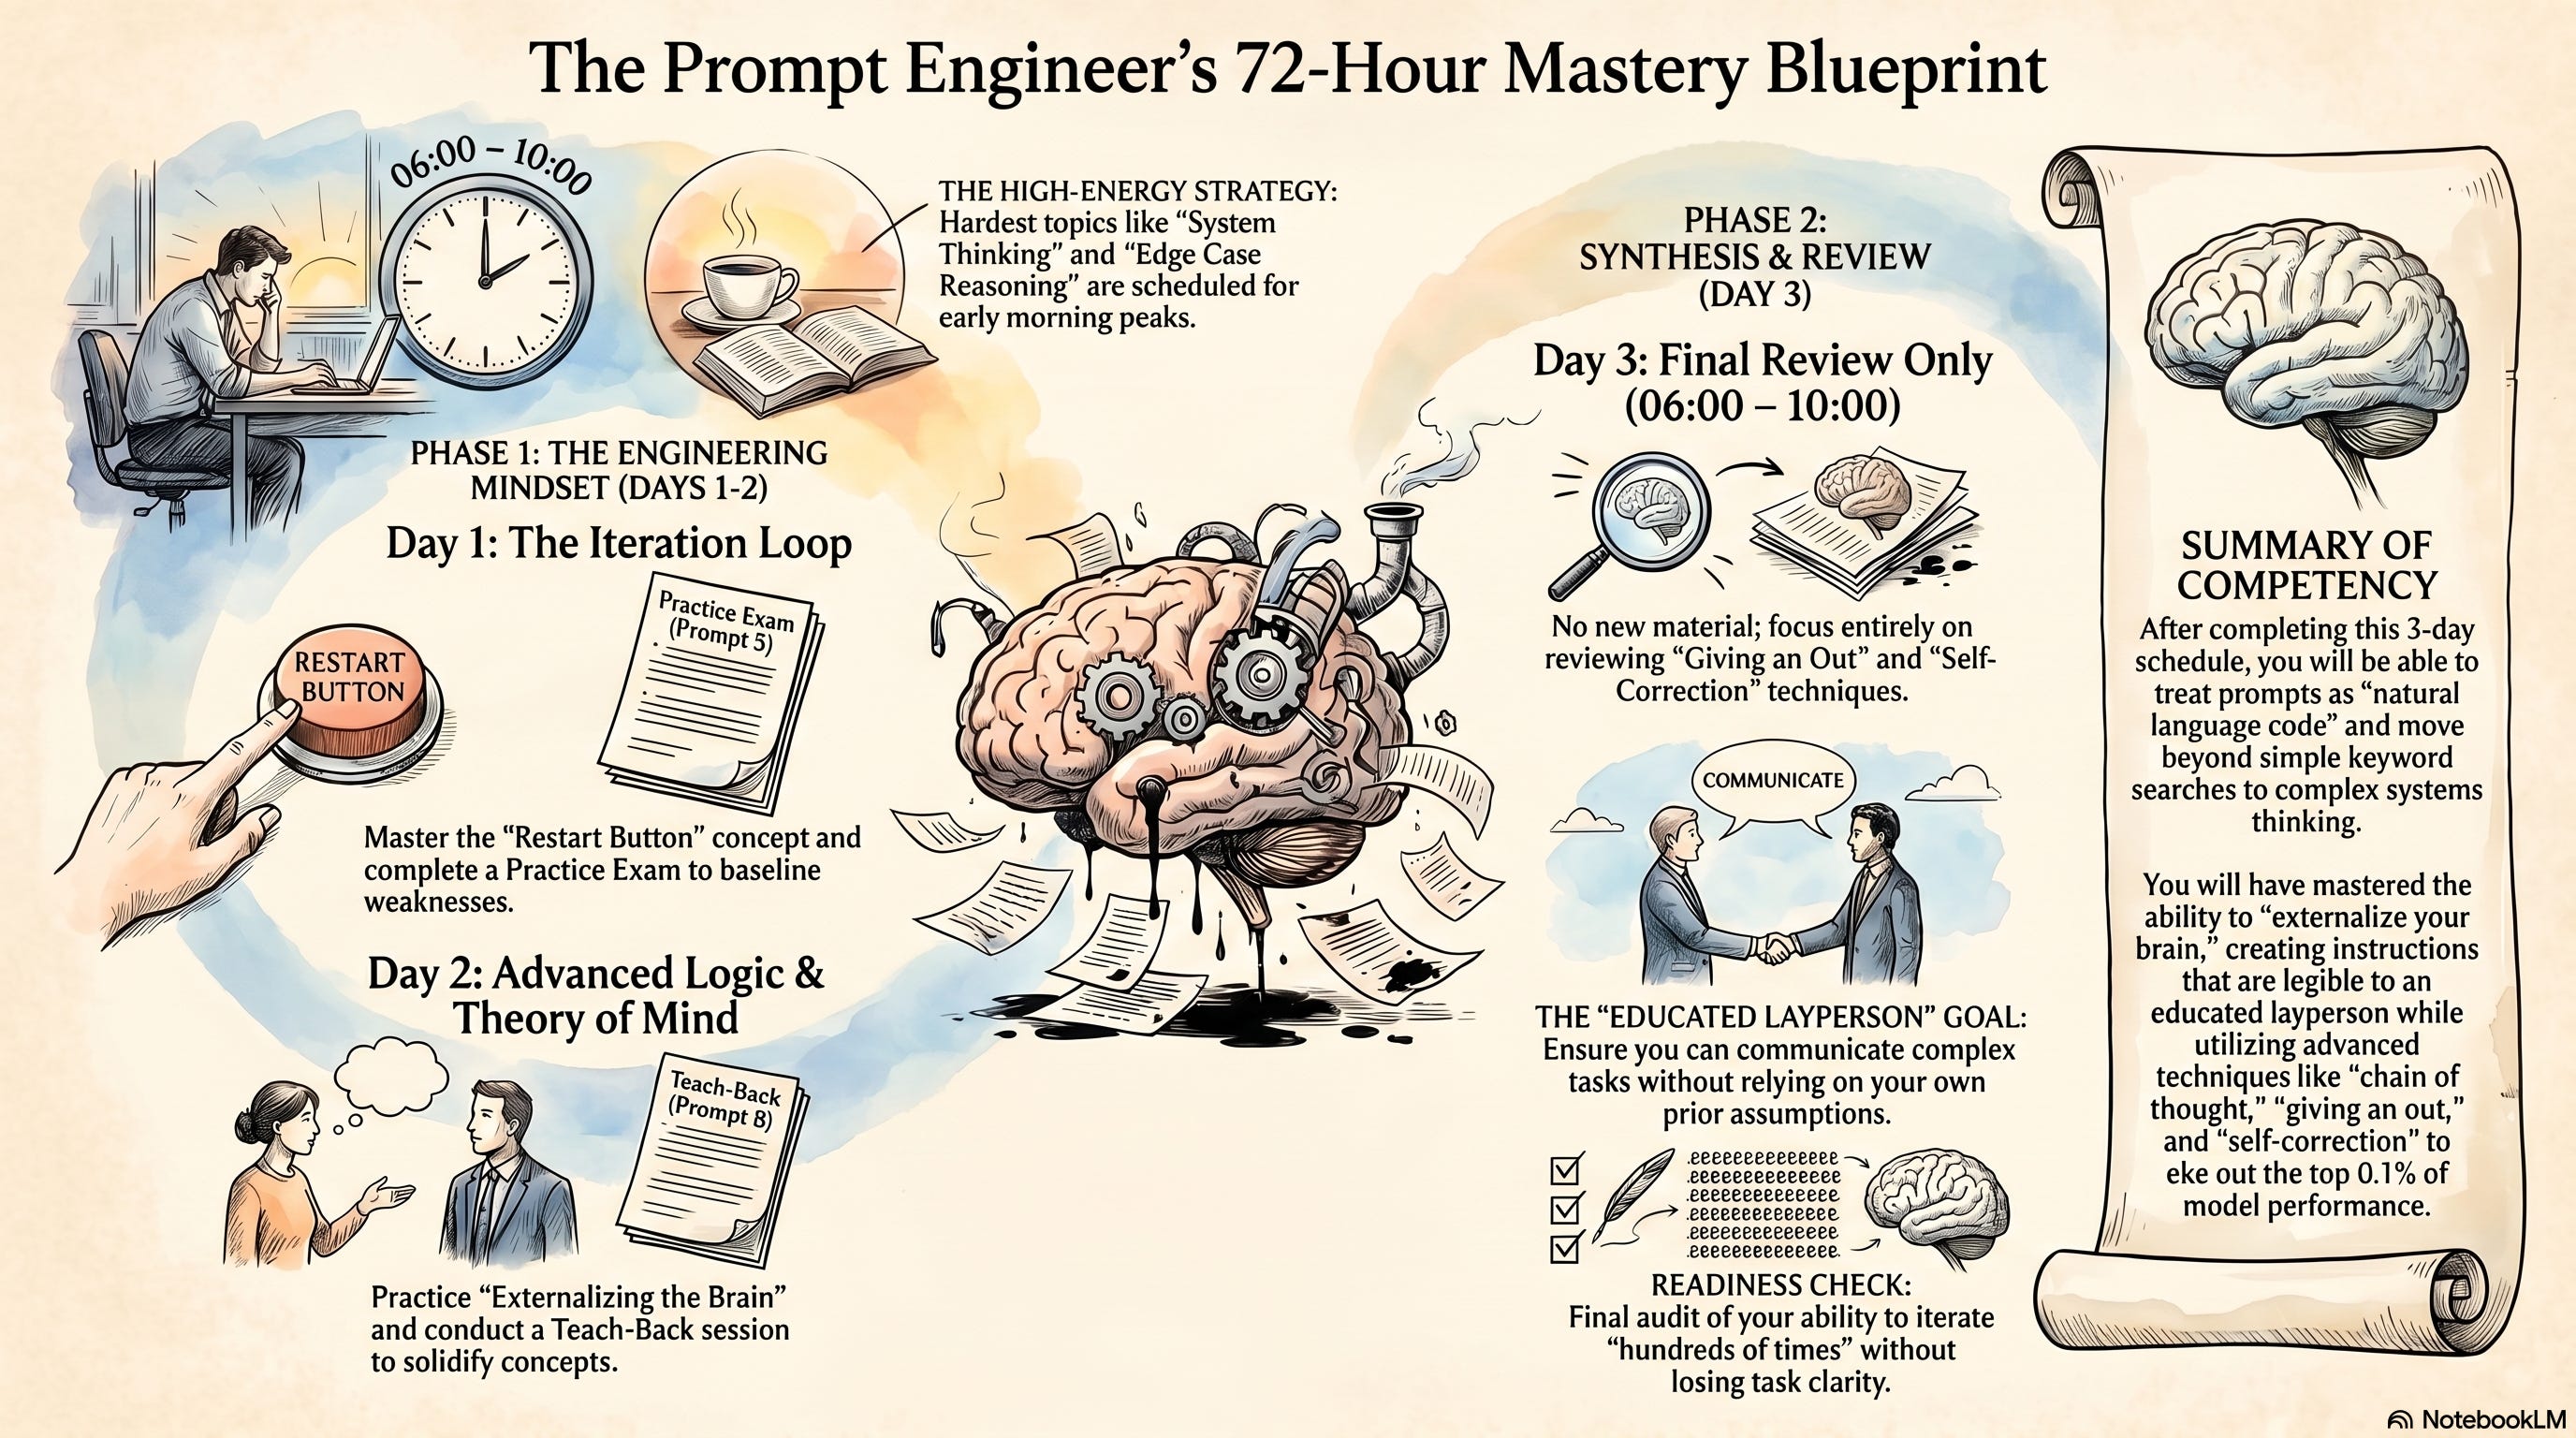
Prompt 9: Build a 7-Day Exam Prep Schedule (Infographic You Can Print)
You have a week. You have a pile of material. You have good intentions.
By Tuesday, you’ve done nothing because “I’ll start tomorrow with a clean plan.”
By Thursday, you’re panicking. By Sunday night, you’re cramming.
The problem isn’t discipline.
The problem is that you never built a concrete plan. “Study Chapter 5 this week” is not a plan. “Monday 7 pm to 8 pm, review Chapter 5 flashcards, then 8 to 9 pm, answer 10 practice questions” is a plan.
The 1-click way: None directly, but the Infographic makes it beautiful
No Studio feature builds a schedule. But once you have one, the Infographic feature turns it into a poster you can print and stick on your wall.
The pattern is two steps: prompt first, then Infographic.
Build a study schedule from my sources and my weakness analysis.

--- MY CONTEXT (fill this in) ---

What I'm preparing for:
[e.g., "Thermodynamics final exam", "job interview on
prompt engineering", "thesis defense"]

Exam or deadline date:
[e.g., "April 28", "next Monday", "in 10 days"]

Days I have:
[e.g., "7 days", "14 days", "3 days"]

Hours I can study per day:
[e.g., "2 hours on weekdays, 4 hours on weekends"]

My weakest topics (from Prompt 6 output, or add your own):
[e.g., "Refining prompts, model reasoning,
enterprise prompting"]

My strongest topics (review lightly, don't waste time):
[e.g., "Basic prompting, personas"]

Energy pattern:
[e.g., "I focus best in the morning", "I'm a night owl",
"I have class 9-3 so only evenings work"]

--- BUILD THE SCHEDULE ---

Structure the plan day by day. For each day:

1. Date and time block (match my available hours above).
2. Topic for that session — pull from my weakest topics first,
   then from sources I've underutilized.
3. Specific action — which prompt to run, which section to
   review, which flashcards to practice.
4. Expected outcome — what I should be able to do by
   the end of that session.

Rules:
- Put the hardest topics in my highest-energy slots.
- Schedule a practice exam (Prompt 5) 2-3 days before
  the deadline, not the day before.
- Schedule a teach-back session (Prompt 8) the day before
  the deadline.
- Build in one rest block every 3 days. Burnout kills
  retention.
- The last day before the deadline is review only,
  not new material.

End with a one-paragraph summary of what I will be able
to do after completing the schedule.
Here is your plan.
When to use:
Any deadline with more than 3 days of prep time. Exams, interviews, presentations, thesis defenses, and client meetings.
The schedule forces you to be honest about your available time and your weakest areas.
The Infographic turns that honesty into something you see every morning.
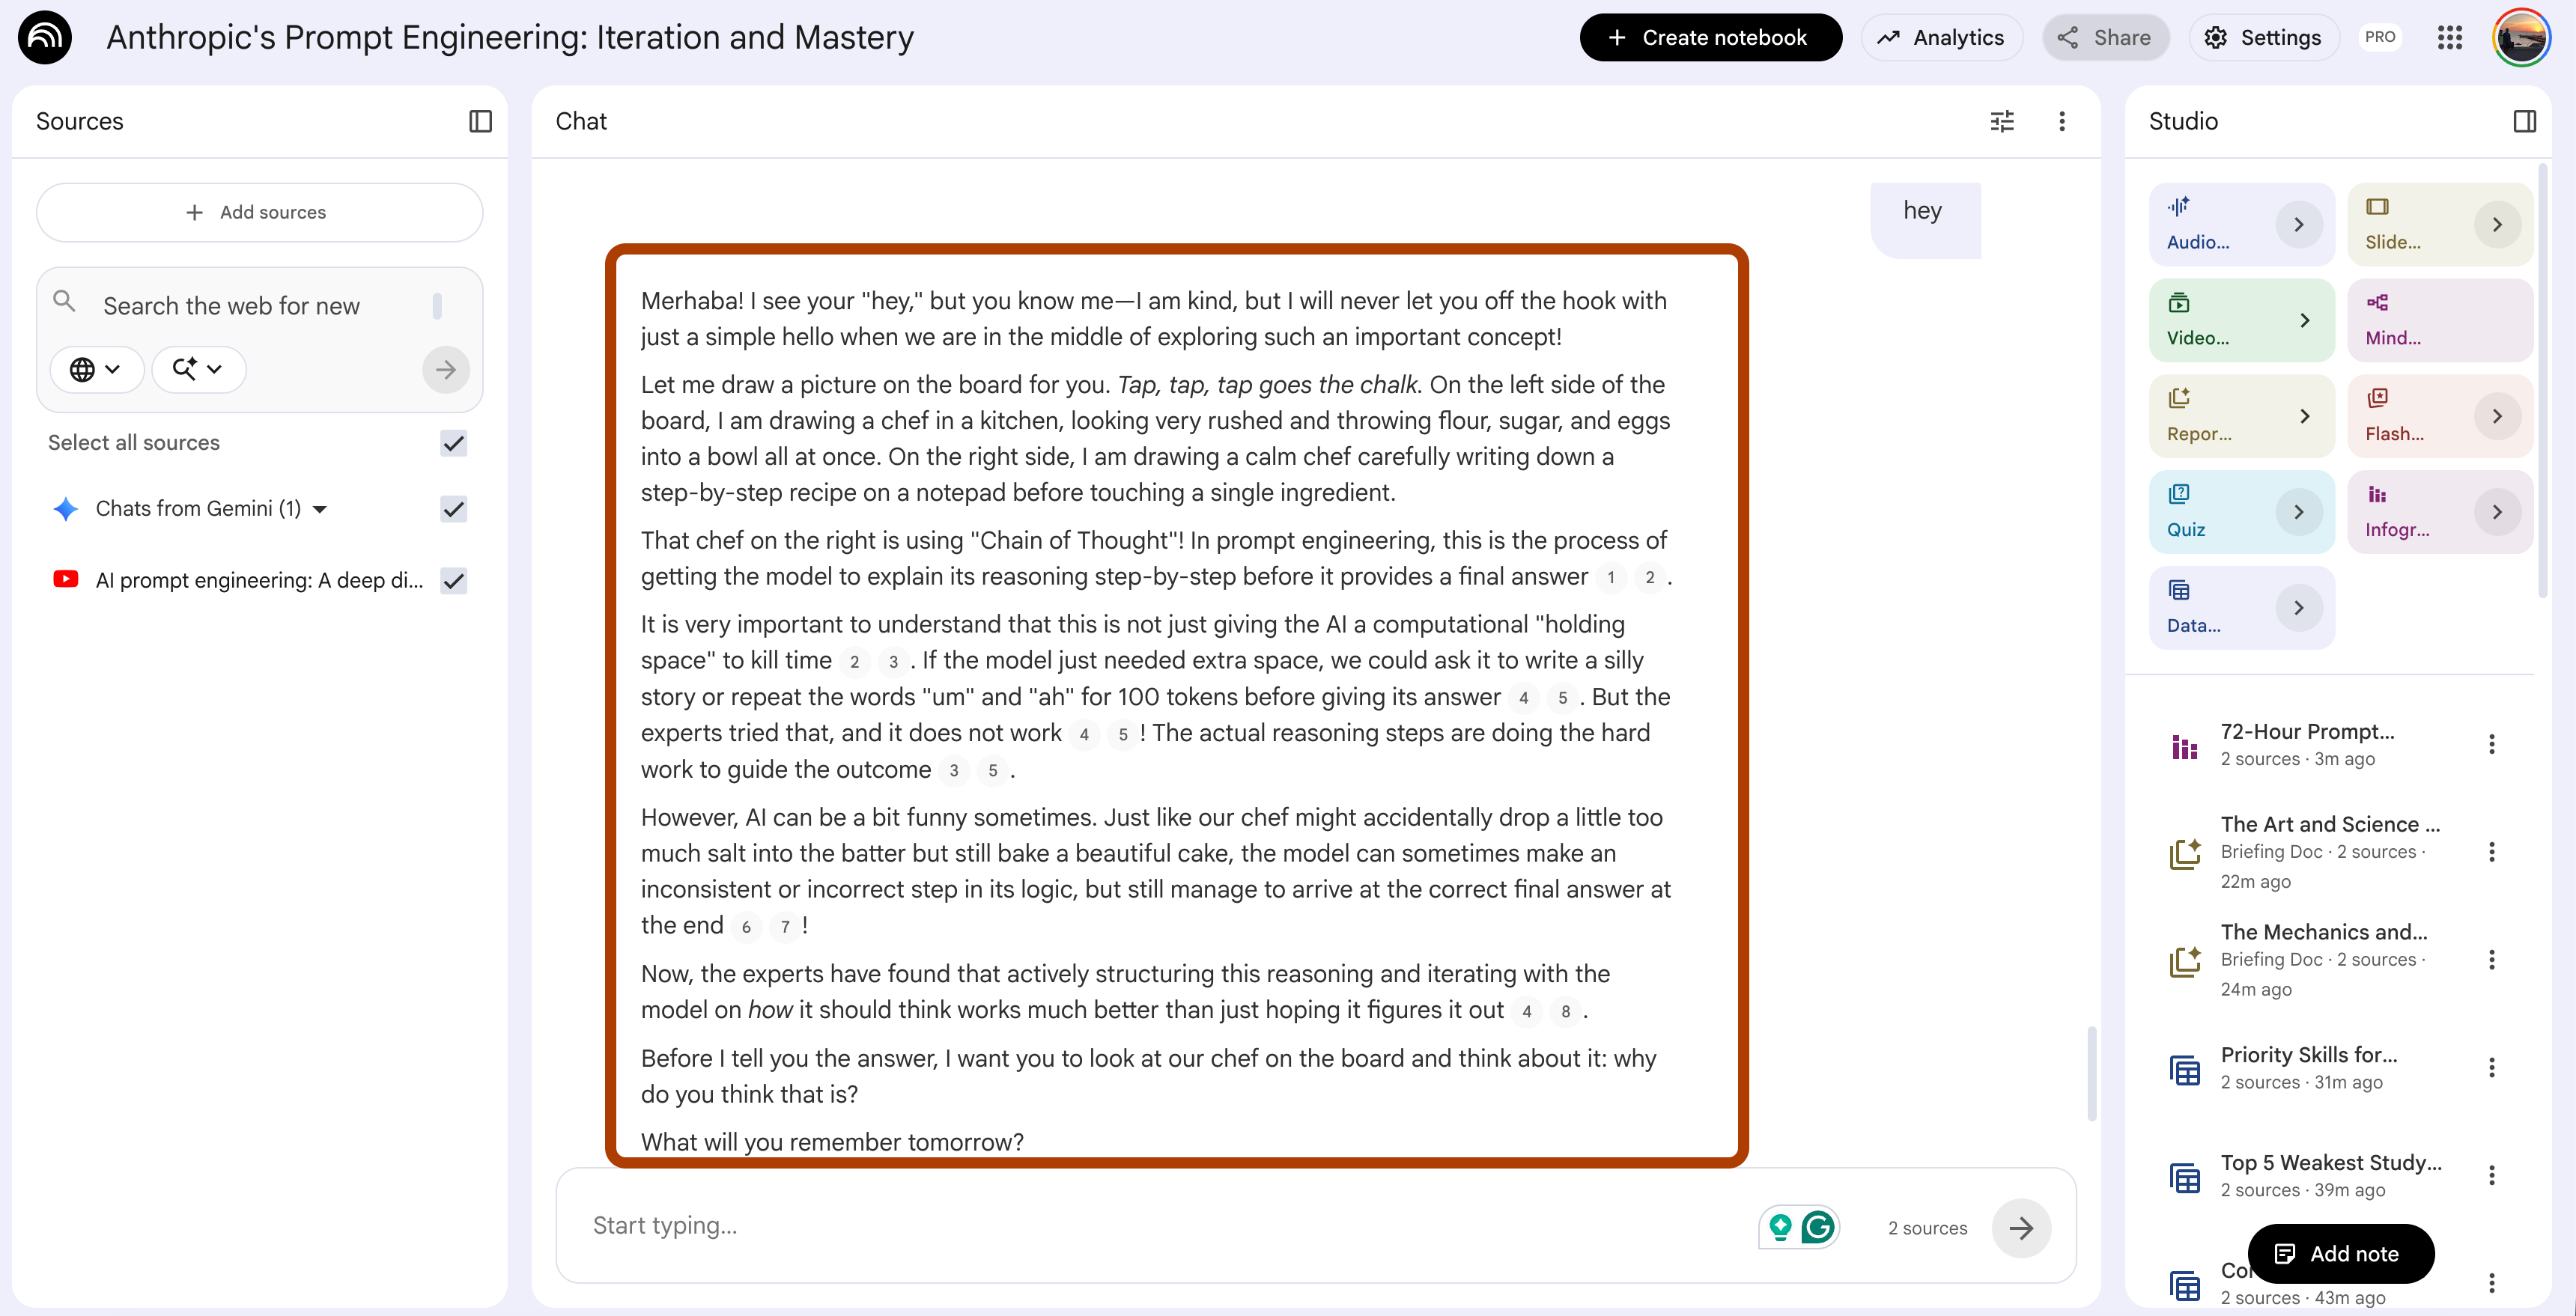
Prompt 10: Turn NotebookLM Into Your Personal Tutor (The Ms. Nilüfer Setup)
You can ask NotebookLM any question and get a decent answer. But the experience is transactional; you type, it replies, you close the tab. It doesn’t feel like learning with someone. It feels like searching.
The best teachers I had as a student weren’t the ones who knew the most. They were the ones who made me want to come back and keep learning. They had a voice. A personality. A way of explaining that made hard things feel approachable.
NotebookLM can have one too. Most people never set it up.
The 1-click way: Instructions + Persona in Settings
Open your notebook.
Click here.
Click on “Custom” and paste your prompt here.
In the Persona field, paste this template (fill in the brackets):
Act like [TEACHER NAME] — my [DESCRIPTION].

[TEACHER NAME] is:
- [PERSONALITY TRAIT 1, e.g., "patient when I don't understand"]
- [PERSONALITY TRAIT 2, e.g., "excited about the subject"]
- [PERSONALITY TRAIT 3, e.g., "always uses real-world examples"]
- [PERSONALITY TRAIT 4, e.g., "never makes me feel stupid for asking"]

How [TEACHER NAME] teaches:
- Explains visually when possible.
- Asks me questions back instead of just giving answers.
- Uses analogies from [FIELD OR INTEREST, e.g., "cooking",
  "sports", "everyday life"].
- Connects new ideas to things I already know.
- Tells me when I'm getting off track and gently pulls me back.

When I ask a question, [TEACHER NAME] does not just answer.
[TEACHER NAME] also asks me one follow-up question to
check if I actually understood.

Stay in character for our entire conversation.
Use my sources to answer, but speak in [TEACHER NAME]'s voice.
Example output:
I tested this on the Anthropic prompt engineering notebook. My persona:
Act like Ms. Nilüfer — my elementary school teacher.
Ms. Nilüfer is:

Patient when I don't understand
Passionate about the subject
Always visual in her explanations
Kind but never lets me off the hook with a half-answer

How Ms. Nilüfer teaches:

Draws diagrams on the board (describes them in words to me)
Asks "why do you think that?" before giving answers
Uses analogies from daily life — traffic, kitchen, school
Ends every lesson with "what will you remember tomorrow?"
Most people leave these blank. Their NotebookLM sounds like a generic AI assistant. Yours doesn’t have to.
Here is the output.
What’s next?
We are in the era where everyone can be a builder.
Yesterday, I watched a 15-year-old on YouTube explaining how he started his startup with AI.
That’s where I hope you are going.
NotebookLM is step one. You’ve learned how to turn your sources into study systems. But the real shift happens when you realize NotebookLM is not just for studying. It’s a research engine you can plug into anything you build.
The next natural step is connecting NotebookLM to Gemini. Once they talk to each other, your notebook turns into an app.
I walked through two real examples, an AI teacher from Stanford’s ML playlist and a prompt advisor from Anthropic’s own prompting course.
If those two apps made you think “wait, I could actually build a product with this”, you’re right. That’s where Claude Code comes in.
It’s the tool I use every day for client work and for my own apps.
The part most people miss is that you can run it for free using the leaked source code and Ollama. I wrote the full setup; you can read it here.
And if you want to watch someone do this in public, I just started a new series called Build. Ship. Repeat.
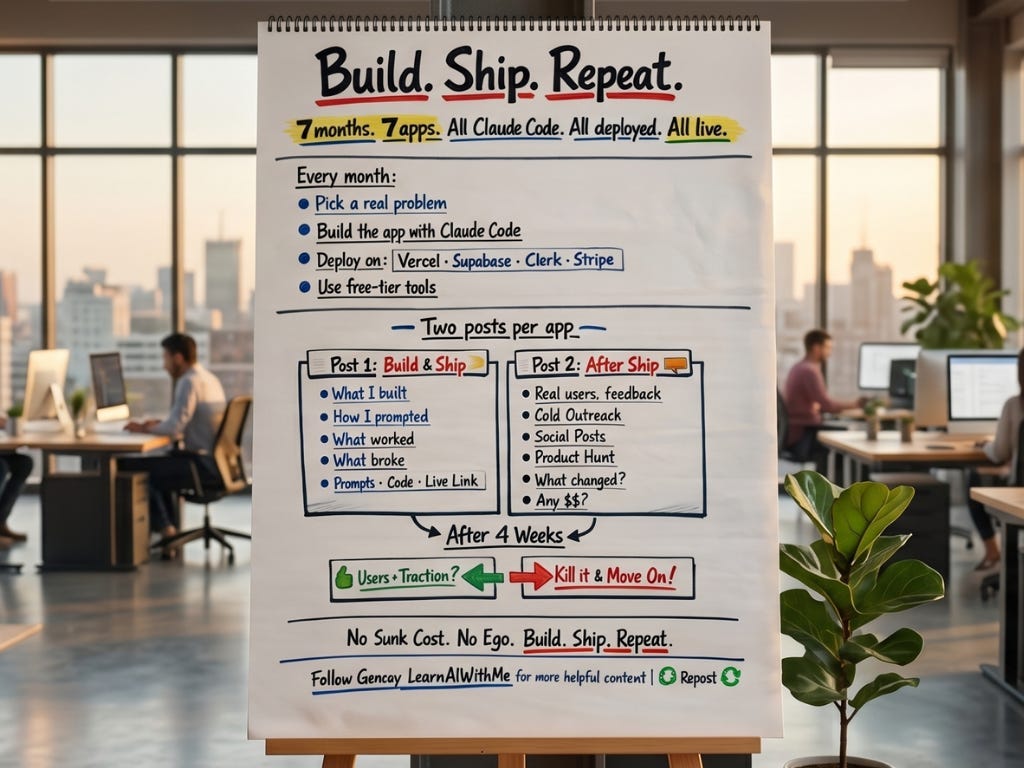
Seven apps, seven months, all built with Claude Code, all deployed live. App #1 drops May 1.
I’ll show the prompts, the code, the mistakes, and the real numbers.
Not a tutorial, a build log.
Very useful. It helps to explore notebooklm in better way.
NotebookLM is just such an amazing tool if you want to learn something. I need to use it more for Prosper when I am researching something, I feel like I don't use it enough.
Amazing article, Gencay!