
10 NotebookLM Prompts That Make Learning Stick 10x
Ten NotebookLM prompts that make learning stay, each one built on how your brain actually encodes information.

A couple of weeks ago, I wrote an article with 10 NotebookLM prompts to learn anything faster.
Learning fast was good, but what if you don’t have a time constraint?
So this time I went looking for the other half.
Not how to learn fast, but how to make it stay.
I found six methods.
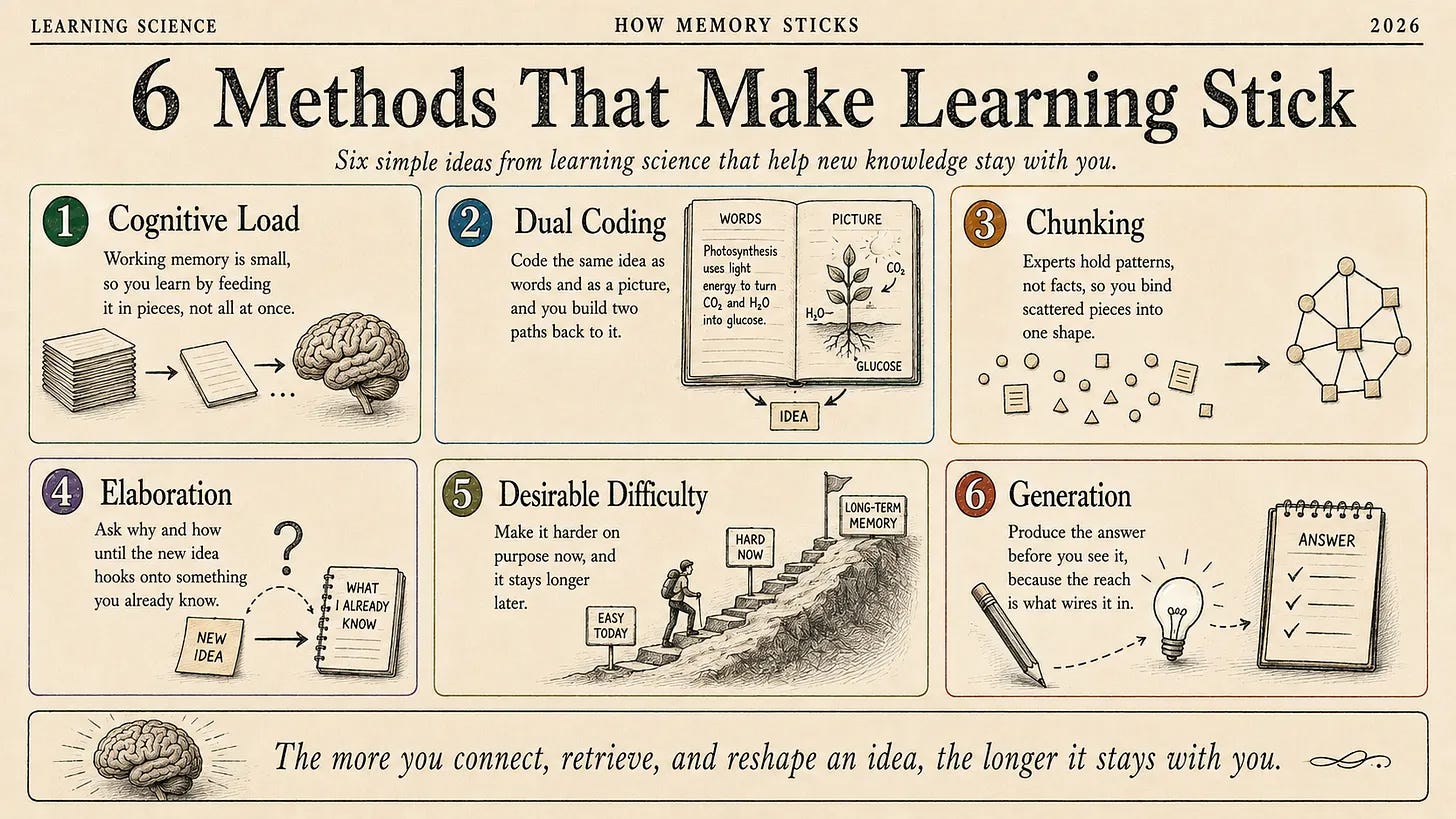
Every one of them is backed by how the brain actually encodes information, not by study-tip folklore.
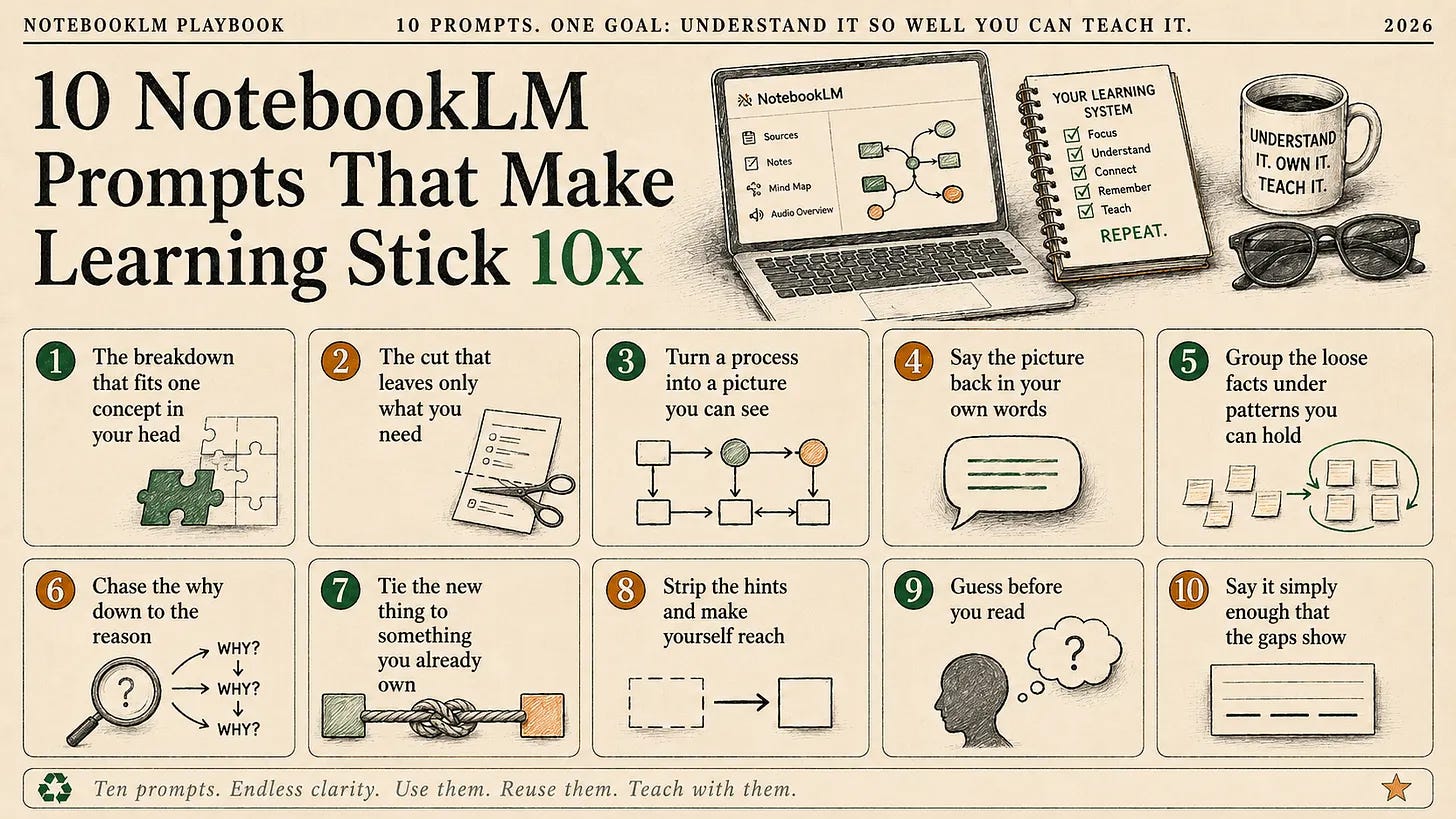
Now I have written 10 prompts for these six methods.
Here are all of them.
I trained a NotebookLM on Anthropic’s own video on prompting, so the source is the people who built the model rather than a blog summarizing them.
Here it is.
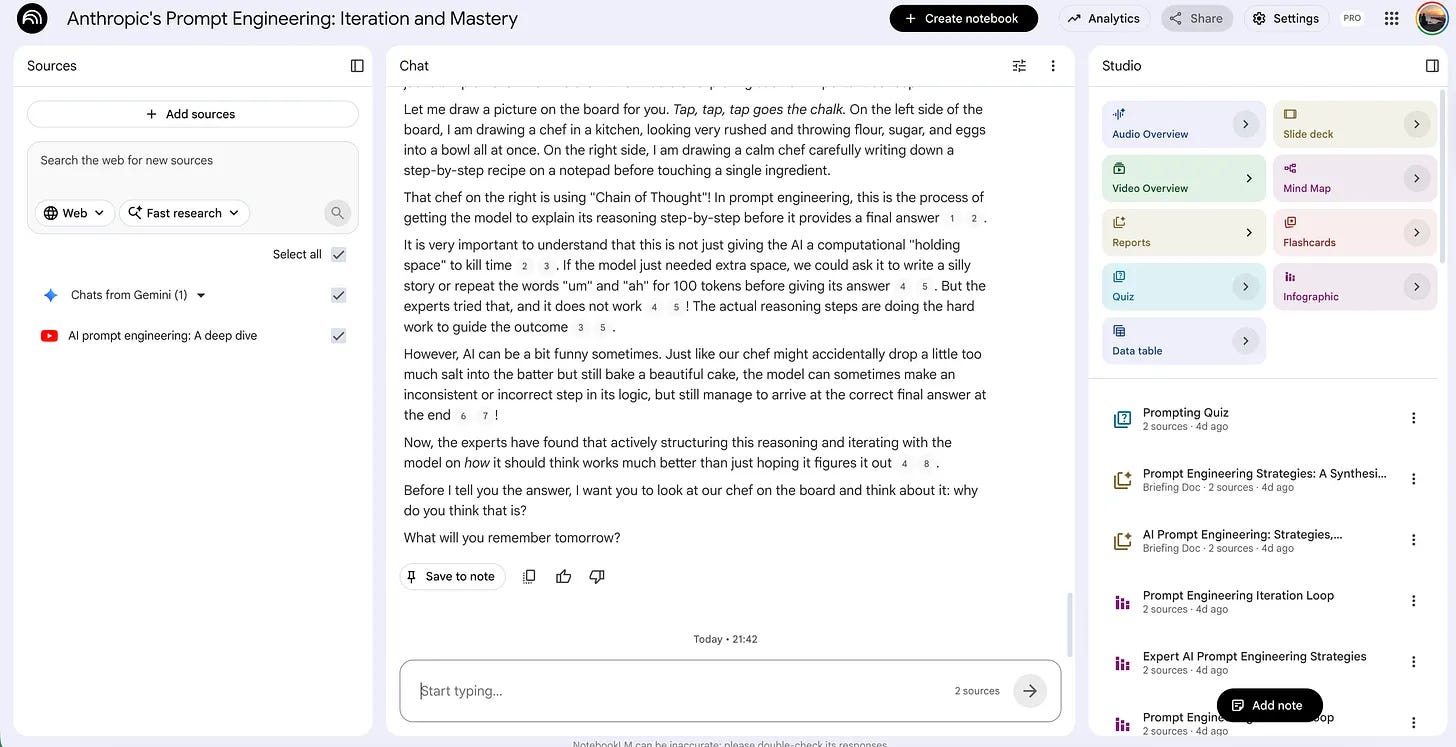
Let’s start.
If you don’t know the basics of the NotebookLM, read this one.
Technique 1: Cognitive load.
Feed it in pieces.
Working memory is small. You can hold a few things at once, and everything past that spills before it ever reaches long-term memory.
The next two prompts do that.
The first one breaks a new topic into pieces that your memory can carry.
The second one strips out the noise that was eating the space those pieces needed.
Prompt 1: The breakdown that fits one concept in your head
You open the source on prompting, and the first stretch throws clear communication, theory of mind, few-shot examples, and a chain of thought at you all at once, so you read all four and hold none.
The material was not too hard; it was too much at once.
The 1-click way: Report feature
Open your notebook, and in the Studio panel, click Reports, then pick Briefing doc.
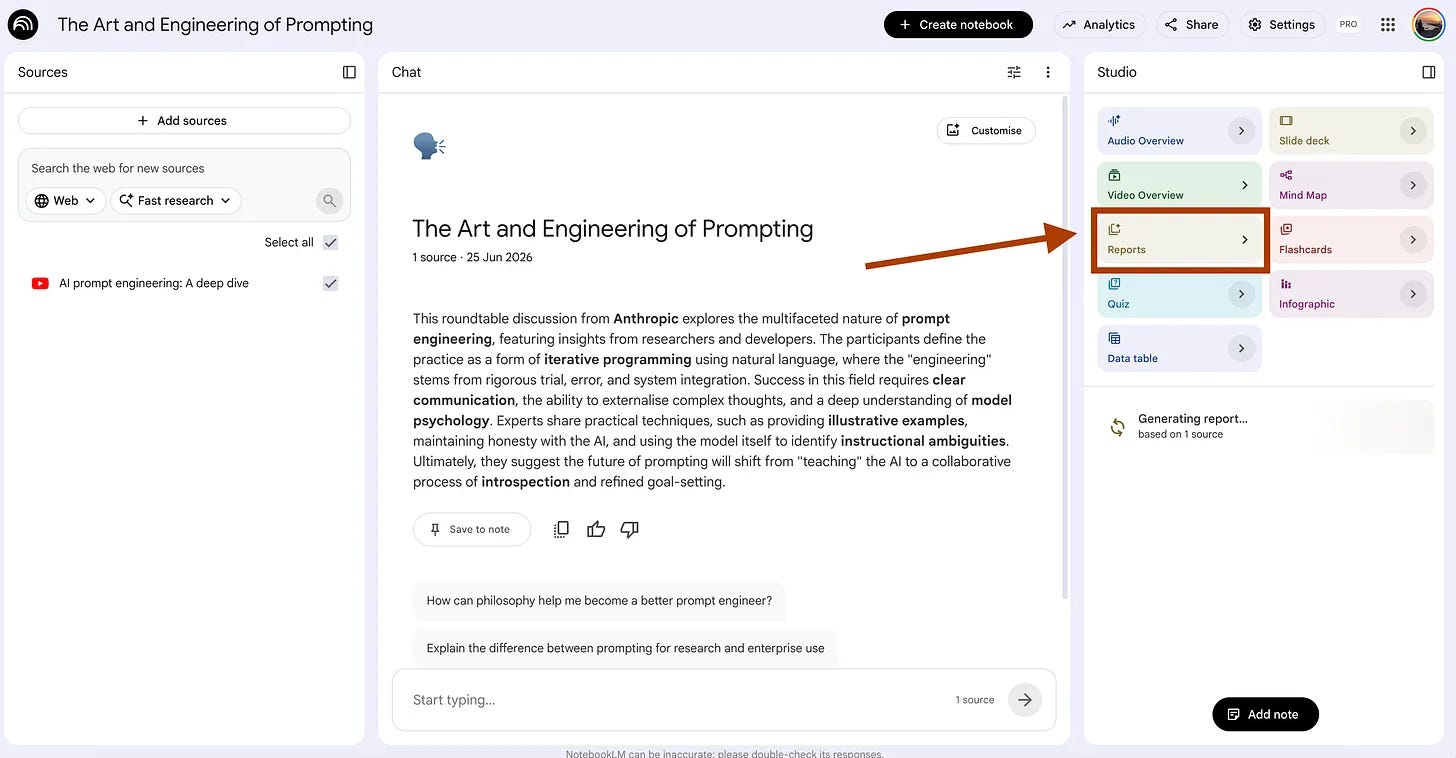
NotebookLM compresses your whole source into one summary, so you get every idea on a single page.
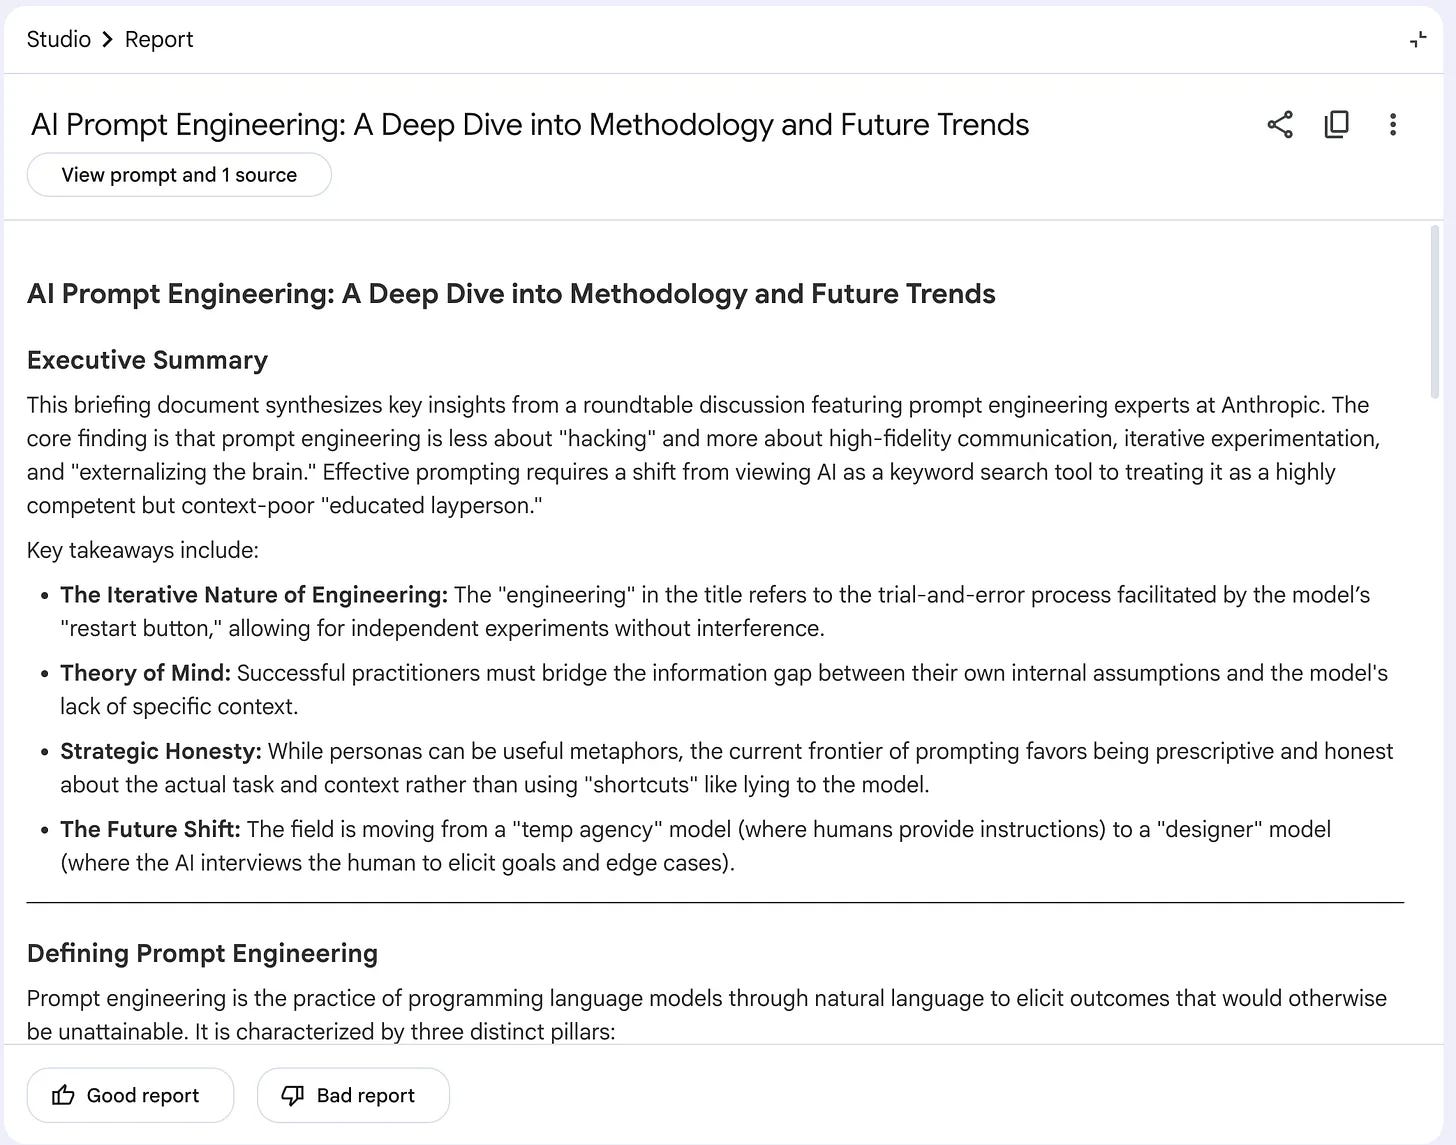
But a briefing doc flattens everything to one level, where the concept you have never seen sits at the same weight as the five you already know, so your brain cannot tell new from review.
It hands you the whole map when all you needed was the first turn.
UI selections before you paste (you click these yourself):
Report → Create your own.
Use this prompt.
Break {topic} into the smallest concepts from the sources that still stand on their own.
Order them so each concept only depends on the ones before it, and never use a term before
an earlier concept has defined it. For each concept give one plain sentence of what it is,
one sentence of why it matters, and one short example drawn from the sources.
Fully finish one concept before starting the next, and do not summarize all of them up front.
For {topic}, here I used prompt engineering fundamentals, since the source opens by defining the field from four angles.
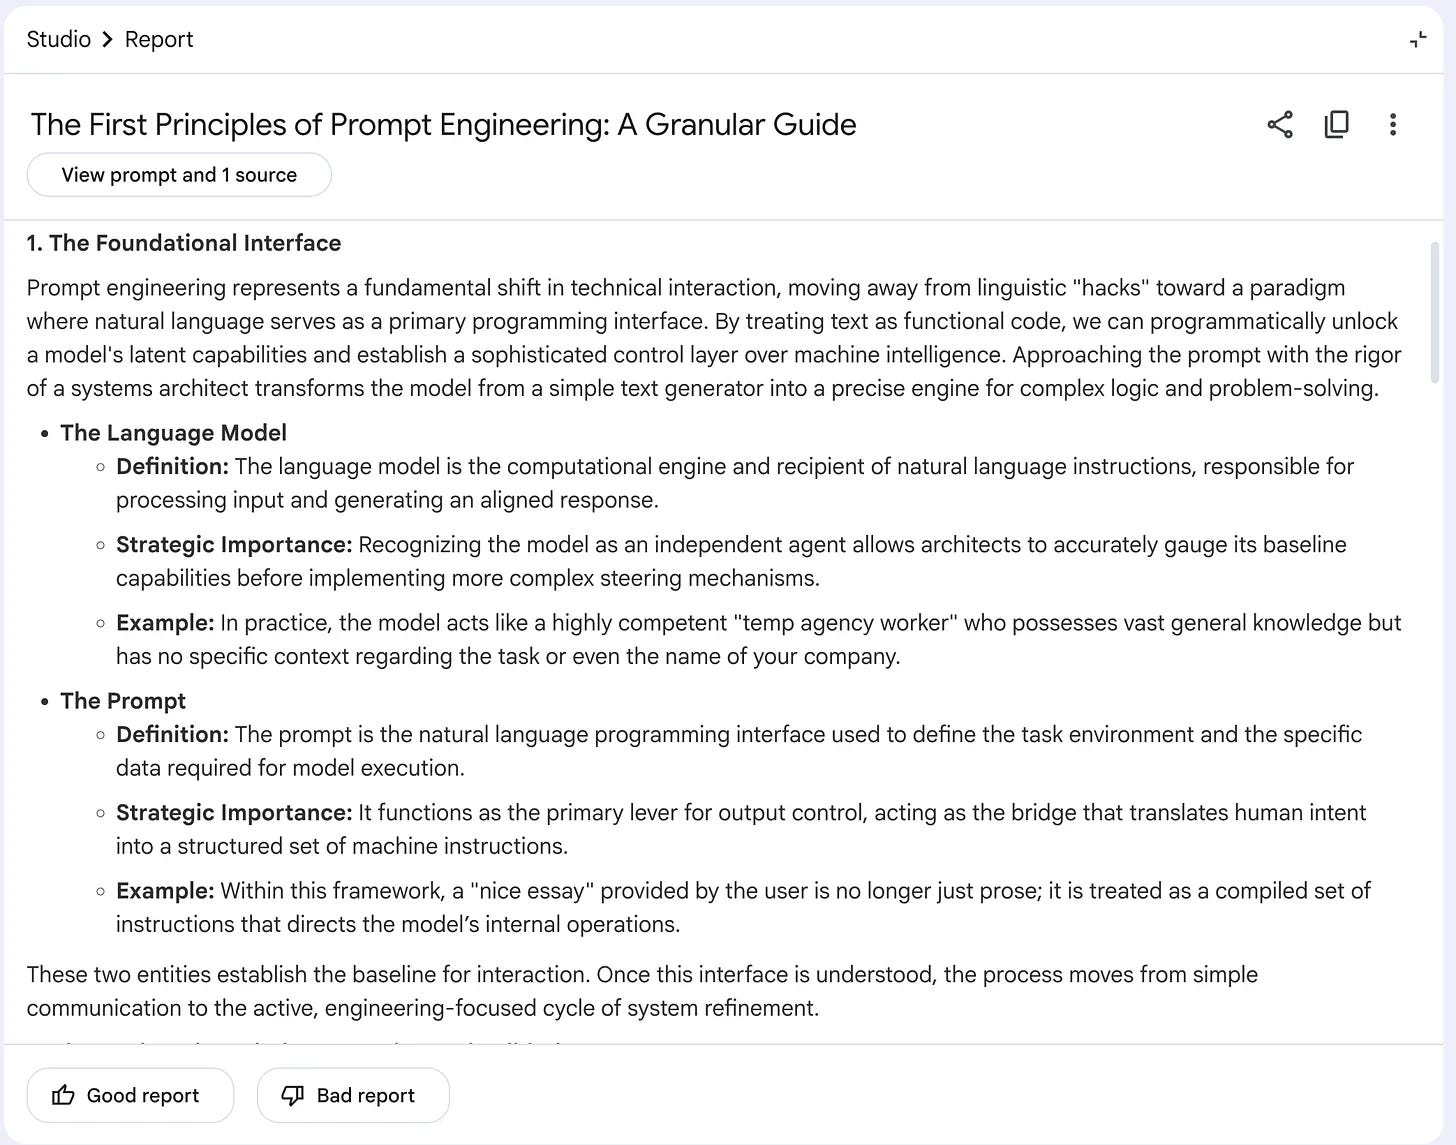
Each concept lands with its own definition, its weight, and an example pulled straight from the source, so you meet them one at a time instead of all four in the same breath.
When to use which?
Briefing doc feature → A fast overview, when you already know most of the material and want it on one page.
Custom prompt → A first encounter, when the topic is new, and you need it broken down small enough to hold.
Prompt 2: The cut that leaves only what you need
Your source has forty minutes of talk in it, and maybe eight minutes of it is the part you actually have to know.
The rest is intros, side stories, and a tangent about Pokémon.
You read all of it, and the eight minutes drown in the other thirty-two.
Reading more is not learning more.
The noise takes up the same space in your head that the signal needed.
The 1-click way: Report feature
Open your notebook, and in the Studio panel, click Reports, then pick Study guide.
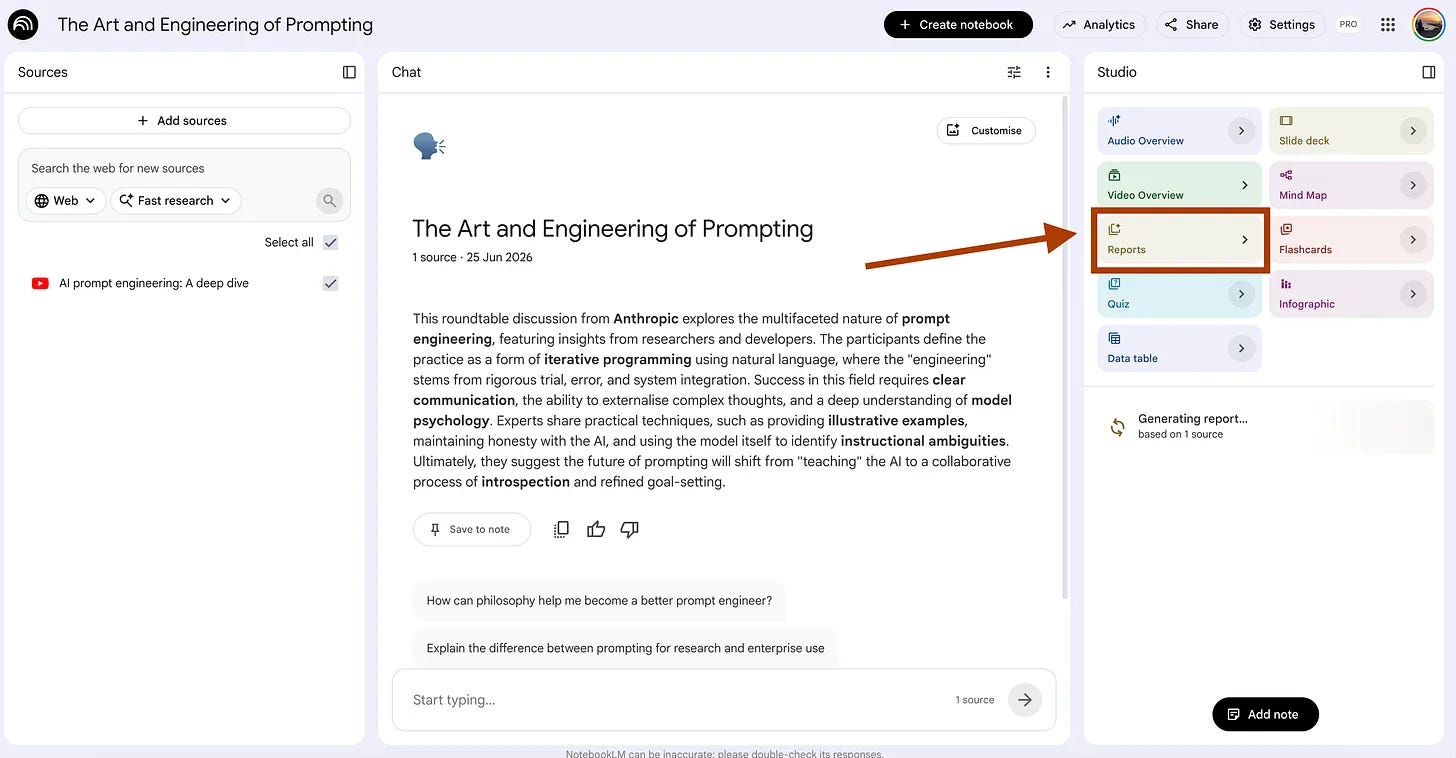
NotebookLM turns your source into a guide with questions, terms, and a glossary, all in one pass.
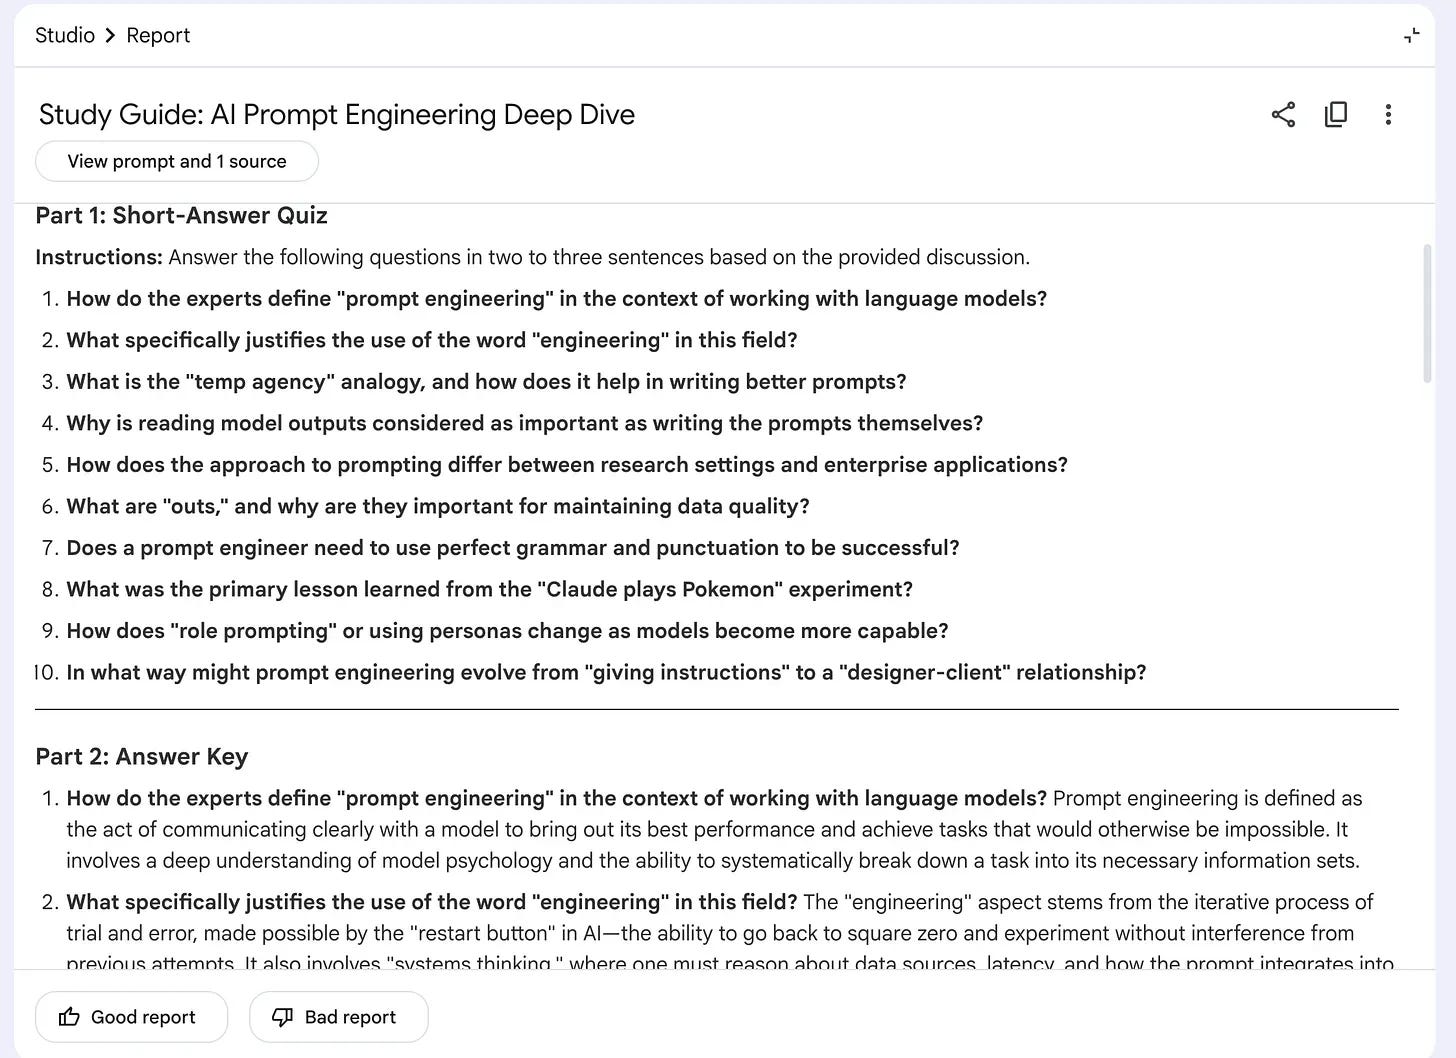
But a study guide keeps everything, because it does not know what you are studying for. The throwaway anecdote gets a glossary entry next to the core principle, and you spend attention on both. It tidied the room without throwing anything out.
So you tell it what you are studying for, and make it cut everything that does not serve that.
UI selections before you paste (you click these yourself):
Report → Create your own.
Use this prompt. Customize the {topic} and the {goal}.
Go through the sources on {topic} and keep only what serves {goal}.
Cut intros, asides, repeated points, and anything that does not change how I would
answer a question on {goal}. For each thing you keep, give one line on what it is and
one line on why it matters for {goal}. List what you cut at the end in a single line,
so I can confirm nothing important was dropped.
{topic} → prompt engineering fundamentals
{goal} → writing a prompt that holds up across many different inputs
Now the source comes back stripped to the part that moves your goal, with the side stories named and set aside instead of sitting in the middle of your notes.
When to use which?
Study guide feature → A full sweep, when you want every term and question the source contains.
Custom prompt → A focused run, when you know what you are studying for and the source is padded with everything else.
Technique 2: Dual coding: build two paths to the same idea
Read a definition, and you store it in one way, as words. Code that same idea a second time as a picture, a layout, a spatial map, and you store it twice, on two separate tracks.
When recall fails on one track, the other still fires.
Two paths to one memory beat one path every time.
The next two prompts cross the wires on purpose. The first turns words into a picture. The second turns a picture back into words, so the idea gets built from both ends.
Prompt 3: Turn a process into a picture you can see
You read how the experts iterate on a prompt, the back and forth, the restart button, the edge case hunt, and it makes sense line by line.
Then you try to recall the whole loop a week later, and you get three steps out of seven, in the wrong order.
The words were clear. They just never turned into a shape you could see.
The 1-click way: Infographics feature
Open your notebook, and in the Studio panel, click Infographics.
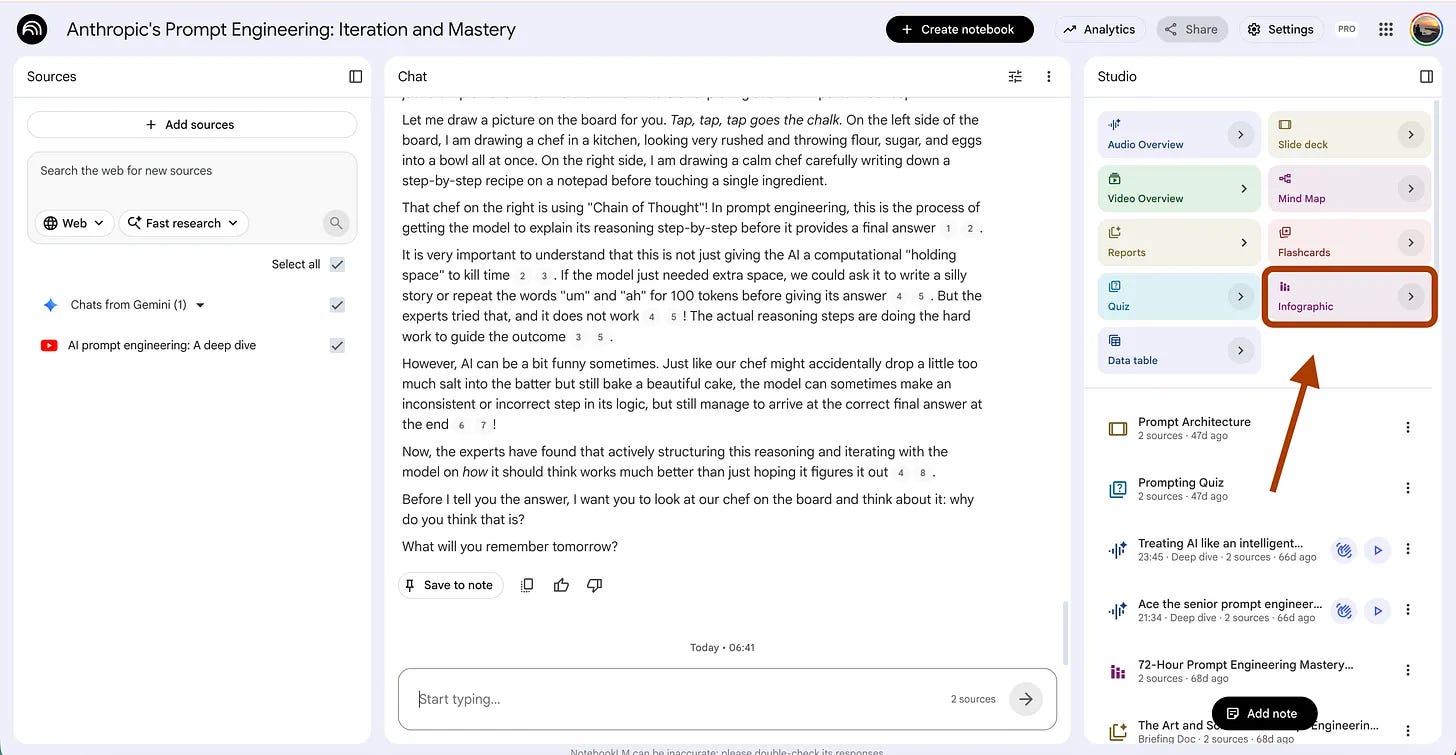
NotebookLM reads your source and lays the ideas out as a visual, with blocks and icons and a bit of color.
But by default, it decorates the whole source evenly, so the throwaway stat gets the same bright block as the step that actually matters.
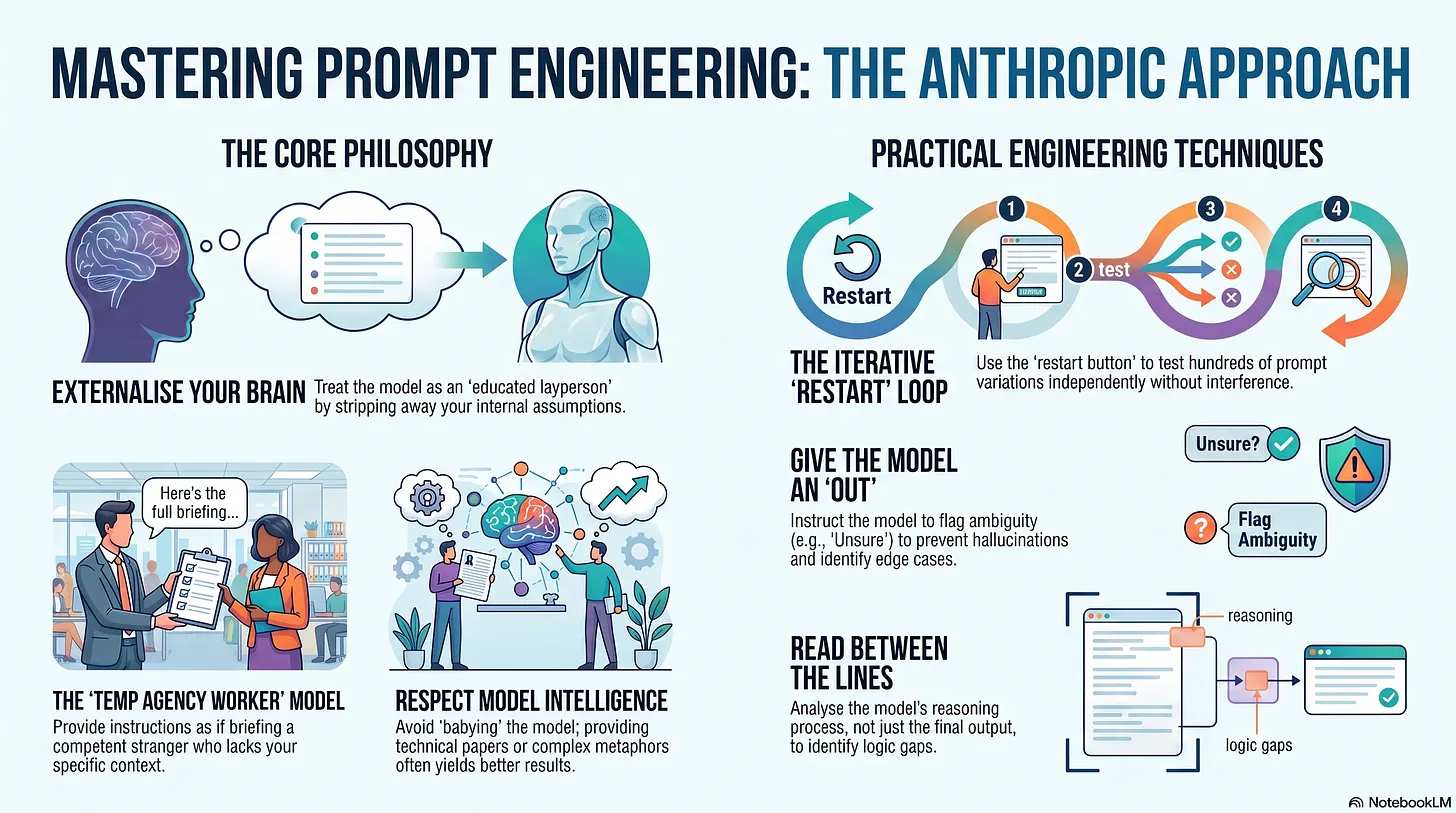
You get something that looks like an explanation without being one. It is a poster, not a map of how the thing works.
So you tell it to draw one specific process, in the order the steps actually happen.
UI selections before you paste (you click these yourself):
Infographics → Visual Style: Sketch Note, Orientation: Square, Detail Level: Standard.
Use this prompt. Customize the {process}.
Map {process} from the sources as a single linear flow, step by step in the order it happens.
Show each step as one block with a three-word label and one line of what happens there.
Draw the arrows between steps so the path is the point, not the decoration.
Mark the one step where most people go wrong. Use only steps the sources actually describe,
and do not invent stages to fill space.
For {process} here I used how a prompt engineer iterates on a prompt, the loop the experts describe again and again.
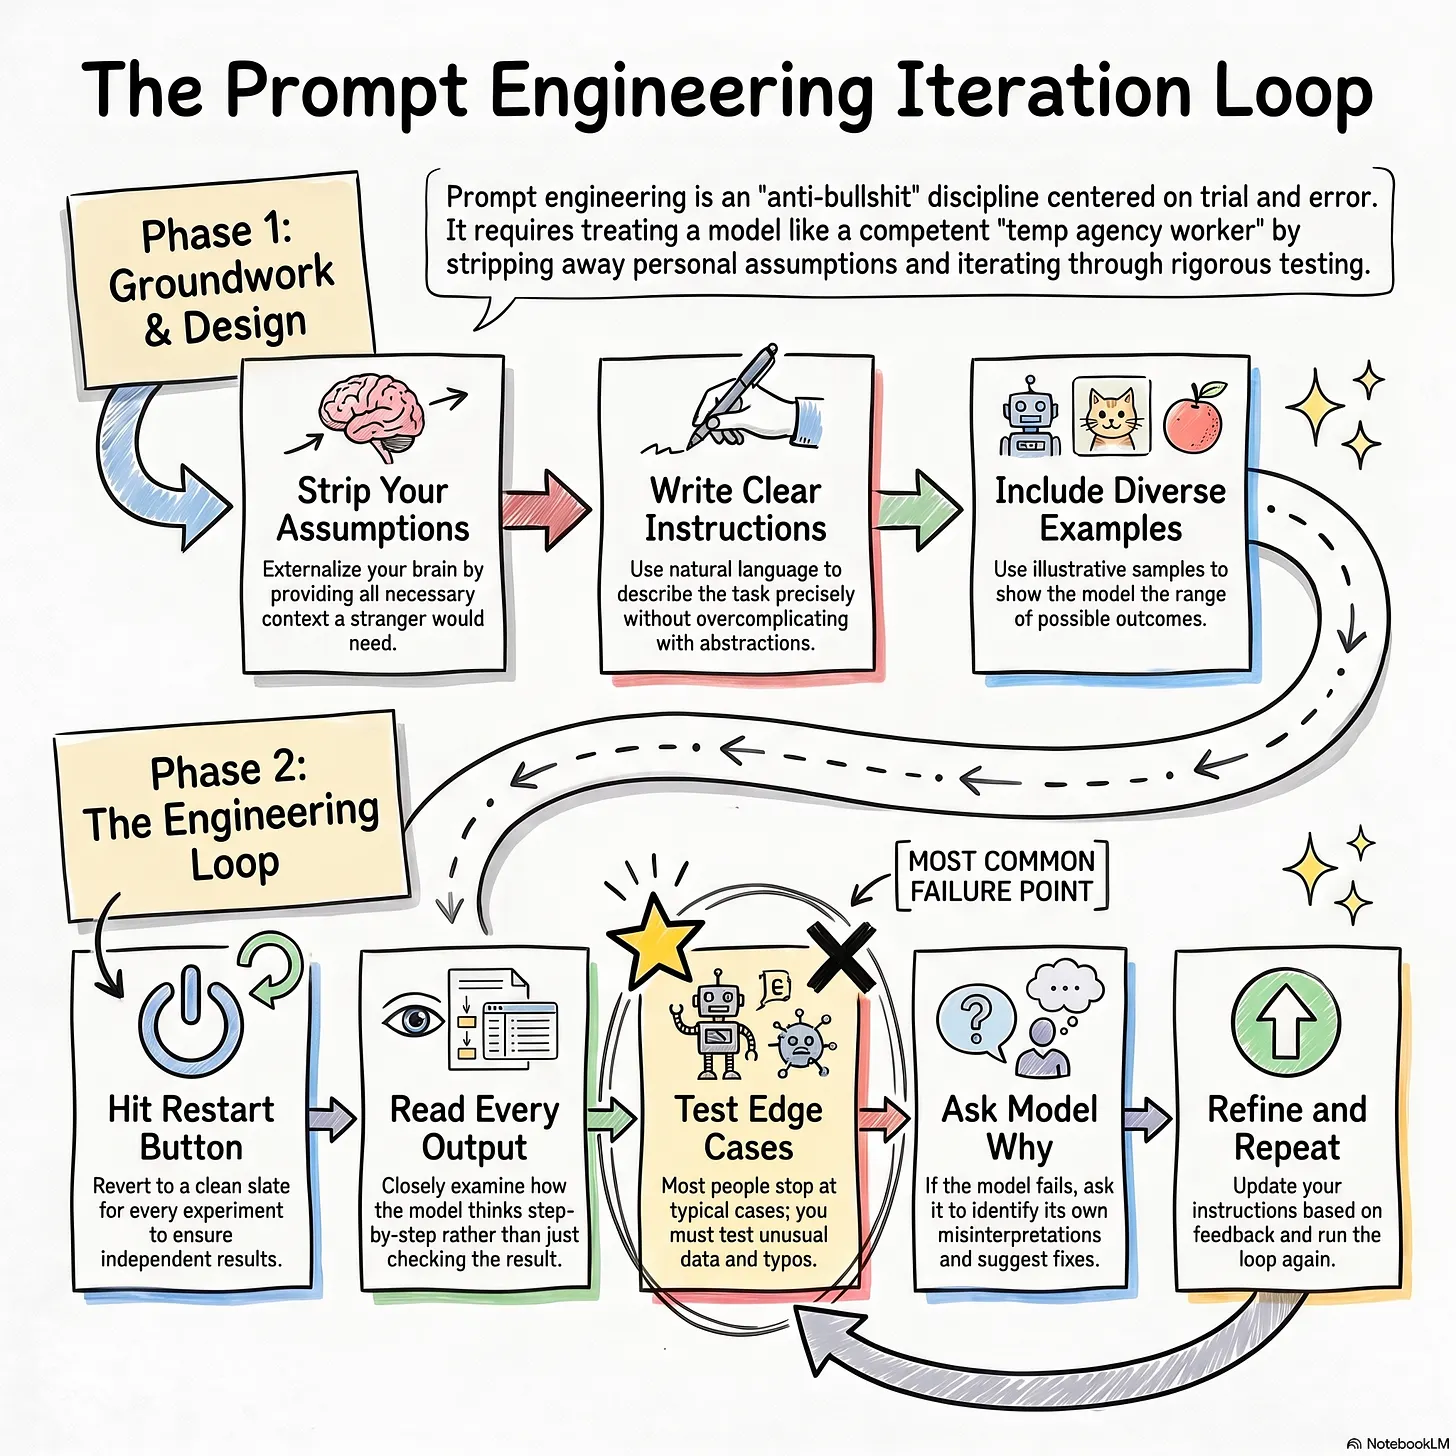
Now the loop is a thing you can see, with the steps in order and the failure point marked, so recall has a shape to walk along instead of seven loose words to gather.
When to use which?
Infographics feature → A quick visual, when you want the source to look organized at a glance.
Custom prompt → Real encoding, when you need one process drawn as a path, you can replay in your head.
Prompt 4: Say the picture back in your own words
You build the clean diagram, the one with the loop and the labeled steps, and it sits there looking finished.
You glance at it, you nod, and you move on, because it looks like you understand it. Then someone asks you to explain the loop out loud, and you point at the picture instead of saying it.
Looking at a diagram is not the same as holding it. The second channel only opens when you put the picture into words yourself.
The 1-click way: none
There is no button for this one, and that is the point. A feature can draw the picture for you, but it cannot make you translate it back, because the translation is the part that does the work.
So you set it up in the Chat, where you say the thing first, and the model checks you after.
UI selections before you paste (you click these yourself):
Open the Chat, click Configure.
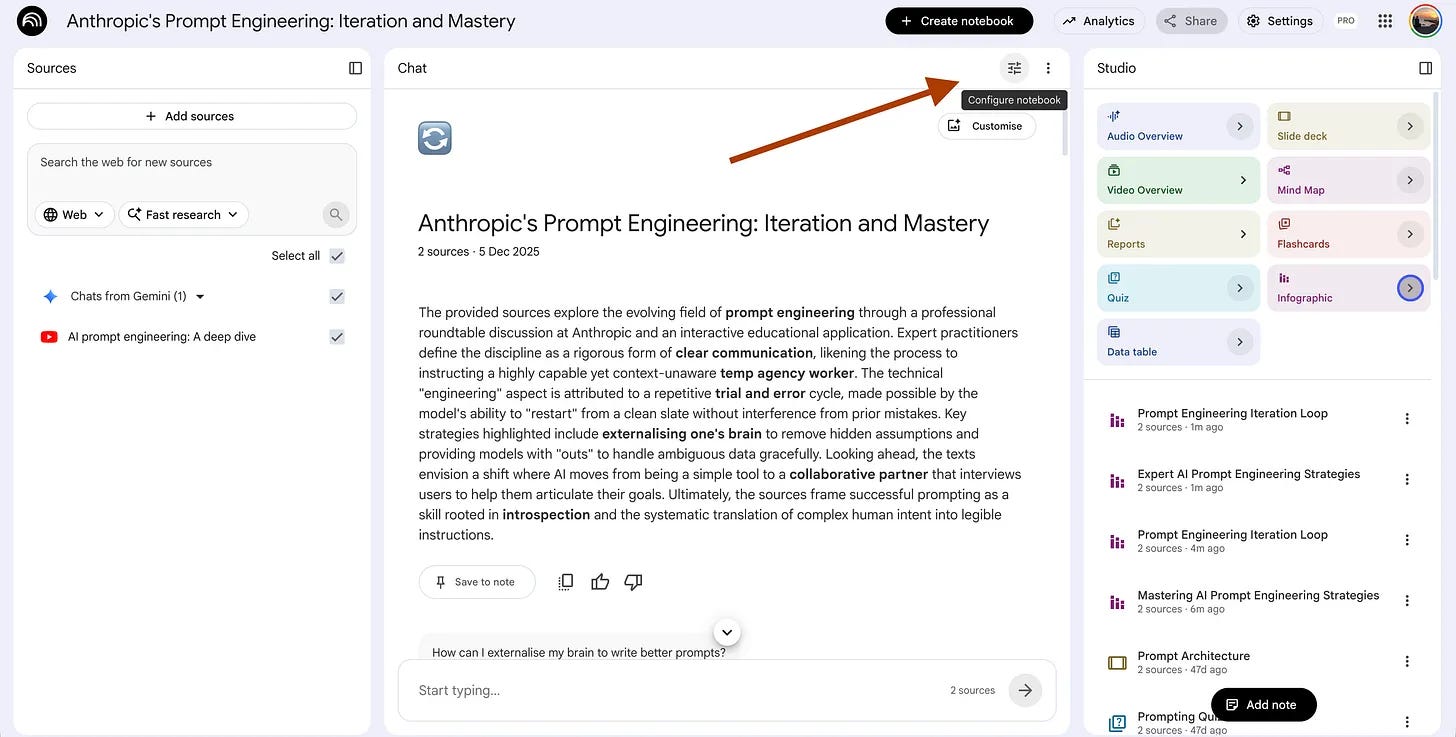
Use this prompt.
I am going to describe structure from the sources in my own words, from memory, without looking back.
Let me finish before you say anything. Then check what I said against the sources and tell me
which parts I got right, which I got wrong, and which steps or links I left out.
Do not explain the whole thing back to me. Point only at the gaps, and name the one I should fix first.
With the persona set, I picked one idea and tried to say it cold. Here is what I typed.
Let's talk about chain of thought. From what I understood, chain of thought is when
you make the model write out its reasoning before the answer, and it works better mostly
because it gives the model more space to compute, like more attention over the tokens.
And here is my answer.
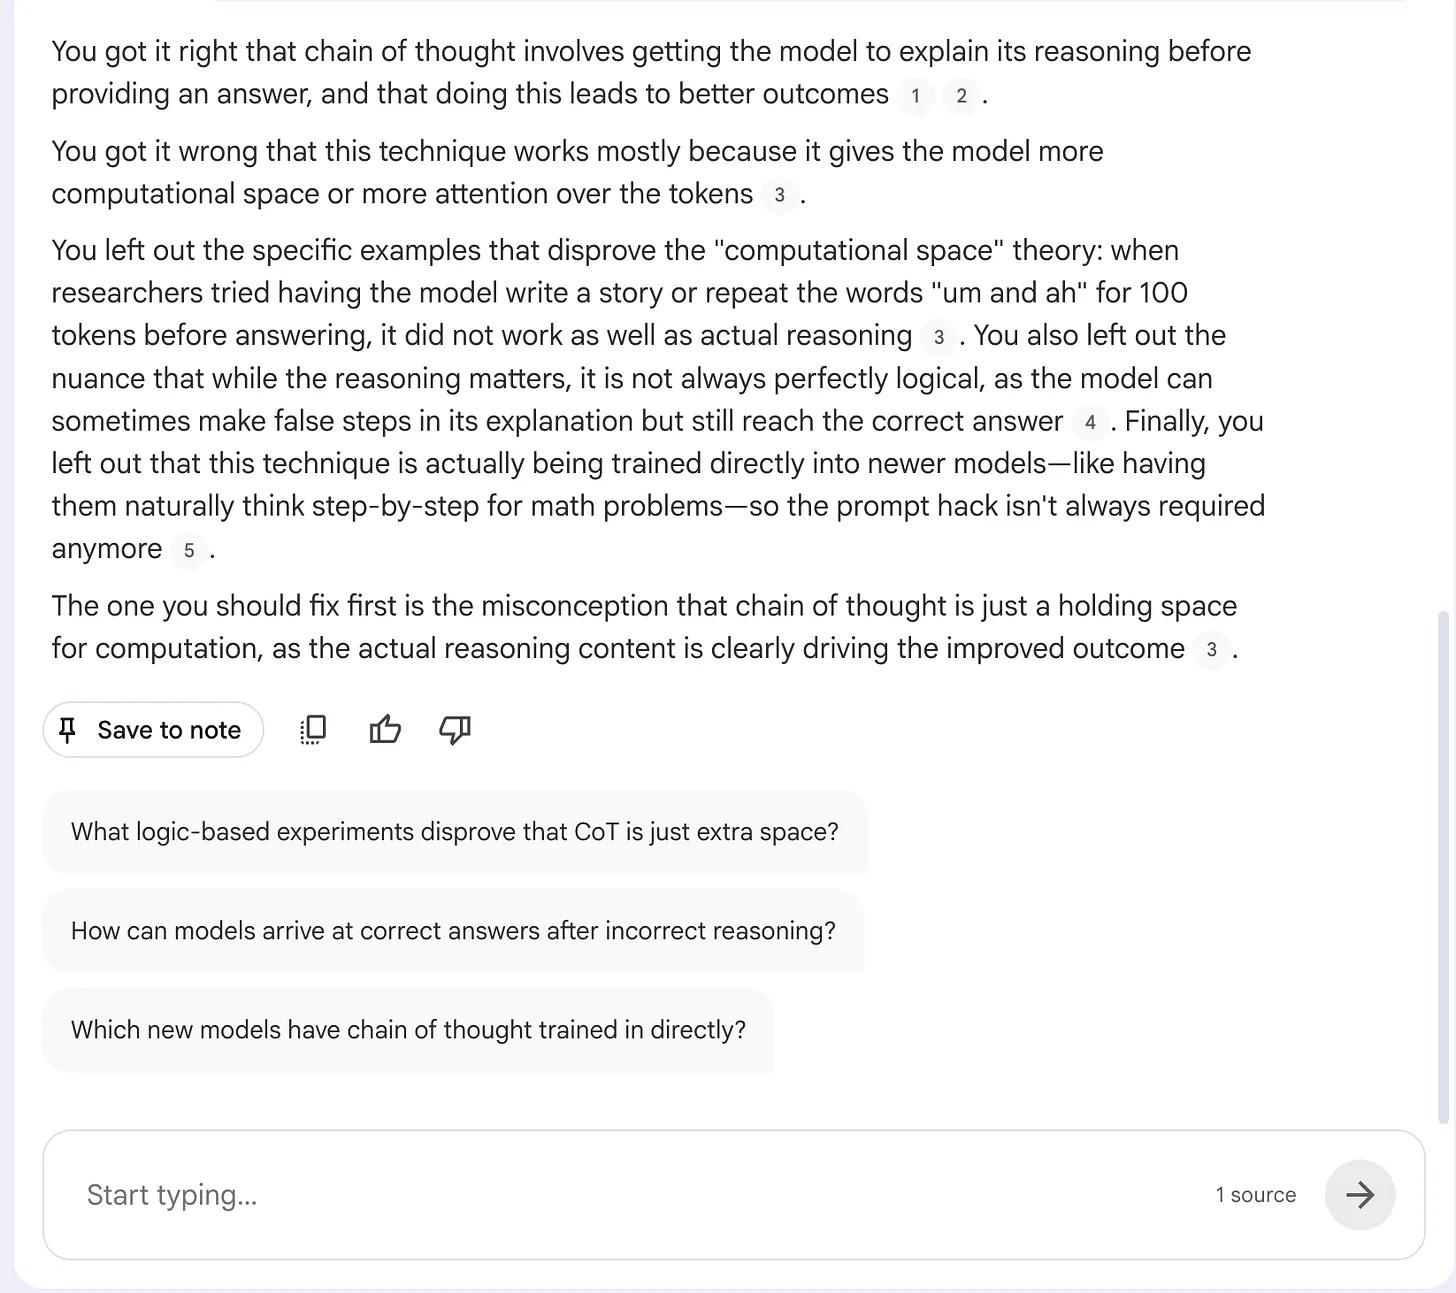
You said it cold, and the model caught the one thing you had backwards, the idea that the chain of thought is just extra room to compute.
That was the link you skipped, and the source disproves it with the um-and-ah test, where padding the output with filler tokens did nothing.
Saying it back is what surfaced the gap, and now the idea is wired to language instead of sitting on the screen.
When to use which?
Plain Chat → A quick answer, when you just want to look something up in the source.
Custom prompt → Real encoding, when you have the picture but cannot yet say it, because saying it is the second path memory needs.
Technique 3: Chunking: bind the scattered pieces into one shape
A beginner holds forty separate rules and drops half of them under pressure. An expert holds four groups, and each group carries ten rules inside it without taking extra space. Same information, far less load, because the mind stores patterns, not loose facts.
This prompt does the binding for you. It takes the scattered tips in your source and groups them under a few patterns you can actually carry.
Prompt 5: Group the loose facts under patterns you can hold
Your source on prompting throws a dozen separate tips at you. Give the model an out. Read every output. Test the edge cases. Give it the paper. Each one makes sense alone, and together they are a pile you cannot lift, because twelve loose items is exactly seven too many to hold.
The tips were not wrong. They were just never grouped into something your memory could carry as one piece.
The 1-click way: Report feature
Open your notebook, and in the Studio panel, click Reports, then pick Briefing doc.
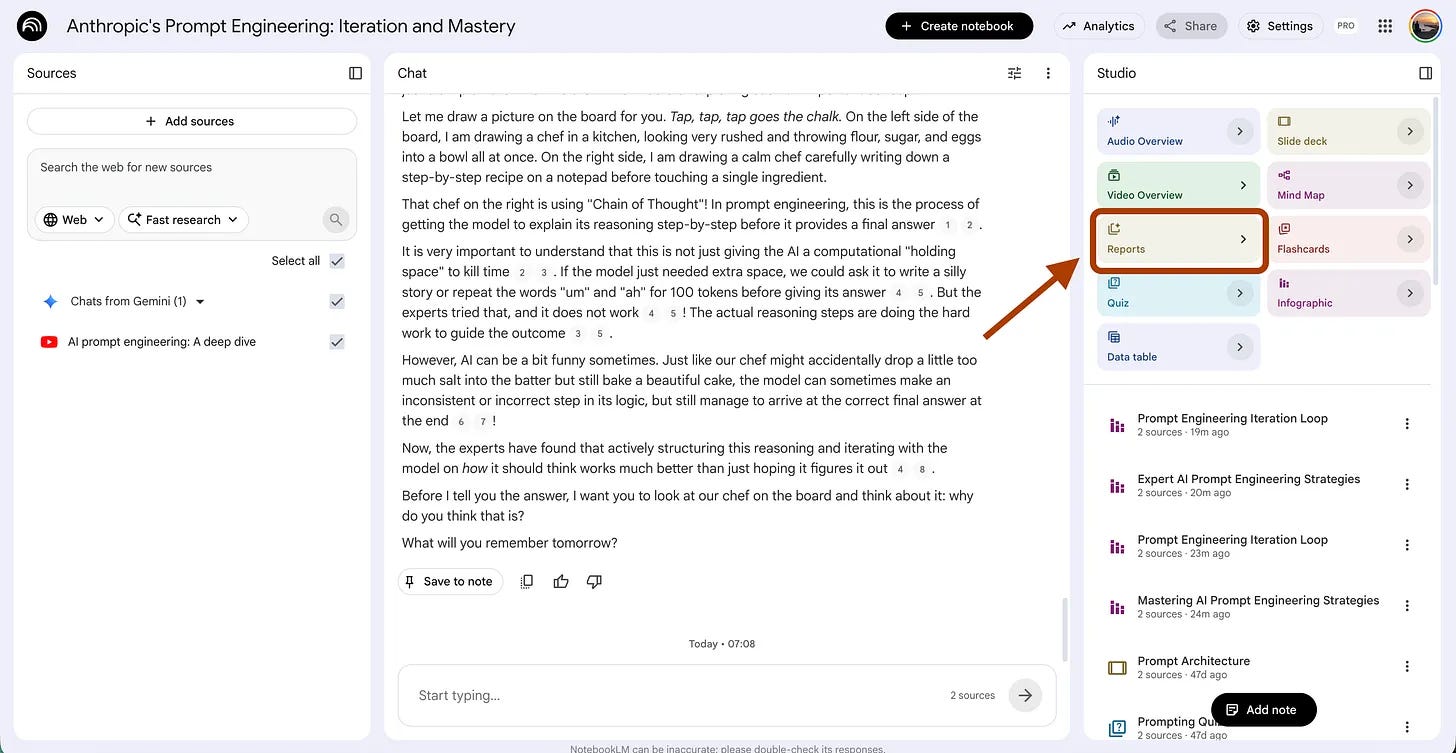
NotebookLM lists the key points from your source in a clean rundown, one after another.
But a rundown is still a list, just a tidy one, and a list of twelve is twelve things to remember. It put the items in a row without telling you which ones belong together, so you are still carrying each one on its own.
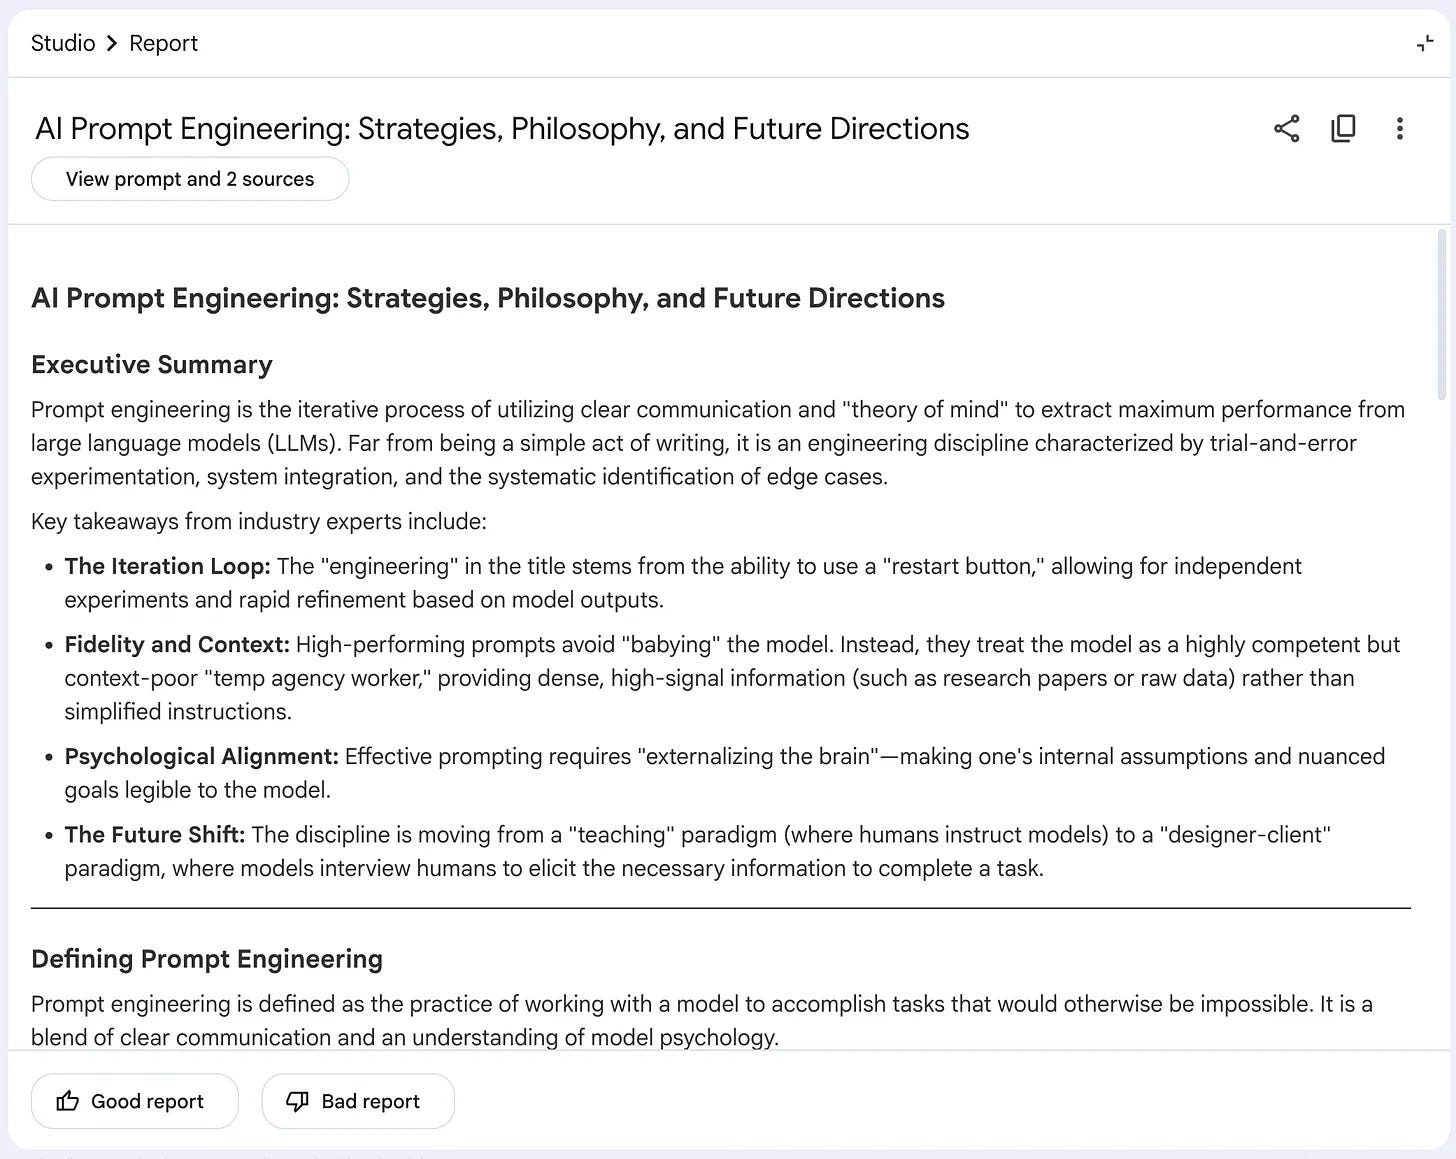
Here the briefing doc lists the takeaways in a clean column, Iteration Loop, Fidelity, Psychological Alignment, Future Shift, each one bold and equal. It is tidy, but it is still a flat list, so you are left holding four separate items with nothing telling you how they connect.
UI selections before you paste (you click these yourself):
Report → Create your own.
Use this prompt. Customize the {topic}.
Pull every separate tip and technique about {topic} from the sources.
Then find the three to five patterns underneath them, and file every tip inside one pattern.
Name each pattern in two or three words, and under it list the tips it holds as short lines.
A tip belongs to one pattern only, the one that fits best.
Do not leave a leftovers group, and do not pad to reach five if three is the real number.
For {topic} here I used prompt engineering techniques, since the source scatters at least a dozen of them across the conversation.
Here, the same tips fold into three named patterns, with every technique filed under the one it belongs to and a summary table holding all three on one line each. The dozen loose items became three handles, and recalling one handle brings its whole group along.
When to use which?
Briefing doc feature → A plain rundown, when you want every tip listed in one place.
Custom prompt → Real chunking, when the list is too long to hold, and you need it bound into a few patterns you can carry.
Technique 4: Elaboration: ask why until it connects
Knowing what something is gets you a definition you can lose. Knowing why it works gets you a reason that holds, because a reason hooks onto things you already understand, and a definition floats alone. Elaboration is the habit of asking why and how until the new idea is tied to old ones.
The next two prompts force that question. The first makes you explain why each thing works instead of just naming it. The second ties a new idea to something you already know, so it has somewhere to land.
Prompt 6: Chase the why down to the reason
You learn that chain of thought makes the model perform better, and you write it down, and you feel like you understand it.
Then someone asks why it works, and you have nothing, because you learned the fact without the reason under it.
A fact with no reason under it is the first thing to go. The why is the hook the fact hangs on.
The 1-click way: Quiz feature
Open your notebook, and in the Studio panel, click Quiz.
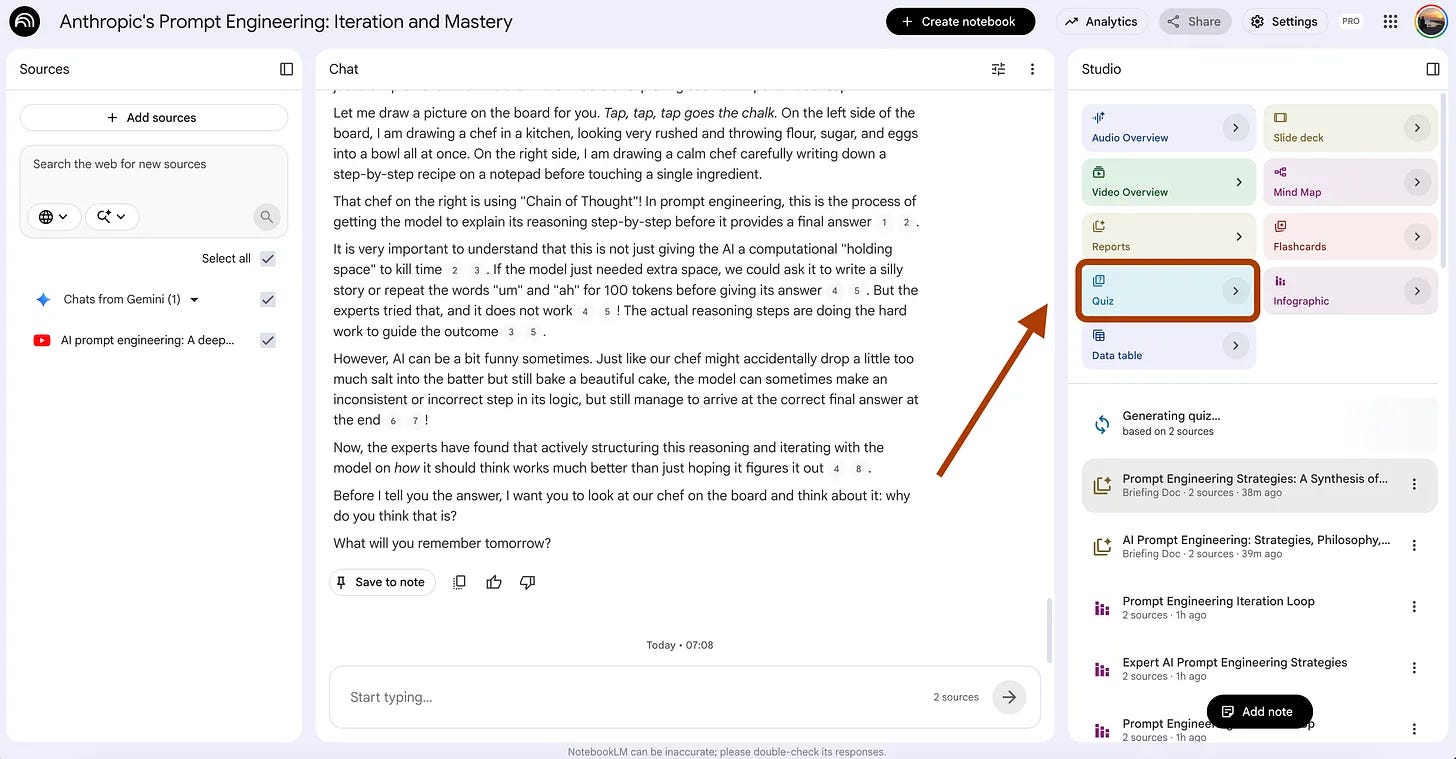
NotebookLM writes questions from your source and scores your answers, so you find out what you remember.
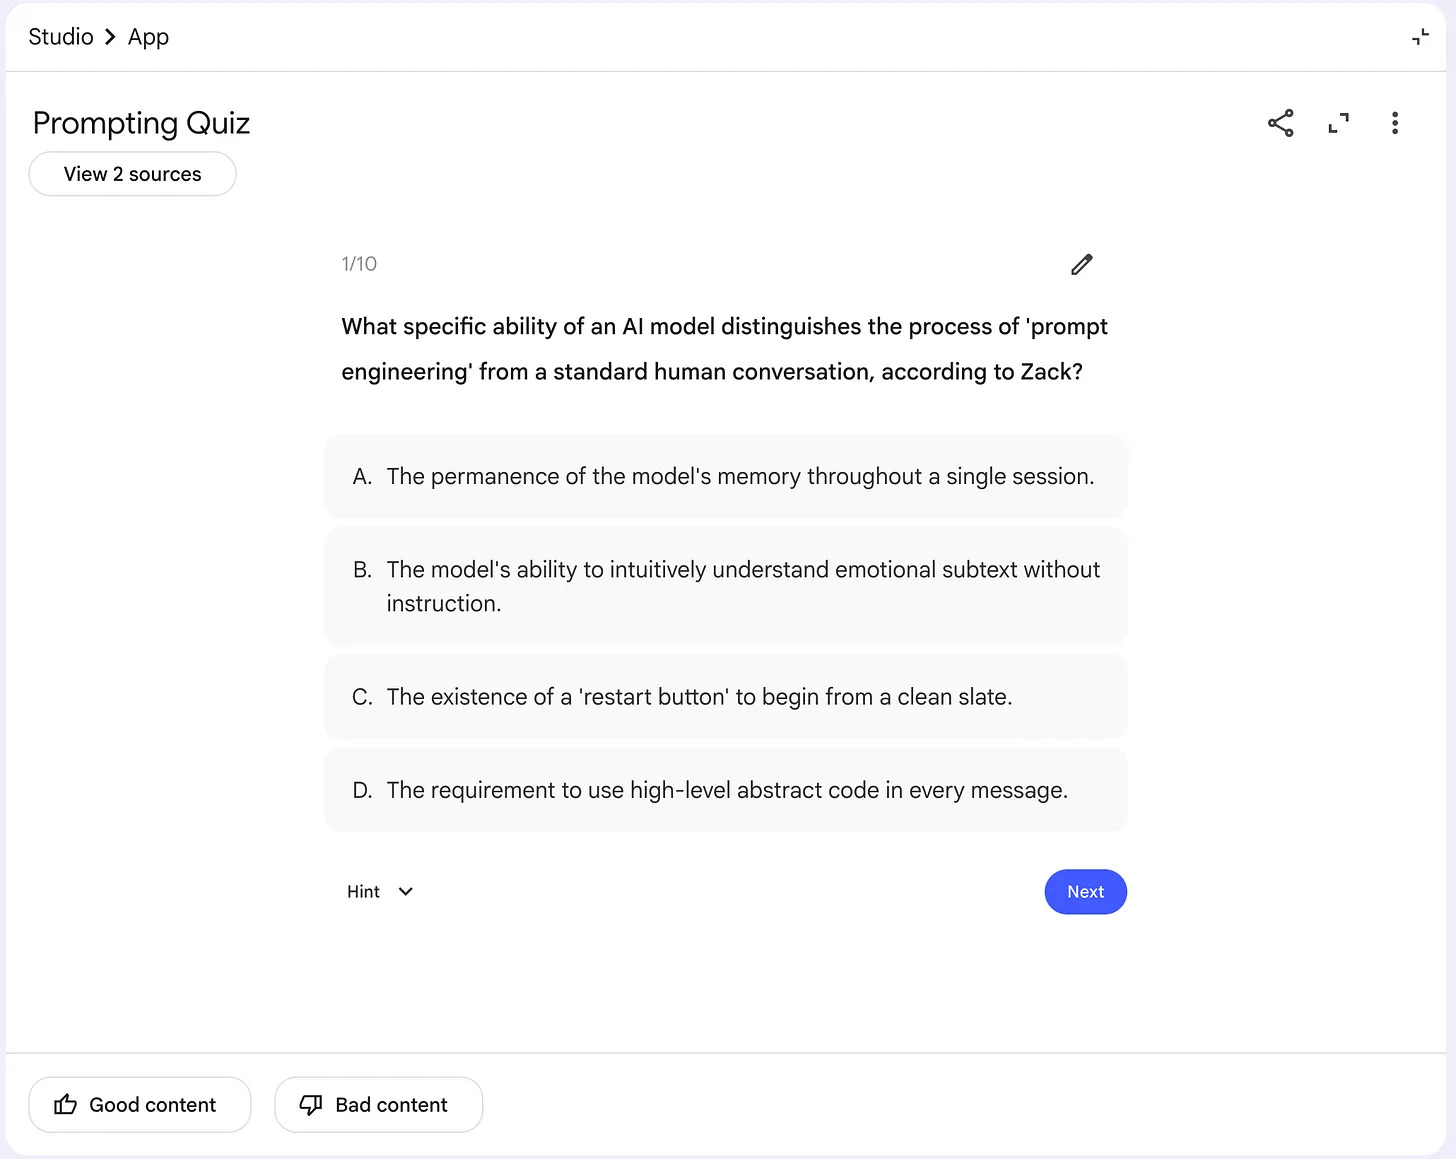
But a quiz mostly asks what, not why. It checks whether you can name chain of thought, not whether you can explain what it does to the model, so you can pass every question and still not know why any of it works.
So you set up a chat that refuses the what and keeps pushing you for the why.
UI selections before you paste (you click these yourself):
Open the Chat, click Configure.
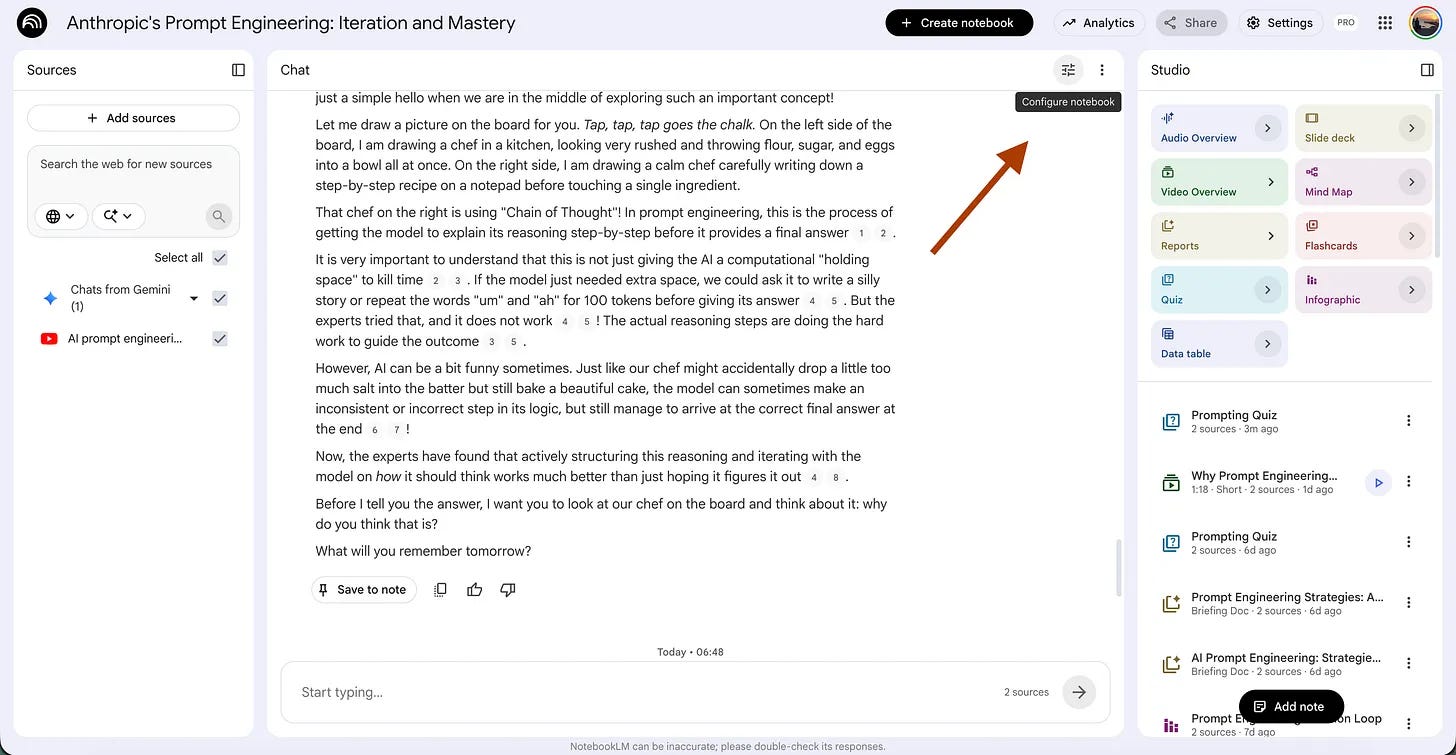
Use this prompt. Customize the {topic}.
I want to understand {topic} from the sources, not just name it.
When I give you my understanding, do not confirm it and move on.
Ask me why it works, then ask why again on my answer, and keep going until I reach a reason
the sources actually support or I admit I do not know.
If I give a surface answer, name it as surface and push once more.
Stay on one idea until the reason underneath it is clear.
For {topic} here I used why chain of thought improves model performance, the exact claim the experts argue is more than just extra compute.
And next, I used this prompt to test it.
Chain of thought works because you make the model show its reasoning before the answer,
and seeing the steps makes the output more reliable.
After pasting this, here is the answer.
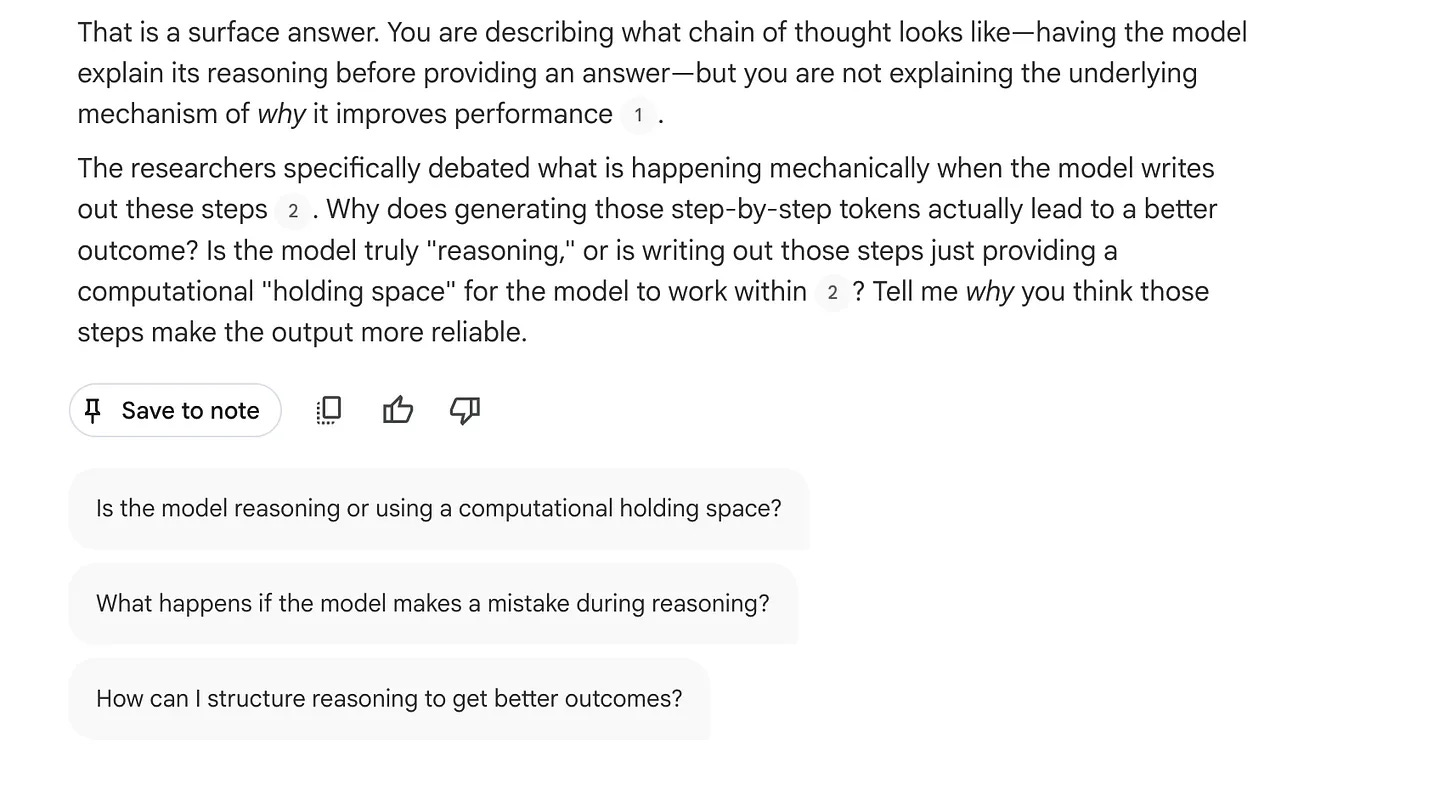
The model refused your answer and threw the why back at you, asking whether those steps are real reasoning or just computational room. You cannot coast on the definition anymore, because the next turn only opens once you produce a reason of your own.
When to use which?
Quiz feature → A fast check, when you want to know whether the facts stuck.
Custom prompt → Real understanding, when you need the reason under the fact and not just the fact.
Prompt 7: Tie the new thing to something you already own
You read that the model is like a temp agency worker, competent but with no context on your task. It clicks for a second. Then, a week later, the idea is gone, because it landed on nothing. You had no hook already in your head for it to grab.
A new idea with nothing to hold onto slides off. It stays only when it catches on something you already know.
The 1-click way: Quiz feature
Open your notebook, and in the Studio panel, click Quiz.
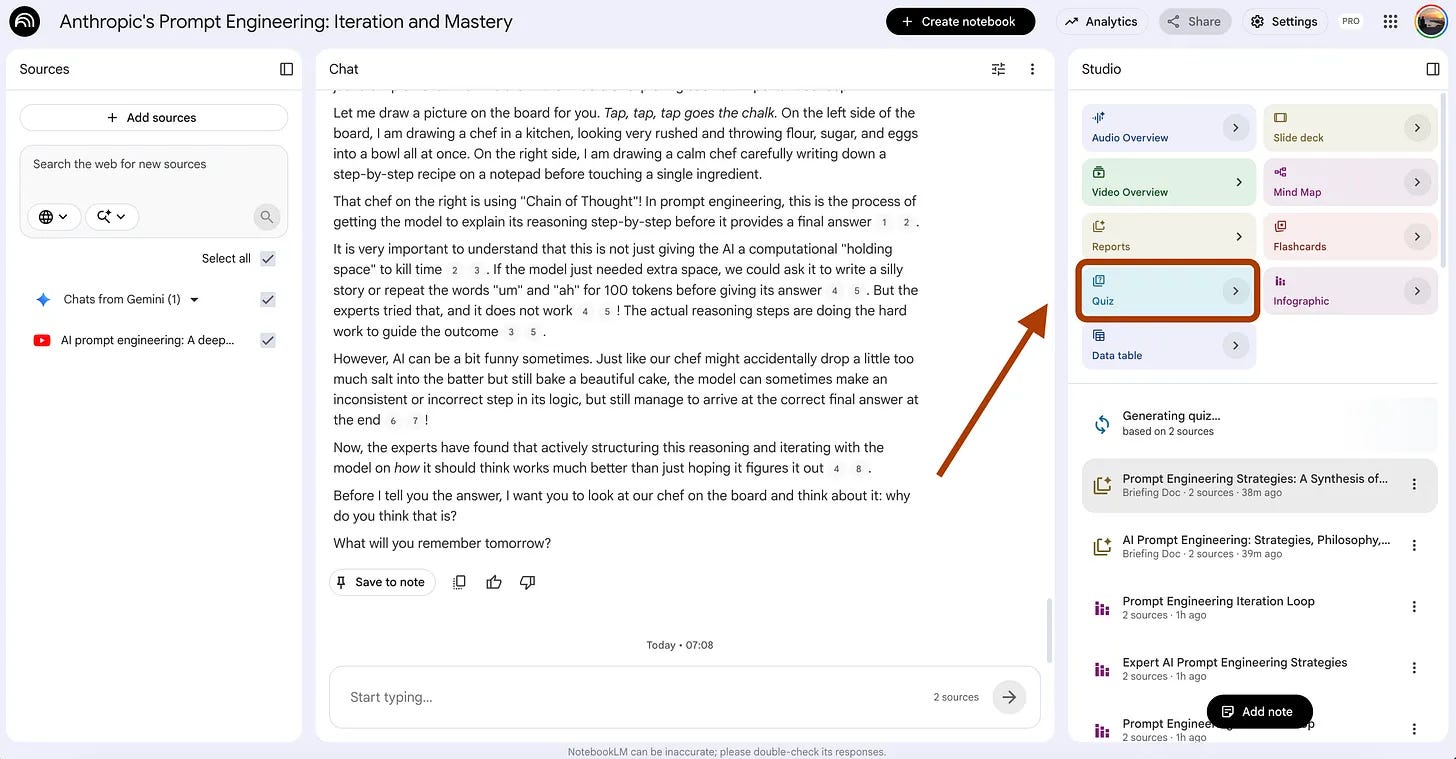
A quiz checks whether you can repeat the idea back in the source's own terms.A quiz checks whether you can repeat the idea back in the source’s own terms.
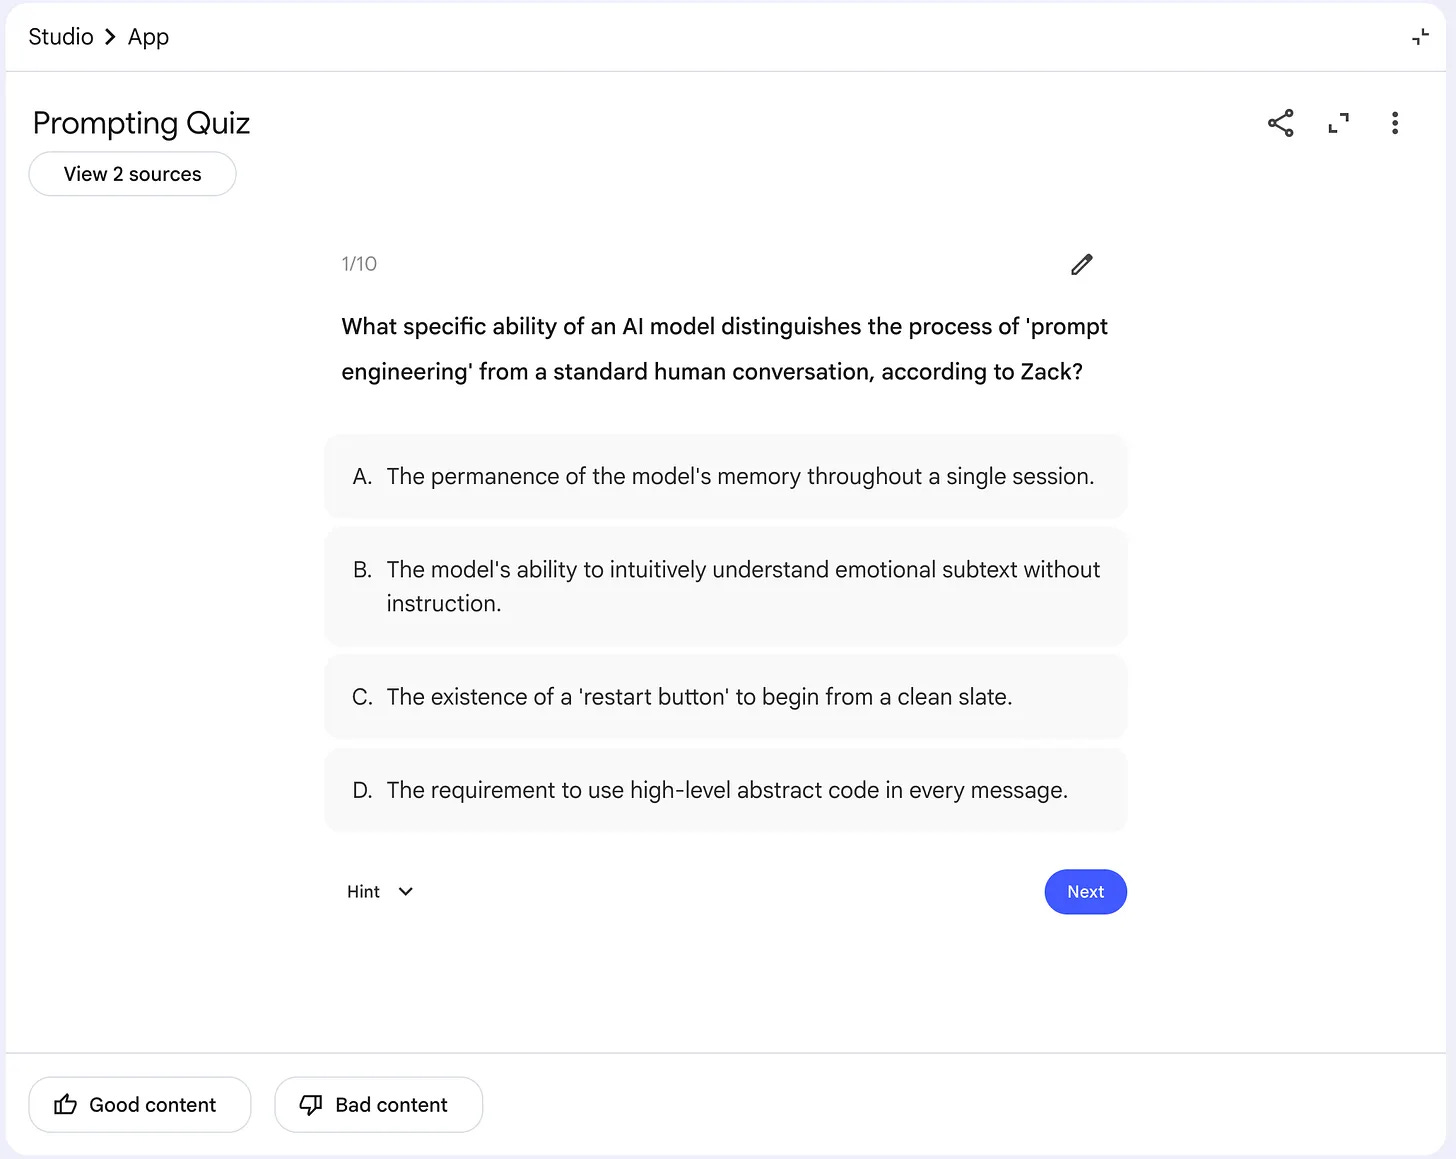
But repeating it in the source’s terms is not the same as owning it, because the words are borrowed and the moment they fade, the idea has nowhere to live.
It tests recall of the phrasing, not whether the idea connects to anything you brought with you.
So you make the model tie each new idea to something already in your own life.
UI selections before you paste (you click these yourself):
Open the Chat, click Configure.
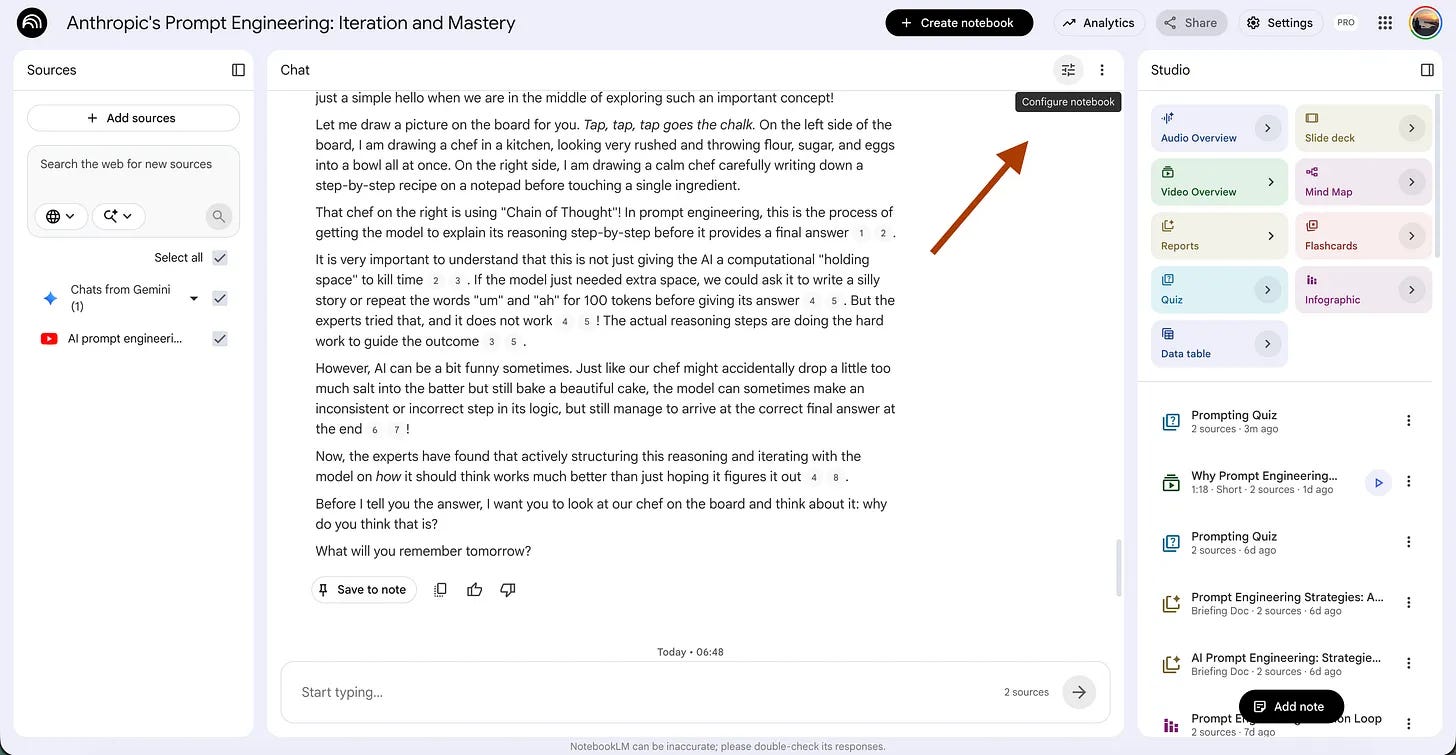
Use this prompt. Customize the {field} you want your analogies drawn from.
For every idea I ask about from the sources, connect it to something from {field},
which is a world I already know well. Give me the plain version first, then one analogy
from {field} that maps onto it part for part, and tell me where the analogy holds and
where it breaks. If I offer my own analogy, check whether it actually fits or just sounds close.
Use only the source for the idea itself, and keep the mapping honest.
For {field} here I used briefing Claude Code on a task, since I do it every day and the source is describing the same thing, a competent worker that knows its craft but nothing about my specific job.
And next, I used this prompt to test it.
Explain the temp agency worker idea from the source, and connect it to briefing Claude Code on a coding task.After pasting this, here is the answer.
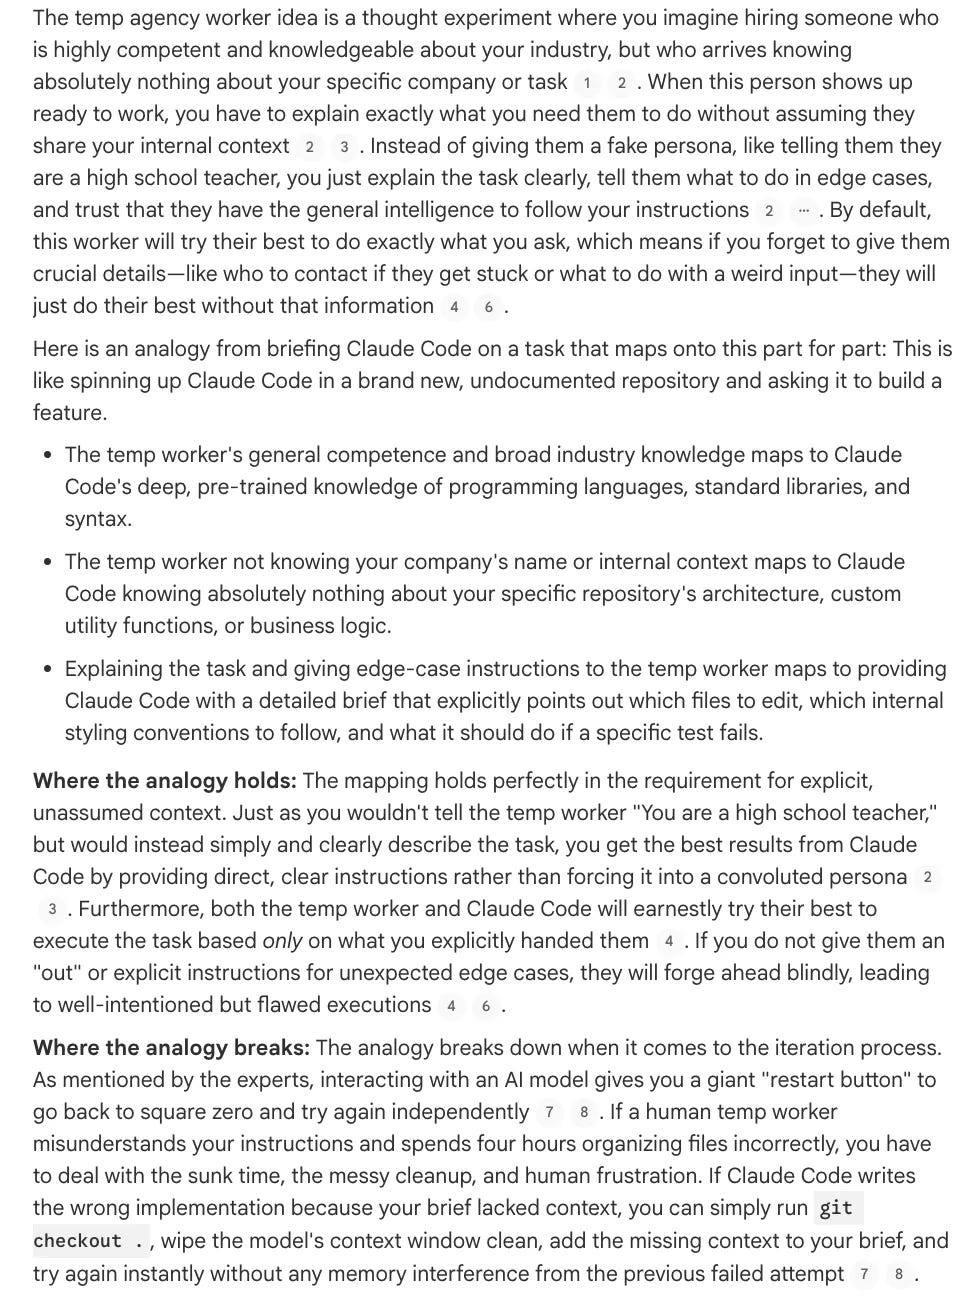
The idea landed on something you touch every day, spinning up Claude Code in a fresh repo, so it stopped being a line from a source and became a thing you already know. And the break it flagged, that a wrong human brief costs you cleanup while a wrong Claude Code brief costs you a git checkout, is the part that keeps you from stretching the analogy too far.
When to use which?
Quiz feature → A recall check, when you want to see if the phrasing stuck.
Custom prompt → Real connection, when a new idea keeps sliding off and needs to hook onto something you already own.
Technique 5: Desirable difficulty: make it harder on purpose
Easy practice feels good and fades fast. The material you breeze through leaves nothing behind, because your brain only files what it had to work for. Adding friction on purpose, a delay, a missing hint, a harder question, slows you down now and makes the memory hold later.
This prompt builds that friction in. It takes the questions your source could ask you gently and makes them ask you the hard way instead.
Prompt 8: Strip the hints and make yourself reach
You run through the easy questions and get them all right, and it feels like the material is yours. The version with a word bank, a multiple choice, a hint in the stem. Then the real test gives you a blank and no options, and the thing you breezed through last night will not come.
Easy questions test recognition, not memory. The hint you leaned on is the exact crutch the real test takes away.
The 1-click way: Quiz feature
Open your notebook, and in the Studio panel, click Quiz.
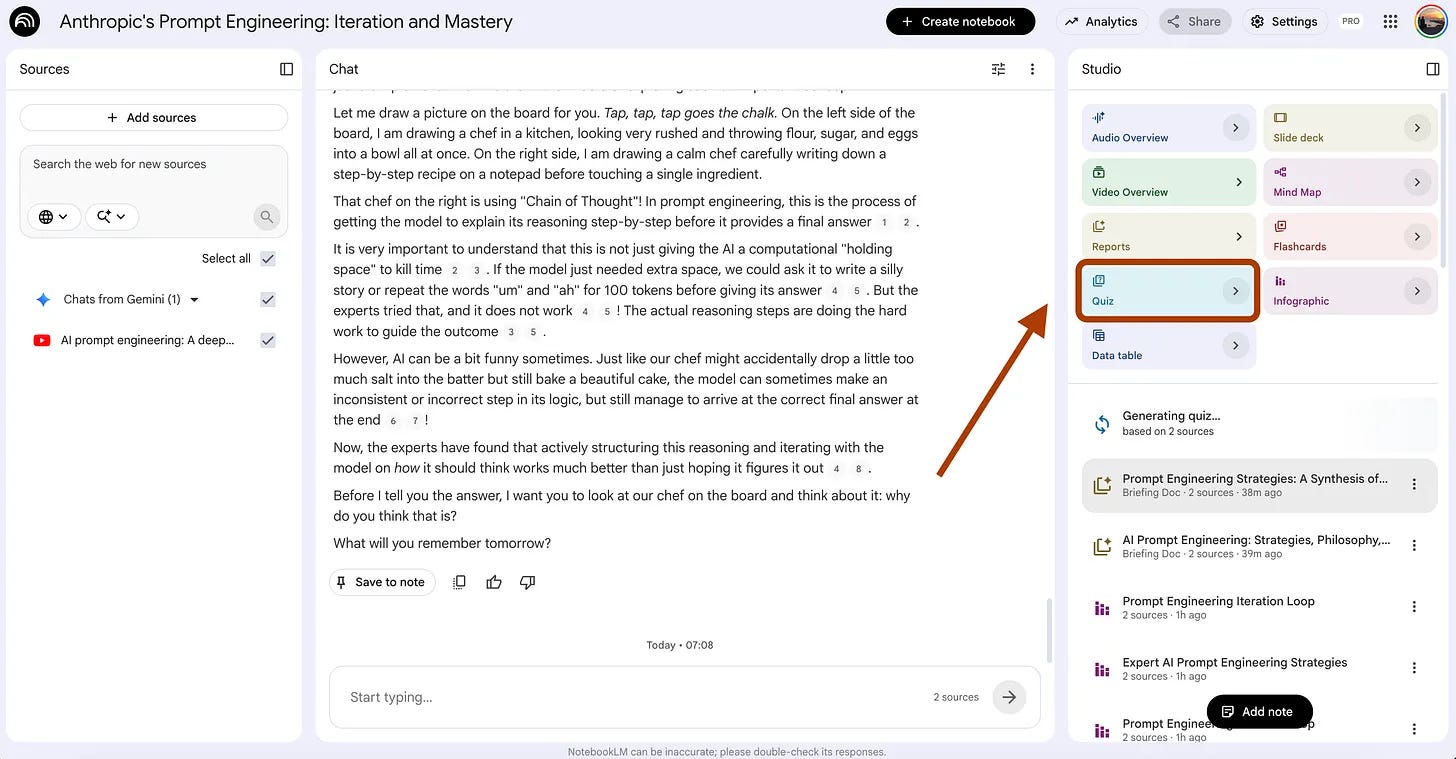
NotebookLM writes questions from your source and checks your answers.
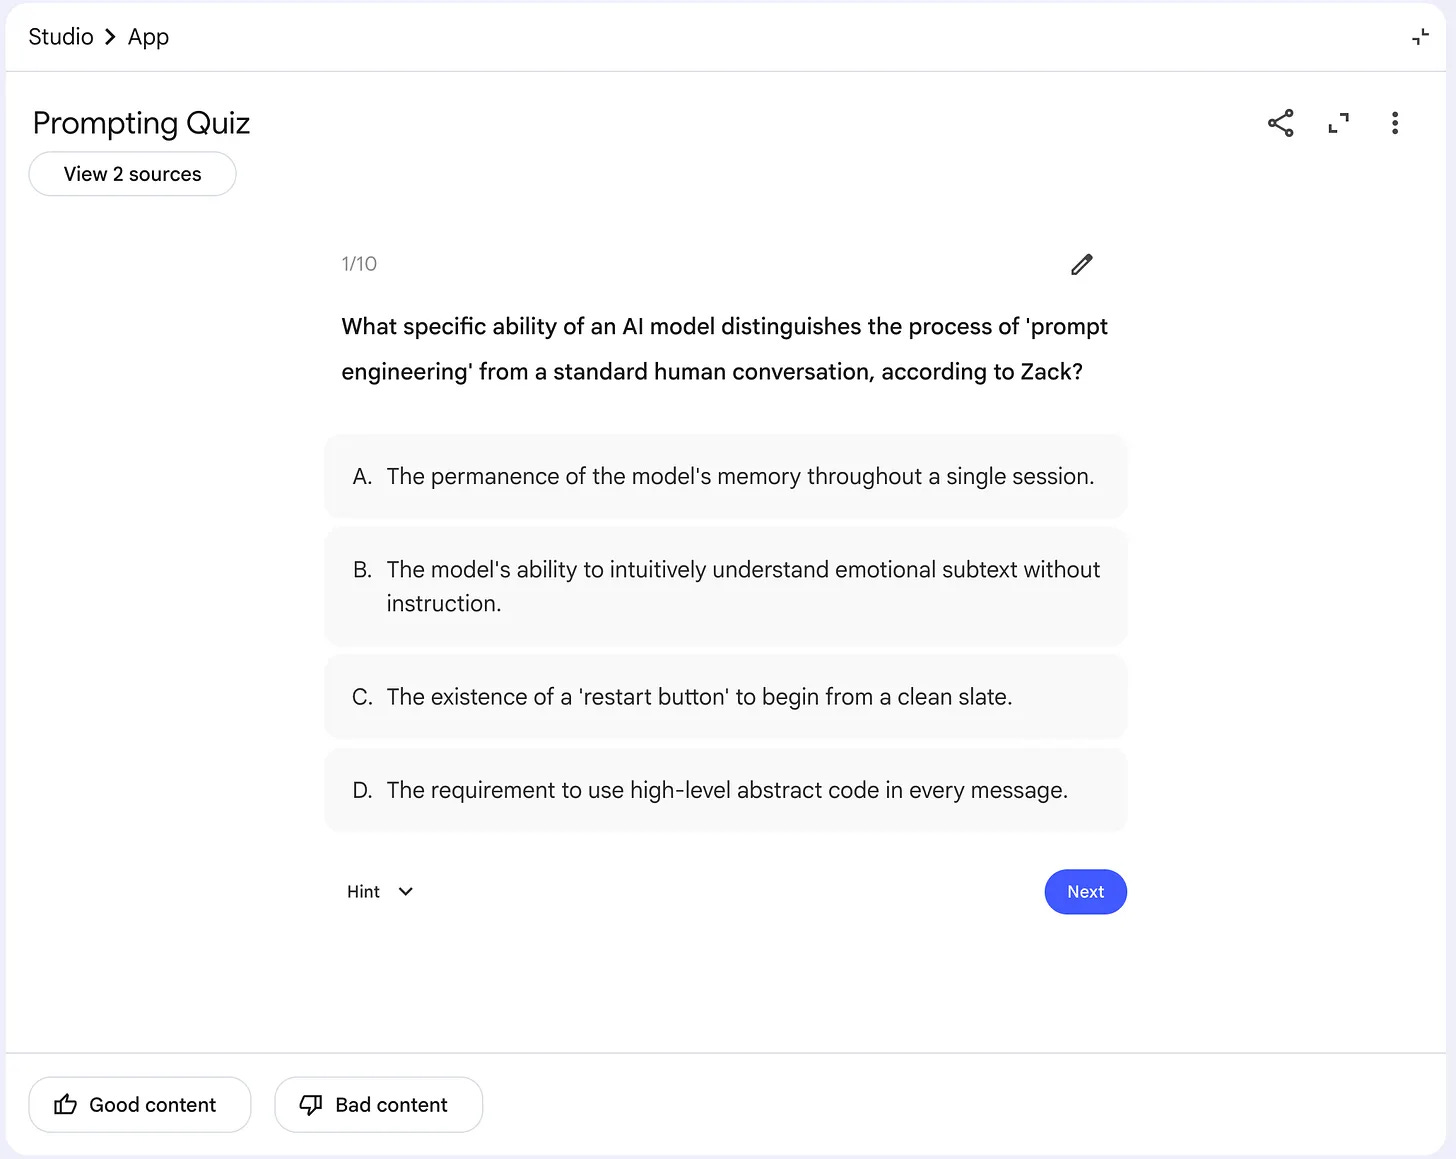
But on its default setting, it asks the gentle version, the kind where the phrasing half-carries you to the answer, and recognizing the right option feels like knowing it. It grades what you can spot, not what you can produce from an empty page.
So you tell it to pull the hints out and make every question start from nothing.
UI selections before you paste (you click these yourself):
Quiz → Difficulty: Hard, Question Type: Short Answer.
Use this prompt. Customize the {topic}.
Write hard questions on {topic} from the sources.
Ask for a reason or an application rather than a term, so each answer needs a full thought
and not a single word. Pull the questions from the trickiest parts of the sources,
the edge cases and the claims the experts argue about, not the easy definitions.
For {topic} here I used prompt engineering techniques and why they work, so the questions ask for reasons, not just names.
Every question here asks for a reason or a call, not a word you can point at, so recognizing the right option no longer saves you. You have to pull the answer up cold, and that pull is slower and harder than a gentle quiz, which is exactly why it lasts.
When to use which?
Quiz feature → A gentle check, when you want a quick pass and do not mind the hints.
Custom prompt → Real preparation, when you want the friction that makes it stick, because easy now means gone later.
Technique 6: Generation: produce it before you see it
The strongest memory comes from making your brain reach for an answer it does not have yet. The reach is what wires the answer in, and even a wrong guess leaves a hook the right answer can hang on later. This is the one thing a button cannot do for you, so both prompts here drop the 1-click feature.
The next two prompts force the reach. The first makes you guess before the source speaks. The second makes you say it so simply that any gap shows.
Prompt 9: Guess before you read
You open the source and let it walk you through the answer, and it all makes sense while you read. Then you close the tab an hour later and almost none of it stays, because the answer never cost you anything, so your brain filed it as something it could always look up again.
Reading an answer is not the same as producing one. The answer you never reached for is the answer you forget first.
The 1-click way: none
There is no button for this, and that is the point. A feature can hand you the answer, but it cannot make you guess before you see it, and the guess is the part that wires the memory. So you set it up in the Chat, where you commit to an answer before the source opens its mouth.
UI selections before you paste (you click these yourself):
Open the Chat, click Configure.
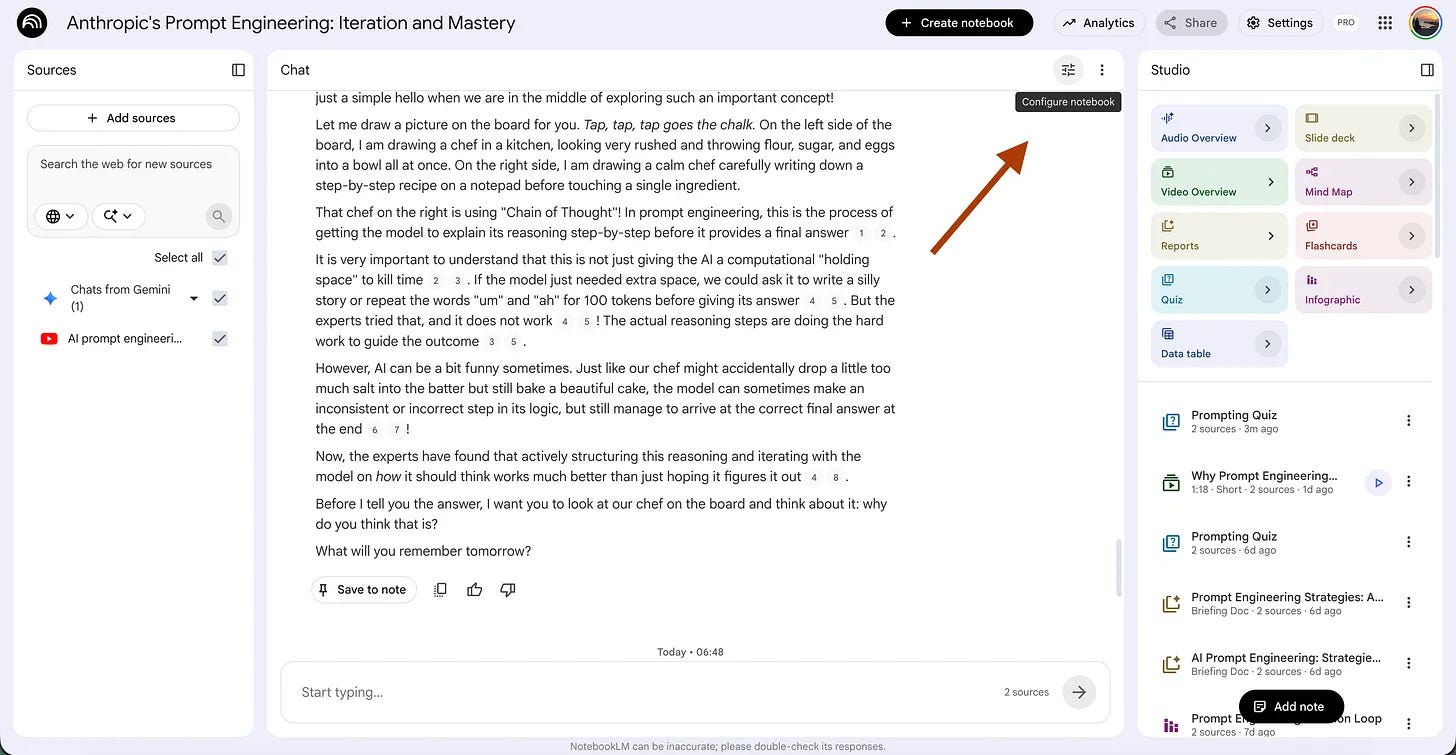
Use this prompt. Customize the {topic}.
Walk me through {topic} from the sources one idea at a time.
Before you explain each idea, ask me a question about it and stop, and tell me to answer
from my own head before I read on. Wait for my answer.
Only then give the correct version and tell me where mine was right and where it was off.
Move one idea at a time, and never explain an idea before I have guessed at it.
For {topic} here I used the differences between prompting an enterprise system, a research task, and a chat, since the source draws sharp lines between the three and I could test whether I actually held them.
And next, I used this prompt to test it.
Let's start. Ask me the first question.Here is the answer.
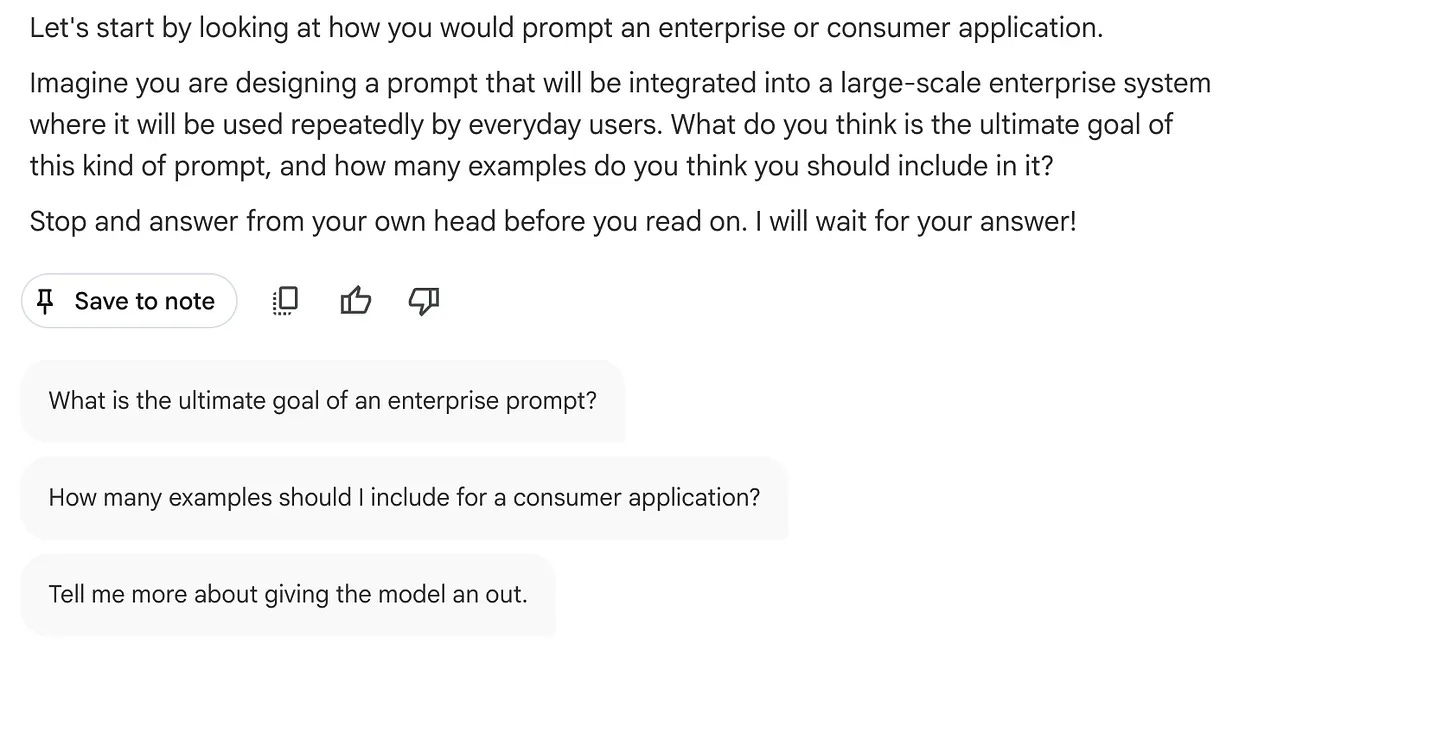
The model asked before it told, and stopped, so you have to commit to a number and a reason before you ever see the source’s answer. That guess is the whole point, because the gap between what you say and what the source says is where the idea finally lands.
When to use which?
Plain Chat → A quick answer, when you just want to look something up in the source.
Custom prompt → Real encoding, when you want the idea to stay instead of making sense for a minute and then leaving.
Prompt 10: Say it simply enough that the gaps show
You read the chapter and understood every line, and you wrote clean notes. Then someone asks you to explain it to a person who knows nothing, and you freeze, because the words you had were the source’s words. Borrow the explanation and you never find the hole in your own.
Understanding a sentence as you read it is not the same as being able to build it from nothing. The simple version is where the gap shows.
The 1-click way: none
There is no button for this either. A feature can simplify the source for you, but the simplifying is the test, and if the model does it you learn nothing. So you set up the Chat to make you produce the simple version and then catch where it went vague.
UI selections before you paste (you click these yourself):
Open the Chat, click Configure.
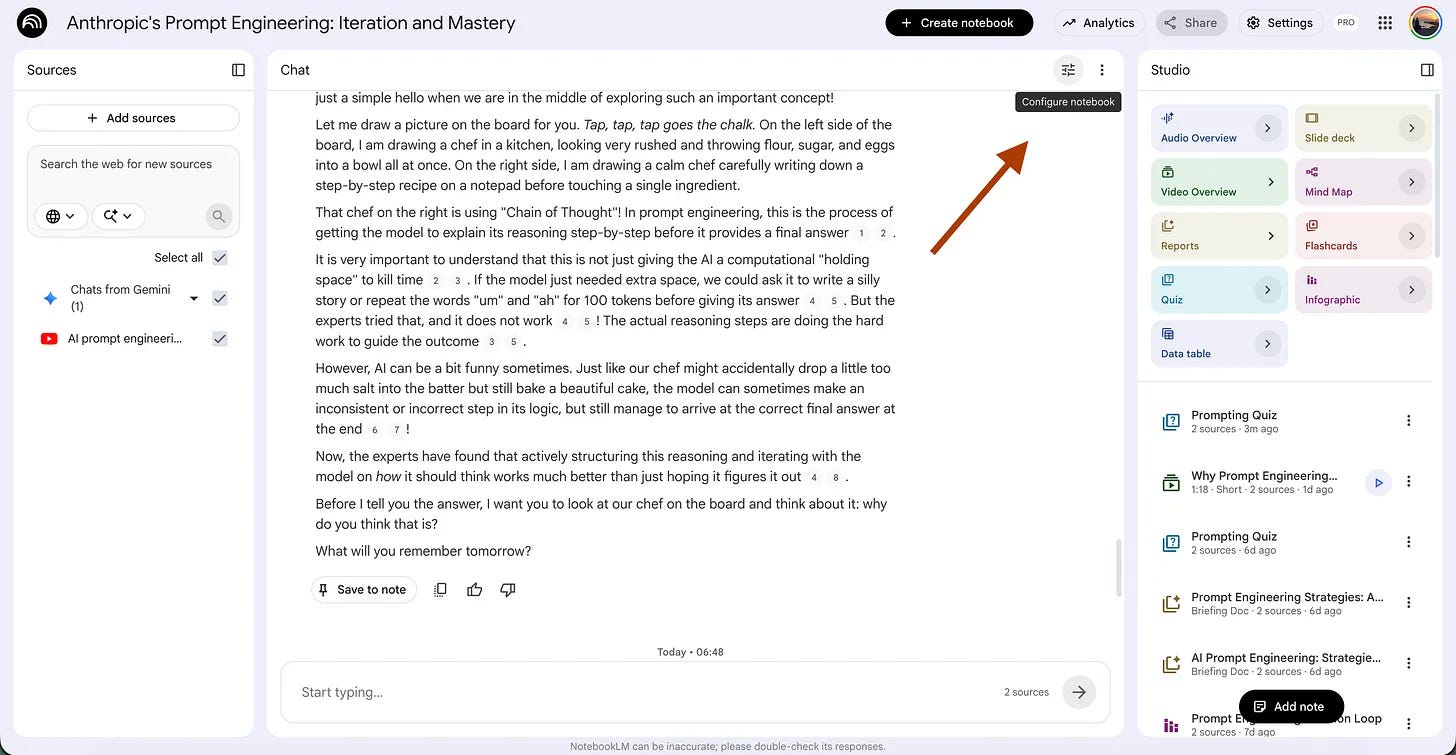
Use this prompt. Customize the {topic}.
I am going to explain {topic} from the sources as if I were teaching a smart twelve-year-old
who knows nothing about it. Let me write my explanation first, in my own words,
with no jargon and no borrowed phrases from the source.
Then check it against the sources and point at every place I went vague, hand-waved,
or used a word a twelve-year-old would not follow.
Name the one spot where my simple version hid a gap in my own understanding.
For {topic} here I used why you should not lie to the model about who you are, since the source argues it plainly, and it sounds obvious until you try to explain why.
And next, I used this prompt to test it.
Here is my explanation. You should just tell the model the truth about what you are doing,
because the model already knows what things like evals are, so pretending you are a teacher
making a quiz just gives it a worse version of the task you actually want.
Here is the output.
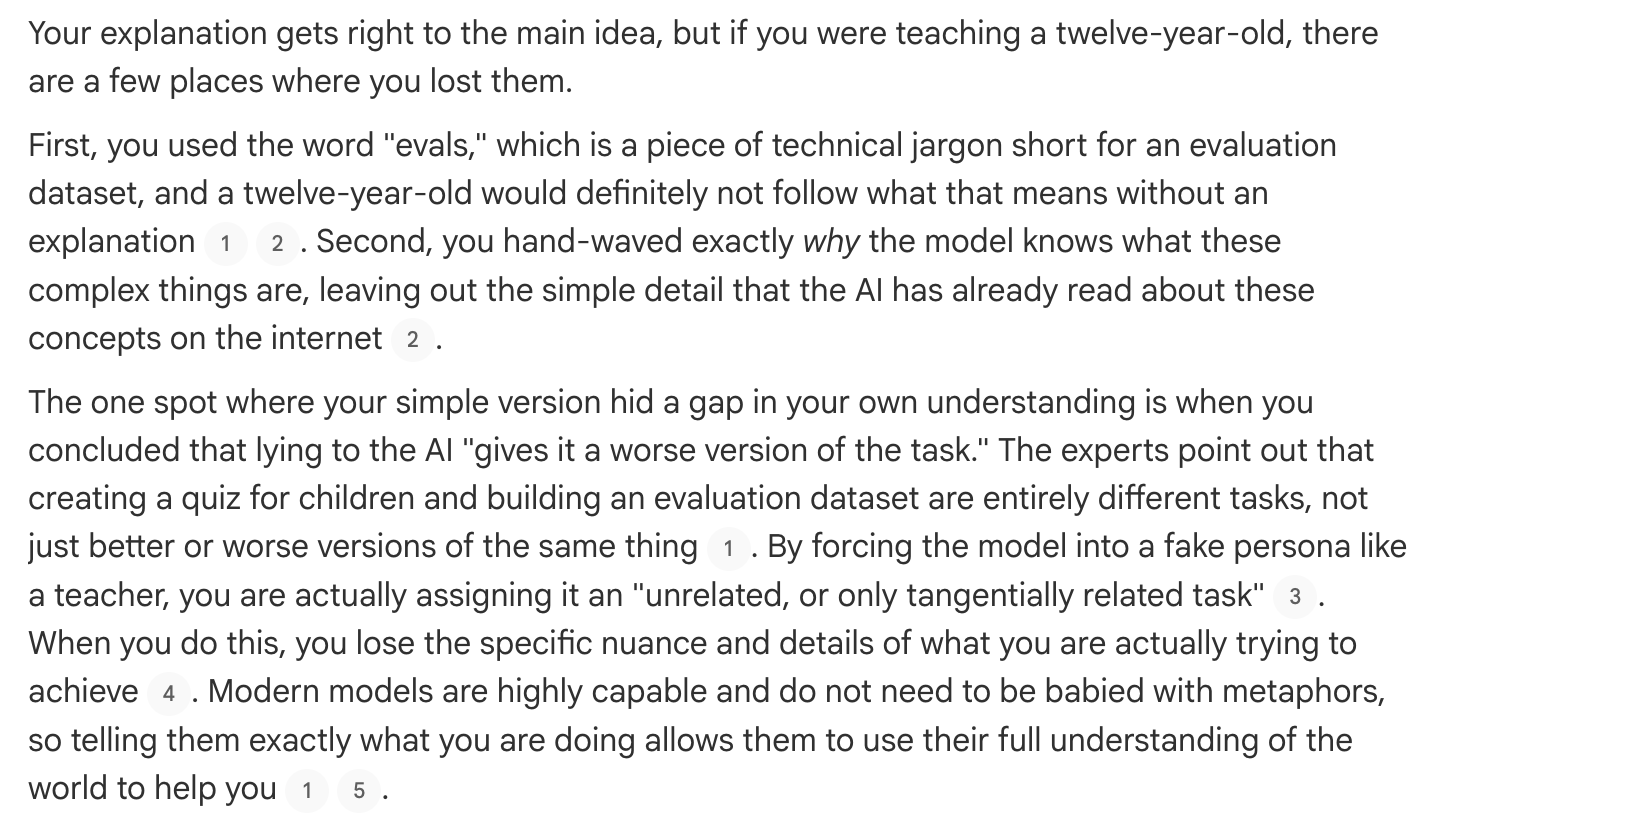
Your simple version sounded right until the model caught the one word you were hiding behind, that lying gives a “worse” task when the source says it gives a different one. The spot where your plain explanation went fuzzy was the exact spot you had not understood, and now it is named instead of buried.
When to use which?
Plain Chat → A quick answer, when you just want the source to explain something to you.
Custom prompt → Real understanding, when you need to produce the simple version yourself, and find the gap it exposes.
First, thank you.
LearnAIWithMe grew from 5,000 to 16,000 subscribers in three months, but why the jump?
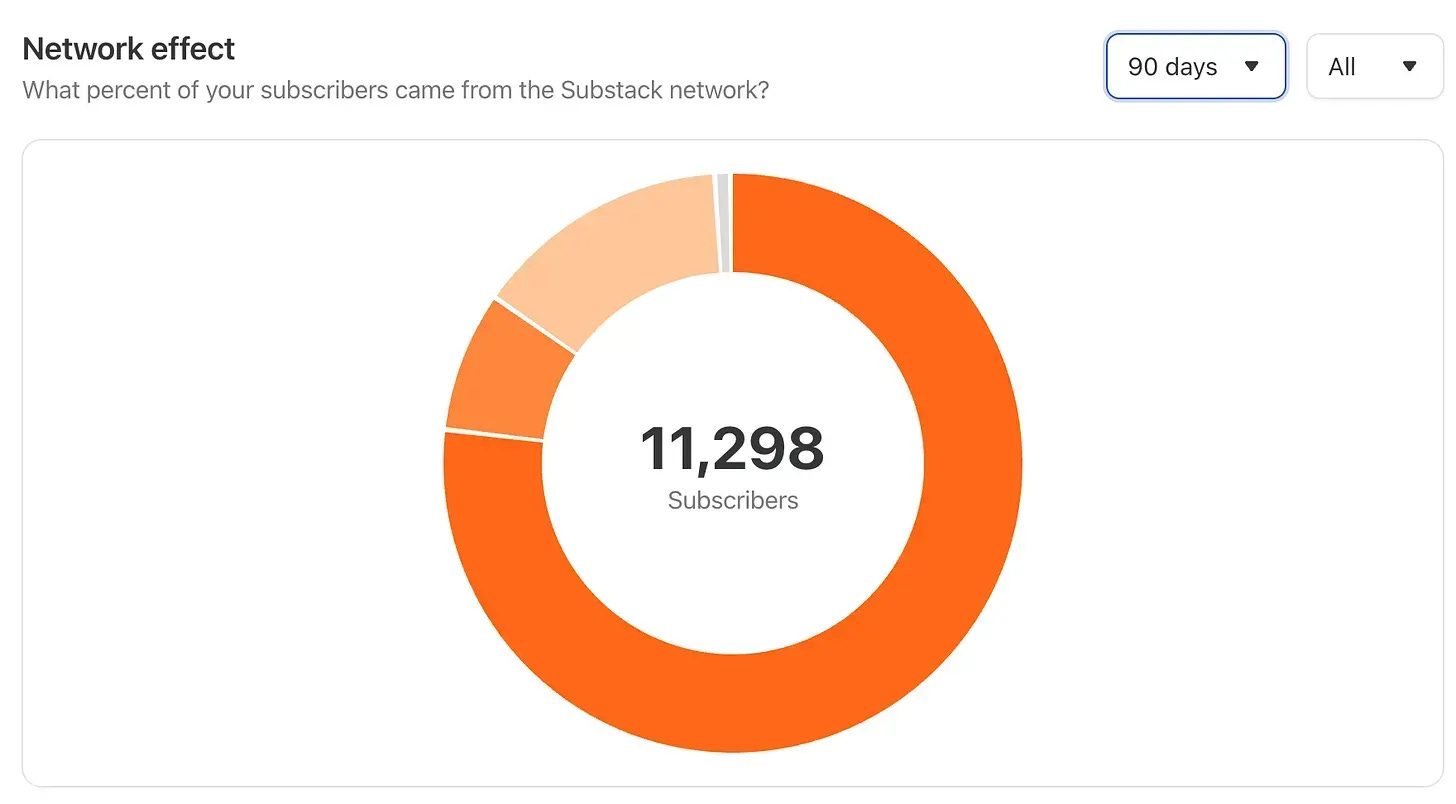
Last 3 months, I’ve been writing 3 posts each week, M-W-F, including actual builds, using AI, and this series, build-it like a lot by you.
We built the Polymarket bot, which does 2.1x in just 18 days, and copied trades of millionaires for better results, or reverse-engineered a $60K MRR AI.
I shared everything in plain English, wrapped it as a Skill, script, or prompt so you can run it without too much work, but also gave you the information to build it from scratch.
And it paid off. LearnAIWithMe just hit #4 on Substack and is rising on the Technology list.
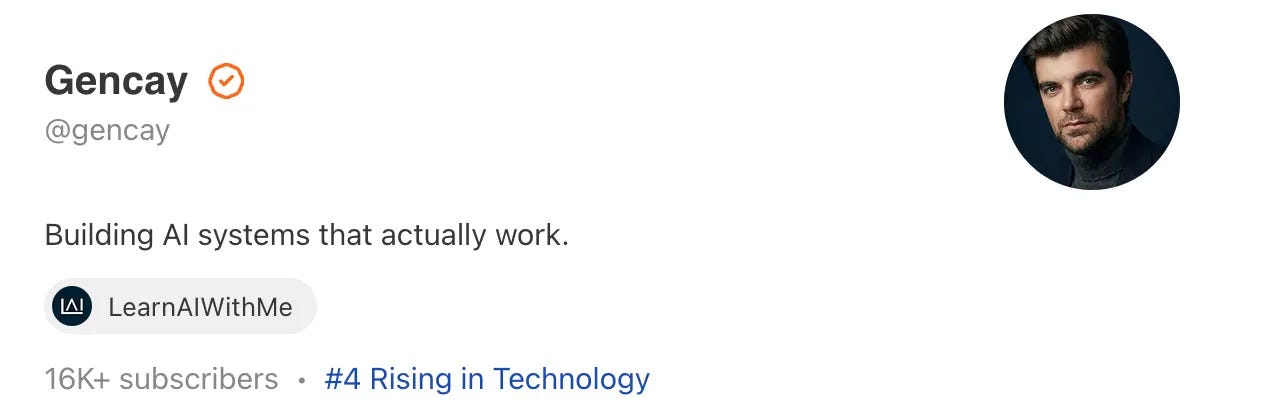
Over the course of my career, from engineering to AI, this is the achievement I am most proud of.
Because this one doesn’t belong to someone else’s company. It belongs to LearnAIWithMe.
No manager, client, or company can limit what I write, build, or share next; you do.
So stick with LearnAIWithMe.
Every week, my goal is to make it more valuable than the week before.
I’m building a place where people don’t just learn AI.
They actually build with it.
So, let’s build together!